

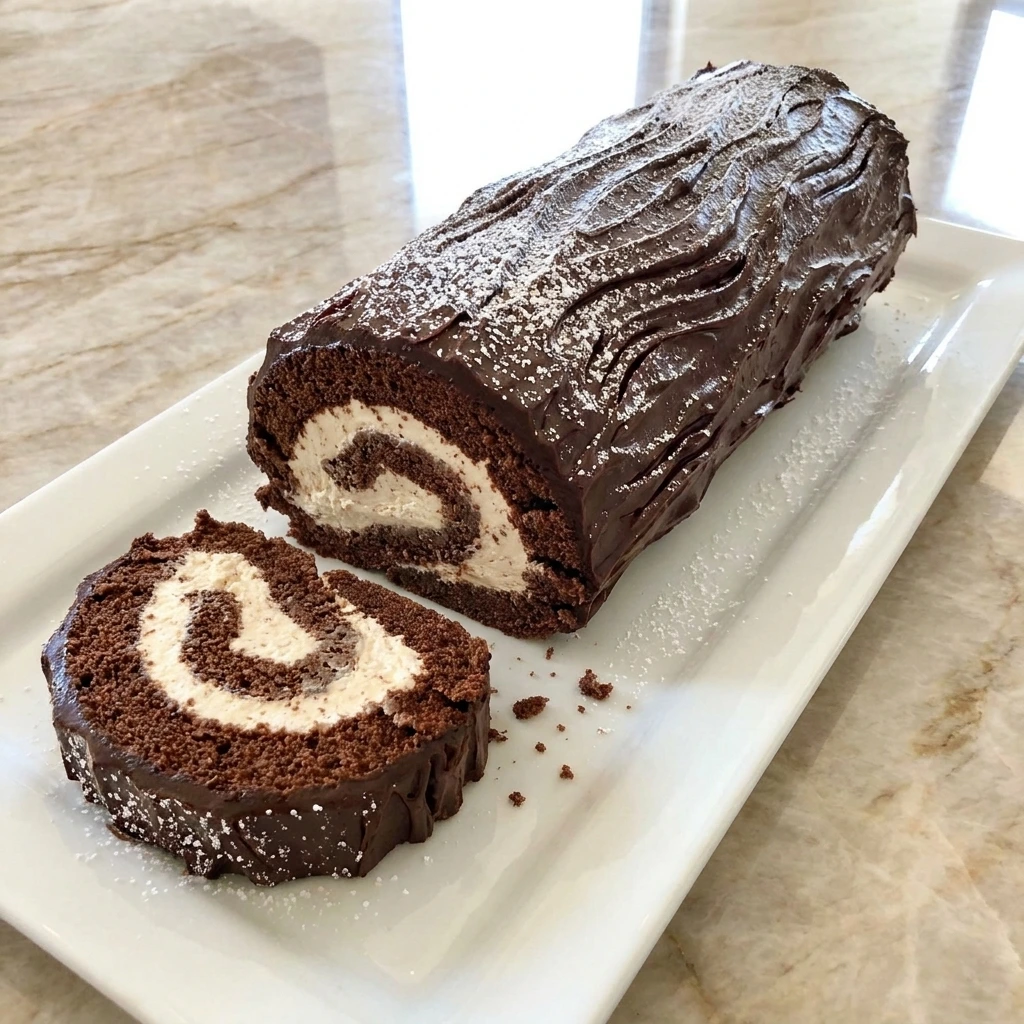
This recipe for Chocolate Yule Log will be one of the easiest homemade Christmas cakes you’ve ever whipped up! A soft chocolate sponge is rolled around a light and creamy filling before being covered with a rich chocolate ganache that looks just like a festive wooden log. All you need to do is bake the sponge and roll it with the filling and let the chocolate coating set to create a beautiful Christmas dessert!
I know we aren’t quite at Christmas yet but that hasn’t stopped me from daydreaming about holiday decorations and family gatherings and most importantly all of my favorite festive desserts! Some of my favorite Christmas treats that I indulge in throughout the holiday season include Peppermint Brownie Cheesecake Bars and homemade chocolate cakes and sweet holiday cookies.
This Christmas I plan on adding another staple to that ever-growing list… Chocolate Yule Log! It’s the perfect way to bring a little Christmas magic to your dessert table and couldn’t be more fun to make. If you’re looking to add something beautiful and chocolatey to your Christmas dinner spread then this is the dessert for you!
Ingredients
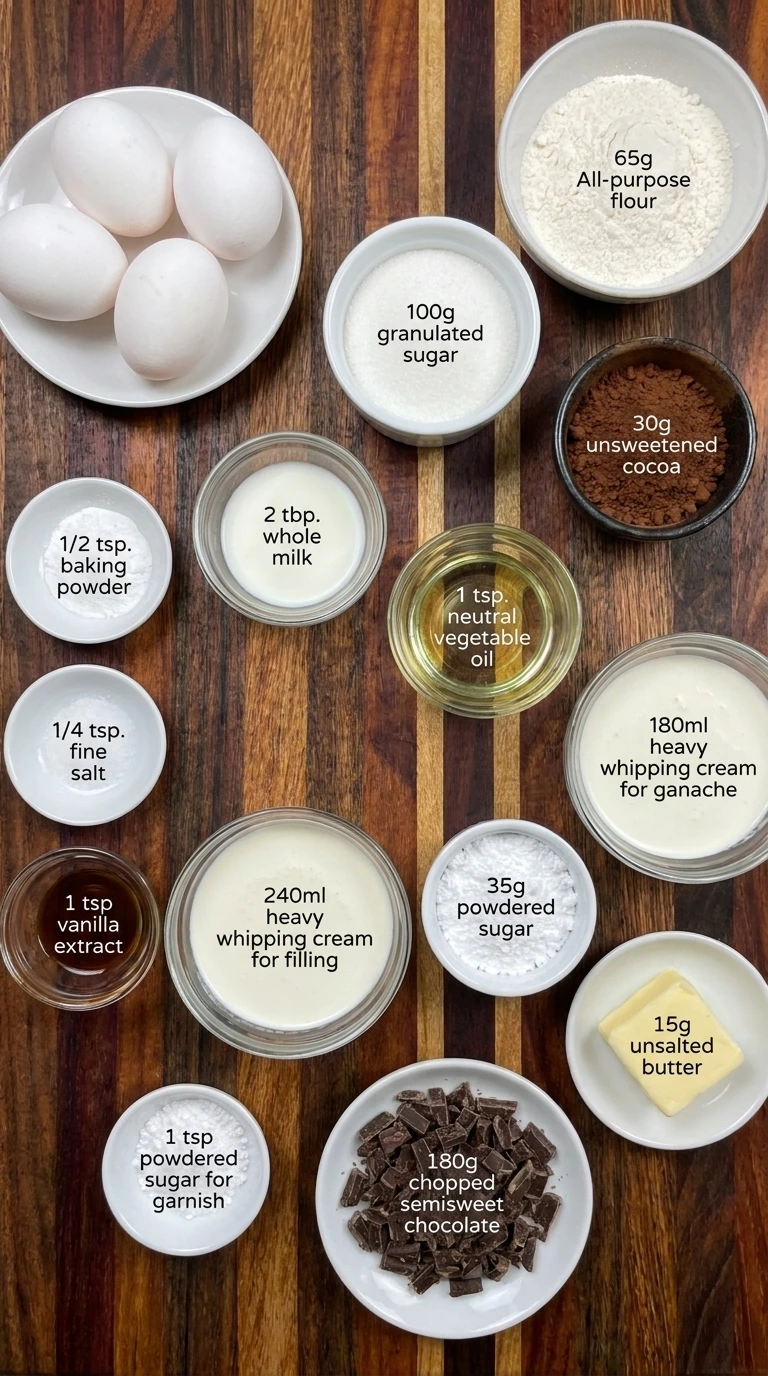
Here is what I use for this recipe :
- Large eggs: Room-temperature eggs provide the structure and natural lift needed to create a light and flexible chocolate sponge that rolls without breaking easily.
- Granulated sugar: Granulated sugar sweetens the chocolate sponge and helps stabilize the whipped eggs while keeping the baked cake tender and moist.
- All-purpose flour: All-purpose flour gives the sponge enough structure to hold its shape while keeping the crumb soft enough for rolling.
- Unsweetened cocoa powder: Unsweetened cocoa powder delivers the rich chocolate flavor and deep brown color that make the sponge look like a traditional Christmas log.
- Baking powder: Baking powder provides a small amount of additional lift to help the chocolate sponge bake evenly and remain light.
- Fine salt: Fine salt balances the sweetness of the cake and enhances the natural chocolate flavor without making the dessert taste salty.
- Vanilla extract: Vanilla extract adds a warm aromatic flavor that complements the cocoa and brings a familiar homemade sweetness to the sponge.
- Whole milk: Whole milk adds moisture to the sponge batter and helps create a softer finished cake that can be rolled more easily.
- Neutral vegetable oil: Neutral vegetable oil keeps the chocolate sponge tender and flexible while helping prevent excessive dryness after baking.
- Heavy whipping cream for filling: Cold heavy whipping cream transforms into a fluffy filling that creates a beautiful pale spiral inside the chocolate sponge.
- Powdered sugar: Powdered sugar gently sweetens the whipped cream filling while the additional teaspoon creates a delicate snowy finish on the completed Christmas log.
- Semisweet chocolate: Finely chopped semisweet chocolate melts into a rich ganache coating that gives the Yule Log its deep chocolate color and textured bark appearance.
- Heavy whipping cream for ganache: Warm heavy cream melts the chopped chocolate and creates a smooth ganache that thickens into a soft spreadable frosting.
- Unsalted butter: Unsalted butter adds richness to the chocolate ganache and helps create a smooth coating that remains pleasantly soft when sliced.
Tools I Use :
- 10 by 15 inch rimmed baking pan: Creates the thin rectangular chocolate sponge needed for an evenly shaped Yule Log that can be rolled without excessive thickness.
- Parchment paper: Prevents the chocolate sponge from sticking to the baking pan and supports the cake during the first warm rolling stage.
- Large mixing bowl: Provides enough room for whipping the eggs and gently combining the ingredients without losing too much trapped air.
- Electric hand mixer or stand mixer: Whips the eggs until thick and airy and transforms cold heavy cream into a stable filling with soft peaks.
- Fine-mesh sieve: Removes lumps from the flour and cocoa powder to create a smooth chocolate sponge with an even texture.
- Flexible silicone spatula: Gently folds dry ingredients into the aerated eggs and helps transfer thick batter without excessive mixing.
- Offset spatula: Spreads the chocolate batter into a thin layer and distributes whipped cream and ganache across the cake.
- Heatproof bowl: Holds the chopped chocolate while the heated cream melts it into a rich and smooth ganache.
- Small saucepan: Heats the cream for the chocolate ganache until steaming without allowing it to boil aggressively.
- Long white serving platter: Supports the assembled rolled cake while the ganache is applied and provides enough space for presentation.
- Sharp serrated knife: Cuts through the finished sponge and soft ganache with minimal pressure to preserve the cream spiral.
- Measuring cups and spoons: Measure the milk and oil and vanilla and small quantities of baking powder and salt accurately.
- Kitchen scale: Measures flour and sugar and cocoa powder and chocolate for more consistent sponge texture and ganache thickness.
- Small dessert plates: Hold individual slices of the finished Yule Log while displaying their chocolate and cream spiral layers.
Instructions
Step 1: Whip the eggs and fold in the chocolate sponge ingredients
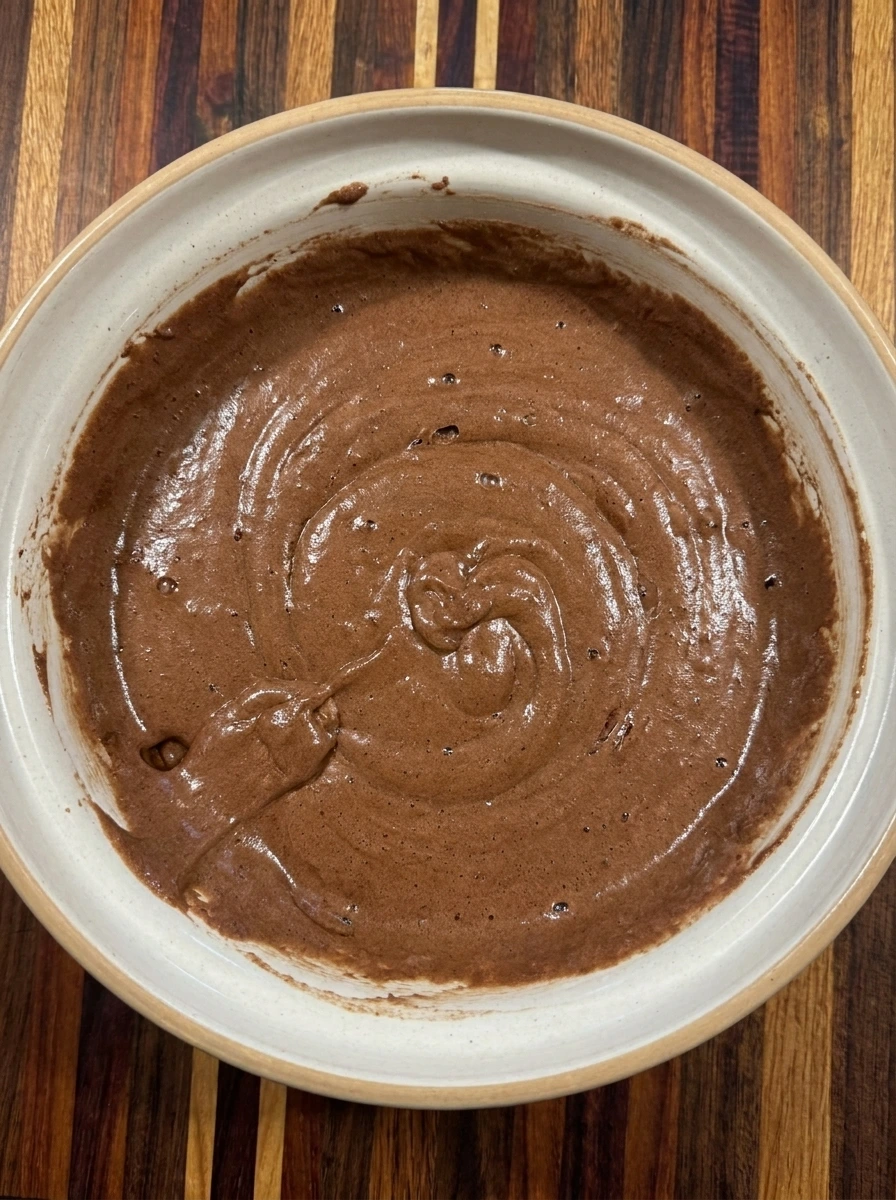
Preheat your oven to 350°F or 175°C and line a 10 by 15 inch rimmed baking pan with parchment paper. In a large mixing bowl beat the four eggs with the granulated sugar for about five minutes until the mixture becomes thick and pale and noticeably fluffy. Add the vanilla extract and gently mix in the milk and vegetable oil until incorporated. Sift the flour with the cocoa powder and baking powder and salt. Gently fold the dry ingredients into the egg mixture using broad folding motions until the batter becomes an even chocolate brown. Stop as soon as the dry streaks disappear because too much mixing can reduce the air that gives the sponge its soft texture.
Tip: Whip the eggs until the mixture falls in thick ribbons because this trapped air helps the chocolate sponge stay light and flexible.
Step 2: Spread the chocolate batter across the baking pan
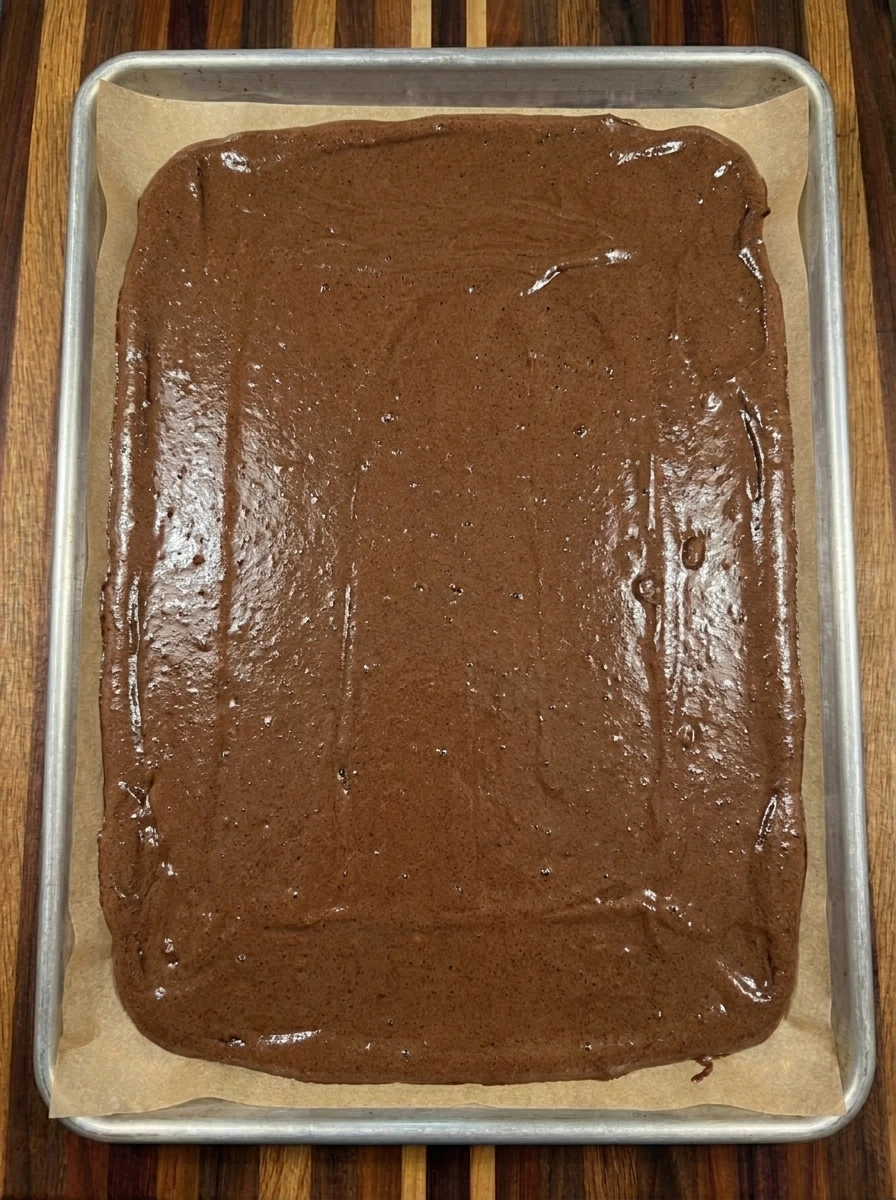
Transfer the freshly mixed chocolate sponge batter into the prepared 10 by 15 inch baking pan. Spread it gently from the middle toward the corners until it forms a relatively even layer across the parchment. Make sure the batter reaches every corner so the sponge will bake into a rectangle that can be rolled without thick sections. Smooth the surface lightly while preserving the air inside the mixture. The batter should form a thin chocolate sheet with a few natural waves across the top rather than a thick cake layer. Place the filled pan into the preheated oven immediately after spreading.
Tip: Spread the batter gently and evenly across the pan because a consistent thickness helps prevent dry edges and underbaked centers.
Step 3: Bake the chocolate sponge until soft and springy
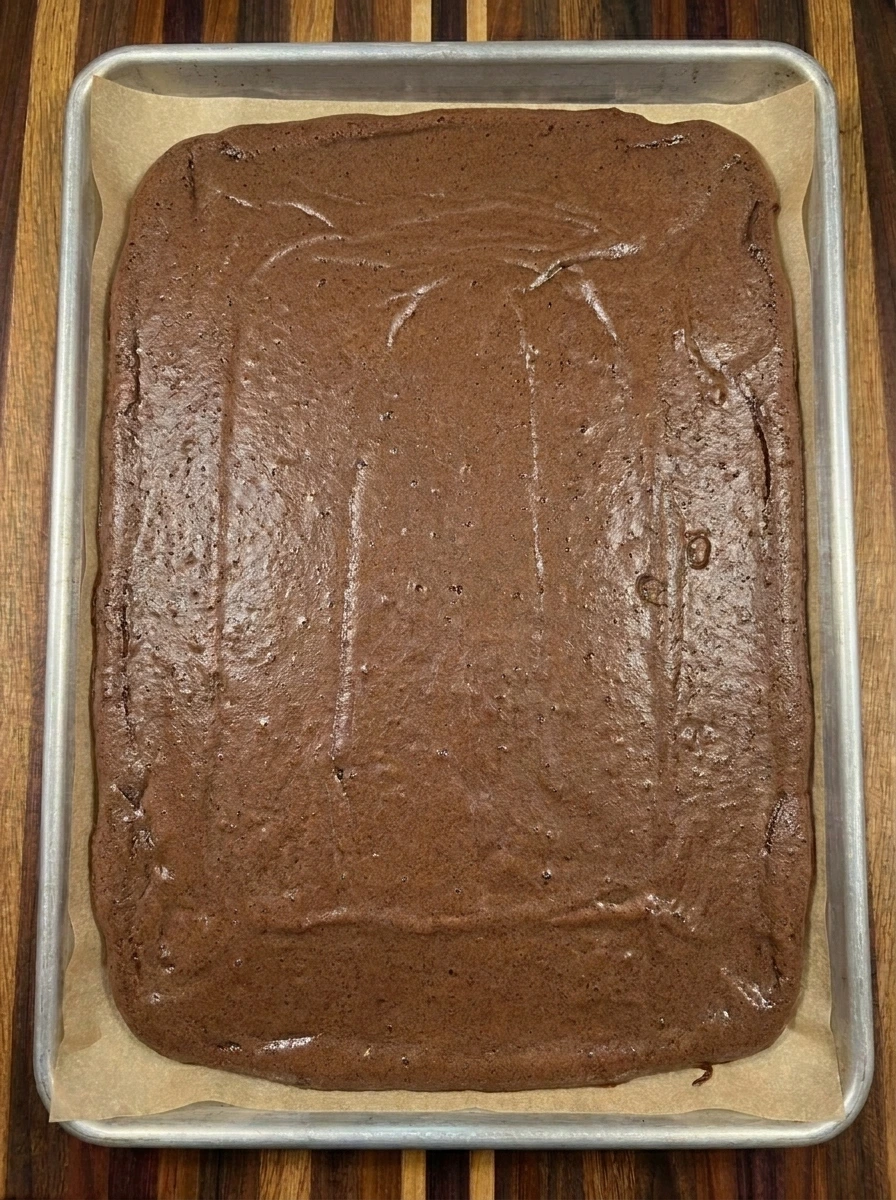
Bake the chocolate sponge for approximately 10 to 12 minutes until the top looks set and springs back gently when touched. The surface will change from shiny wet batter into a soft matte chocolate cake with delicate pores and slightly darker edges. Avoid overbaking because a dry sponge is more likely to crack during rolling. Remove the baking pan from the oven as soon as the sponge is ready. The baked cake should remain thin and flexible with a soft crumb and no wet batter remaining in the center. Allow it to rest for about one minute before beginning the rolling process.
Tip: Check the sponge early because even a few extra minutes in the oven can make a thin chocolate cake dry and difficult to roll.
Step 4: Roll the warm chocolate sponge and let it cool
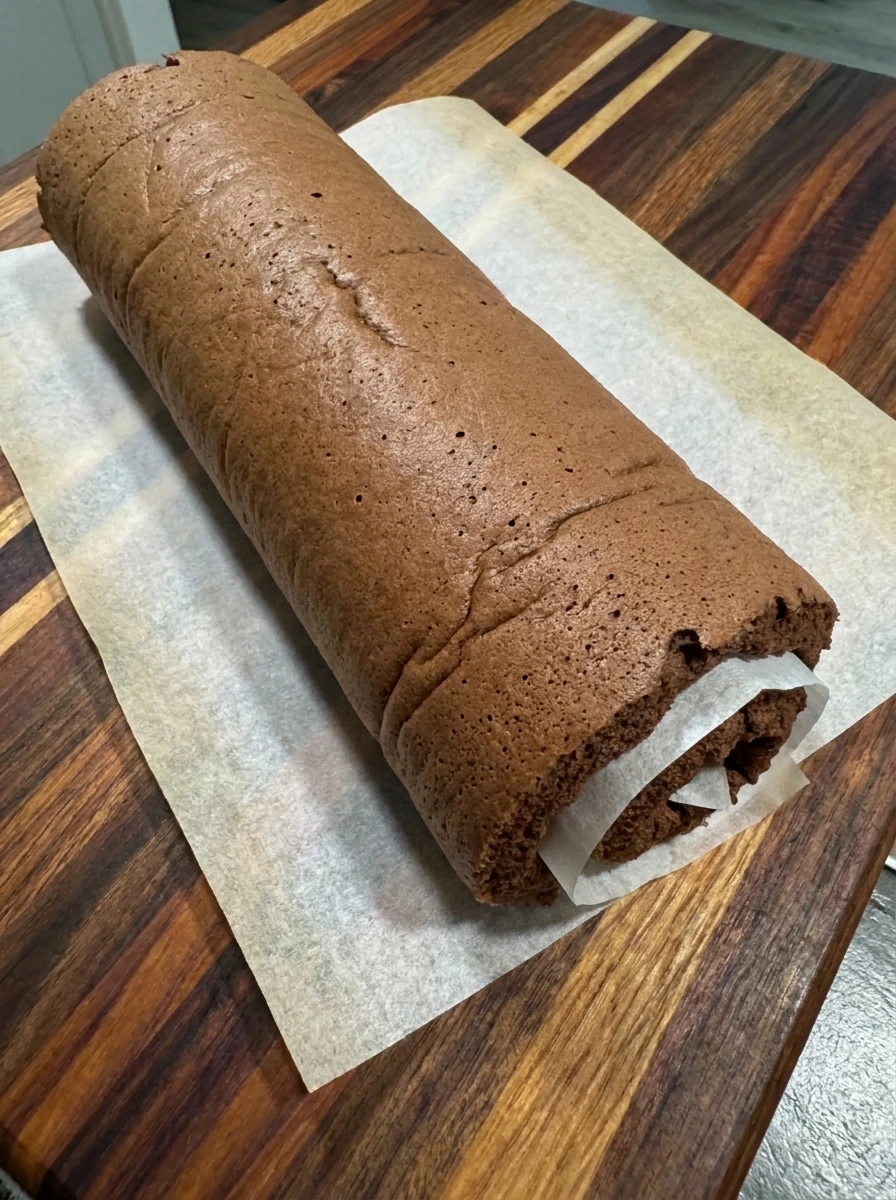
While the sponge is still warm carefully lift it from the baking pan using its parchment and transfer it to a clean working area. Starting from one short end roll the sponge into a loose spiral with the parchment inside the roll. The warm cake should curl naturally without being pulled too tightly or squeezed. Place the rolled sponge seam side down and allow it to cool completely for approximately 30 to 40 minutes. This temporary shape trains the sponge to curve so it can be filled and rolled again with less cracking. Keep the parchment between the layers until you are ready to add the whipped cream filling.
Tip: Roll the sponge while it is still warm and flexible because waiting until it becomes completely cold increases the risk of cracking.
Step 5: Whip the cream into a fluffy filling
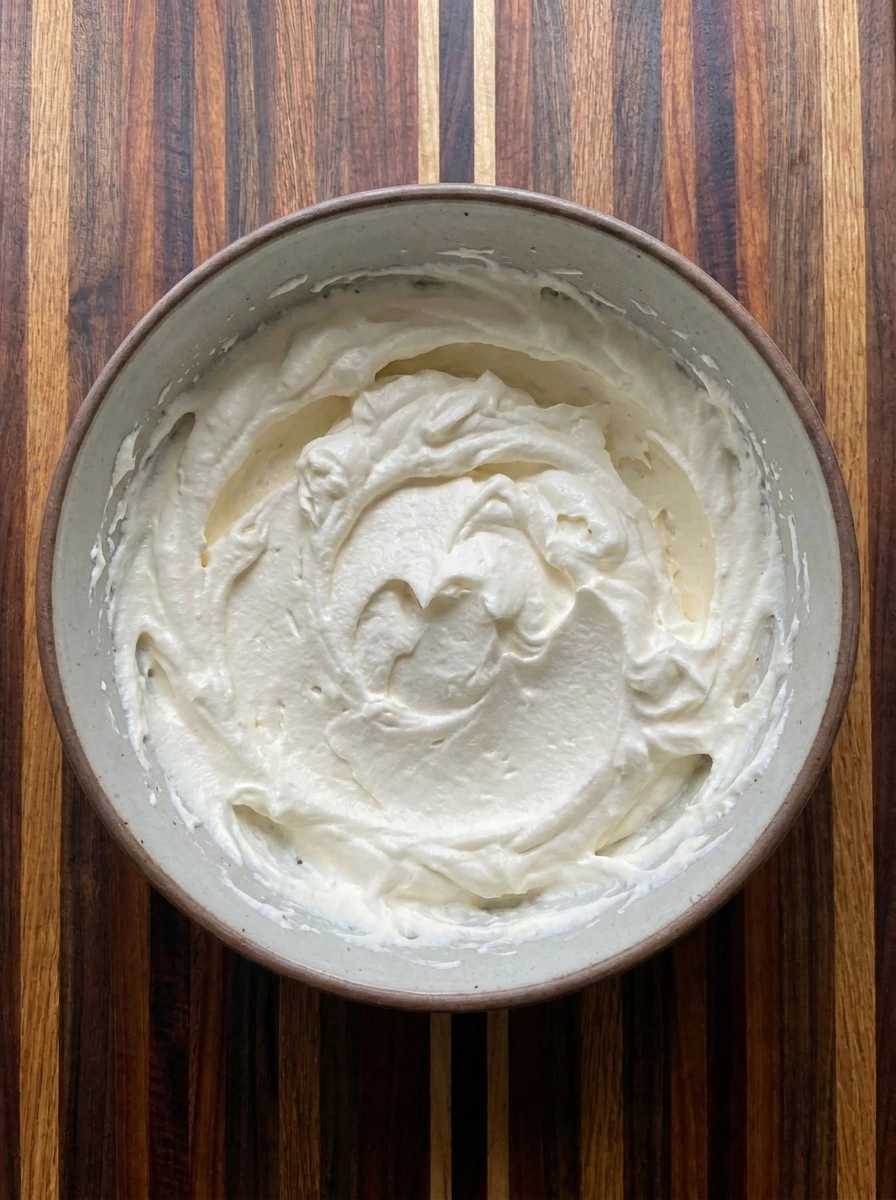
Pour the cold heavy whipping cream for the filling into a clean mixing bowl and add the 35 grams of powdered sugar. Whip until the cream becomes thick and fluffy and holds firm peaks that retain their shape. The mixture should look smooth and pale with soft ridges across the surface. Stop whipping once the filling is stable enough to spread without running. The cream should remain light and silky rather than stiff and grainy. Keep it chilled if the rolled sponge has not completely cooled because warm cake can soften the filling and make the finished spiral lose its definition.
Tip: Use thoroughly chilled heavy cream and stop at firm peaks so the filling stays fluffy without becoming grainy or separating.
Step 6: Spread the cream and roll the filled chocolate cake
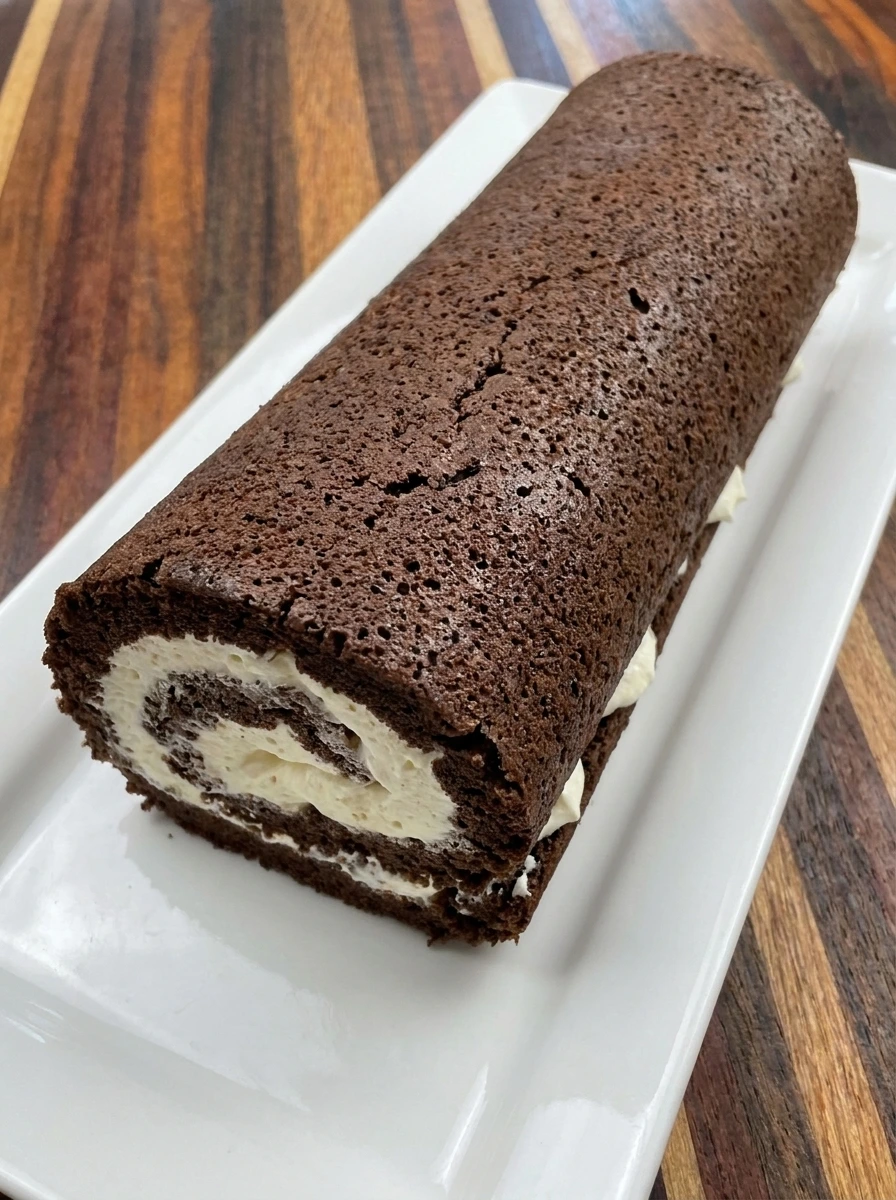
Carefully unroll the completely cooled chocolate sponge and remove the parchment that was tucked inside. Spread the whipped cream across the exposed cake surface while leaving approximately half an inch uncovered along the far short edge. Keep the cream layer fairly even and make sure it reaches the side edges without building up large piles. Beginning at the same short end used for the first roll gently roll the sponge back into a tight but comfortable spiral. The whipped cream will settle between the chocolate layers and create a distinct light-colored swirl. Place the completed roll seam side down on a serving platter and refrigerate for about 30 minutes so the filling can firm up before coating.
Tip: Leave a small uncovered border at the far edge because the whipped cream spreads slightly as the chocolate sponge is rolled.
Step 7: Cover the rolled cake with chocolate ganache bark
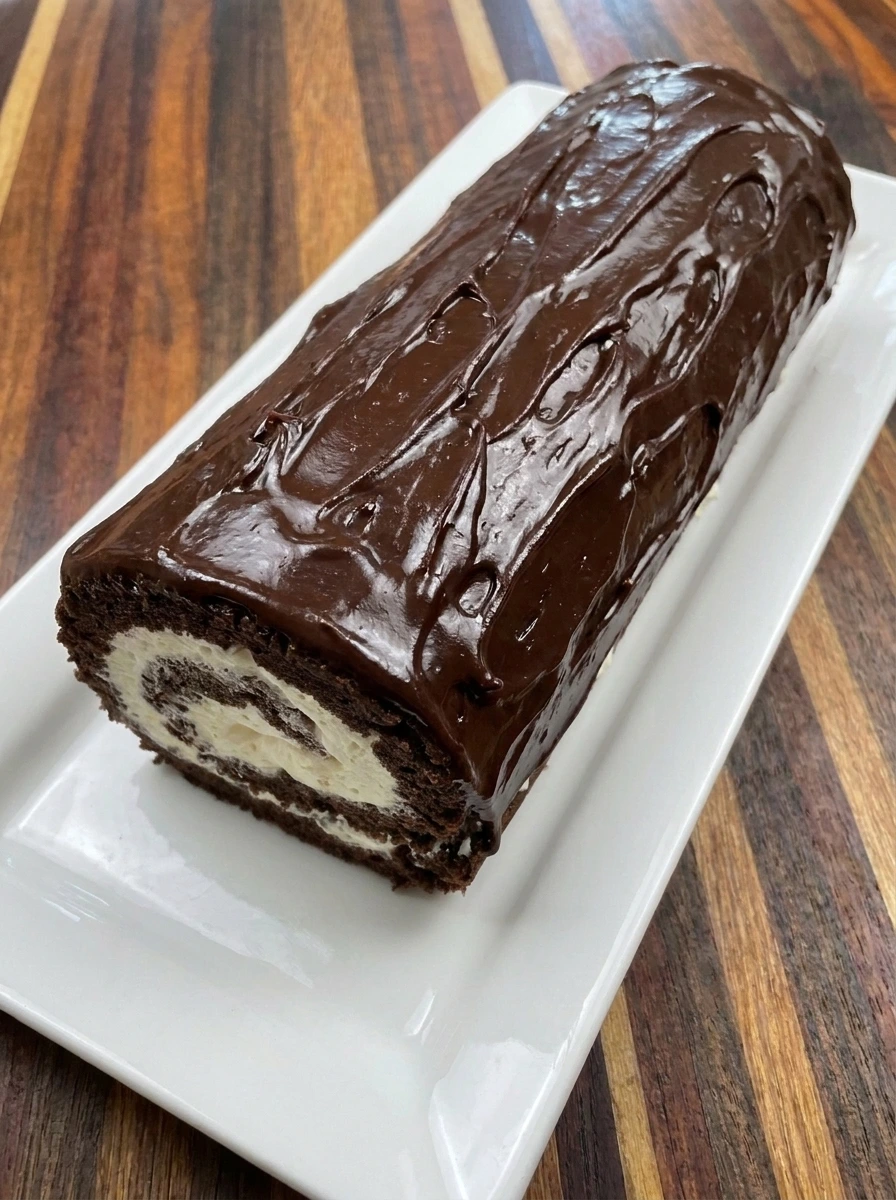
Heat the heavy cream reserved for the ganache in a small saucepan until it is steaming but not boiling. Pour the hot cream over the finely chopped semisweet chocolate in a heatproof bowl and allow it to sit for two minutes. Stir until completely smooth and mix in the unsalted butter. Allow the ganache to cool until it becomes thick enough to spread without sliding off the cake. Remove the chilled cake from the refrigerator and spread the thickened chocolate ganache across its curved surface while leaving the spiral ends visible. Create irregular lengthwise bark grooves throughout the coating using gentle dragging motions. Refrigerate for another 20 minutes until the ganache becomes softly set with a textured handmade finish.
Tip: Let the ganache cool until it spreads like soft frosting because warm runny chocolate will slide off the curved cake.
Step 8: Dust the finished log and serve a chocolate spiral slice
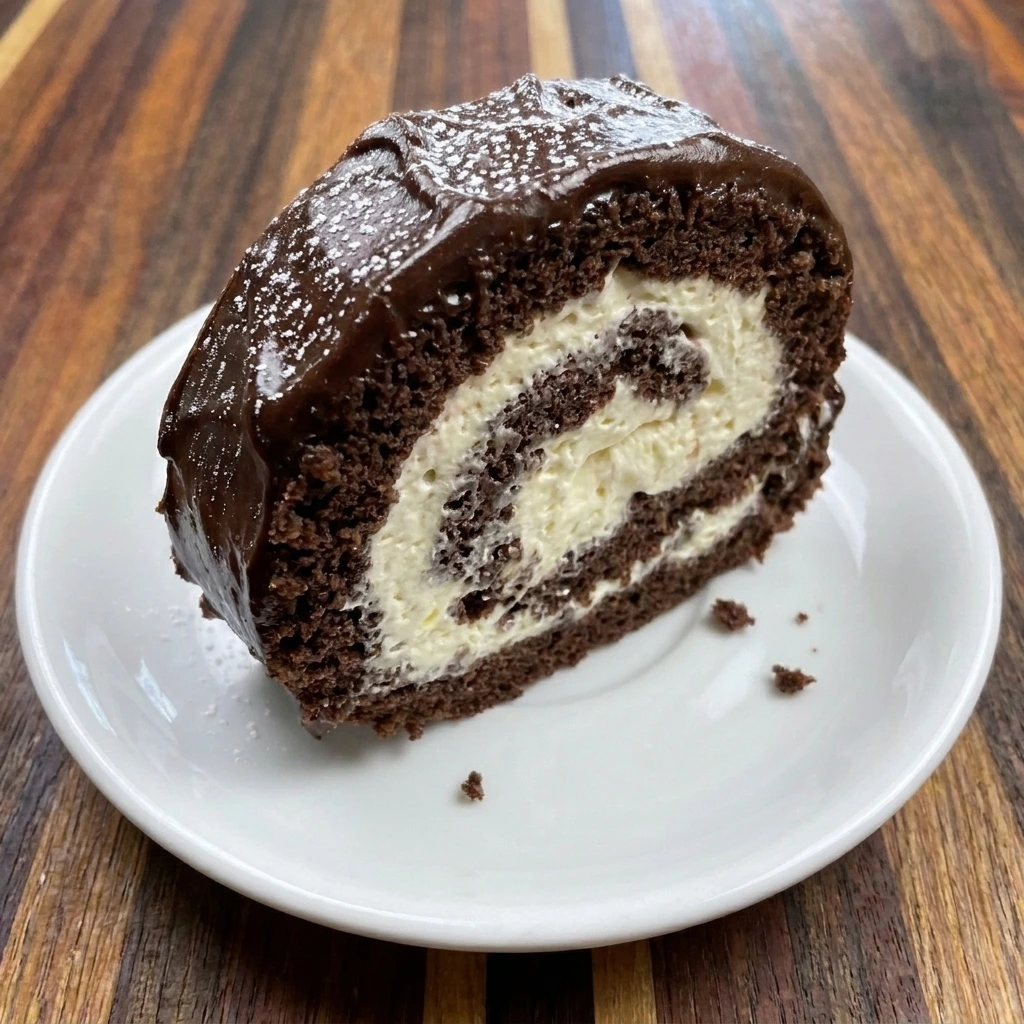
Remove the fully chilled Chocolate Yule Log from the refrigerator and lightly dust the top with the reserved teaspoon of powdered sugar. Allow the sugar to settle unevenly across the ganache ridges so the cake resembles a snowy winter log. Slice the cake with a clean sharp knife while wiping the blade between cuts to keep the spiral visible. Transfer one generous slice to a small white dessert plate and turn it slightly to reveal the soft chocolate sponge surrounding the fluffy whipped cream center. The finished slice should show distinct layers and a rich textured ganache coating with naturally irregular edges. Serve chilled or let the portion stand briefly until the ganache softens slightly.
Tip: Wipe the knife between slices to reveal the chocolate and cream spiral without dragging excess filling across the cut edges.
Pro Tips
- Beat the eggs and sugar until thick and pale because plenty of trapped air helps create a soft chocolate sponge that rolls easily.
- Never overbake the chocolate sponge because a slightly moist and flexible cake is much less likely to crack when you shape it.
- Chill the whipped cream filling and let the rolled sponge cool completely before assembling to prevent melting and sliding.
- Allow the chocolate ganache to thicken before spreading and create uneven bark ridges for a beautiful homemade Christmas look.
Storage Instructions
Refrigerator Storage: Keep the finished Chocolate Yule Log in a covered cake container in the refrigerator for up to three days. Because the filling contains fresh whipped cream the dessert must remain refrigerated rather than sitting at room temperature for extended periods. Store any individual slices in airtight containers to prevent the sponge from drying out. Freezer Storage: Freeze the fully assembled and chilled Yule Log on a flat tray until the ganache feels firm. Wrap the frozen cake carefully in plastic wrap followed by an additional protective layer and store for up to one month for the best quality.
Freezing before adding the powdered sugar helps preserve a cleaner snowy appearance when the cake is served. Thawing Instructions: Move the frozen Yule Log into the refrigerator and allow it to thaw slowly overnight. Keep the protective wrapping in place during the initial thawing stage to reduce moisture collecting directly on the ganache. Once the cake is completely thawed carefully remove the wrapping and add the powdered sugar decoration before slicing.
Serving Leftovers: Remove individual portions from the refrigerator about 10 minutes before serving if you prefer a slightly softer ganache texture. Use a clean sharp knife for each slice and return any remaining cake to the refrigerator promptly. Avoid reheating because heat will melt the whipped cream filling and destroy the spiral structure.
Frequently Asked Questions
Cracks usually happen when the sponge is overbaked or rolled after cooling. Roll the cake while warm to keep it flexible.
Yes! Assemble the cake a day ahead and refrigerate it in a covered container. Add the powdered sugar before serving.
Yes! Freeze the completed cake until firm and wrap it securely. Thaw slowly in the refrigerator before serving.
Use firmly whipped cold cream and leave a small border around the sponge. Roll gently without pressing too tightly.
See You in the Kitchen
This Chocolate Yule Log is a great way to satisfy your Christmas chocolate cravings without picking up the phone to order a fancy bakery dessert.
I typically make my Peppermint Brownie Cheesecake Bars and prepare our Brown Sugar Glazed Christmas Ham around the same holiday celebration so that all of my Christmas dinner favorites are ready for the family.
Even my kids love this one!
Print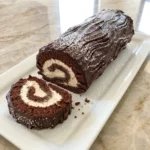
Chocolate Yule Log
- Total Time: 2 hours 17 minutes
- Yield: 10 servings
Description
This Chocolate Yule Log is one of the best easy Christmas dessert ideas for your holiday celebrations. A soft chocolate sponge wraps around a light whipped cream filling before getting covered in rich chocolate ganache. With simple ingredients and quick preparation steps this homemade dessert brings a beautiful festive touch to any Christmas party or holiday dinner. It is a sweet treat to share with family and a fun alternative to traditional cakes for special occasions.
Ingredients
- 4 large eggs Large eggs
- 100 g (1/2 cup) Granulated sugar
- 65 g (1/2 cup plus 1 tablespoon) All-purpose flour
- 30 g (approximately 1/3 cup) Unsweetened cocoa powder
- 1/2 teaspoon Baking powder
- 1/4 teaspoon Fine salt
- 1 teaspoon Vanilla extract
- 2 tablespoons Whole milk
- 1 tablespoon Neutral vegetable oil
- 240 ml (1 cup) Heavy whipping cream for filling
- 35 g (approximately 1/4 cup) plus 1 teaspoon for decoration Powdered sugar
- 180 g (approximately 1 cup chopped) Semisweet chocolate
- 180 ml (3/4 cup) Heavy whipping cream for ganache
- 15 g (1 tablespoon) Unsalted butter
Instructions
- Preheat your oven to 350°F or 175°C and line a 10 by 15 inch rimmed baking pan with parchment paper. In a large mixing bowl beat the four eggs with the granulated sugar for about five minutes until the mixture becomes thick and pale and noticeably fluffy. Add the vanilla extract and gently mix in the milk and vegetable oil until incorporated.
Sift the flour with the cocoa powder and baking powder and salt. Gently fold the dry ingredients into the egg mixture using broad folding motions until the batter becomes an even chocolate brown. Stop as soon as the dry streaks disappear because too much mixing can reduce the air that gives the sponge its soft texture.
- Transfer the freshly mixed chocolate sponge batter into the prepared 10 by 15 inch baking pan. Spread it gently from the middle toward the corners until it forms a relatively even layer across the parchment. Make sure the batter reaches every corner so the sponge will bake into a rectangle that can be rolled without thick sections.
Smooth the surface lightly while preserving the air inside the mixture. The batter should form a thin chocolate sheet with a few natural waves across the top rather than a thick cake layer. Place the filled pan into the preheated oven immediately after spreading.
- Bake the chocolate sponge for approximately 10 to 12 minutes until the top looks set and springs back gently when touched. The surface will change from shiny wet batter into a soft matte chocolate cake with delicate pores and slightly darker edges. Avoid overbaking because a dry sponge is more likely to crack during rolling.
Remove the baking pan from the oven as soon as the sponge is ready. The baked cake should remain thin and flexible with a soft crumb and no wet batter remaining in the center. Allow it to rest for about one minute before beginning the rolling process.
- While the sponge is still warm carefully lift it from the baking pan using its parchment and transfer it to a clean working area. Starting from one short end roll the sponge into a loose spiral with the parchment inside the roll. The warm cake should curl naturally without being pulled too tightly or squeezed.
Place the rolled sponge seam side down and allow it to cool completely for approximately 30 to 40 minutes. This temporary shape trains the sponge to curve so it can be filled and rolled again with less cracking. Keep the parchment between the layers until you are ready to add the whipped cream filling.
- Pour the cold heavy whipping cream for the filling into a clean mixing bowl and add the 35 grams of powdered sugar. Whip until the cream becomes thick and fluffy and holds firm peaks that retain their shape. The mixture should look smooth and pale with soft ridges across the surface.
Stop whipping once the filling is stable enough to spread without running. The cream should remain light and silky rather than stiff and grainy. Keep it chilled if the rolled sponge has not completely cooled because warm cake can soften the filling and make the finished spiral lose its definition.
- Carefully unroll the completely cooled chocolate sponge and remove the parchment that was tucked inside. Spread the whipped cream across the exposed cake surface while leaving approximately half an inch uncovered along the far short edge. Keep the cream layer fairly even and make sure it reaches the side edges without building up large piles.
Beginning at the same short end used for the first roll gently roll the sponge back into a tight but comfortable spiral. The whipped cream will settle between the chocolate layers and create a distinct light-colored swirl. Place the completed roll seam side down on a serving platter and refrigerate for about 30 minutes so the filling can firm up before coating.
- Heat the heavy cream reserved for the ganache in a small saucepan until it is steaming but not boiling. Pour the hot cream over the finely chopped semisweet chocolate in a heatproof bowl and allow it to sit for two minutes. Stir until completely smooth and mix in the unsalted butter. Allow the ganache to cool until it becomes thick enough to spread without sliding off the cake.
Remove the chilled cake from the refrigerator and spread the thickened chocolate ganache across its curved surface while leaving the spiral ends visible. Create irregular lengthwise bark grooves throughout the coating using gentle dragging motions. Refrigerate for another 20 minutes until the ganache becomes softly set with a textured handmade finish.
- Remove the fully chilled Chocolate Yule Log from the refrigerator and lightly dust the top with the reserved teaspoon of powdered sugar. Allow the sugar to settle unevenly across the ganache ridges so the cake resembles a snowy winter log. Slice the cake with a clean sharp knife while wiping the blade between cuts to keep the spiral visible.
Transfer one generous slice to a small white dessert plate and turn it slightly to reveal the soft chocolate sponge surrounding the fluffy whipped cream center. The finished slice should show distinct layers and a rich textured ganache coating with naturally irregular edges. Serve chilled or let the portion stand briefly until the ganache softens slightly.
Notes
Pro Tips:
- Beat the eggs and sugar until thick and pale because plenty of trapped air helps create a soft chocolate sponge that rolls easily.
- Never overbake the chocolate sponge because a slightly moist and flexible cake is much less likely to crack when you shape it.
- Chill the whipped cream filling and let the rolled sponge cool completely before assembling to prevent melting and sliding.
- Allow the chocolate ganache to thicken before spreading and create uneven bark ridges for a beautiful homemade Christmas look.
Storage: Refrigerator Storage: Keep the finished Chocolate Yule Log in a covered cake container in the refrigerator for up to three days. Because the filling contains fresh whipped cream the dessert must remain refrigerated rather than sitting at room temperature for extended periods. Store any individual slices in airtight containers to prevent the sponge from drying out.
Freezer Storage: Freeze the fully assembled and chilled Yule Log on a flat tray until the ganache feels firm. Wrap the frozen cake carefully in plastic wrap followed by an additional protective layer and store for up to one month for the best quality. Freezing before adding the powdered sugar helps preserve a cleaner snowy appearance when the cake is served.
Thawing Instructions: Move the frozen Yule Log into the refrigerator and allow it to thaw slowly overnight. Keep the protective wrapping in place during the initial thawing stage to reduce moisture collecting directly on the ganache. Once the cake is completely thawed carefully remove the wrapping and add the powdered sugar decoration before slicing.
Serving Leftovers: Remove individual portions from the refrigerator about 10 minutes before serving if you prefer a slightly softer ganache texture. Use a clean sharp knife for each slice and return any remaining cake to the refrigerator promptly. Avoid reheating because heat will melt the whipped cream filling and destroy the spiral structure.
- Prep Time: 35 minutes
- Cook Time: 12 minutes
- Category: Dessert
- Cuisine: French-inspired