

This is my tried-and-true recipe for making Peppermint Brownie Cheesecake Bars in the oven. With just a few ingredients including rich cocoa powder and cream cheese and peppermint extract you get deeply chocolatey and fudgy brownies beneath a creamy and refreshing cheesecake layer. It’s pure holiday comfort food and the kind of Christmas dessert that makes the whole kitchen smell incredible.
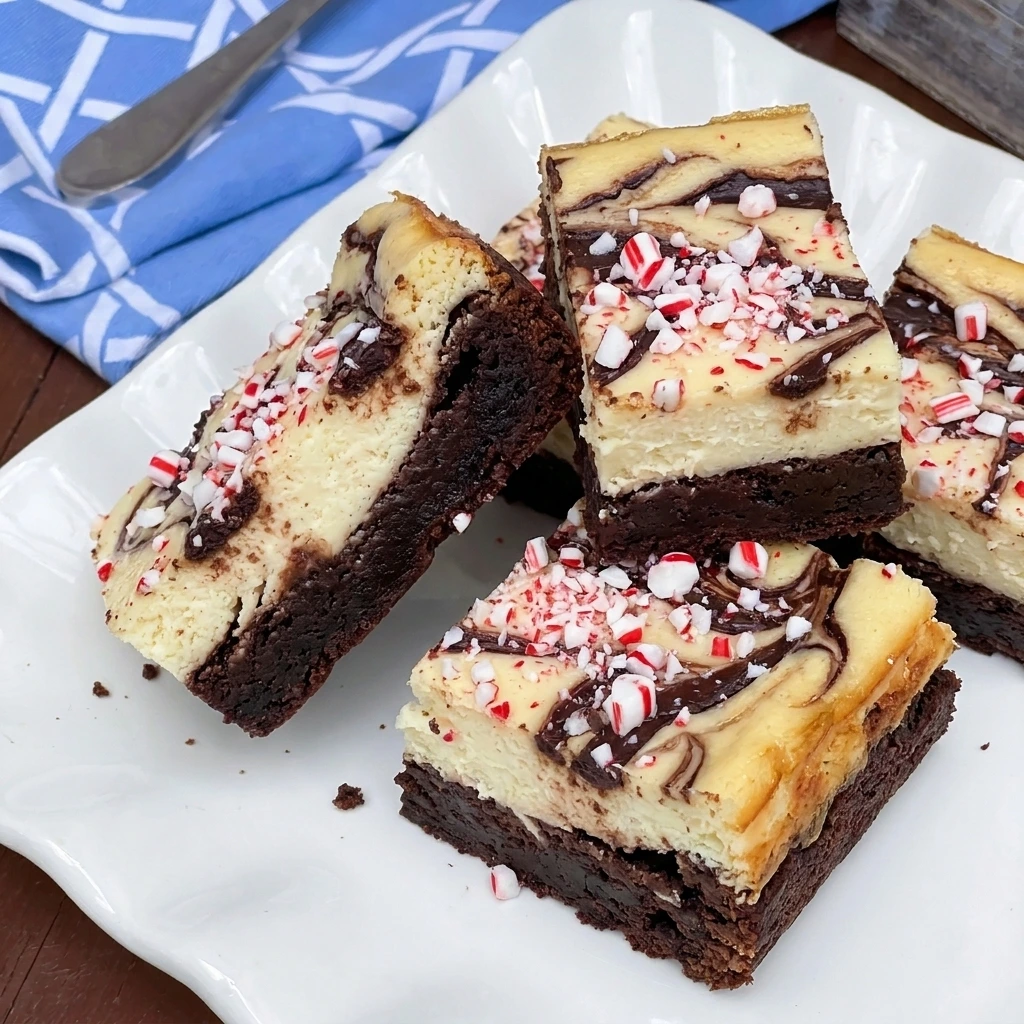
What I love most about this recipe is how simple it is with no complicated decorating or fancy ingredients and still it turns out unbelievably rich and creamy. Simple ingredients let the flavors of chocolate and peppermint shine. Every time I make it for friends or family it’s gone before I can even get a second helping!
These bars are especially wonderful for Christmas parties and holiday dessert trays because you can prepare them ahead of time and slice them into individual servings. If you love festive cheesecake desserts then you should also try my No-Bake Christmas Mini Cheesecakes for another easy holiday treat.
Ingredients
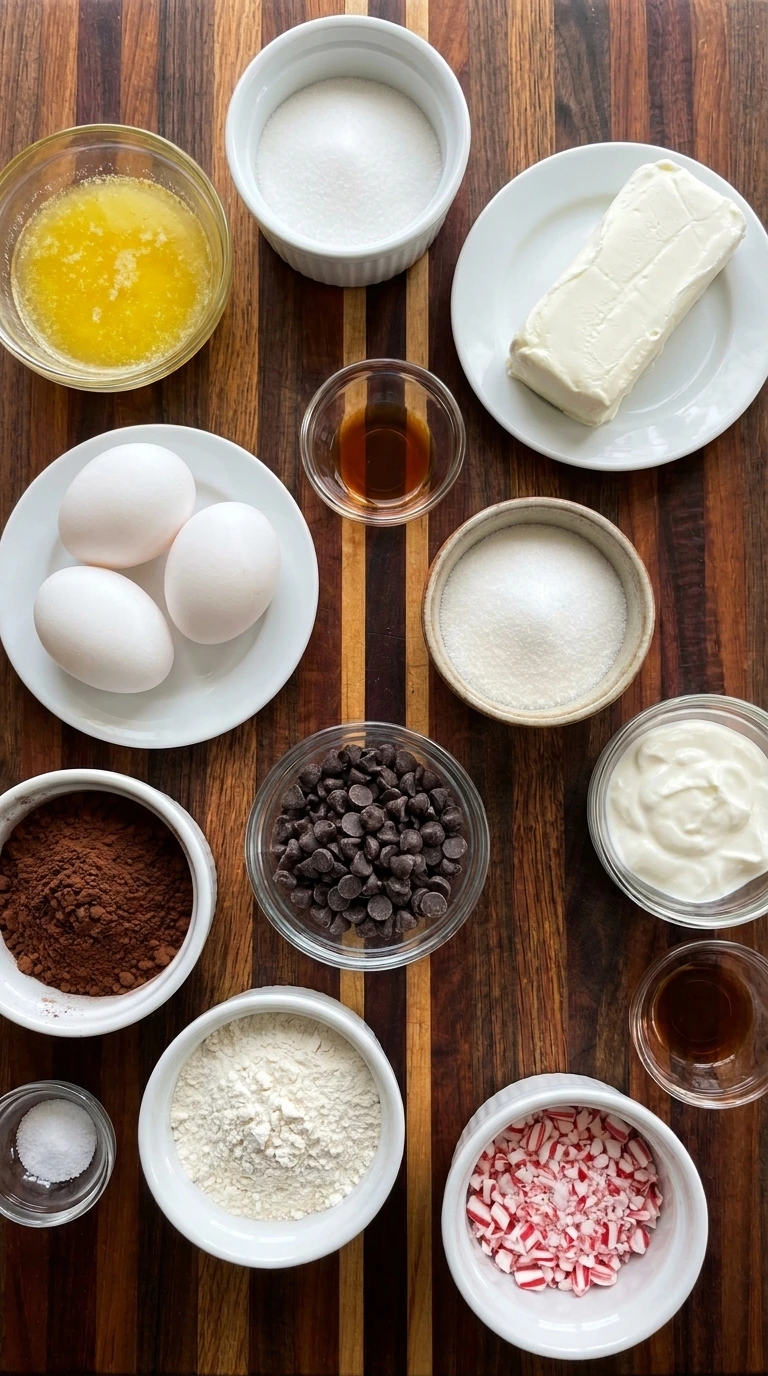
Here is what I use for this recipe :
- Unsalted butter: Melted butter gives the brownie base its rich flavor and moist fudgy texture while helping the chocolate layer stay tender after baking.
- Granulated sugar: Sugar sweetens both layers and helps create a tender brownie texture while balancing the tanginess of the cream cheese.
- Large eggs: Two eggs bind the brownie batter and provide structure while the remaining egg helps the cheesecake filling set into a smooth creamy layer.
- Vanilla extract: Vanilla adds warmth to the chocolate base and rounds out the sweet flavor of the cheesecake filling.
- Unsweetened cocoa powder: Unsweetened cocoa creates the deep chocolate flavor and dark color that contrast beautifully with the pale peppermint cheesecake.
- All-purpose flour: Flour provides enough structure to hold the brownie base together without making it overly cakey or dry.
- Fine salt: Salt enhances the chocolate flavor and balances the sweetness of the brownie and cheesecake layers.
- Semisweet chocolate chips: Chocolate chips add pockets of melted chocolate to the brownie layer and create an extra rich chocolate texture.
- Full-fat cream cheese: Softened cream cheese forms the smooth creamy cheesecake layer and provides the signature tangy flavor.
- Sour cream: Sour cream makes the cheesecake filling softer and creamier while adding gentle tanginess that balances the chocolate.
- Peppermint extract: Peppermint extract gives the cheesecake its refreshing holiday flavor without overpowering the chocolate base.
- Crushed peppermint candy canes: Crushed candy canes provide festive red and white color plus a light peppermint crunch when scattered over the finished chilled bars.
Tools I Use :
- 8-inch square baking pan: Holds the chocolate brownie and peppermint cheesecake layers during baking and creates a slab that can be cut into 16 bars.
- Parchment paper: Lines the baking pan to prevent sticking and allows the chilled cheesecake slab to be lifted out without breaking.
- Two medium mixing bowls: Keep the chocolate brownie batter and peppermint cheesecake filling separate until both mixtures are ready for layering.
- Electric hand mixer: Blends the softened cream cheese and sugar into a smooth filling while reducing lumps in the cheesecake layer.
- Whisk: Combines the melted butter and sugar and eggs to create the glossy base of the brownie batter.
- Rubber spatula: Folds dry ingredients and chocolate chips into the brownie batter and spreads both mixtures into the baking pan.
- Measuring cups and spoons: Measure the baking ingredients accurately and help maintain the correct balance between the chocolate and cheesecake layers.
- Kitchen scale: Provides more accurate measurements for flour and sugar and cream cheese when preparing the dessert.
- Butter knife or skewer: Creates gentle chocolate swirls through the pale cheesecake layer without completely combining the two batters.
- Wire cooling rack: Supports the hot baking pan during cooling and allows heat to escape before refrigeration.
- Refrigerator: Chills the baked dessert until the cheesecake becomes firm enough to slice into neat individual portions.
- Sharp kitchen knife: Cuts the chilled brownie cheesecake slab into 16 bars while preserving the visible contrast between the two layers.
- Wooden cutting board: Provides a stable cutting surface for dividing the chilled cheesecake slab into individual servings.
- White dessert plate: Holds an individual finished bar and displays the chocolate brownie base and creamy cheesecake topping clearly.
Instructions
Step 1: Mix the fudgy chocolate brownie batter
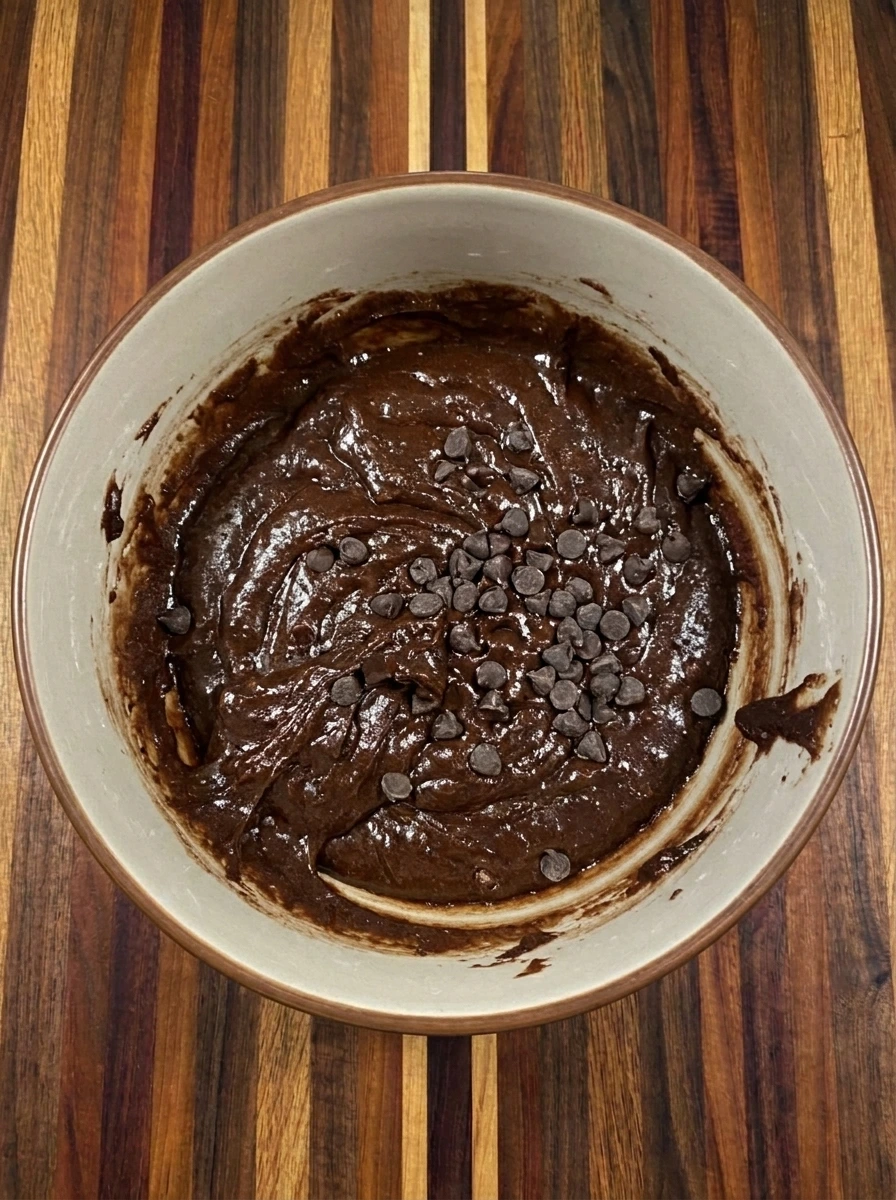
Begin by preheating your oven to 325°F and lining an 8-inch square baking pan with parchment paper. Leave enough parchment hanging over two sides so the finished bars will be easier to lift out after chilling. In a medium mixing bowl whisk together the melted butter and 3/4 cup granulated sugar until the mixture looks glossy. Add 2 eggs and 1/2 teaspoon vanilla extract and stir until everything is combined. Fold in the cocoa powder and flour and salt until no dry patches remain. Finally fold in the semisweet chocolate chips to create a thick and deeply chocolatey brownie batter. The finished batter should look dark and slightly glossy with chocolate chips distributed unevenly throughout. Avoid overmixing because the brownies should remain dense and fudgy rather than becoming cakey.
Tip: Stop stirring as soon as the flour disappears because overmixing can make the brownie base tougher.
Step 2: Beat the creamy peppermint cheesecake filling
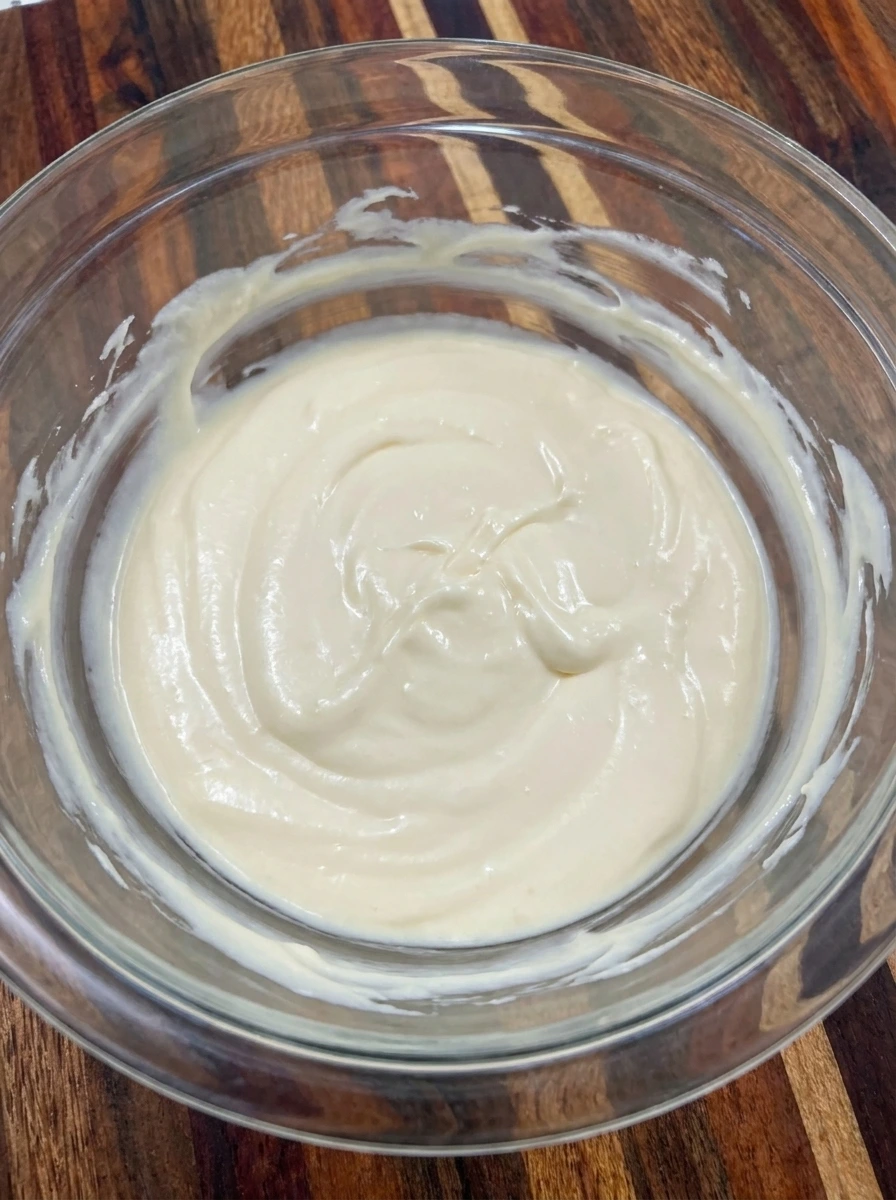
Place the softened cream cheese in a separate mixing bowl and beat until it becomes smooth and creamy. Add the remaining 1/3 cup granulated sugar and continue mixing until the mixture becomes soft and evenly blended. Add the remaining egg along with the sour cream and remaining 1/2 teaspoon vanilla extract and peppermint extract. Mix on low speed until the ingredients form a smooth pale cheesecake filling with a slightly thick and pourable consistency. The finished filling should look creamy and ivory colored with gentle swirls across the surface. Scrape down the sides as needed and avoid whipping in too much air because excess air can cause the cheesecake layer to puff and crack during baking.
Tip: Use fully softened cream cheese so the peppermint filling stays smooth without visible cream cheese lumps.
Step 3: Layer and swirl the brownie cheesecake batter
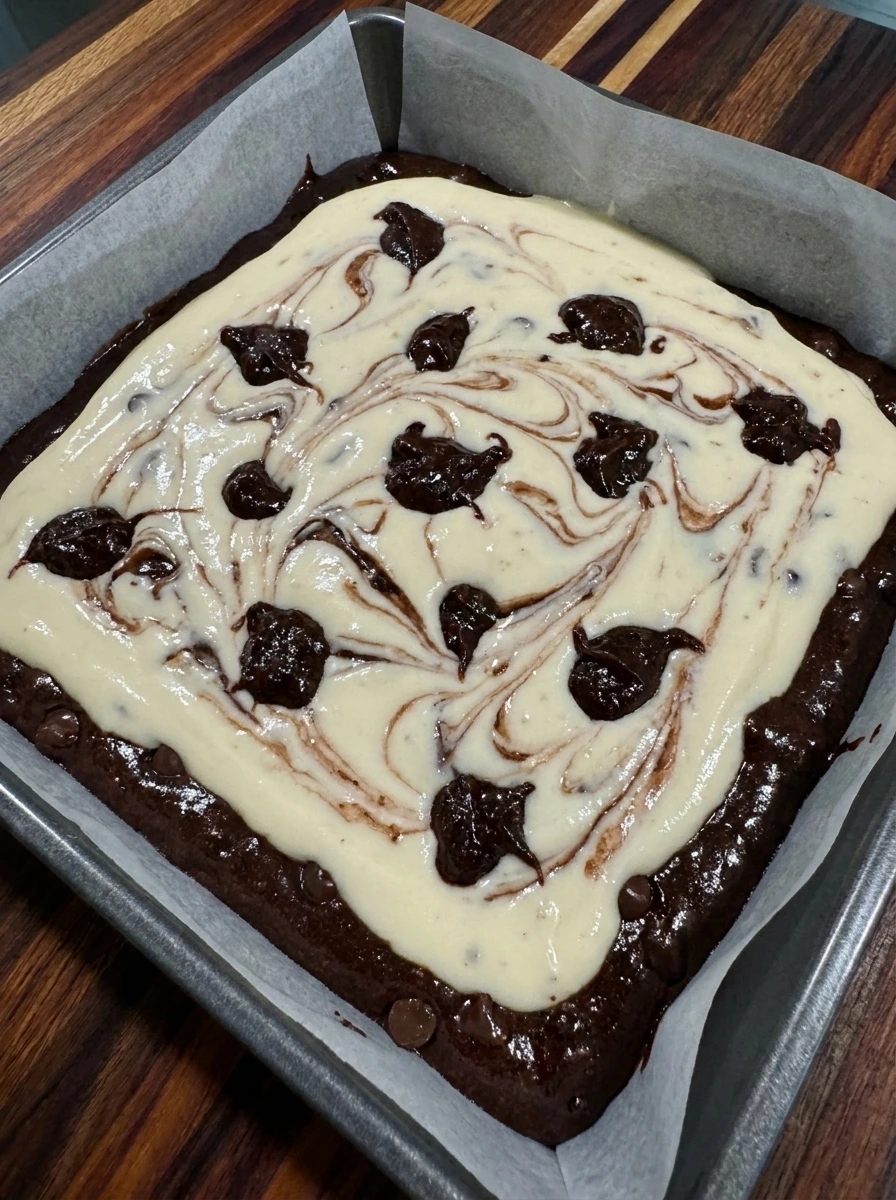
Transfer the chocolate brownie batter into the prepared 8-inch square baking pan. Spread it across the bottom in an even but naturally textured layer and make sure the batter reaches the corners. Reserve about 2 tablespoons of brownie batter before spreading the rest into the pan. Pour the peppermint cheesecake filling over the brownie layer and gently spread it toward the edges. Drop the reserved brownie batter in small irregular portions over the pale cheesecake mixture and lightly drag through the surface to create a few chocolate swirls. Keep the layers mostly distinct so each baked bar will show a dark brownie base beneath the creamy peppermint cheesecake. The top should have a few loose chocolate ribbons rather than a completely blended brown surface.
Tip: Swirl the top lightly and stop while the cheesecake remains mostly pale so the finished bars show distinct layers.
Step 4: Bake until the cheesecake layer is gently set
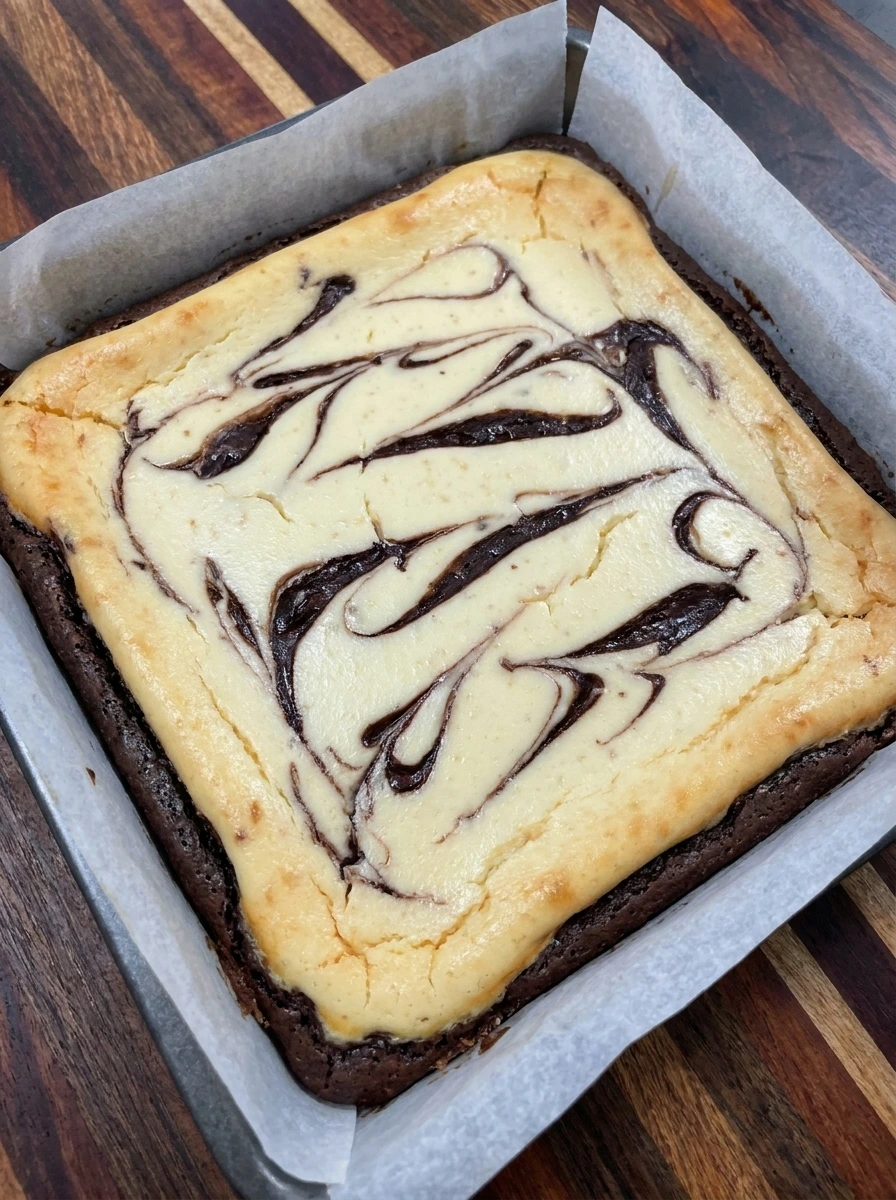
Place the assembled baking pan into the preheated oven and bake at 325°F for approximately 35 to 40 minutes. The brownie base will cook into a dense chocolate layer while the cheesecake topping gradually thickens and sets. Look for cheesecake edges that appear set with a slight golden tint and a center that still has a small gentle wobble when the pan is carefully moved. The dark chocolate swirls should look more defined and the top may develop a few tiny natural cracks. Remove the pan from the oven and allow it to cool at room temperature for approximately one hour. The cheesecake will continue setting as it cools and the brownie base will become firmer without losing its fudgy interior.
Tip: Remove the pan while the center still has a gentle wobble because overbaking can dry the cheesecake and brownie layers.
Step 5: Chill and cut the cheesecake into bars
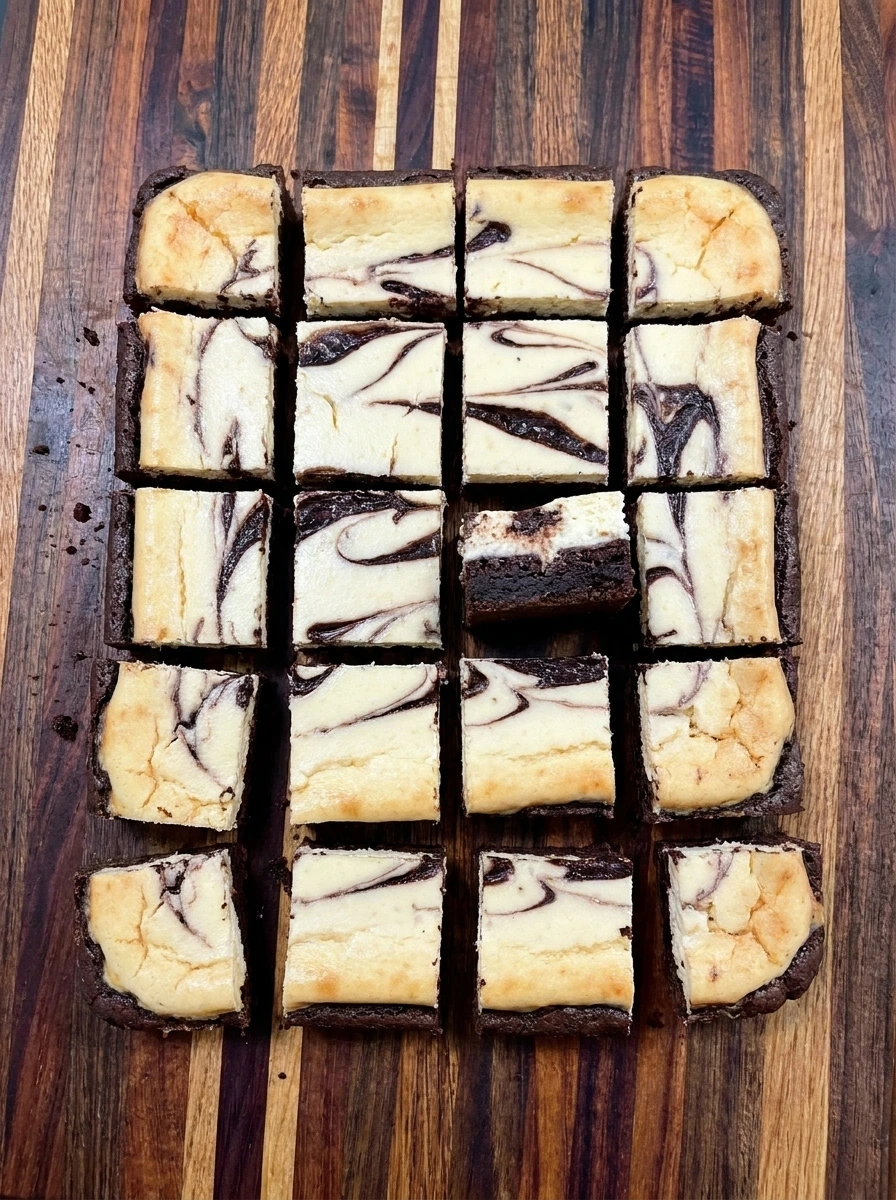
Once the baked cheesecake has cooled to room temperature cover the pan and refrigerate it for at least 3 hours. Chilling allows the cheesecake filling to become firm enough for clean slicing while helping the brownie base develop its rich fudgy texture. Lift the chilled dessert from the pan using the parchment overhang and transfer it to a cutting board. Cut into 16 rectangular bars using a sharp knife. Wipe the blade between cuts if you want more visible layers while keeping the naturally homemade appearance. The sliced bars should reveal a thick dark brownie base with a creamy pale cheesecake layer above it. Expect a few irregular edges and slightly different bar sizes because homemade desserts rarely cut into perfectly identical pieces.
Tip: Chill the entire slab thoroughly before slicing because warm cheesecake can smear into the brownie layer.
Step 6: Add crushed peppermint and serve a cheesecake bar
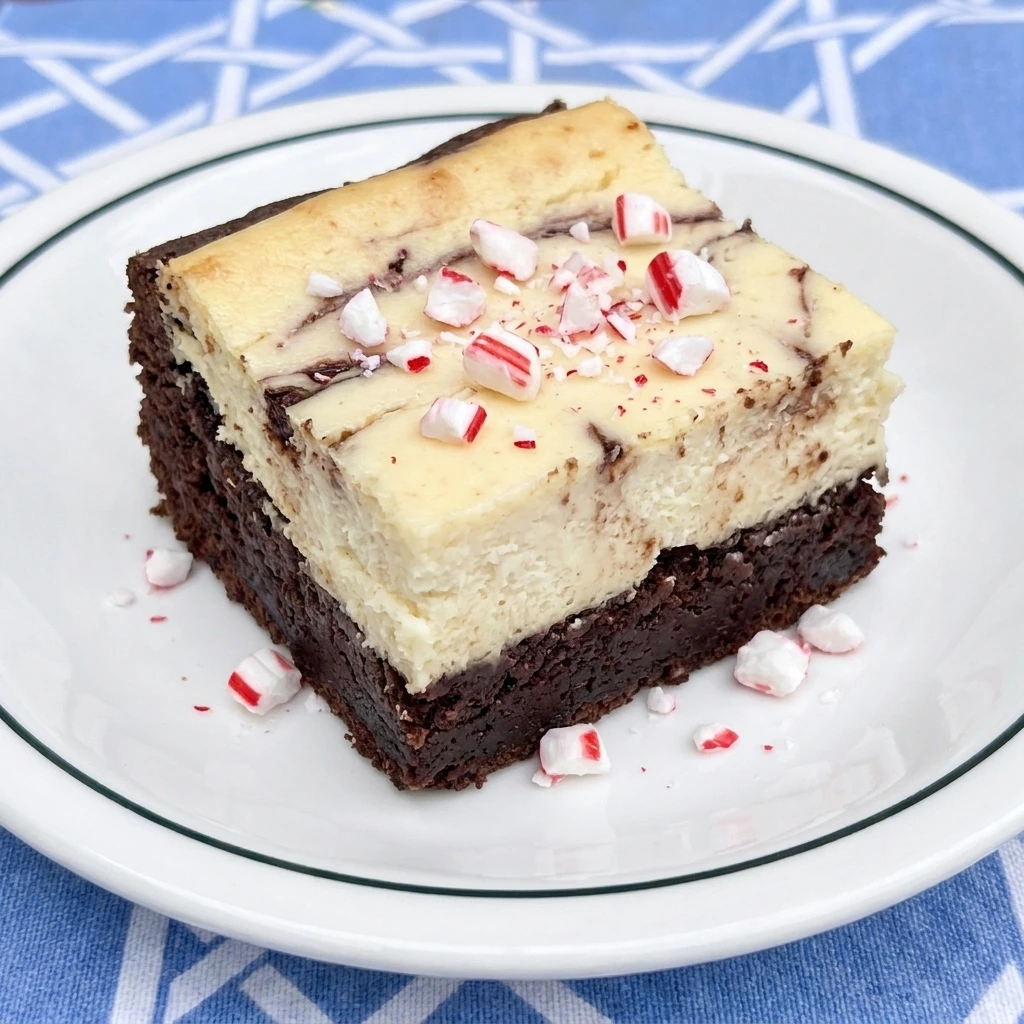
Scatter the crushed candy canes over the chilled cheesecake bars just before serving. The red and white peppermint pieces add a festive Christmas appearance and a light crunchy finish that contrasts with the creamy cheesecake. Transfer one bar onto a small white dessert plate and position it slightly off center. Let the cut side face outward so the thick dark brownie base and pale peppermint cheesecake filling are clearly visible. Serve the bars chilled for the best texture and flavor. Each bite should combine dense chocolate brownie with smooth cheesecake and a refreshing peppermint crunch for a beautiful homemade Christmas dessert.
Tip: Add crushed candy canes just before serving because peppermint candy can soften and bleed color during storage.
Pro Tips
- Let the cream cheese reach room temperature before mixing because cold cream cheese can leave lumps throughout the cheesecake layer.
- Use a light hand when swirling the brownie batter through the cheesecake so the finished bars keep their contrasting chocolate layers.
- Allow the bars to chill for at least three hours before slicing because a firm cheesecake layer produces cleaner cuts and better texture.
- Sprinkle crushed candy canes over the chilled bars immediately before serving to preserve their crunch and prevent red color bleeding.
Storage Instructions
Refrigerator Storage: Allow the Peppermint Brownie Cheesecake Bars to cool completely before placing them in the refrigerator. Transfer the sliced bars into an airtight container and separate any stacked layers with parchment paper to prevent sticking. Store for up to four days and keep the cheesecake chilled until ready to serve. Freezer Storage: These bars freeze well when stored without the crushed peppermint topping. Wrap individual chilled bars tightly and place them inside a freezer-safe airtight container. Freeze for up to two months for the best flavor and texture. Label the container with the freezing date so you can easily track freshness. Thawing Instructions: Transfer frozen cheesecake bars to the refrigerator and allow them to thaw overnight.
Avoid thawing at room temperature for extended periods because the cream cheese filling should remain safely chilled. Once thawed and ready to serve add freshly crushed candy canes for the best color and crunch. Serving and Texture: Peppermint Brownie Cheesecake Bars taste especially good when served chilled because the cheesecake layer stays creamy and the brownie remains rich and fudgy. The crushed candy topping can absorb moisture while stored and may become sticky or dissolve into the cheesecake. For the prettiest presentation keep the candy topping separate until serving.
Frequently Asked Questions
Yes and these bars are excellent for making a day ahead because chilling overnight helps the cheesecake firm up.
Yes and you can freeze the bars without candy cane topping for up to two months in an airtight container.
They may need more chilling time or additional baking if the center was still liquid when removed from the oven.
Keep the bars refrigerated in an airtight container for up to four days and add the candy topping before serving.
See You in the Kitchen
These Peppermint Brownie Cheesecake Bars are a great way to satisfy your Christmas dessert cravings without spending hours making complicated holiday treats.
I typically prepare a batch of White Christmas Pie or No-Bake Christmas Mini Cheesecakes at the same time I make my brownie cheesecake bars and that way all of my holiday dessert options will be ready for the Christmas party.
Even my kids love this one!
Print
Peppermint Brownie Cheesecake Bars
- Total Time: 5 hours 5 minutes
- Yield: 16 servings
Description
These Peppermint Brownie Cheesecake Bars combine a rich fudgy brownie base with a creamy peppermint cheesecake layer and a festive sprinkle of crushed candy canes. This easy dessert is one of the best Christmas baking ideas when you need something quick to prepare and simple to share. Perfect for a holiday party or winter potluck and these homemade bars offer a sweet chocolate peppermint treat that feels special without complicated steps. Enjoy alongside a healthy holiday meal.
Ingredients
- 1/2 cup (113 g) Unsalted butter
- 3/4 cup (150 g) for brownies plus 1/3 cup (67 g) for cheesecake Granulated sugar
- 3 large eggs divided Large eggs
- 1 teaspoon divided Vanilla extract
- 1/3 cup (30 g) Unsweetened cocoa powder
- 1/2 cup (63 g) All-purpose flour
- 1/4 teaspoon Fine salt
- 1/2 cup (85 g) Semisweet chocolate chips
- 8 ounces (226 g) softened Full-fat cream cheese
- 1/4 cup (60 g) Sour cream
- 1/4 teaspoon Peppermint extract
- 1/4 cup (30 g) Crushed peppermint candy canes
Instructions
- Begin by preheating your oven to 325°F and lining an 8-inch square baking pan with parchment paper. Leave enough parchment hanging over two sides so the finished bars will be easier to lift out after chilling.
In a medium mixing bowl whisk together the melted butter and 3/4 cup granulated sugar until the mixture looks glossy. Add 2 eggs and 1/2 teaspoon vanilla extract and stir until everything is combined. Fold in the cocoa powder and flour and salt until no dry patches remain. Finally fold in the semisweet chocolate chips to create a thick and deeply chocolatey brownie batter.
The finished batter should look dark and slightly glossy with chocolate chips distributed unevenly throughout. Avoid overmixing because the brownies should remain dense and fudgy rather than becoming cakey.
- Place the softened cream cheese in a separate mixing bowl and beat until it becomes smooth and creamy. Add the remaining 1/3 cup granulated sugar and continue mixing until the mixture becomes soft and evenly blended.
Add the remaining egg along with the sour cream and remaining 1/2 teaspoon vanilla extract and peppermint extract. Mix on low speed until the ingredients form a smooth pale cheesecake filling with a slightly thick and pourable consistency.
The finished filling should look creamy and ivory colored with gentle swirls across the surface. Scrape down the sides as needed and avoid whipping in too much air because excess air can cause the cheesecake layer to puff and crack during baking.
- Transfer the chocolate brownie batter into the prepared 8-inch square baking pan. Spread it across the bottom in an even but naturally textured layer and make sure the batter reaches the corners. Reserve about 2 tablespoons of brownie batter before spreading the rest into the pan.
Pour the peppermint cheesecake filling over the brownie layer and gently spread it toward the edges. Drop the reserved brownie batter in small irregular portions over the pale cheesecake mixture and lightly drag through the surface to create a few chocolate swirls.
Keep the layers mostly distinct so each baked bar will show a dark brownie base beneath the creamy peppermint cheesecake. The top should have a few loose chocolate ribbons rather than a completely blended brown surface.
- Place the assembled baking pan into the preheated oven and bake at 325°F for approximately 35 to 40 minutes. The brownie base will cook into a dense chocolate layer while the cheesecake topping gradually thickens and sets.
Look for cheesecake edges that appear set with a slight golden tint and a center that still has a small gentle wobble when the pan is carefully moved. The dark chocolate swirls should look more defined and the top may develop a few tiny natural cracks.
Remove the pan from the oven and allow it to cool at room temperature for approximately one hour. The cheesecake will continue setting as it cools and the brownie base will become firmer without losing its fudgy interior.
- Once the baked cheesecake has cooled to room temperature cover the pan and refrigerate it for at least 3 hours. Chilling allows the cheesecake filling to become firm enough for clean slicing while helping the brownie base develop its rich fudgy texture.
Lift the chilled dessert from the pan using the parchment overhang and transfer it to a cutting board. Cut into 16 rectangular bars using a sharp knife. Wipe the blade between cuts if you want more visible layers while keeping the naturally homemade appearance.
The sliced bars should reveal a thick dark brownie base with a creamy pale cheesecake layer above it. Expect a few irregular edges and slightly different bar sizes because homemade desserts rarely cut into perfectly identical pieces.
- Scatter the crushed candy canes over the chilled cheesecake bars just before serving. The red and white peppermint pieces add a festive Christmas appearance and a light crunchy finish that contrasts with the creamy cheesecake.
Transfer one bar onto a small white dessert plate and position it slightly off center. Let the cut side face outward so the thick dark brownie base and pale peppermint cheesecake filling are clearly visible.
Serve the bars chilled for the best texture and flavor. Each bite should combine dense chocolate brownie with smooth cheesecake and a refreshing peppermint crunch for a beautiful homemade Christmas dessert.
Notes
Pro Tips:
- Let the cream cheese reach room temperature before mixing because cold cream cheese can leave lumps throughout the cheesecake layer.
- Use a light hand when swirling the brownie batter through the cheesecake so the finished bars keep their contrasting chocolate layers.
- Allow the bars to chill for at least three hours before slicing because a firm cheesecake layer produces cleaner cuts and better texture.
- Sprinkle crushed candy canes over the chilled bars immediately before serving to preserve their crunch and prevent red color bleeding.
Storage: Refrigerator Storage: Allow the Peppermint Brownie Cheesecake Bars to cool completely before placing them in the refrigerator. Transfer the sliced bars into an airtight container and separate any stacked layers with parchment paper to prevent sticking. Store for up to four days and keep the cheesecake chilled until ready to serve.
Freezer Storage: These bars freeze well when stored without the crushed peppermint topping. Wrap individual chilled bars tightly and place them inside a freezer-safe airtight container. Freeze for up to two months for the best flavor and texture. Label the container with the freezing date so you can easily track freshness.
Thawing Instructions: Transfer frozen cheesecake bars to the refrigerator and allow them to thaw overnight. Avoid thawing at room temperature for extended periods because the cream cheese filling should remain safely chilled. Once thawed and ready to serve add freshly crushed candy canes for the best color and crunch.
Serving and Texture: Peppermint Brownie Cheesecake Bars taste especially good when served chilled because the cheesecake layer stays creamy and the brownie remains rich and fudgy. The crushed candy topping can absorb moisture while stored and may become sticky or dissolve into the cheesecake. For the prettiest presentation keep the candy topping separate until serving.
- Prep Time: 25 minutes
- Cook Time: 40 minutes
- Category: Dessert
- Cuisine: American