Our family discovered these Skeleton Cookie Pops during the height of fall. Our boys were hosting a cousin from Detroit at our remote lake cottage where they carved pumpkins during the day and toasted marshmallows around the bonfire every night.

That was one of my best weeks of the year and these easy cookie pops quickly became one of my favorite Halloween recipes. If you love playful desserts then try our Mini Oreo Cheesecake Cups for another party treat.
I will never forget the first time I made these and the look on the kids’ faces when they saw the skeleton designs. Read on and as I show you how to make these unforgettable Halloween treats.
Ingredients

Here is what I use for this recipe and you can adjust nuts or spices based on preference:
- Chocolate sandwich cookies: These form the crisp cookie center and provide a dark base that supports the skeleton theme.
- Dark chocolate candy melts: These create a smooth dark shell around every cookie and also help secure each pop stick.
- White vanilla candy melts: These create the bright skull faces and bone lines that make the finished pops look like skeletons.
- Refined coconut oil: This loosens the dark coating so it flows more evenly around the cookies without becoming too thick.
- Food safe lollipop sticks: These turn the coated cookies into handheld pops and make them easy to serve at a party.
Tools You’ll Need
- Small saucepan: Melts the candy coating gently and keeps it deep enough for smooth dipping.
- Baking tray: Holds the cookie pops while the sticks set and while the dark and white coatings firm.
- Parchment paper: Creates a nonstick resting layer so the coated pops lift away cleanly after setting.
- Piping bag: Applies narrow white candy lines for simple skull faces and skeleton bone details.
- Heat safe spatula: Stirs the melting candy coating until the texture becomes smooth and evenly fluid.
Instructions
Step 1: Melt the dark candy coating

Place the dark candy melts with the coconut oil together and heat until the pieces lose their shape and become a smooth flowing coating. The mixture should look glossy and fluid with a few natural swirls instead of thick separate wafers.
Tip: Stir only until smooth because overheating candy melts can make the coating thicker and harder to spread evenly.
Step 2: Secure sticks inside the cookies

Press one lollipop stick gently into the cream center of each of the 12 sandwich cookies and use a small dab of dark coating to help hold every stick in place. The cookies now change from plain rounds into handheld pops and the sticks sit at slightly different natural angles without forming a perfect row.
Tip: Press the sticks gently into the cream centers so the cookies stay intact and the finished pops remain easy to dip.
Step 3: Coat the cookie pops in dark candy

Dip each prepared cookie pop into the melted dark coating until the cookie is covered while allowing small natural ripples and slightly thicker edges to remain. Return all 12 coated pops in a loose arrangement so the dark shells begin to set with irregular spacing and a few tiny exposed cookie spots.
Tip: Let excess coating drip away before setting the pops down so the shells stay smooth enough for decorating without becoming bulky.
Step 4: Pipe the white skeleton details
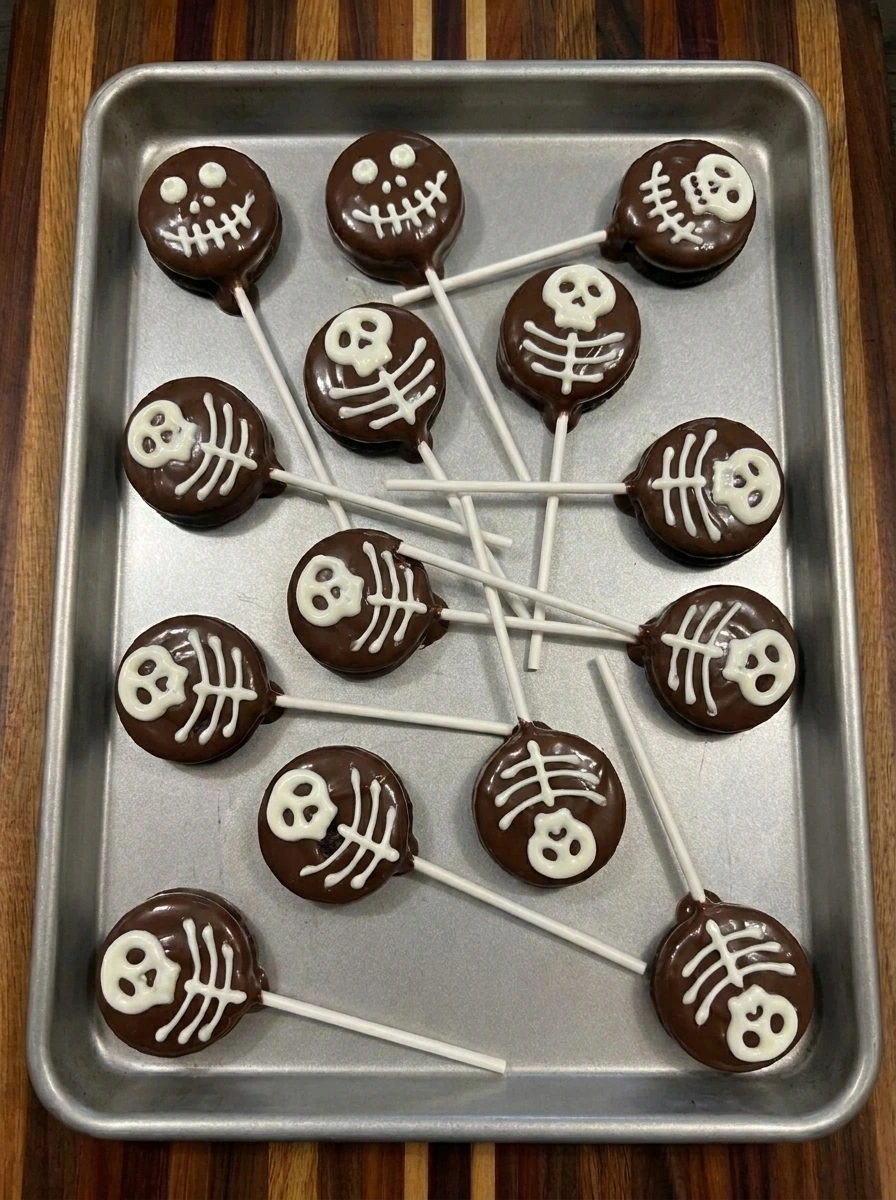
Melt the white candy melts until smooth and pipe skull faces with simple ribs and arm and leg lines across each dark coated pop. The 12 pops now change from plain dark rounds into recognizable skeleton treats with uneven handmade lines and slightly different faces on every cookie.
Tip: Keep the white candy lines simple and slightly uneven because tiny variations make the skeleton designs look playful and homemade.
Step 5: Serve one finished cookie pop
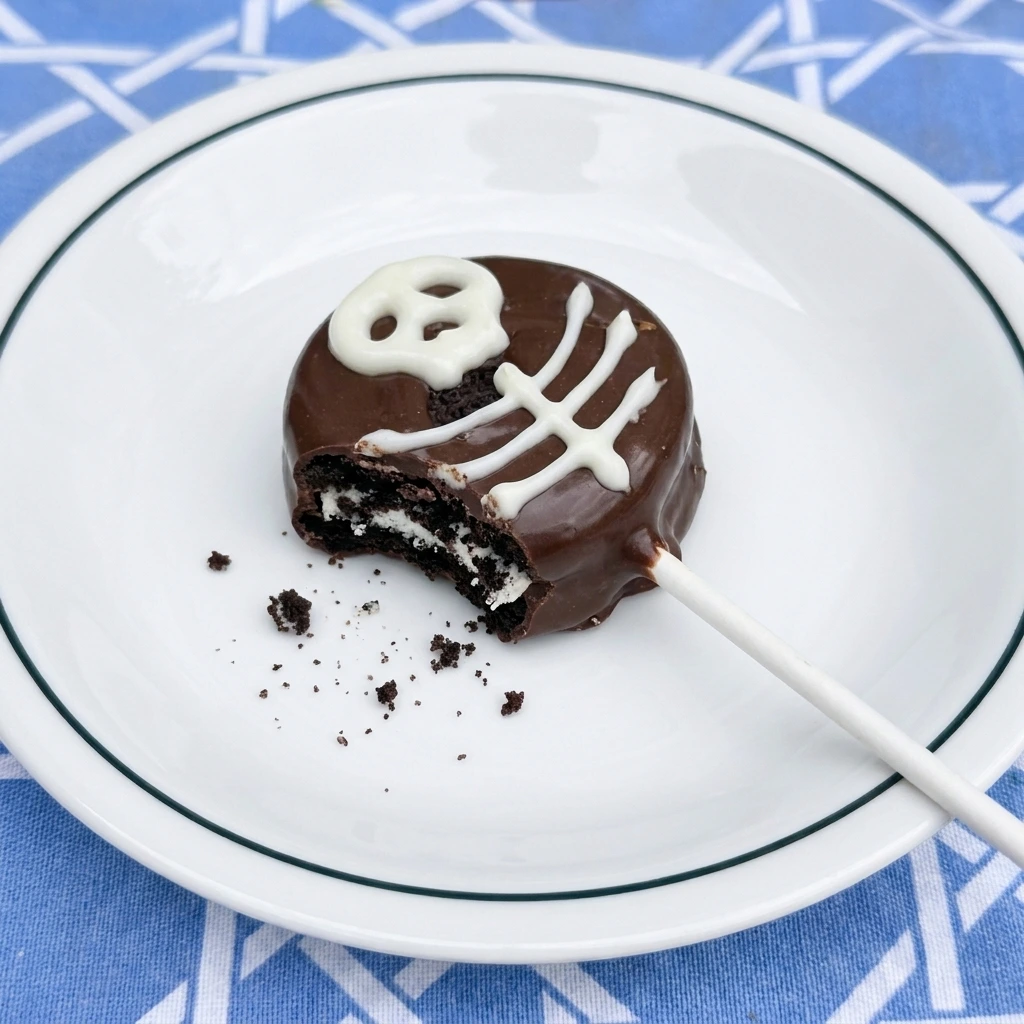
Let the decorated pops set until the coating feels firm and the white skeleton lines hold their shape then choose one finished pop for serving. Place one pop on a white plate with a small broken edge that reveals the dark cookie and pale cream center while the handmade skeleton design remains clearly visible.
Tip: Allow the coating to set fully before serving so the skeleton lines stay crisp and the cookie center keeps its clean layered texture.
Pro Tips
- Use room temperature cookies so the cream centers stay firm enough to hold the sticks without cracking during assembly.
- Keep the dark coating fluid but not overly hot so it covers the cookies smoothly without softening the cream filling too much.
- Pipe simple skeleton shapes instead of tiny detailed bones because bold lines stay clearer once the white candy coating sets.
- Let every coated pop set in a loose single layer so the edges keep their shape and the decorations do not touch each other.
Storage Instructions
Store fully set Skeleton Cookie Pops in a single layer inside an airtight container at cool room temperature for up to three days. If the room is warm then refrigerate the pops in a covered container so the candy coating stays firm and the skeleton lines keep their shape. Bring chilled pops closer to room temperature before serving so the cookie centers are easier to bite and the coating is not overly hard. Avoid stacking the pops unless parchment separates the layers because direct pressure can crack the white decorations or scuff the dark coating.
Frequently Asked Questions
Yes. Let them set completely then store them covered at cool room temperature until the next day.
The cookies may be too cold or the stick may be pushed too hard. Insert each stick gently into the cream center.
Yes. Milk chocolate works well although the white skeleton details will have slightly less contrast.
Set the coated pops on parchment until firm so the shells release cleanly without tearing or smearing.
See You in the Kitchen
I hope you try these Skeleton Cookie Pops soon!
They are a simple recipe that looks playful and tastes incredible and makes every Halloween occasion a little more special alongside Mini Oreo Cheesecake Cups or Ham and Cheese Crescent Bites.
Do not forget to share your results or save this recipe for later because it is one worth keeping.
Print
Skeleton Cookie Pops
- Total Time: 45 minutes
- Yield: 12 servings
Description
Skeleton Cookie Pops are an easy Halloween treat with quick chocolate coating and simple white candy skeleton details on crisp sandwich cookies. These playful ideas are best for a holiday party or potluck and they are fun to assemble with kids. The recipe uses familiar ingredients and portion friendly pops so the result feels lighter and more controlled while still giving you a festive dessert that looks impressive without complicated decorating.
Ingredients
- 12 cookies Chocolate sandwich cookies
- 10 ounces Dark chocolate candy melts
- 4 ounces White vanilla candy melts
- 1 teaspoon Refined coconut oil
- 12 sticks Food safe lollipop sticks
Instructions
- Place the dark candy melts with the coconut oil together and heat until the pieces lose their shape and become a smooth flowing coating. The mixture should look glossy and fluid with a few natural swirls instead of thick separate wafers.
- Press one lollipop stick gently into the cream center of each of the 12 sandwich cookies and use a small dab of dark coating to help hold every stick in place. The cookies now change from plain rounds into handheld pops and the sticks sit at slightly different natural angles without forming a perfect row.
- Dip each prepared cookie pop into the melted dark coating until the cookie is covered while allowing small natural ripples and slightly thicker edges to remain. Return all 12 coated pops in a loose arrangement so the dark shells begin to set with irregular spacing and a few tiny exposed cookie spots.
- Melt the white candy melts until smooth and pipe skull faces with simple ribs and arm and leg lines across each dark coated pop. The 12 pops now change from plain dark rounds into recognizable skeleton treats with uneven handmade lines and slightly different faces on every cookie.
- Let the decorated pops set until the coating feels firm and the white skeleton lines hold their shape then choose one finished pop for serving. Place one pop on a white plate with a small broken edge that reveals the dark cookie and pale cream center while the handmade skeleton design remains clearly visible.
Notes
Pro Tips:
- Use room temperature cookies so the cream centers stay firm enough to hold the sticks without cracking during assembly.
- Keep the dark coating fluid but not overly hot so it covers the cookies smoothly without softening the cream filling too much.
- Pipe simple skeleton shapes instead of tiny detailed bones because bold lines stay clearer once the white candy coating sets.
- Let every coated pop set in a loose single layer so the edges keep their shape and the decorations do not touch each other.
Storage: Store fully set Skeleton Cookie Pops in a single layer inside an airtight container at cool room temperature for up to three days. If the room is warm then refrigerate the pops in a covered container so the candy coating stays firm and the skeleton lines keep their shape. Bring chilled pops closer to room temperature before serving so the cookie centers are easier to bite and the coating is not overly hard. Avoid stacking the pops unless parchment separates the layers because direct pressure can crack the white decorations or scuff the dark coating.
- Prep Time: 25 minutes
- Cook Time: 5 minutes
- Category: Dessert
- Cuisine: American