I honestly havent really shared many waffle based recipes in my blog but these Chocolate Covered Waffle Pops were one I had to share. This recipe is inspired by fun bakery treats and is easy to prepare and make. It is a super tasty dessert packed with crisp waffle texture plus smooth chocolate and it is quite satisfying.
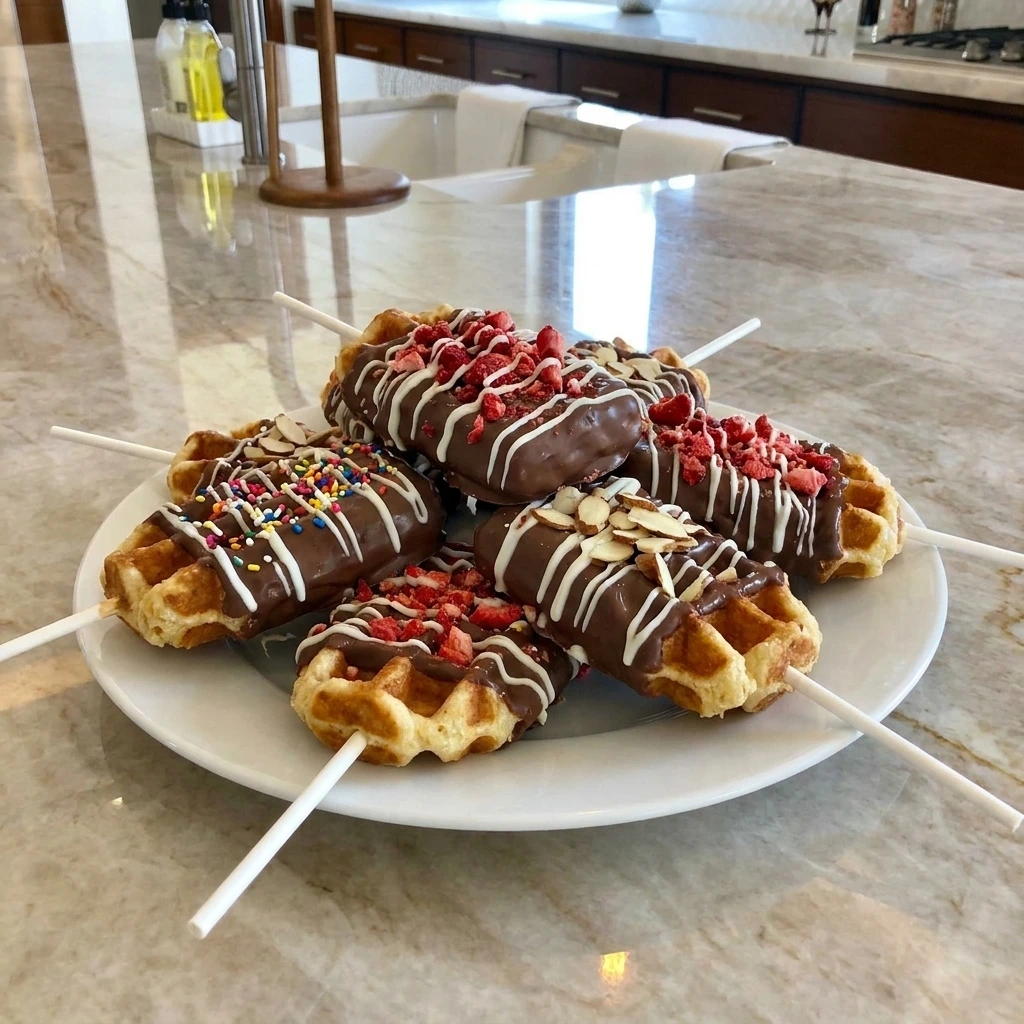
When people think about chocolate covered treats they probably expect something complicated or messy to make. But trust me on this because these waffle pops stay simple and playful while offering a sweet crunch that feels perfect for sharing. You can also try our Chocolate Dipped Strawberry Crackers when you want another chocolate dipped snack.
This recipe is super tasty and quick to make and I recommend this treat for those who want an easy dessert for brunch or parties.
Ingredients
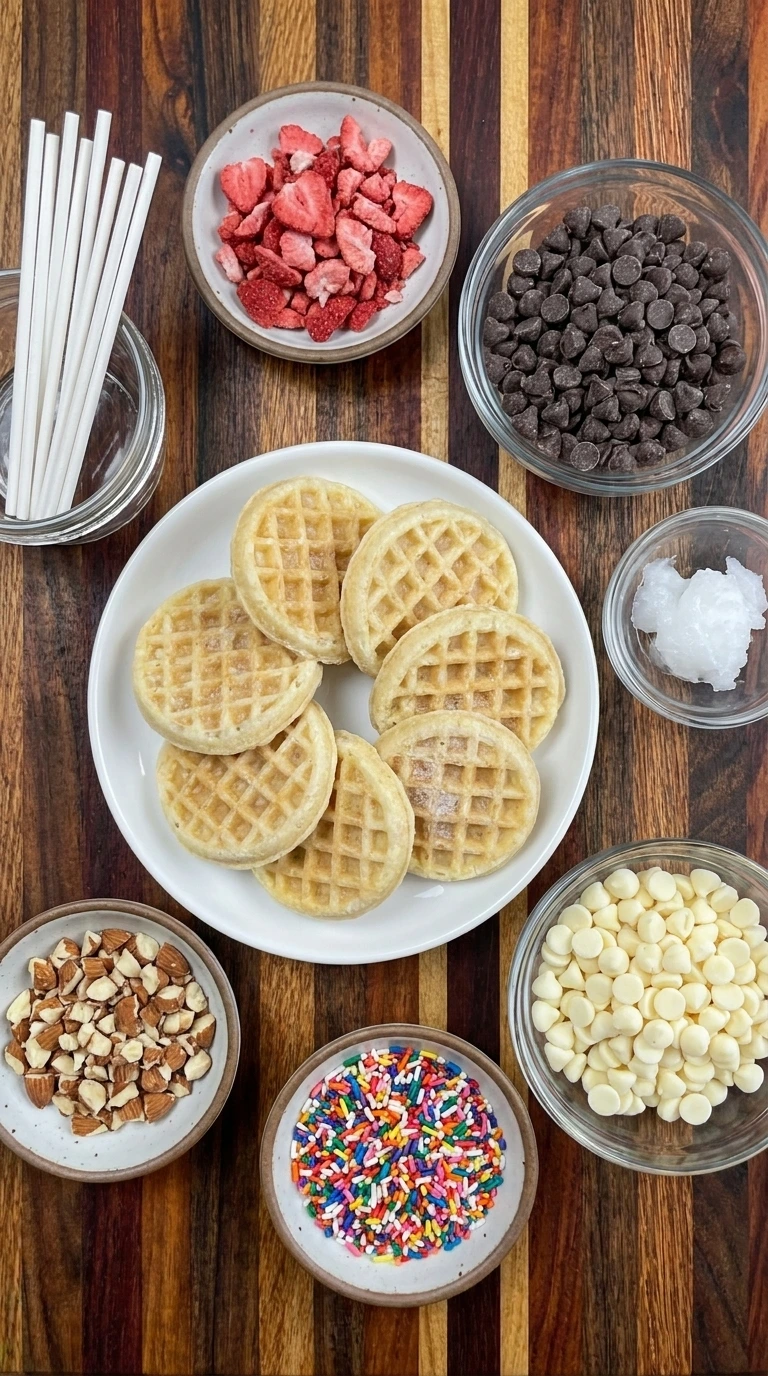
Here is what I use for this recipe and you can adjust nuts or spices based on preference:
- Mini round waffles: These create the crisp and sturdy base for each pop while keeping every serving easy to hold.
- Semisweet chocolate chips: These melt into a smooth coating with balanced sweetness and enough structure to set firmly.
- Coconut oil: This loosens the melted chocolate slightly so it spreads across the waffle ridges more evenly.
- White chocolate chips: These create a contrasting drizzle that adds extra sweetness and a bright decorative finish.
- Rainbow sprinkles: These add playful color plus a light candy crunch that makes the pops suitable for celebrations.
- Freeze dried strawberries: These provide tart berry flavor plus a crisp texture and naturally colorful topping.
- Chopped toasted almonds: These add a nutty crunch and help balance the sweetness of the chocolate coating.
- Lollipop sticks: These support the waffles and turn each coated piece into a neat handheld dessert.
Tools You’ll Need
- Toaster or toaster oven: This crisps the mini waffles and creates the golden surface needed to support the chocolate coating.
- Microwave safe bowls: These hold the semisweet and white chocolate separately while each coating melts.
- Baking tray: This keeps all eight dipped waffle pops in one layer while the toppings and chocolate set.
- Parchment paper: This prevents the chocolate coating from sticking to the baking tray during setting.
- Small spoon: This stirs the melted chocolate and creates thin irregular lines of white chocolate drizzle.
- White serving plate: This presents the completed waffle pops after the chocolate has become firm.
Instructions
Step 1: Toast the mini waffles and add sticks
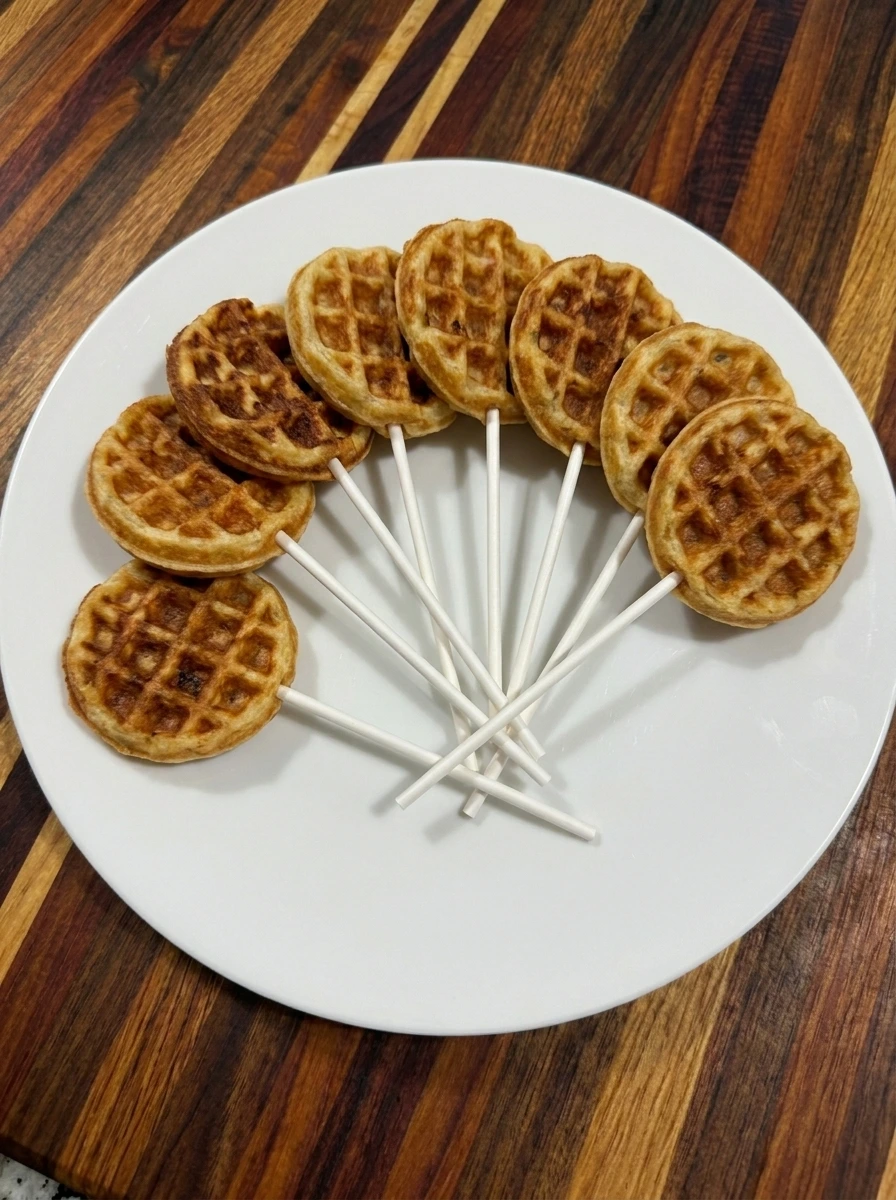
Toast the eight mini waffles until their surfaces turn golden and the square ridges become crisp while the centers remain slightly tender. Let them cool briefly and press one lollipop stick into the lower edge of each waffle so the eight pieces become sturdy handheld pops.
Tip: Cool the waffles before coating so trapped steam does not soften the chocolate or make it slide away from the crisp ridges.
Step 2: Melt the semisweet chocolate
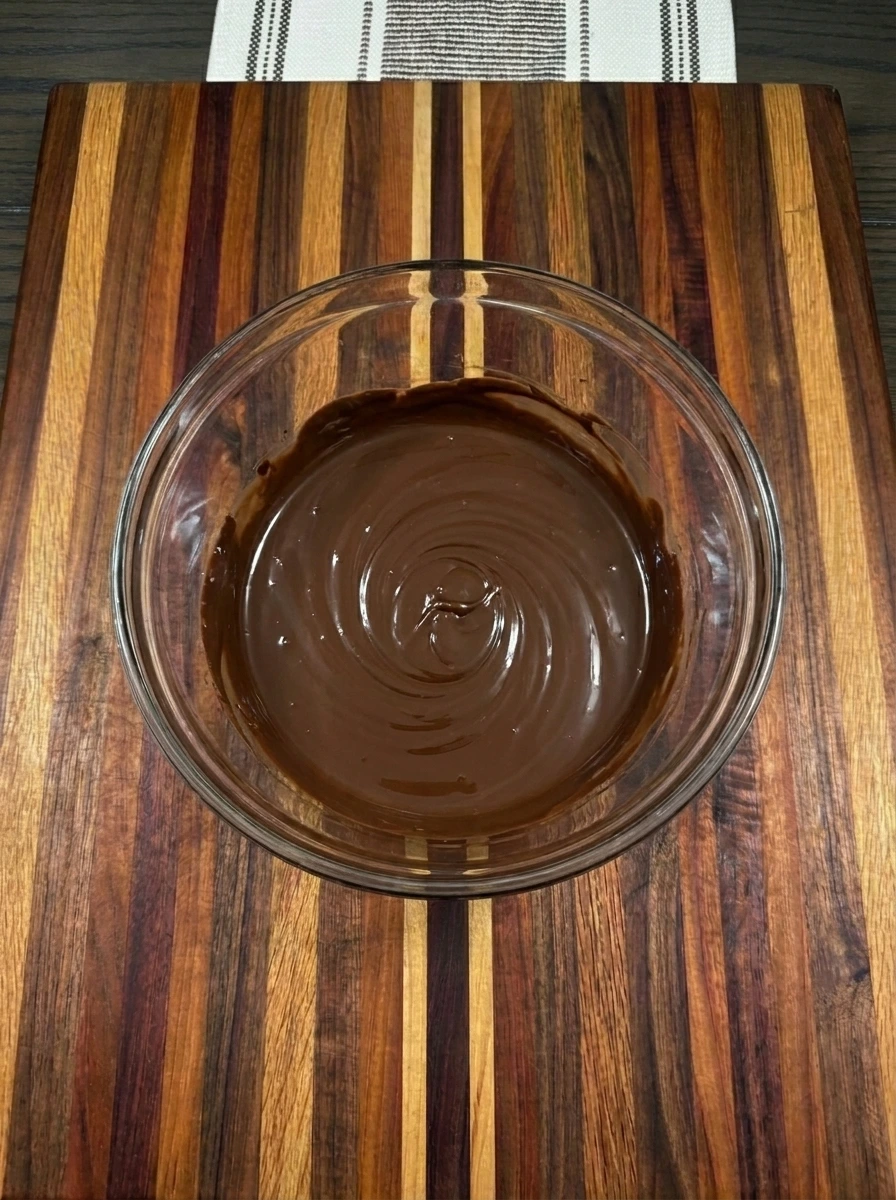
Combine the semisweet chocolate chips with the coconut oil until the chips change into a glossy and fluid chocolate coating. The melted mixture should look smooth with a few natural swirls and enough movement to settle back into the center after stirring.
Tip: Melt the chocolate gently in short intervals because excess heat can make it thick and grainy instead of glossy and fluid.
Step 3: Dip the waffle pops in chocolate
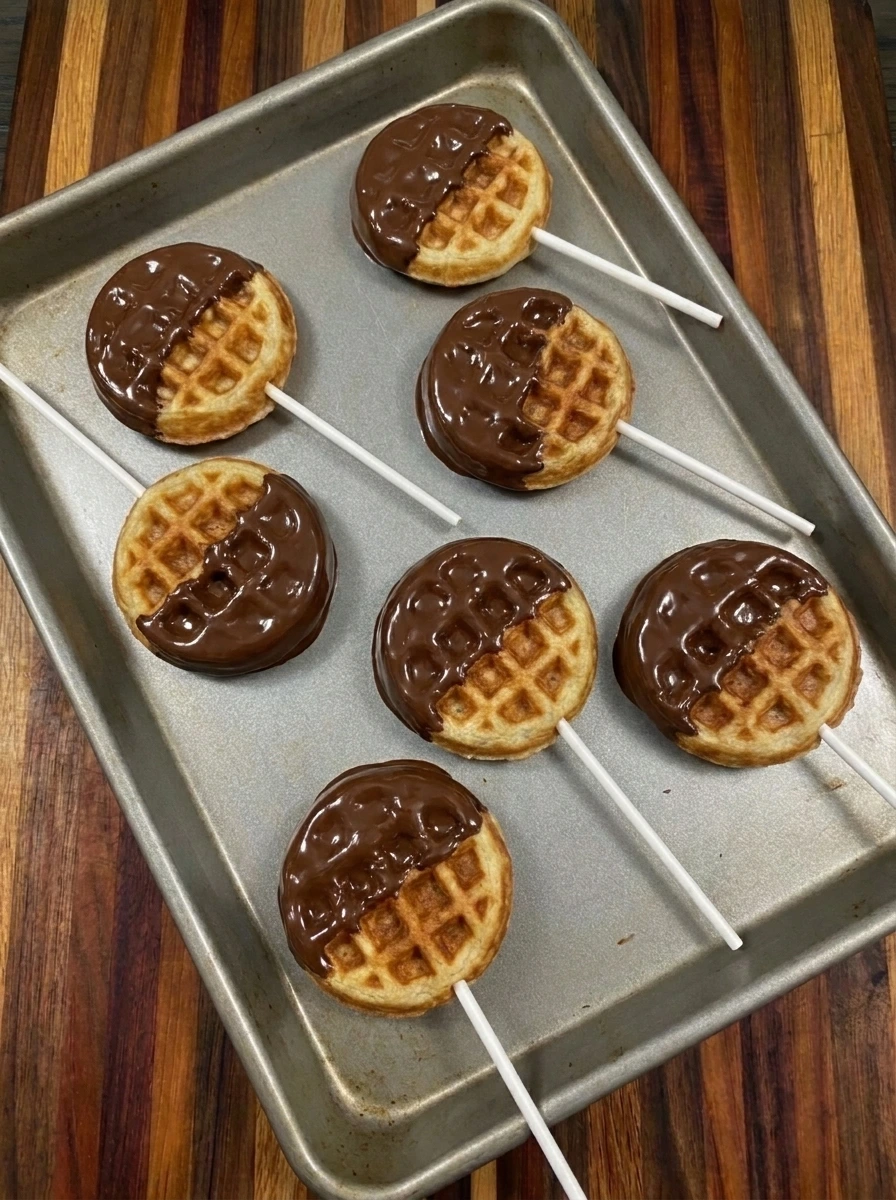
Dip the upper half of each toasted waffle into the melted chocolate so the coating settles inside some ridges while golden sections remain visible around the edges. Place all eight dipped pops apart from one another with different coating lines and a few natural chocolate drips near the dipped edges.
Tip: Leave part of every waffle uncovered so the crisp golden texture remains visible and the pops are easier to handle without smudging.
Step 4: Scatter the toppings over the chocolate

Sprinkle rainbow sprinkles plus crushed freeze dried strawberries and chopped toasted almonds across the wet chocolate so every pop receives a different mix. Keep the toppings unevenly scattered with some chocolate still visible and allow small pieces to gather naturally inside the waffle pockets.
Tip: Add the toppings while the chocolate is still glossy so the pieces stick securely without needing another layer of coating.
Step 5: Drizzle and set the finished pops
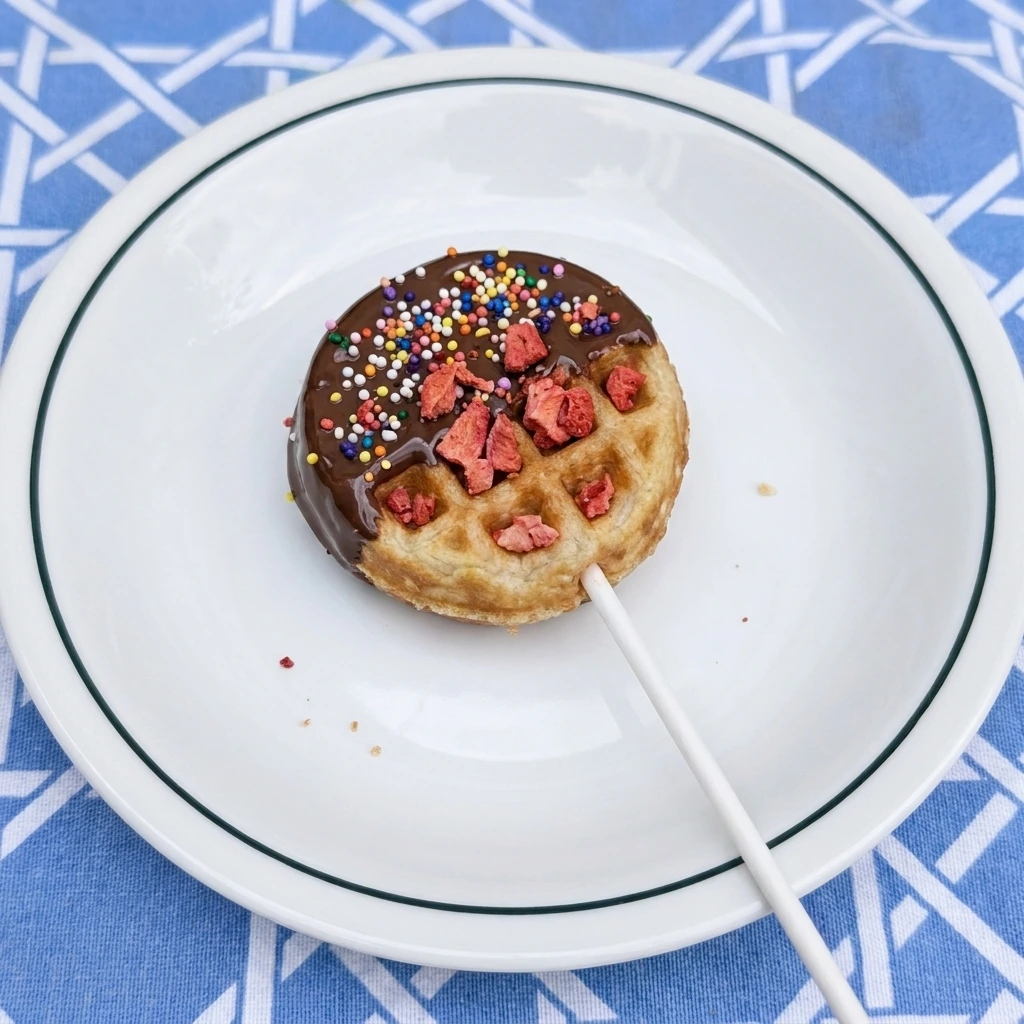
Melt the white chocolate until creamy and drizzle it in irregular thin lines across the decorated waffle pops so it crosses both toppings and exposed chocolate. Allow the coatings to set until firm and transfer one finished pop to a white plate with crisp golden edges plus nonuniform chocolate and naturally scattered toppings clearly visible.
Tip: Let the pops set in a single layer because stacking them too soon can crack the drizzle and press the toppings into the coating.
Pro Tips
- Use waffles with deep pockets because the chocolate settles into the ridges and creates a more satisfying contrast of crisp and smooth textures.
- Toast the waffles until crisp but not dark because a sturdy golden surface holds the stick and coating without tasting dry or burnt.
- Crush the strawberries into mixed sizes so fine crumbs add color while larger pieces create bright tart bites across the chocolate.
- Keep every topping in a separate dish and decorate two pops at a time so the wet chocolate does not set before everything sticks.
Storage Instructions
Allow every Chocolate Covered Waffle Pop to set completely before storing because soft chocolate can smear and cause the pops to stick together. Arrange the pops in a single layer inside a covered container and place parchment between layers only when stacking is unavoidable. Refrigerate them for up to three days for the best balance of crisp waffle texture and firm chocolate. Let refrigerated pops rest briefly before serving so the chocolate loses its deep chill while remaining firm.
Avoid leaving them in a warm room because the coating may soften and slide into the waffle pockets. Freezing is possible although the waffles may become softer after thawing. Freeze them individually until firm and then move them into a sealed container before thawing them in the refrigerator.
Frequently Asked Questions
Yes because the finished pops can be refrigerated in one covered layer for up to three days.
Yes although small firm waffles work best because soft waffles may bend when dipped in chocolate.
Cool the toasted waffles fully before dipping and store the finished pops without excess moisture.
Try sprinkles plus chopped nuts or cookie crumbs and freeze dried fruit for varied texture.
See You in the Kitchen
These Chocolate Covered Waffle Pops are a great way to satisfy your chocolate dessert cravings without picking up the phone to order a bakery treat.
I typically make Mini Oreo Cheesecake Cups or Peanut Butter Pretzel Energy Balls at the same time I decorate my waffle pops so all of my party desserts will be ready at the same time.
Even my kids love this one!
Print
Chocolate Covered Waffle Pops
- Total Time: 20 minutes
- Yield: 4 servings
Description
These Chocolate Covered Waffle Pops are an easy treat with crisp mini waffles and smooth chocolate plus colorful toppings. They are quick to assemble and simple enough for kids to help make. Serve the best batch for brunch or a party plus a holiday dessert table or a cheerful potluck. With portion friendly pieces and fruit topping ideas they can fit a healthy balance while still feeling fun for meal prep or a sweet weeknight dinner finish at home.
Ingredients
- 8 frozen mini waffles Mini round waffles
- 1 cup Semisweet chocolate chips
- 1 teaspoon Coconut oil
- 1/3 cup White chocolate chips
- 2 tablespoons Rainbow sprinkles
- 1/4 cup crushed Freeze dried strawberries
- 2 tablespoons Chopped toasted almonds
- 8 sticks Lollipop sticks
Instructions
- Toast the eight mini waffles until their surfaces turn golden and the square ridges become crisp while the centers remain slightly tender. Let them cool briefly and press one lollipop stick into the lower edge of each waffle so the eight pieces become sturdy handheld pops.
- Combine the semisweet chocolate chips with the coconut oil until the chips change into a glossy and fluid chocolate coating. The melted mixture should look smooth with a few natural swirls and enough movement to settle back into the center after stirring.
- Dip the upper half of each toasted waffle into the melted chocolate so the coating settles inside some ridges while golden sections remain visible around the edges. Place all eight dipped pops apart from one another with different coating lines and a few natural chocolate drips near the dipped edges.
- Sprinkle rainbow sprinkles plus crushed freeze dried strawberries and chopped toasted almonds across the wet chocolate so every pop receives a different mix. Keep the toppings unevenly scattered with some chocolate still visible and allow small pieces to gather naturally inside the waffle pockets.
- Melt the white chocolate until creamy and drizzle it in irregular thin lines across the decorated waffle pops so it crosses both toppings and exposed chocolate. Allow the coatings to set until firm and transfer one finished pop to a white plate with crisp golden edges plus nonuniform chocolate and naturally scattered toppings clearly visible.
Notes
Pro Tips:
- Use waffles with deep pockets because the chocolate settles into the ridges and creates a more satisfying contrast of crisp and smooth textures.
- Toast the waffles until crisp but not dark because a sturdy golden surface holds the stick and coating without tasting dry or burnt.
- Crush the strawberries into mixed sizes so fine crumbs add color while larger pieces create bright tart bites across the chocolate.
- Keep every topping in a separate dish and decorate two pops at a time so the wet chocolate does not set before everything sticks.
Storage: Allow every Chocolate Covered Waffle Pop to set completely before storing because soft chocolate can smear and cause the pops to stick together. Arrange the pops in a single layer inside a covered container and place parchment between layers only when stacking is unavoidable. Refrigerate them for up to three days for the best balance of crisp waffle texture and firm chocolate. Let refrigerated pops rest briefly before serving so the chocolate loses its deep chill while remaining firm. Avoid leaving them in a warm room because the coating may soften and slide into the waffle pockets. Freezing is possible although the waffles may become softer after thawing. Freeze them individually until firm and then move them into a sealed container before thawing them in the refrigerator.
- Prep Time: 15 minutes
- Cook Time: 5 minutes
- Category: Dessert
- Cuisine: American