

Making a delicious family Christmas dessert is so EASY with recipes like these No-Bake Christmas Mini Cheesecakes. Just a handful of simple ingredients come together to make a creamy cheesecake filling with a buttery graham cracker crust that can be decorated in so many different ways. The sweetness of vanilla and rich cream cheese combine to make flavors both kids and adults will love and it will only take you about 25 minutes of hands on time to make.
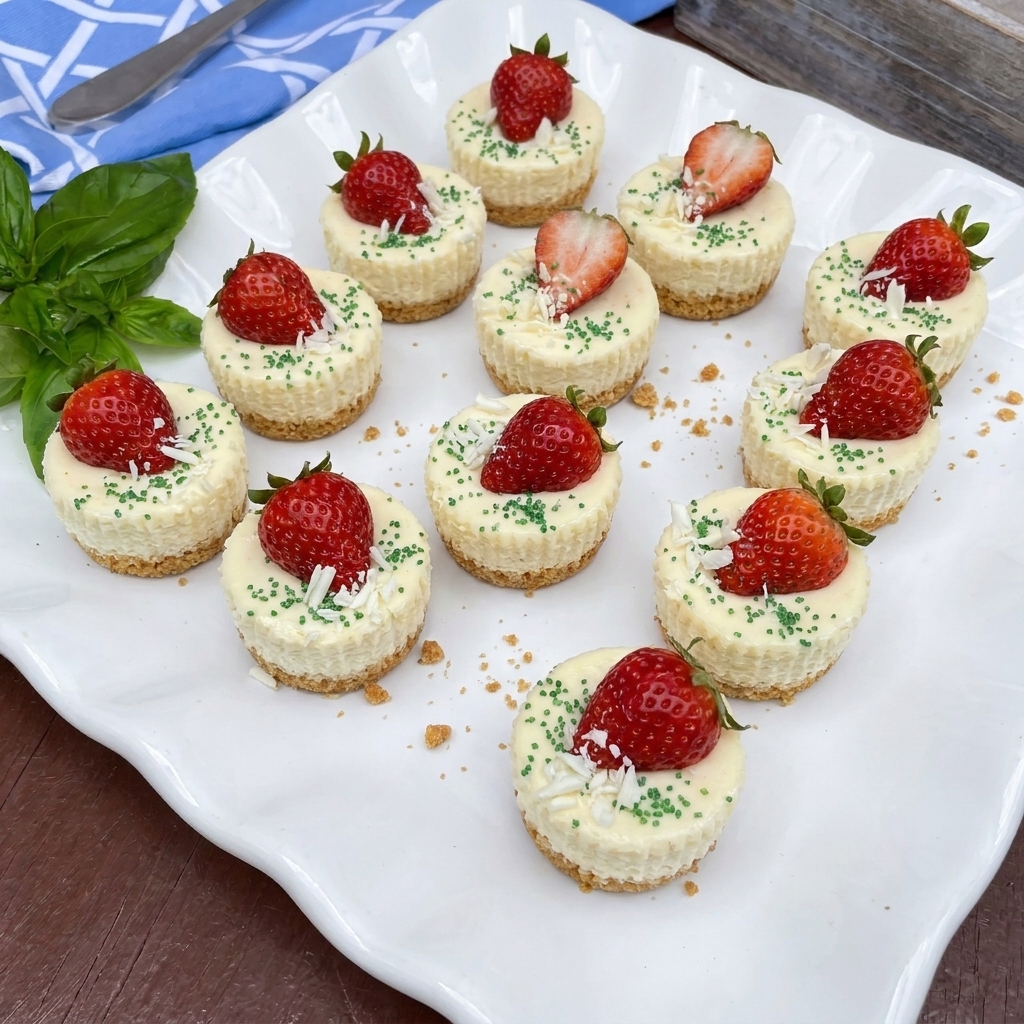
Mini cheesecakes are one of those well-loved and classic American party desserts for a ton of great reasons. Making them without the oven will make you love them even more! They are so easy to make and require ZERO baking and in the end you get a delicious and creamy Christmas dessert with a festive homemade look.
I especially love making these little cheesecakes when the holiday season gets busy because they can be prepared ahead of time and kept in the refrigerator until everyone is ready for dessert. The individual portions also make serving so much easier when family and friends gather around the Christmas table. If you love simple refrigerated holiday treats then you should also try my White Christmas Pie for another creamy dessert that feels right at home on a festive menu.
Ingredients
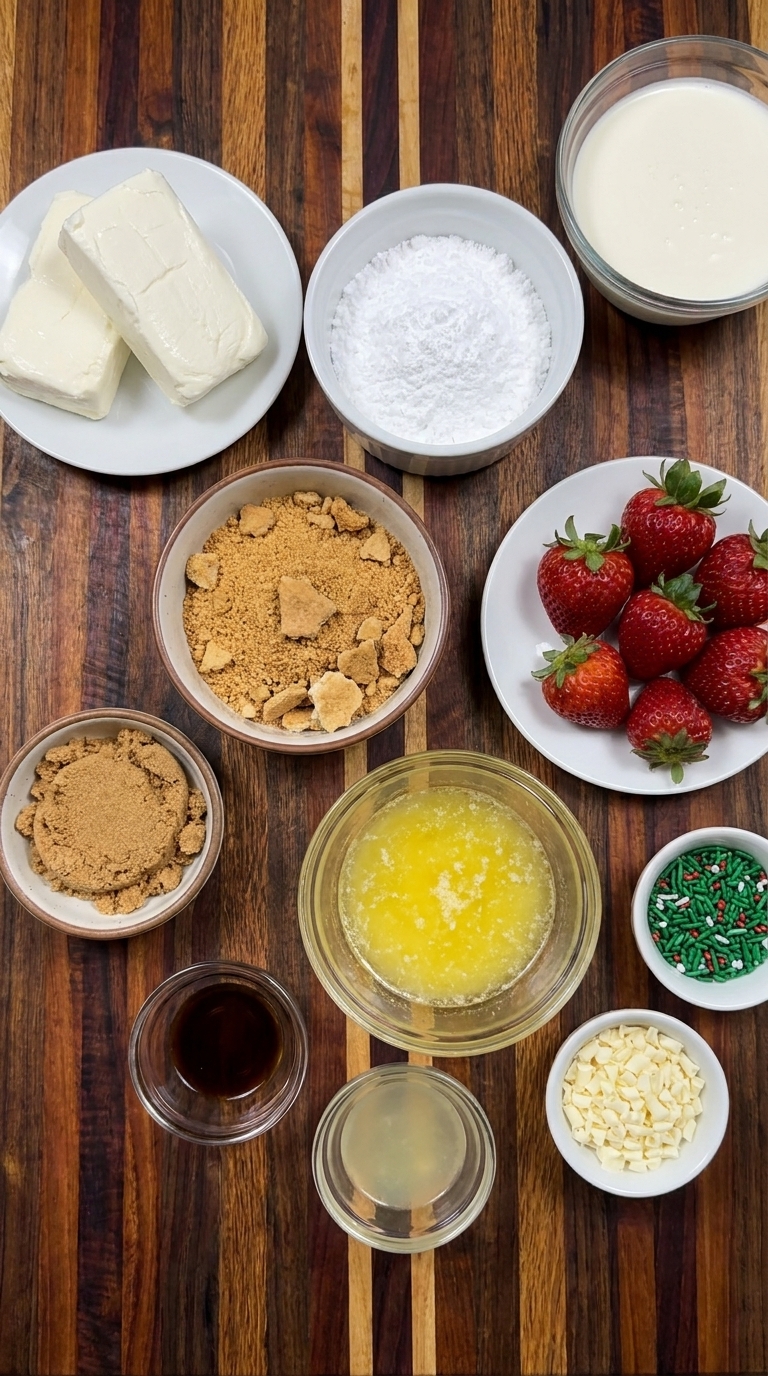
Here is what I use for this recipe :
- Graham cracker crumbs: Finely crushed graham crackers create a lightly sweet and sturdy foundation for the individual cheesecakes while adding a delicate crumbly texture that contrasts with the creamy filling.
- Unsalted butter: Melted butter coats the graham cracker crumbs and helps them hold together as a compact crust once the individual cheesecake bases are refrigerated.
- Light brown sugar: Brown sugar adds gentle caramel sweetness to the crust and helps the buttery crumbs develop a cohesive texture without requiring any baking.
- Full-fat cream cheese: Softened full-fat cream cheese forms the rich and tangy foundation of the filling while providing the structure needed for each miniature cheesecake to hold its shape after chilling.
- Powdered sugar: Powdered sugar sweetens the cheesecake filling while dissolving smoothly into the softened cream cheese without leaving a gritty texture.
- Vanilla extract: Vanilla extract adds a warm and familiar bakery-style flavor that balances the tanginess of the cream cheese and complements the graham cracker crust.
- Fresh lemon juice: Fresh lemon juice brightens the cheesecake filling and enhances the natural tang of the cream cheese without creating a noticeably lemon-flavored dessert.
- Heavy whipping cream: Cold heavy whipping cream is beaten until stiff peaks form and then folded into the cream cheese mixture to create a lighter filling that becomes pleasantly firm after refrigeration.
- Fresh strawberries: Fresh strawberries are trimmed and sliced in half to provide twelve festive red garnishes that add freshness and a naturally sweet contrast to the creamy cheesecakes.
- Green holiday sprinkles: Green holiday sprinkles add a cheerful Christmas color contrast and a delicate decorative finish to the individual cheesecakes just before serving.
- White chocolate shavings: Small curls of white chocolate add a delicate snowy appearance and an extra touch of sweetness to the finished Christmas cheesecakes.
Tools I Use :
- Standard twelve-cup muffin tin: Holds the twelve individual cheesecake portions in their paper liners while the crusts and fillings chill into stable shapes.
- Twelve paper muffin liners: Keep the crumb crusts and creamy filling separated into individual portions and make it easier to remove the finished cheesecakes from the muffin tin.
- Medium mixing bowl: Provides enough room to thoroughly combine the graham cracker crumbs and melted butter with the brown sugar.
- Large mixing bowl: Holds the cream cheese and sweetener while the cheesecake filling is beaten until smooth and later combined with whipped cream.
- Second mixing bowl: Provides a separate clean container for whipping the cold heavy cream until it forms stiff peaks.
- Electric hand mixer: Beats the softened cream cheese until smooth and whips the heavy cream into a stable airy consistency.
- Rubber spatula: Scrapes down the mixing bowls and gently folds the whipped cream into the cream cheese mixture without removing too much air.
- Measuring cups and spoons: Measure the crust ingredients and cheesecake filling components accurately to maintain the proper sweetness and texture.
- Small flat-bottomed glass: Helps compress the graham cracker mixture into the bottom of each muffin liner to create an even and stable crust.
- Piping bag or large spoon: Transfers the cheesecake filling into the lined muffin cups and helps create softly textured swirls on top.
- Small paring knife: Trims and halves the strawberries for decoration and can also cut a small cheesecake wedge for the final serving.
- Large serving platter: Displays the finished cheesecakes together for a festive holiday dessert presentation.
- Small white dessert plate: Holds an individual finished cheesecake and provides room to display a cut section showing the creamy filling and crumb crust.
- Refrigerator: Chills the pressed crusts and firms the cheesecake filling for at least four hours before serving.
- Food-safe covering: Protects the cheesecake filling from drying out and absorbing refrigerator odors during the chilling period.
Instructions
Step 1: Combine the buttery graham cracker crust
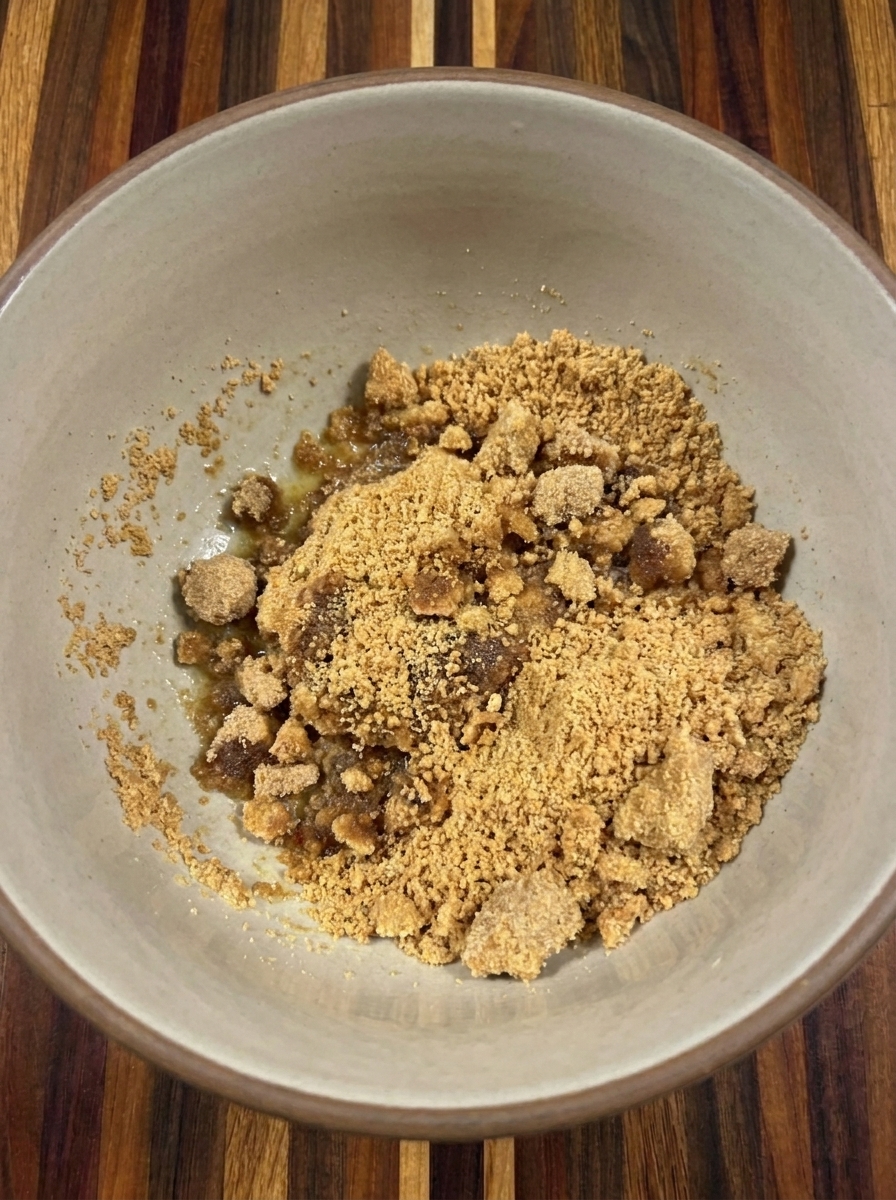
Place the graham cracker crumbs in a medium mixing bowl and add the packed light brown sugar. Pour the melted butter over the crumbs and stir until everything is combined. The dry golden crumbs should gradually become darker and slightly clumpy as the butter spreads throughout the mixture. Continue mixing until the crumbs resemble damp sand and hold together briefly when pressed between your fingers. The mixture should still have small irregular clusters rather than becoming a smooth paste. This crumbly texture will give each finished cheesecake a firm base with a little homemade crunch.
Tip: If the crumbs seem too coarse then crush them more finely before adding the butter so the finished crust holds together.
Step 2: Press the crumbs into twelve muffin liners
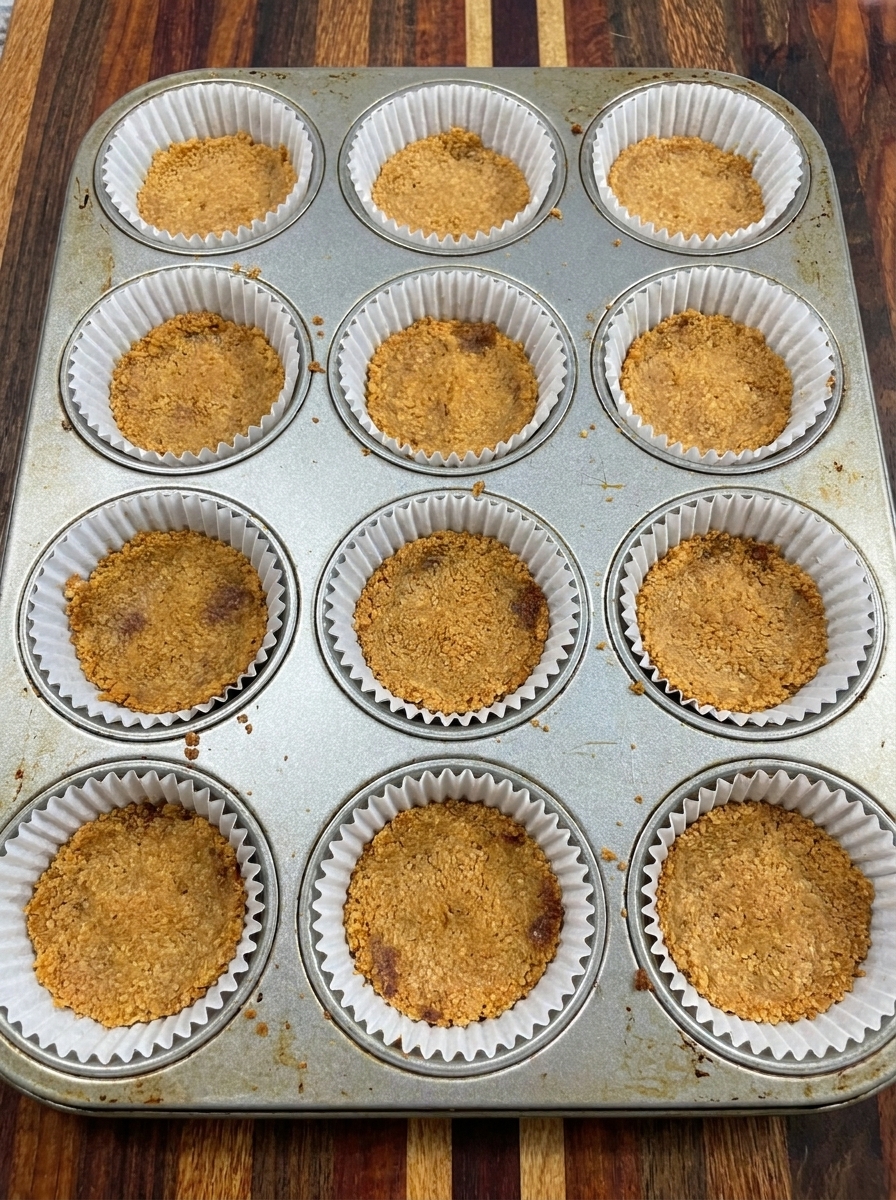
Line a standard twelve-cup muffin tin with paper liners and divide the buttery graham cracker mixture evenly between the cups. Add approximately 2 tablespoons of crumbs to each liner and press them firmly against the bottom until they form compact little crusts. The edges can remain slightly uneven because they will be covered with cheesecake filling later. Place the muffin tin in the refrigerator while you make the filling. This short chilling period helps the melted butter firm up and keeps the crusts from scattering when the cream cheese mixture is added. The crusts should look compressed and textured rather than perfectly smooth.
Tip: Press the crumbs firmly enough to form a stable base but avoid crushing them into a completely solid layer.
Step 3: Beat the cream cheese into a smooth filling
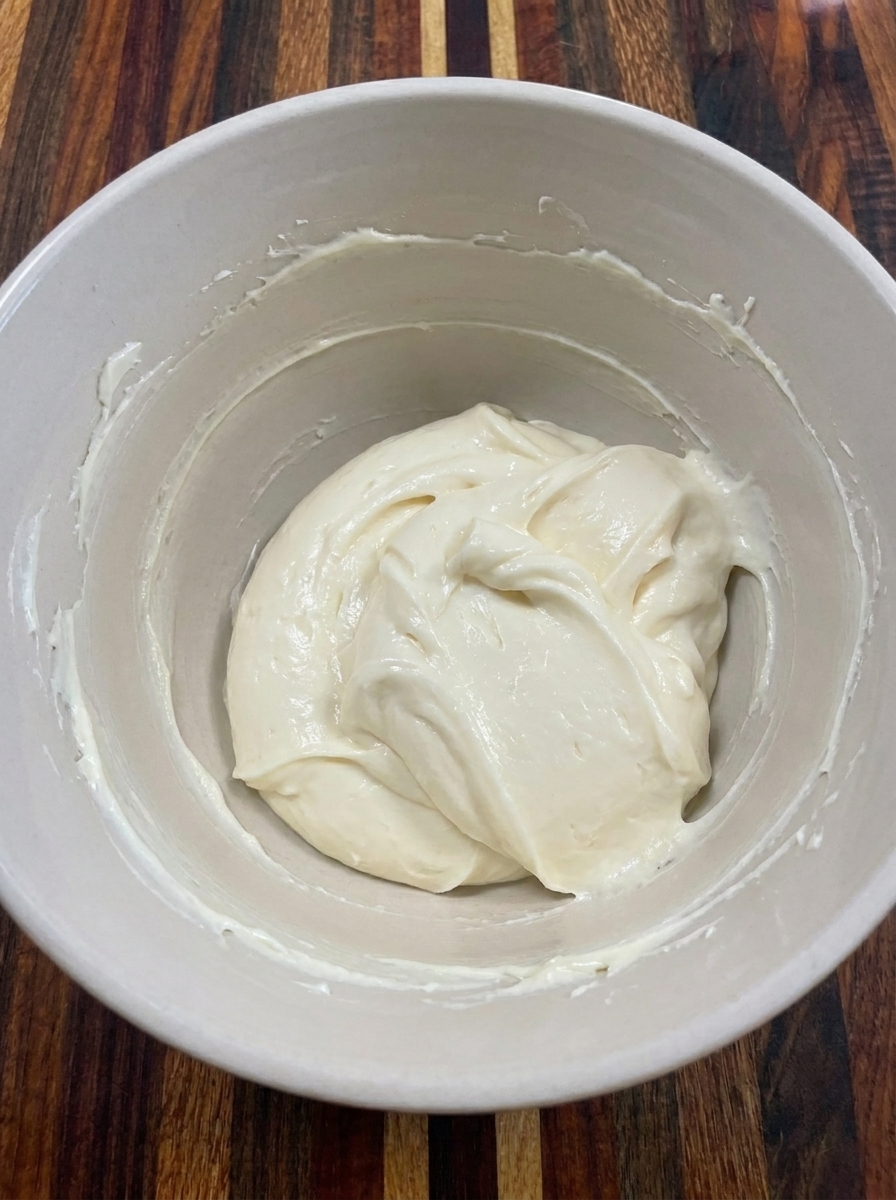
Place the softened cream cheese in a large mixing bowl and beat until it becomes smooth and creamy. Add the powdered sugar along with the vanilla extract and fresh lemon juice. Continue mixing until the ingredients form a thick and uniform pale ivory filling with no visible lumps of cream cheese. The texture should change from dense softened cheese into a smoother and silkier mixture that forms soft ridges when moved. Scrape the mixture toward the center as needed so the sweetener and flavorings are incorporated evenly. At this stage the filling will still be fairly dense because the whipped cream has not been added.
Tip: Let the cream cheese soften fully before mixing because cold cream cheese can leave small lumps in the finished filling.
Step 4: Whip the cream and fold it into the cheesecake filling
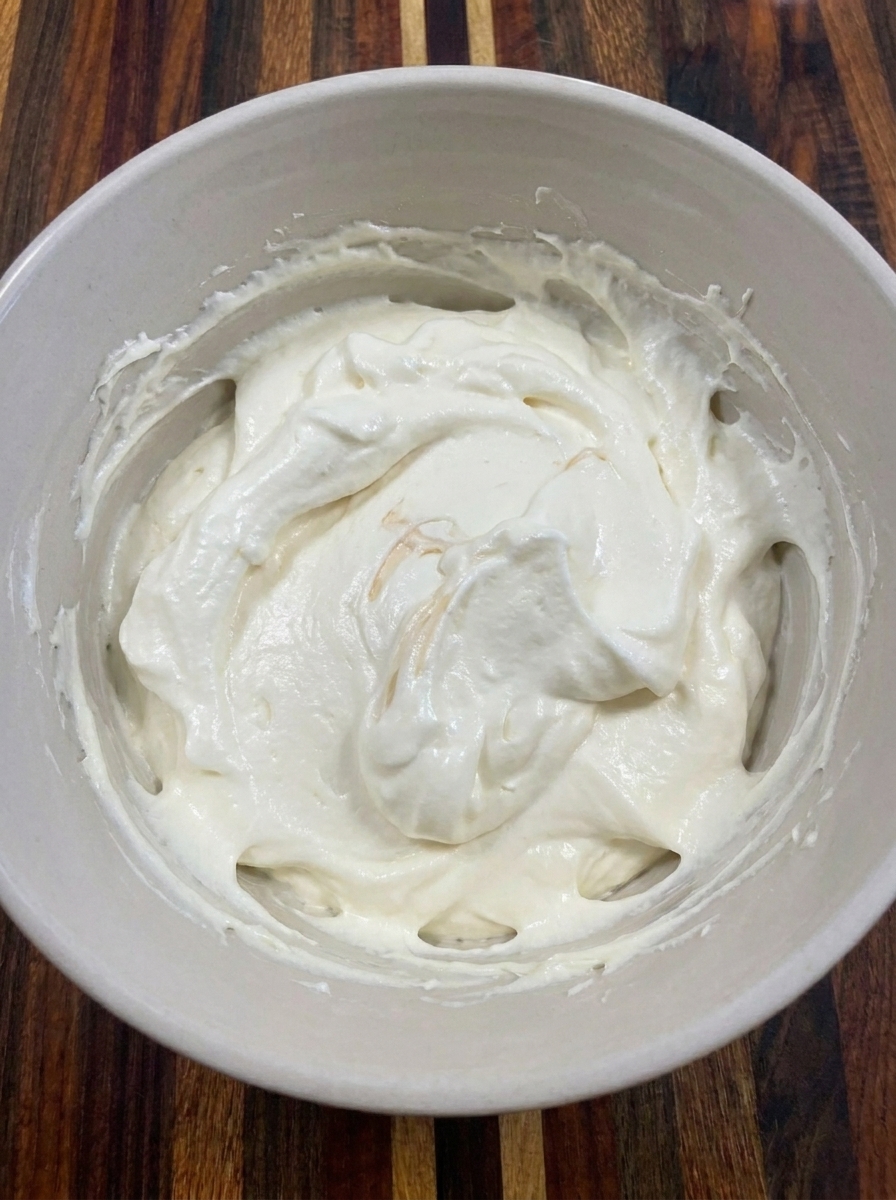
Pour the cold heavy whipping cream into a separate mixing bowl and beat until stiff peaks form. The cream should become noticeably thicker and fluffier while holding its shape. Stop once the peaks stand firmly because overwhipped cream can develop a grainy texture. Add the whipped cream to the sweetened cream cheese mixture and gently fold it through until no large white streaks remain. The dense cream cheese filling will transform into a lighter and more aerated mixture with soft folds and slightly uneven peaks. Keep the folding gentle so the whipped cream retains the air that helps these cheesecakes hold their shape.
Tip: Fold the whipped cream into the cream cheese gently with broad movements to preserve the airy texture of the filling.
Step 5: Fill the graham cracker crusts with cheesecake mixture
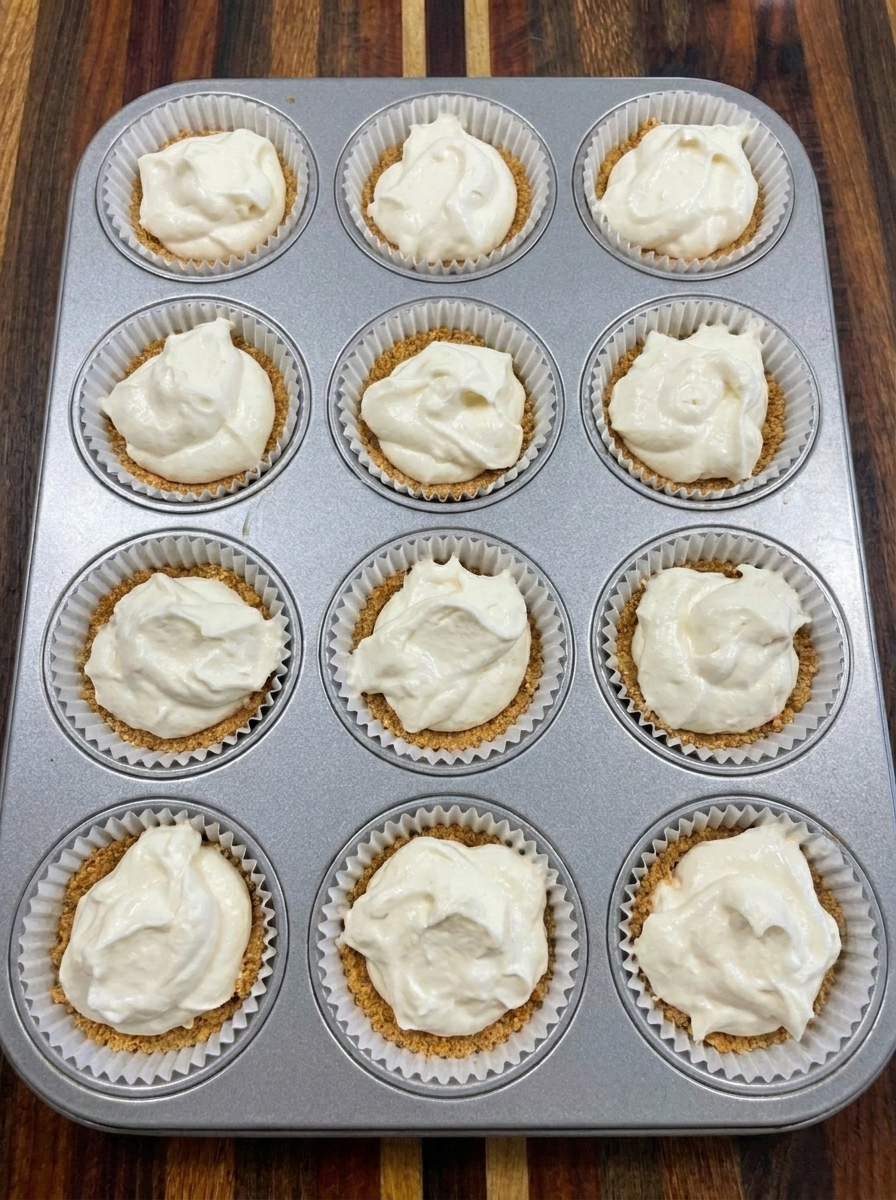
Remove the muffin tin from the refrigerator and divide the fluffy cheesecake mixture evenly among the twelve prepared crusts. Spoon or pipe the filling into each paper liner until the cheesecake filling reaches close to the upper edge. Keep the filling above the graham cracker base so the layers remain clearly visible from the side. Smooth or swirl the tops gently and allow a few natural ridges to remain. Each cheesecake should have a generous pale cream layer over its golden crust. Cover the muffin tin and refrigerate for at least 4 hours or until the cheesecakes are firm enough to lift from their liners without losing their shape.
Tip: Divide the filling evenly among the twelve liners and chill until firm so each cheesecake releases cleanly from its paper liner.
Step 6: Decorate the chilled cheesecakes with festive toppings
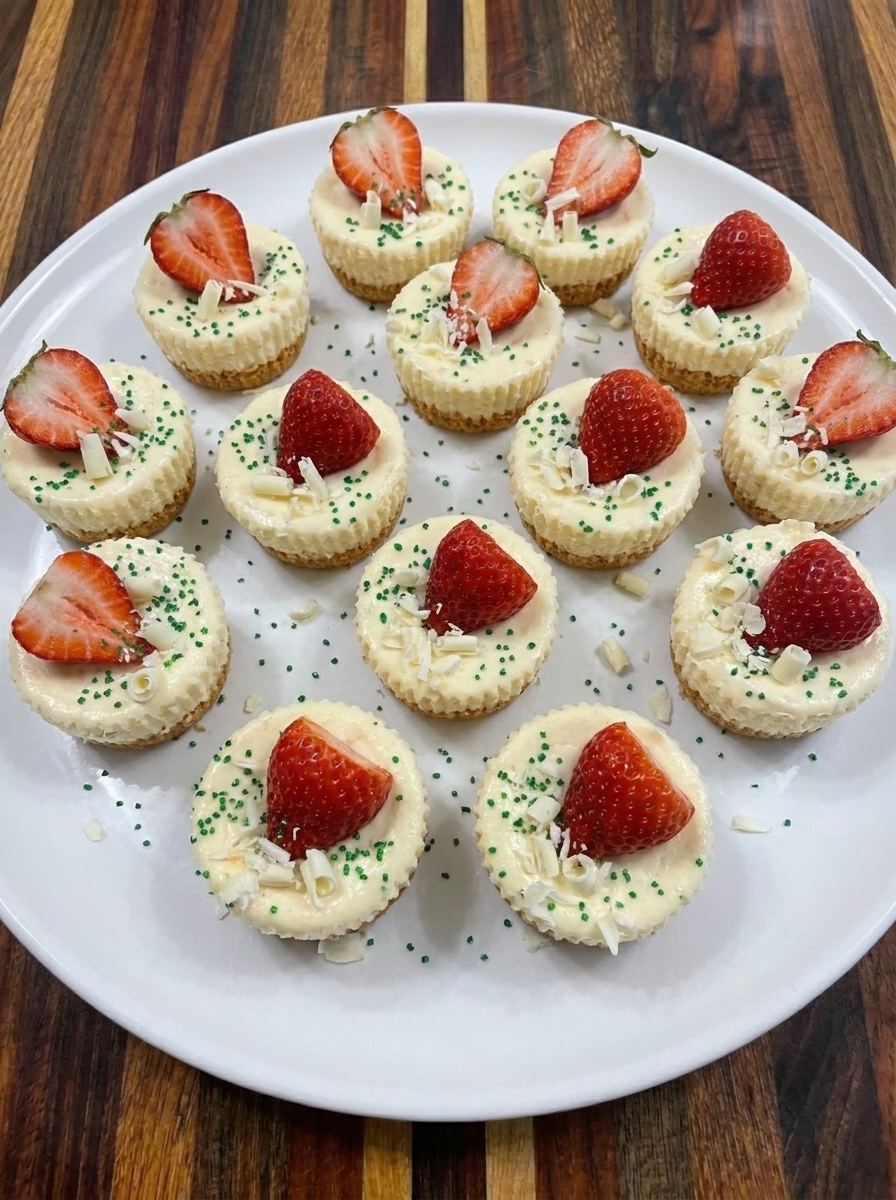
Once the cheesecakes have chilled for at least 4 hours and the filling is firm to the touch then carefully lift each one from the muffin tin. Peel away the paper liners slowly to reveal the compact graham cracker crusts beneath the smooth cheesecake layers. The chilled filling should maintain its shape while still looking soft and creamy. Trim the six fresh strawberries and slice each one in half to create twelve pieces. Place one strawberry half on each cheesecake and scatter the green holiday sprinkles across the filling. Finish with a few delicate white chocolate shavings so the little desserts have a bright Christmas appearance without completely hiding the cream cheese filling.
Tip: Dry the strawberries thoroughly before decorating so excess moisture does not soften the surface of the chilled filling.
Step 7: Plate one mini cheesecake and reveal the creamy layers
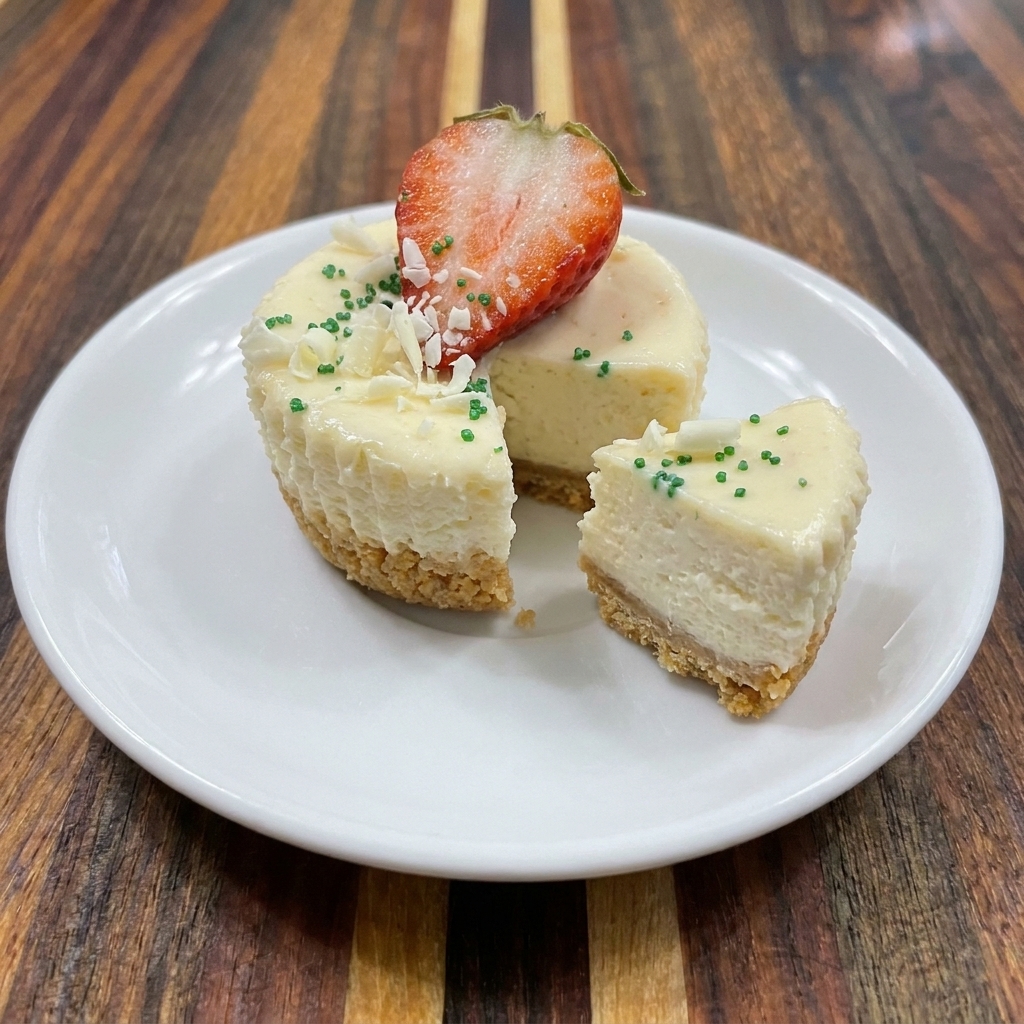
Transfer one finished mini cheesecake from the serving platter onto a small white dessert plate. Cut a narrow wedge from the cheesecake to reveal the thick pale ivory filling and compact golden graham cracker crust underneath. Gently position the removed piece beside the remaining portion so both the inside and outside are visible. Keep the strawberry topping slightly to one side and let the white chocolate shavings settle naturally around the creamy surface. The filling should remain firm while showing a soft and smooth interior. Serve immediately while the cheesecake is cold and the crust still has its delicate buttery crunch.
Tip: Use a clean cut through the chilled cheesecake to reveal the filling and crust without pressing the creamy layers together.
Pro Tips
- Always use softened full-fat cream cheese because it creates a smoother filling and helps the mini cheesecakes hold their shape.
- Whip the heavy cream until stiff peaks form before folding it into the filling so your cheesecakes stay fluffy after chilling.
- Give the cheesecakes at least four hours in the refrigerator because a properly chilled filling releases from the liners more easily.
- Add the fresh strawberries and festive sprinkles shortly before serving to keep the toppings bright and prevent moisture from softening them.
Storage Instructions
Refrigerator Storage: Store leftover No-Bake Christmas Mini Cheesecakes in a tightly covered container in the refrigerator for up to 4 days. Keep the individual cheesecakes in a single layer whenever possible to protect the creamy tops and prevent the strawberry decorations from getting crushed. The filling will remain pleasantly firm when cold although the graham cracker crust may gradually become slightly softer as it absorbs moisture. Make-Ahead Preparation: These mini cheesecakes are ideal for preparing one day before a Christmas dinner or holiday gathering. Assemble the crusts and filling as directed and allow the cheesecakes to chill overnight without adding the fresh fruit or sprinkles.
Once the filling has set you can remove the cheesecakes from their paper liners and arrange them in a covered storage container. Add the decorations just before serving for the freshest appearance. Freezer Storage: For longer storage freeze the mini cheesecakes without strawberries or decorative toppings. Arrange the undecorated cheesecakes in a single layer and freeze until firm. Transfer them to a freezer-safe container with parchment separating any layers and keep frozen for up to one month for best quality.
The crust and filling will hold their shape more reliably when the cheesecakes are frozen individually before stacking. Thawing and Serving: Transfer frozen mini cheesecakes to the refrigerator and allow them to thaw overnight before decorating. Do not leave them at room temperature for extended periods because the cream cheese filling becomes softer as it warms. Add fresh strawberries and sprinkles just before serving and return any leftovers to the refrigerator promptly. For food safety avoid keeping the cheesecakes at room temperature for longer than 2 hours.
Frequently Asked Questions
Yes! Prepare them the day before and refrigerate overnight. Add the strawberries and sprinkles shortly before serving.
Refrigerate them for at least four hours so the filling becomes firm enough to hold its shape when removed from the liners.
Yes! Freeze the undecorated cheesecakes in a covered container for up to one month and thaw overnight in the refrigerator.
The filling may need more chilling time or the cream may not have reached stiff peaks before being folded into the mixture.
See You in the Kitchen
I hope you enjoy all the recipes I share with you including these delicious No-Bake Christmas Mini Cheesecakes and my festive White Christmas Pie or comforting Cinnamon Roll Casserole.
I hope you try them and enjoy them and rate them and share them with your friends and family!
Print
No-Bake Christmas Mini Cheesecakes
- Total Time: 4 hours 25 minutes
- Yield: 12 servings
Description
These No-Bake Christmas Mini Cheesecakes are an easy holiday dessert made with a buttery graham cracker crust and a smooth cream cheese filling. This quick and simple recipe is one of the best Christmas dessert ideas for a party or festive brunch because each little cheesecake is already portioned for serving. Add fresh strawberries and green sprinkles for a cheerful finish. They are a fun addition to your holiday table and can fit into a healthy balanced celebration.
Ingredients
- 1 1/2 cups Graham cracker crumbs
- 6 tablespoons melted Unsalted butter
- 2 tablespoons packed Light brown sugar
- 16 ounces softened Full-fat cream cheese
- 3/4 cup Powdered sugar
- 2 teaspoons Vanilla extract
- 1 tablespoon Fresh lemon juice
- 1 cup cold Heavy whipping cream
- 6 medium strawberries Fresh strawberries
- 2 tablespoons Green holiday sprinkles
- 2 tablespoons White chocolate shavings
Instructions
- Place the graham cracker crumbs in a medium mixing bowl and add the packed light brown sugar. Pour the melted butter over the crumbs and stir until everything is combined. The dry golden crumbs should gradually become darker and slightly clumpy as the butter spreads throughout the mixture.
Continue mixing until the crumbs resemble damp sand and hold together briefly when pressed between your fingers. The mixture should still have small irregular clusters rather than becoming a smooth paste. This crumbly texture will give each finished cheesecake a firm base with a little homemade crunch.
- Line a standard twelve-cup muffin tin with paper liners and divide the buttery graham cracker mixture evenly between the cups. Add approximately 2 tablespoons of crumbs to each liner and press them firmly against the bottom until they form compact little crusts. The edges can remain slightly uneven because they will be covered with cheesecake filling later.
Place the muffin tin in the refrigerator while you make the filling. This short chilling period helps the melted butter firm up and keeps the crusts from scattering when the cream cheese mixture is added. The crusts should look compressed and textured rather than perfectly smooth.
- Place the softened cream cheese in a large mixing bowl and beat until it becomes smooth and creamy. Add the powdered sugar along with the vanilla extract and fresh lemon juice. Continue mixing until the ingredients form a thick and uniform pale ivory filling with no visible lumps of cream cheese.
The texture should change from dense softened cheese into a smoother and silkier mixture that forms soft ridges when moved. Scrape the mixture toward the center as needed so the sweetener and flavorings are incorporated evenly. At this stage the filling will still be fairly dense because the whipped cream has not been added.
- Pour the cold heavy whipping cream into a separate mixing bowl and beat until stiff peaks form. The cream should become noticeably thicker and fluffier while holding its shape. Stop once the peaks stand firmly because overwhipped cream can develop a grainy texture.
Add the whipped cream to the sweetened cream cheese mixture and gently fold it through until no large white streaks remain. The dense cream cheese filling will transform into a lighter and more aerated mixture with soft folds and slightly uneven peaks. Keep the folding gentle so the whipped cream retains the air that helps these cheesecakes hold their shape.
- Remove the muffin tin from the refrigerator and divide the fluffy cheesecake mixture evenly among the twelve prepared crusts. Spoon or pipe the filling into each paper liner until the cheesecake filling reaches close to the upper edge. Keep the filling above the graham cracker base so the layers remain clearly visible from the side.
Smooth or swirl the tops gently and allow a few natural ridges to remain. Each cheesecake should have a generous pale cream layer over its golden crust. Cover the muffin tin and refrigerate for at least 4 hours or until the cheesecakes are firm enough to lift from their liners without losing their shape.
- Once the cheesecakes have chilled for at least 4 hours and the filling is firm to the touch then carefully lift each one from the muffin tin. Peel away the paper liners slowly to reveal the compact graham cracker crusts beneath the smooth cheesecake layers. The chilled filling should maintain its shape while still looking soft and creamy.
Trim the six fresh strawberries and slice each one in half to create twelve pieces. Place one strawberry half on each cheesecake and scatter the green holiday sprinkles across the filling. Finish with a few delicate white chocolate shavings so the little desserts have a bright Christmas appearance without completely hiding the cream cheese filling.
- Transfer one finished mini cheesecake from the serving platter onto a small white dessert plate. Cut a narrow wedge from the cheesecake to reveal the thick pale ivory filling and compact golden graham cracker crust underneath. Gently position the removed piece beside the remaining portion so both the inside and outside are visible.
Keep the strawberry topping slightly to one side and let the white chocolate shavings settle naturally around the creamy surface. The filling should remain firm while showing a soft and smooth interior. Serve immediately while the cheesecake is cold and the crust still has its delicate buttery crunch.
Notes
Pro Tips:
- Always use softened full-fat cream cheese because it creates a smoother filling and helps the mini cheesecakes hold their shape.
- Whip the heavy cream until stiff peaks form before folding it into the filling so your cheesecakes stay fluffy after chilling.
- Give the cheesecakes at least four hours in the refrigerator because a properly chilled filling releases from the liners more easily.
- Add the fresh strawberries and festive sprinkles shortly before serving to keep the toppings bright and prevent moisture from softening them.
Storage: Refrigerator Storage: Store leftover No-Bake Christmas Mini Cheesecakes in a tightly covered container in the refrigerator for up to 4 days. Keep the individual cheesecakes in a single layer whenever possible to protect the creamy tops and prevent the strawberry decorations from getting crushed. The filling will remain pleasantly firm when cold although the graham cracker crust may gradually become slightly softer as it absorbs moisture.
Make-Ahead Preparation: These mini cheesecakes are ideal for preparing one day before a Christmas dinner or holiday gathering. Assemble the crusts and filling as directed and allow the cheesecakes to chill overnight without adding the fresh fruit or sprinkles. Once the filling has set you can remove the cheesecakes from their paper liners and arrange them in a covered storage container. Add the decorations just before serving for the freshest appearance.
Freezer Storage: For longer storage freeze the mini cheesecakes without strawberries or decorative toppings. Arrange the undecorated cheesecakes in a single layer and freeze until firm. Transfer them to a freezer-safe container with parchment separating any layers and keep frozen for up to one month for best quality. The crust and filling will hold their shape more reliably when the cheesecakes are frozen individually before stacking.
Thawing and Serving: Transfer frozen mini cheesecakes to the refrigerator and allow them to thaw overnight before decorating. Do not leave them at room temperature for extended periods because the cream cheese filling becomes softer as it warms. Add fresh strawberries and sprinkles just before serving and return any leftovers to the refrigerator promptly. For food safety avoid keeping the cheesecakes at room temperature for longer than 2 hours.
- Prep Time: 25 minutes
- Cook Time: 0 minute
- Category: Dessert
- Cuisine: American