Our family discovered these No-Bake Peanut Butter Cereal Bars during the height of summer. Our boys were hosting a cousin from Detroit at our remote lake cottage where they frolicked in the lake during the day and toasted marshmallows around the bonfire every night.
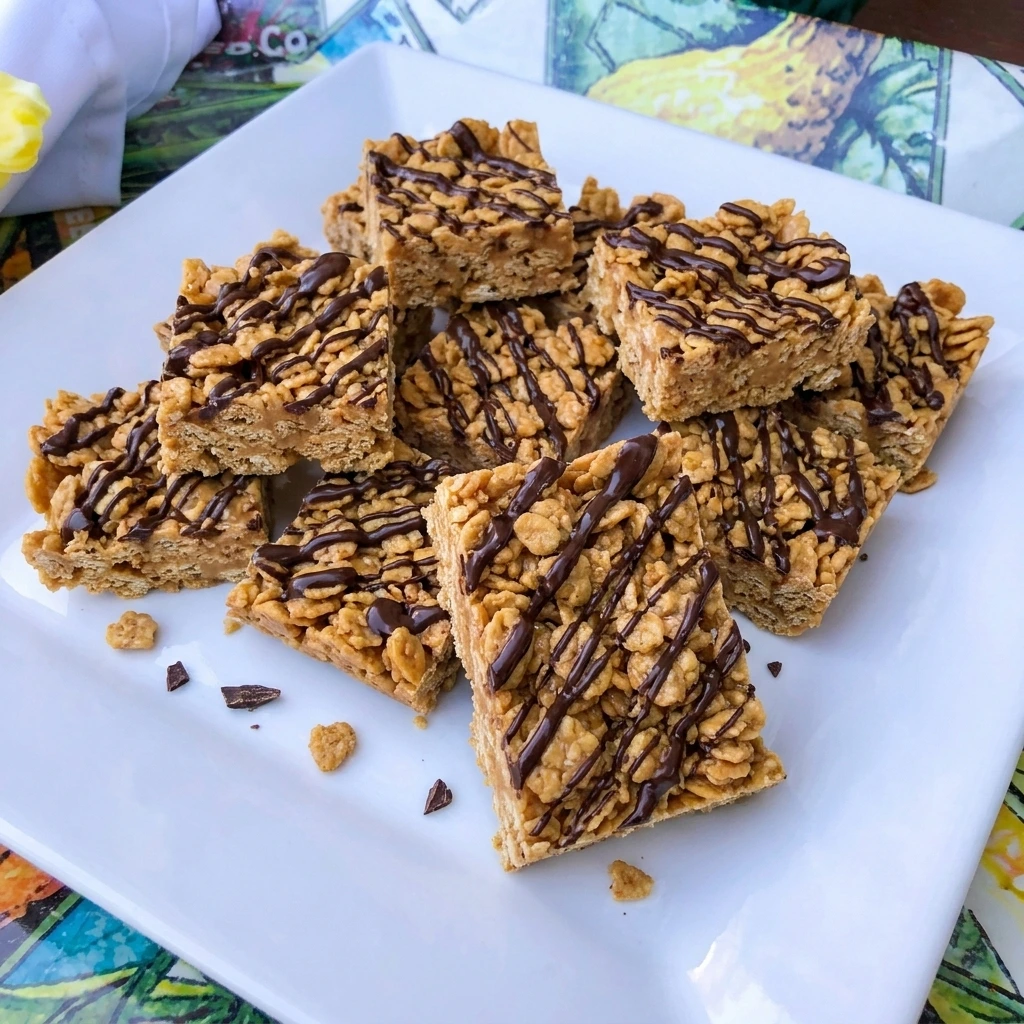
That was one of my best weeks of the year and this easy treat quickly became one of my favorite snack recipes. When we wanted another cozy homemade option we also enjoyed warm slices of Cranberry Orange Muffins.
I will never forget the first time I made these and the look on the kids’ faces when they tasted them. Read on as I show you how to make this unforgettable family snack.
Ingredients
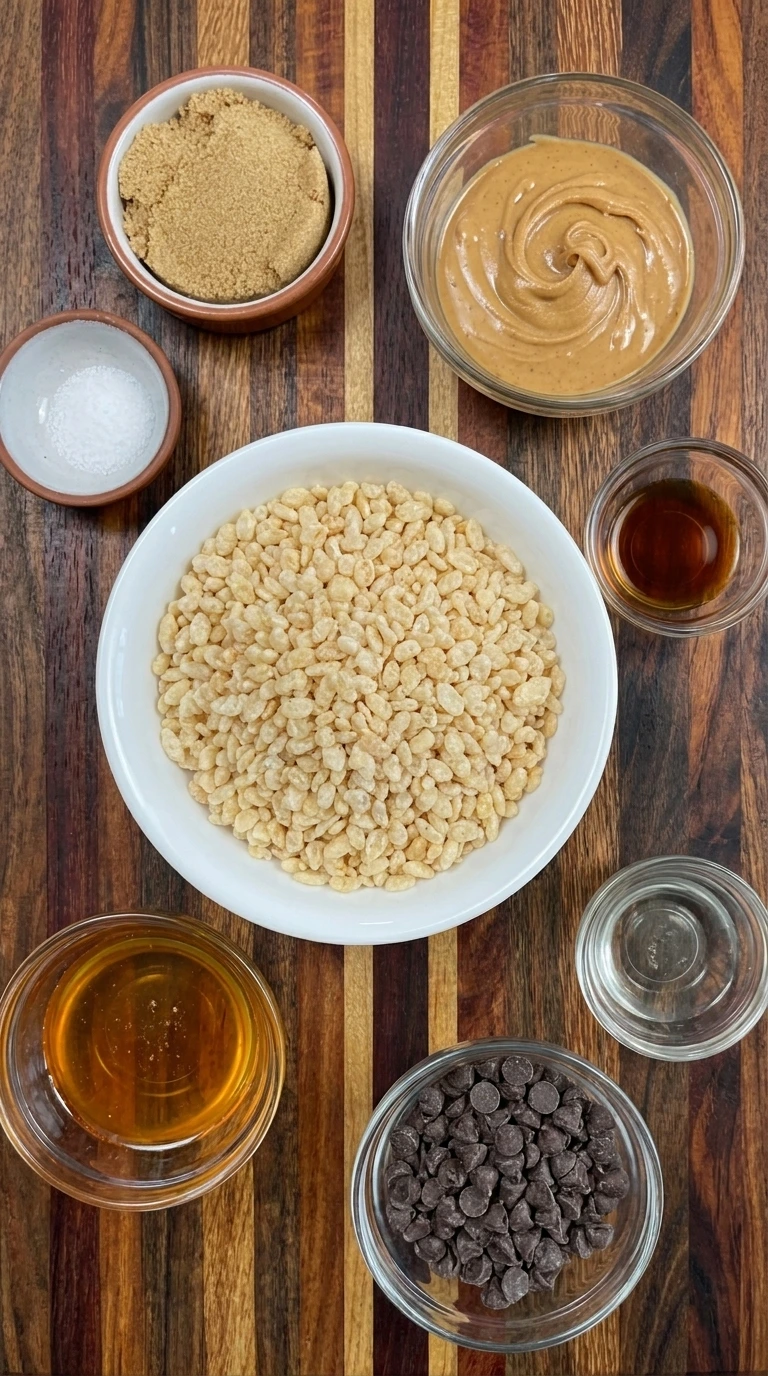
Here is what I use for this recipe and you can adjust nuts or spices based on preference:
- Crispy rice cereal: Provides the light crisp structure that gives every chilled bar its crunchy texture.
- Creamy peanut butter: Creates the rich nutty coating and helps bind the cereal into firm chewy bars.
- Honey: Sweetens the mixture and supplies the sticky texture needed to hold the cereal together.
- Light brown sugar: Adds caramel flavor and helps the warm peanut butter mixture set after chilling.
- Vanilla extract: Rounds out the peanut butter flavor and adds a soft bakery style aroma.
- Fine salt: Balances the sweetness and makes the peanut butter flavor taste fuller.
- Semisweet chocolate chips: Melt into an uneven drizzle that adds contrast and a lightly bittersweet finish.
- Coconut oil: Thins the melted chocolate so it drizzles smoothly and sets with a tender bite.
Tools You’ll Need
- Medium saucepan: Gently melts the peanut butter and honey with the brown sugar into a smooth binder.
- Large mixing bowl: Provides enough room to fold the cereal into the warm binder without crushing it.
- Heat safe spatula: Stirs the warm binder and folds it through the cereal while scraping the containers clean.
- Eight inch square baking dish: Shapes the cereal mixture into a thick slab that can be chilled and cut evenly.
- Parchment paper: Prevents sticking and allows the firm cereal slab to lift cleanly from the baking dish.
- Small microwave safe bowl: Holds the chocolate and coconut oil while they melt into a smooth drizzle.
- Sharp knife: Cuts the chilled slab into twelve bars with clean sides and minimal crumbling.
Instructions
Step 1: Melt the peanut butter binder
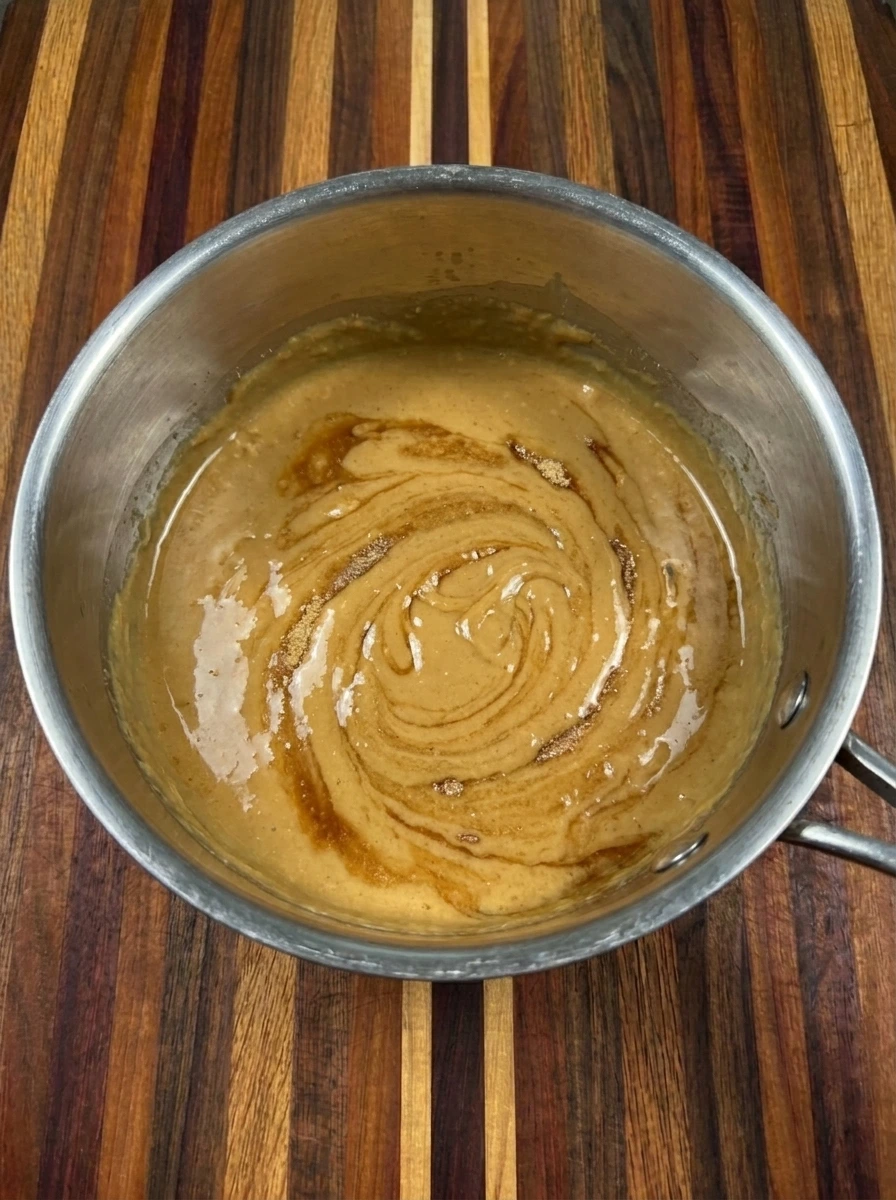
Add the creamy peanut butter and honey plus packed brown sugar to a saucepan. Warm the mixture gently while stirring until the separate ingredients become one smooth glossy mixture. Remove the mixture from the heat once the sugar has dissolved. Stir in the vanilla and salt so the binder looks evenly blended with no dry sugar patches.
Tip: Keep the heat low because gentle warming creates a smooth binder while excessive heat can make the finished bars hard.
Step 2: Coat the crispy cereal
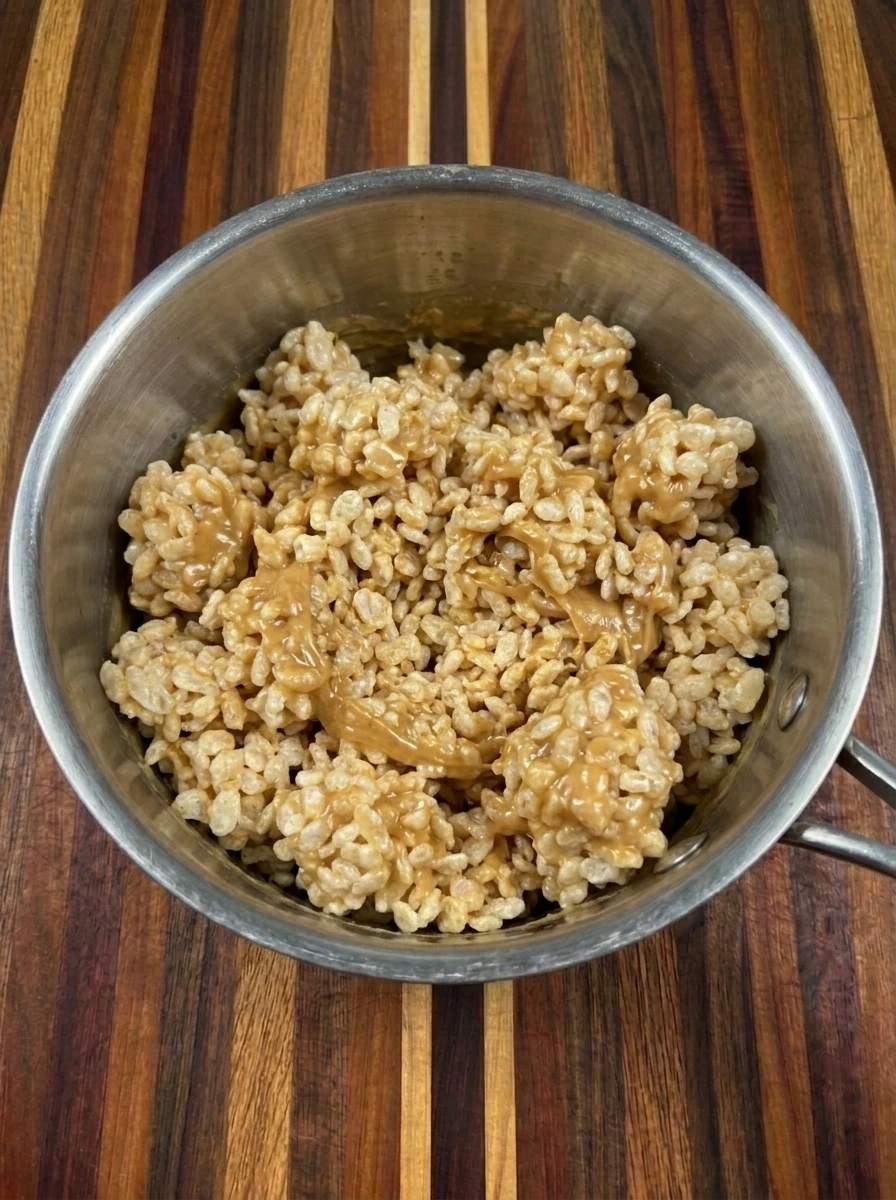
Place all five cups of crispy rice cereal in a mixing bowl. Pour the warm peanut butter binder over the cereal in several uneven ribbons so some cereal remains visible at first. Fold until every cluster is lightly coated and the cereal changes from pale ivory to warm golden tan. Stop once the mixture looks sticky and clumped while the cereal pieces still hold their shape.
Tip: Fold gently and stop as soon as the cereal is coated so the pieces remain crisp instead of becoming crushed.
Step 3: Press the mixture into the dish
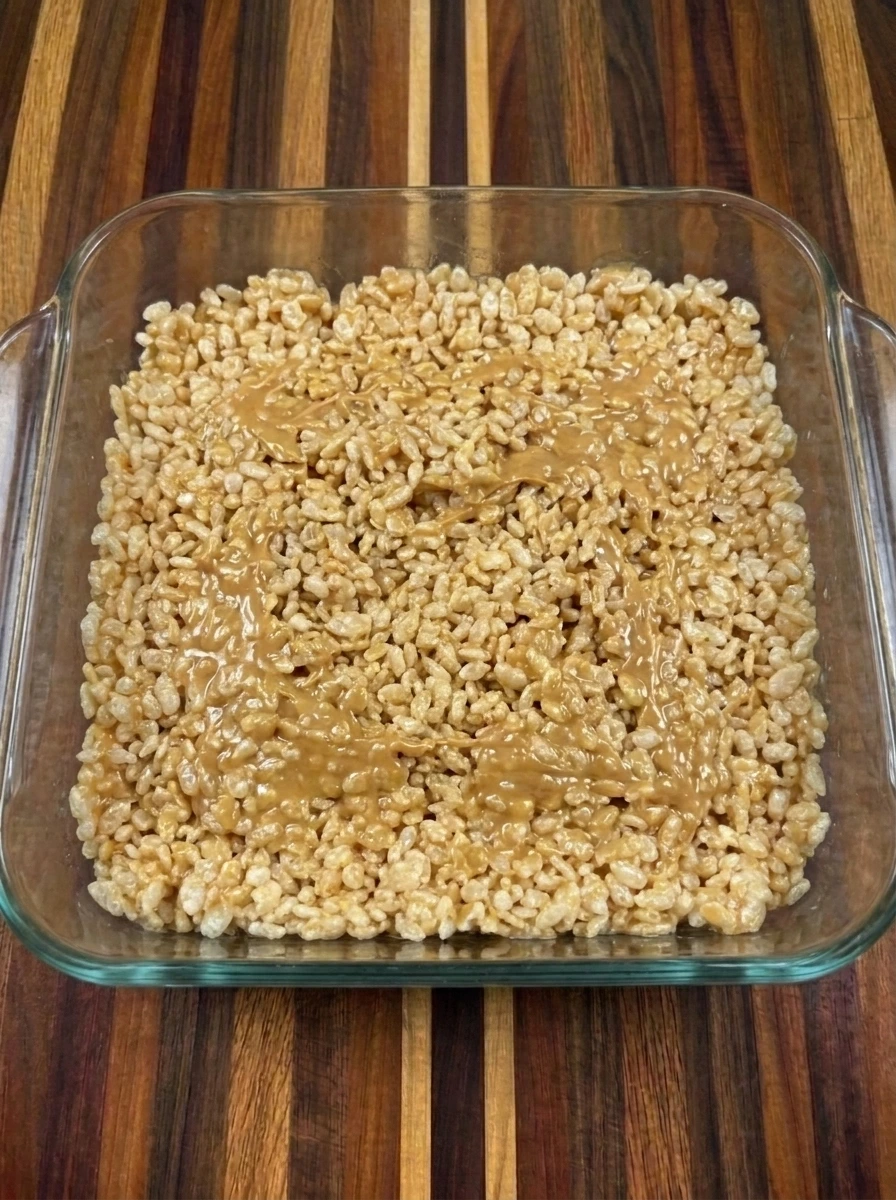
Transfer the coated cereal mixture into a lined square baking dish. Spread it toward the corners in a loose layer before pressing it into a compact slab. Keep the top slightly uneven rather than perfectly flat. A few raised cereal clusters and irregular edges will give the finished bars a natural homemade texture.
Tip: Press firmly enough to join the cereal clusters while avoiding excessive pressure that would make the bars dense.
Step 4: Drizzle with melted chocolate

Melt the semisweet chocolate chips with the coconut oil until fluid and glossy. Drizzle the chocolate over the pressed cereal slab in casual lines with a few thicker pools. Leave part of the golden peanut butter surface uncovered. Chill the slab until the cereal mixture feels firm and the dark chocolate changes from glossy and fluid to softly set.
Tip: Use loose uneven chocolate lines because they create a homemade finish and keep the bars from becoming overly sweet.
Step 5: Cut and serve one chilled bar
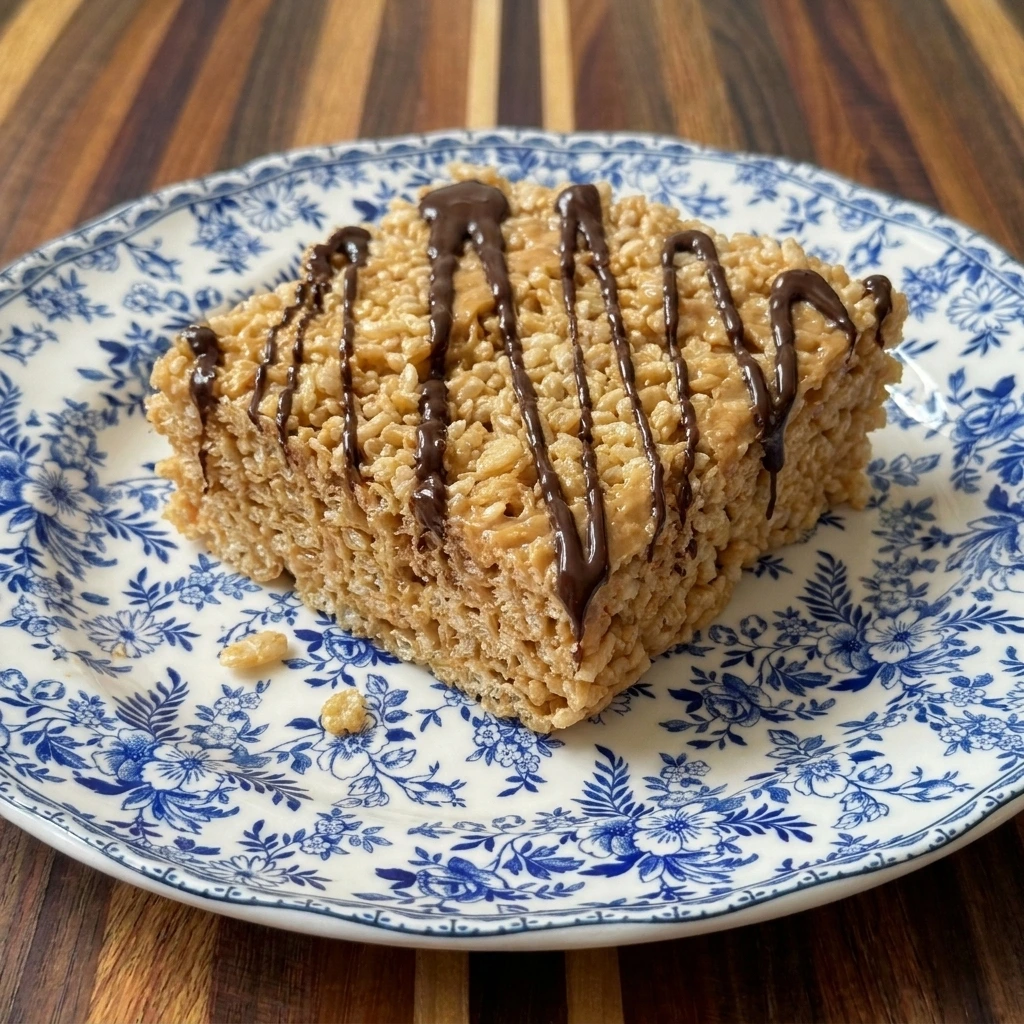
Lift the firm slab from the baking dish and cut it into twelve bars with naturally irregular edges. Separate the pieces gently so the chocolate topping remains visible. Place one bar on a white plate and turn it slightly to reveal the crisp cereal interior. Let a few tiny crumbs rest near the cut edge for a realistic homemade presentation.
Tip: Allow the chilled slab to rest briefly before cutting because a slightly softened surface is less likely to crack.
Pro Tips
- Measure the cereal before warming the binder so you can combine everything while the peanut butter mixture remains fluid.
- Use conventional creamy peanut butter for the firmest set because very runny natural peanut butter can soften the bars.
- Press the cereal with steady gentle pressure so the bars hold together while keeping their light and crisp texture.
- Chill the slab completely before cutting and wipe the knife between slices for cleaner chocolate topped edges.
Storage Instructions
Store the chilled bars in an airtight container with parchment paper between the layers. Keep them in the refrigerator so the peanut butter binder and chocolate remain firm. The bars stay fresh for up to seven days. Let a refrigerated bar stand for several minutes before eating when you prefer a softer and chewier texture. For longer storage wrap each bar separately and place the wrapped bars in a freezer safe container. Freeze them for up to two months so they do not absorb unwanted odors. Thaw frozen bars overnight in the refrigerator. Avoid leaving them in a warm place because the chocolate can soften and the peanut butter binder may become sticky.
Frequently Asked Questions
Yes and the bars can be chilled up to three days ahead when stored in a tightly covered container.
The binder may have cooled before mixing or the cereal slab may need firmer pressing and more chilling time.
Yes and crisp corn cereal or toasted oat cereal works well though the final texture will be slightly different.
Yes and wrap each bar well before freezing for up to two months then thaw it in the refrigerator.
See You in the Kitchen
I hope you try these No-Bake Peanut Butter Cereal Bars soon!
It is a simple recipe that looks beautiful and tastes incredible and makes every occasion a little more special alongside Cranberry Apple Crisp or Cranberry Orange Muffins.
Do not forget to share your results or save this recipe for later because it is one worth keeping.
Print
No-Bake Peanut Butter Cereal Bars
- Total Time: 1 hour 20 minutes
- Yield: 12 servings
Description
These No-Bake Peanut Butter Cereal Bars are an easy and quick treat made with crisp cereal and a simple peanut butter mixture plus a light chocolate drizzle. They are one of the best healthy snack ideas for meal prep and brunch plus holiday gatherings and potluck tables or a casual party. Each chewy bar holds together beautifully after chilling while the cereal stays pleasantly crisp. Make a batch ahead for lunch boxes or an effortless weeknight dinner dessert.
Ingredients
- 5 cups Crispy rice cereal
- 1 cup Creamy peanut butter
- 1/2 cup Honey
- 1/3 cup packed Light brown sugar
- 1 teaspoon Vanilla extract
- 1/4 teaspoon Fine salt
- 1/2 cup Semisweet chocolate chips
- 1 teaspoon Coconut oil
Instructions
- Add the creamy peanut butter and honey plus packed brown sugar to a saucepan. Warm the mixture gently while stirring until the separate ingredients become one smooth glossy mixture. Remove the mixture from the heat once the sugar has dissolved. Stir in the vanilla and salt so the binder looks evenly blended with no dry sugar patches.
- Place all five cups of crispy rice cereal in a mixing bowl. Pour the warm peanut butter binder over the cereal in several uneven ribbons so some cereal remains visible at first. Fold until every cluster is lightly coated and the cereal changes from pale ivory to warm golden tan. Stop once the mixture looks sticky and clumped while the cereal pieces still hold their shape.
- Transfer the coated cereal mixture into a lined square baking dish. Spread it toward the corners in a loose layer before pressing it into a compact slab. Keep the top slightly uneven rather than perfectly flat. A few raised cereal clusters and irregular edges will give the finished bars a natural homemade texture.
- Melt the semisweet chocolate chips with the coconut oil until fluid and glossy. Drizzle the chocolate over the pressed cereal slab in casual lines with a few thicker pools. Leave part of the golden peanut butter surface uncovered. Chill the slab until the cereal mixture feels firm and the dark chocolate changes from glossy and fluid to softly set.
- Lift the firm slab from the baking dish and cut it into twelve bars with naturally irregular edges. Separate the pieces gently so the chocolate topping remains visible. Place one bar on a white plate and turn it slightly to reveal the crisp cereal interior. Let a few tiny crumbs rest near the cut edge for a realistic homemade presentation.
Notes
Pro Tips:
- Measure the cereal before warming the binder so you can combine everything while the peanut butter mixture remains fluid.
- Use conventional creamy peanut butter for the firmest set because very runny natural peanut butter can soften the bars.
- Press the cereal with steady gentle pressure so the bars hold together while keeping their light and crisp texture.
- Chill the slab completely before cutting and wipe the knife between slices for cleaner chocolate topped edges.
Storage: Store the chilled bars in an airtight container with parchment paper between the layers. Keep them in the refrigerator so the peanut butter binder and chocolate remain firm. The bars stay fresh for up to seven days. Let a refrigerated bar stand for several minutes before eating when you prefer a softer and chewier texture. For longer storage wrap each bar separately and place the wrapped bars in a freezer safe container. Freeze them for up to two months so they do not absorb unwanted odors. Thaw frozen bars overnight in the refrigerator. Avoid leaving them in a warm place because the chocolate can soften and the peanut butter binder may become sticky.
- Prep Time: 15 minutes
- Cook Time: 5 minutes
- Category: Dessert
- Cuisine: American