

This recipe for Strawberry Ghosts will be the easiest homemade Halloween treat you’ve ever whipped up! Juicy strawberries are covered with sweet white candy coating then finished with tiny chocolate faces that make every berry look playfully spooky. All you need to do is melt the coating and dip the berries then let your little ghosts set to perfection.

I know we aren’t quite at Halloween yet but that hasn’t stopped me from daydreaming about costumes and parties and most importantly all of my favorite spooky desserts! Some of my favorite fruity treats that I indulge in whenever I want something sweet include Banana Cream Cheese Bites and chocolate dipped fruit and chilled berry snacks. This Halloween I plan on adding another staple to that ever-growing list… Strawberry Ghosts!
It’s the perfect way to use up all of those juicy ripe strawberries and couldn’t be easier to make. If you’re looking to add something cute and spooky to your Halloween spread then this is the dessert for you.
Ingredients

Here is what I use for this recipe :
- Large fresh strawberries: Provide the juicy fruit center and natural ghost body while the green tops give each berry an easy grip for dipping.
- White candy melts: Create the opaque sweet shell that turns each red strawberry into a white ghost and firms up cleanly after dipping.
- Mini semisweet chocolate chips: Form two small eyes and one mouth on each ghost while adding a dark chocolate contrast to the white coating.
Tools I Use :
- Sheet pan or baking tray: Provides a wide flat area for drying the berries and setting the coated ghosts without crowding them.
- Parchment paper: Keeps the soft candy tails from sticking while the coating firms and makes the finished ghosts easier to lift.
- Small saucepan: Melts the white candy coating gently and gives enough depth for dipping most of each strawberry.
- Silicone spatula: Stirs the melting candy evenly and helps keep the coating smooth without scraping the saucepan harshly.
- White serving plate: Holds the finished Strawberry Ghosts for serving while making their white shells and dark faces easy to see.
Instructions
Step 1: Dry the washed strawberries

Rinse the 12 strawberries and keep every green top attached then blot each berry until the red skin looks dry rather than wet and glossy. Spread the berries with uneven gaps and turn a few on their sides so every surface can finish drying before coating.
Tip: Any visible moisture can loosen the coating so take extra time to dry around the leaves.
Step 2: Melt the white candy coating
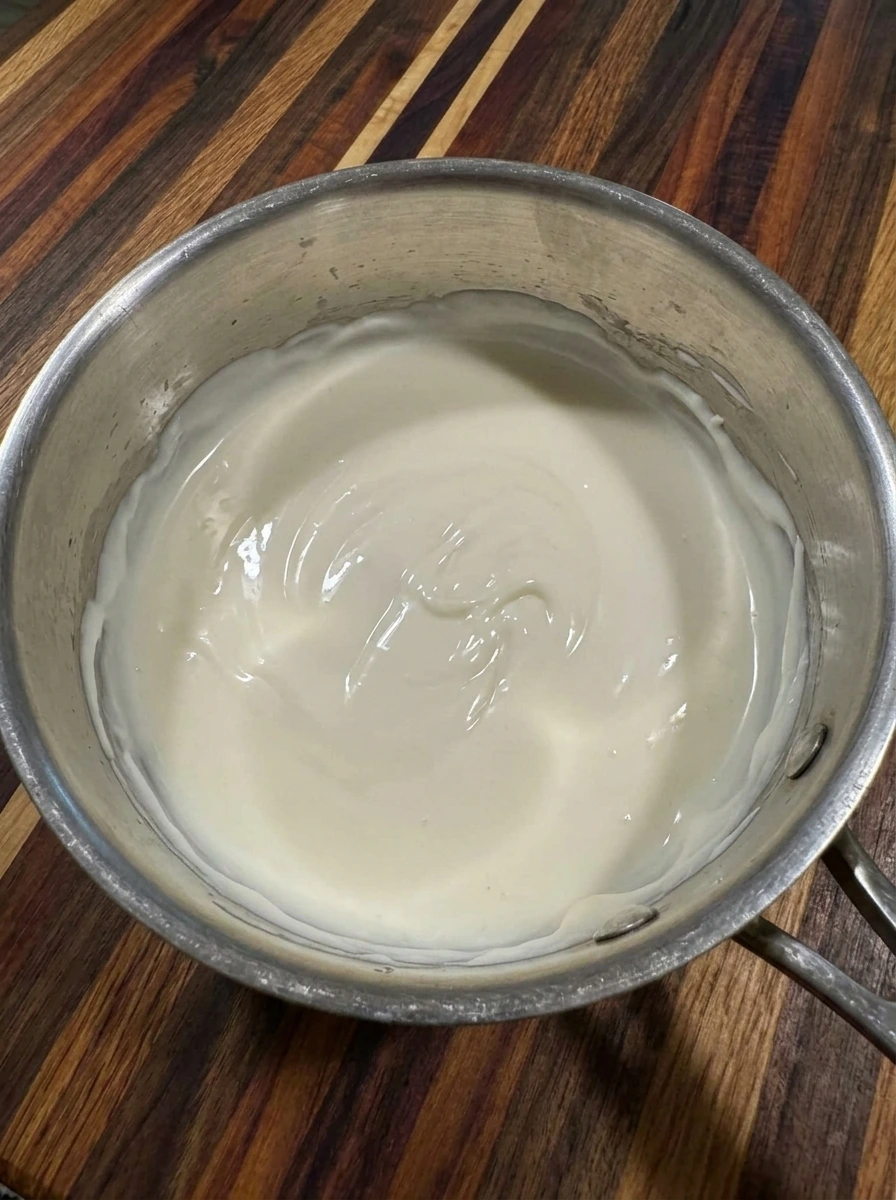
Add the 10 ounces of white candy melts and warm them gently until the separate wafers collapse into a thick glossy pool. Stir until no firm pieces remain and the coating flows slowly enough to cling to the berries without looking watery.
Tip: Use low heat and stop as soon as the coating becomes smooth to keep it from turning thick or grainy.
Step 3: Dip and drag the strawberries
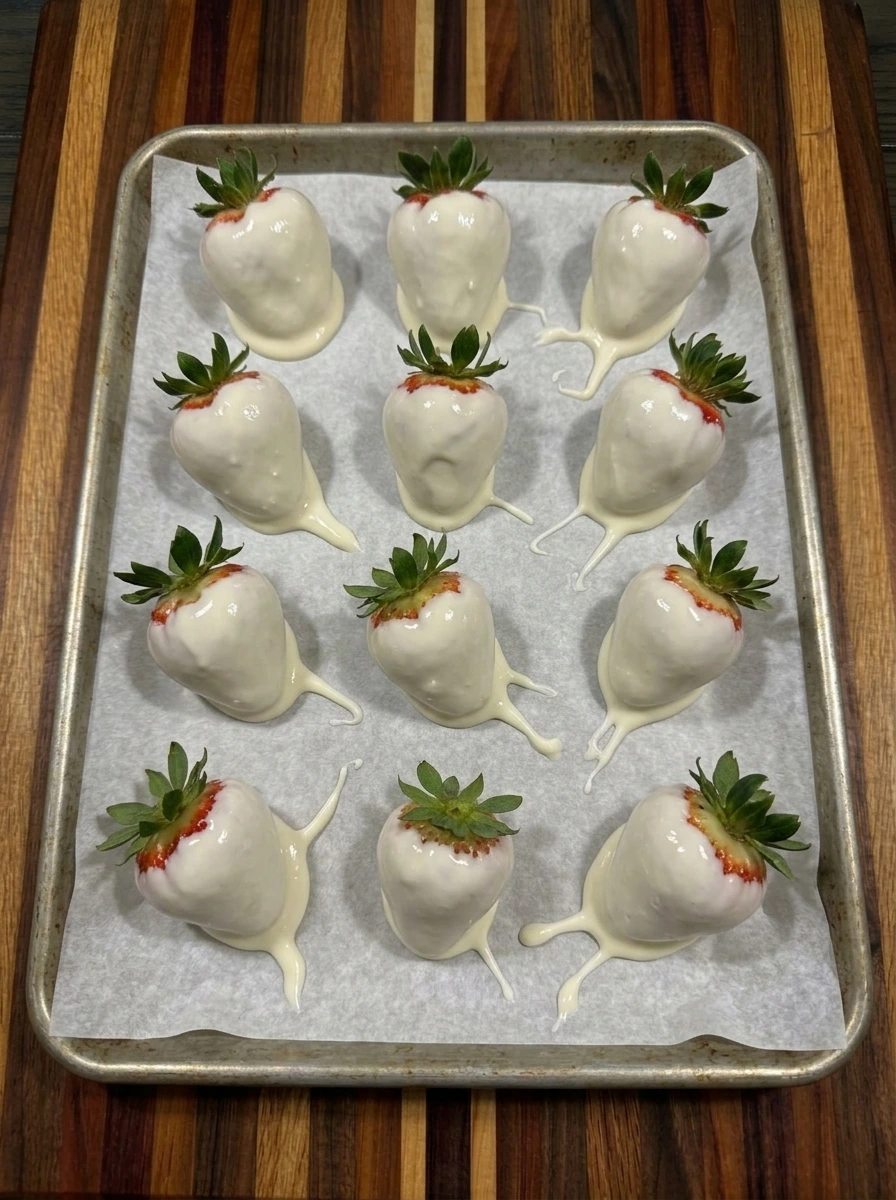
Hold each dry strawberry by its green top and dip the red fruit into the melted coating until most of the berry is covered. Set each coated berry down and drag it slightly so the extra coating stretches into an uneven ghost tail with different lengths and little ridges.
Tip: A short dragging motion makes a more ghostlike tail than setting each dipped berry straight down.
Step 4: Add the chocolate ghost faces

Press two mini chocolate chips near the upper front of each coated berry for eyes and place one chip below for the mouth. Let all 12 ghosts rest until the coating turns firm while small drips and tiny surface ripples stay visible for a homemade look.
Tip: Add faces before the coating sets because firm coating can crack when the chips are pressed in.
Step 5: Plate one Strawberry Ghost

Lift one fully set ghost from the batch and place it on a white plate with the tail angled slightly to one side. Serve it chilled so the white shell stays firm and the strawberry inside remains juicy with a natural red edge peeking near the leafy top.
Tip: Serve cold but let the ghost sit for a minute or two before eating for the best berry flavor.
Pro Tips
- Dry every strawberry very well before dipping because even a little water can make the white coating seize or slide from the fruit.
- Use berries with fresh green tops because the leaves create a handy grip and make each finished ghost look lively and naturally different.
- Drag each dipped strawberry lightly across the coating on the tray so a loose uneven ghost tail forms instead of a perfectly round base.
- Add the chocolate faces while the white coating is still soft so the pieces stick firmly without cracking the shell after it sets.
Storage Instructions
Keep Strawberry Ghosts in a shallow airtight container in the refrigerator so the berries stay cold and the white coating remains firm. Arrange the ghosts in a single loose layer whenever possible because stacking can crack the shells and press the chocolate faces into nearby pieces. For the best texture enjoy them within one day and avoid freezing because thawed strawberries release moisture that can soften the coating.
Frequently Asked Questions
Yes and they are best made the same day or one day ahead then chilled in a covered container until serving.
White candy melts work best because they set firmly and smoothly while still giving each berry a soft homemade ghost shape.
Dry the berries completely before dipping and store them cold without washing again after the white coating has set.
Yes and kids can add the chocolate faces after an adult handles the warm melted coating and the dipping step.
See You in the Kitchen
I hope you enjoy all the recipes I share with you including these playful Strawberry Ghosts and fruity favorites like Banana Fritters!
I hope you try them and enjoy them and rate them and share them with your friends and family along with a slice of Banana Cream Pie.
Print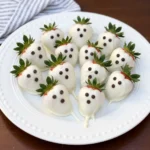
Strawberry Ghosts
- Total Time: 35 minutes
- Yield: 12 servings
Description
These Strawberry Ghosts are an easy Halloween treat with juicy berries under a sweet white candy shell and playful chocolate faces while they are quick enough for busy families and simple enough for kids to help make and they are one of the best healthy dessert ideas for a holiday party or spooky brunch because fresh fruit keeps every bite bright and fun while the chilled finish makes them a cute homemade snack without complicated decorating for everyone.
Ingredients
- 12 Large fresh strawberries
- 10 ounces White candy melts
- 36 Mini semisweet chocolate chips
Instructions
- Rinse the 12 strawberries and keep every green top attached then blot each berry until the red skin looks dry rather than wet and glossy.
Spread the berries with uneven gaps and turn a few on their sides so every surface can finish drying before coating.
- Add the 10 ounces of white candy melts and warm them gently until the separate wafers collapse into a thick glossy pool.
Stir until no firm pieces remain and the coating flows slowly enough to cling to the berries without looking watery.
- Hold each dry strawberry by its green top and dip the red fruit into the melted coating until most of the berry is covered.
Set each coated berry down and drag it slightly so the extra coating stretches into an uneven ghost tail with different lengths and little ridges.
- Press two mini chocolate chips near the upper front of each coated berry for eyes and place one chip below for the mouth.
Let all 12 ghosts rest until the coating turns firm while small drips and tiny surface ripples stay visible for a homemade look.
- Lift one fully set ghost from the batch and place it on a white plate with the tail angled slightly to one side.
Serve it chilled so the white shell stays firm and the strawberry inside remains juicy with a natural red edge peeking near the leafy top.
Notes
Pro Tips:
- Dry every strawberry very well before dipping because even a little water can make the white coating seize or slide from the fruit.
- Use berries with fresh green tops because the leaves create a handy grip and make each finished ghost look lively and naturally different.
- Drag each dipped strawberry lightly across the coating on the tray so a loose uneven ghost tail forms instead of a perfectly round base.
- Add the chocolate faces while the white coating is still soft so the pieces stick firmly without cracking the shell after it sets.
Storage: Keep Strawberry Ghosts in a shallow airtight container in the refrigerator so the berries stay cold and the white coating remains firm.
Arrange the ghosts in a single loose layer whenever possible because stacking can crack the shells and press the chocolate faces into nearby pieces.
For the best texture enjoy them within one day and avoid freezing because thawed strawberries release moisture that can soften the coating.
- Prep Time: 15 minutes
- Cook Time: 5 minutes
- Category: Dessert
- Cuisine: American