

This Italian Christmas Cookies recipe is one of my favorite holiday treats when I’m craving something sweet but want something a little lighter than a rich frosted cake. Inspired by traditional Italian holiday baking and those colorful cookies you find on Christmas dessert trays I’ve packed these little cookies with delicate vanilla and almond flavor plus a soft buttery texture and a sweet glaze with festive sprinkles.
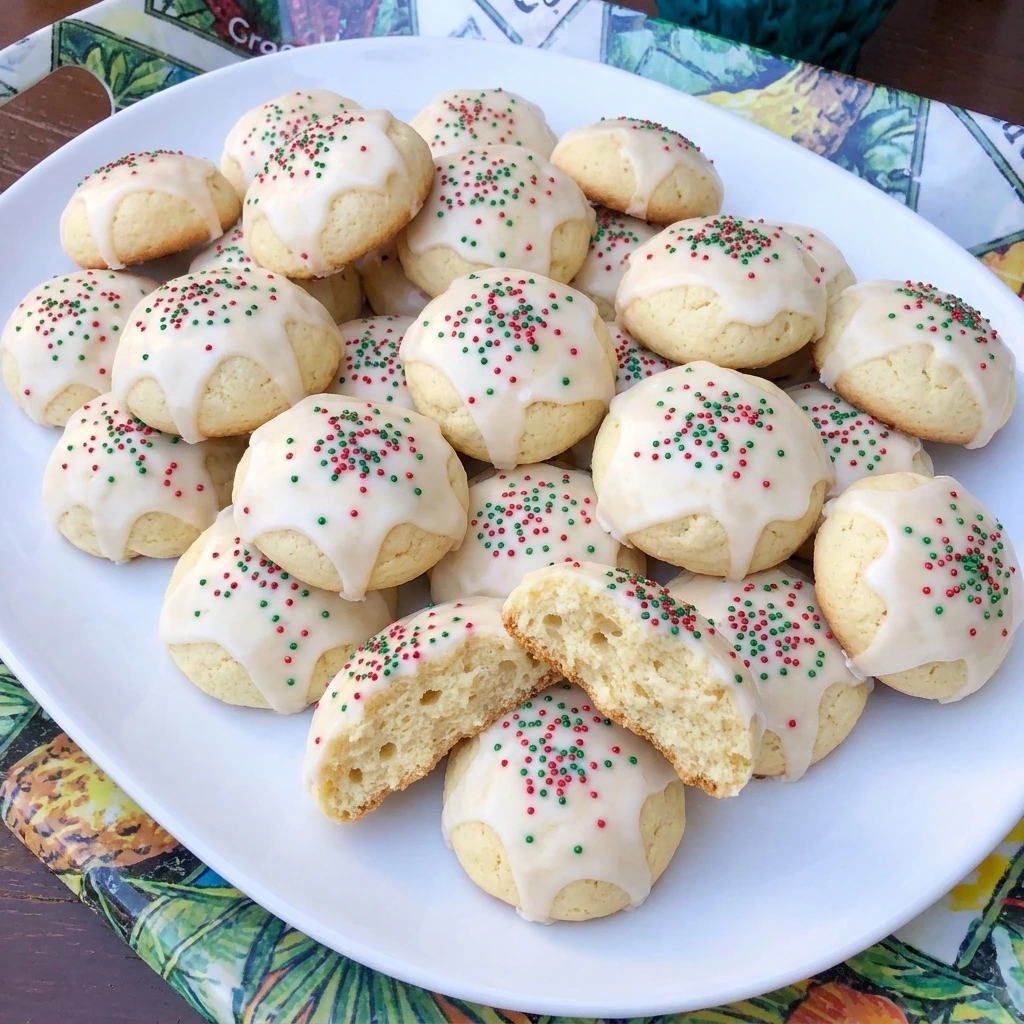
They’re also loaded with flavor from the vanilla extract and almond extract and they’re so easy to customize based on whatever holiday sprinkles you have in your pantry or festive decorations you want to add! I also love baking a batch and enjoying them throughout the week with coffee or hot chocolate alongside a slice of Southern Pecan Praline Cake for holiday gatherings!
These Italian Christmas Cookies are also one of those recipes that make holiday baking feel extra special without requiring complicated steps or expensive ingredients. I love how the soft cookie centers contrast with the thin sweet glaze and how each cookie looks a little different once the colorful sprinkles are scattered over the top.
Ingredients
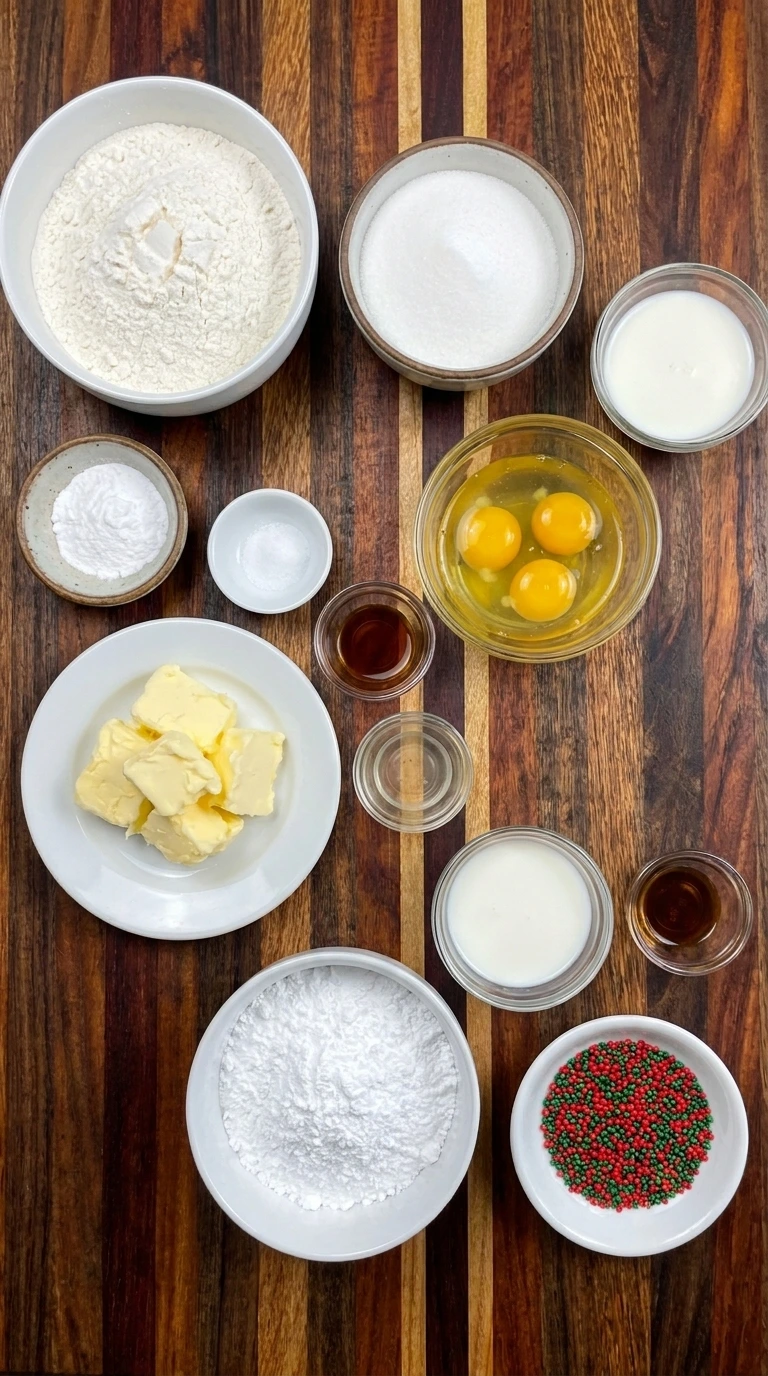
Here is what I use for this recipe :
- All-purpose flour: Provides the main structure for the cookie dough while keeping the baked cookies tender and sturdy enough to hold their glaze.
- Baking powder: Helps the dough rise gently during baking and creates the soft and lightly puffed texture associated with traditional Italian Christmas Cookies.
- Fine salt: Balances the sweetness of the cookies while enhancing the delicate vanilla and almond flavors.
- Unsalted butter: Adds rich buttery flavor and tenderness while helping the dough develop a soft and delicate crumb when softened and creamed.
- Granulated sugar: Sweetens the dough and helps create a light texture when beaten together with the softened butter.
- Large eggs: Bind the ingredients together and provide moisture and structure while contributing to the fluffy texture of the finished cookies.
- Whole milk: Adds moisture to the dough and helps produce a smooth and scoopable consistency without making the cookies dry.
- Vanilla extract: Provides warm and sweet bakery flavor that complements the butter and makes the finished cookies especially fragrant.
- Almond extract: Adds the distinctive nutty aroma commonly associated with Italian holiday cookies without introducing chopped nuts.
- Powdered sugar: Forms the smooth and sweet white glaze that coats the tops of the cooled cookies and sets into a delicate shell.
- Milk for glaze: Thins the powdered sugar into a pourable glaze that spreads across the cookie tops without becoming too watery.
- Vanilla extract for glaze: Adds extra vanilla flavor to the glaze and complements the delicate almond notes in the baked cookies.
- Christmas nonpareil sprinkles: Provide festive red and green color while adding a delicate crunch to the sweet glaze before it sets.
Tools I Use :
- Large mixing bowl: Holds the butter and sugar mixture along with the eggs and milk before the dry ingredients are folded into the dough.
- Medium mixing bowl: Provides space to combine the flour and baking powder and salt before mixing and can also be used to prepare the vanilla glaze.
- Electric hand mixer: Creams the softened butter with sugar and helps incorporate the eggs into a light and smooth mixture.
- Measuring cups and spoons: Ensure accurate quantities of flour and sugar and milk and extracts for consistent dough texture and glaze thickness.
- Rubber spatula: Folds the dry ingredients into the wet mixture and scrapes the bowl to prevent pockets of unmixed flour.
- Two large baking sheets: Hold the shaped cookie portions with enough spacing for gentle spreading during baking.
- Parchment paper: Creates a nonstick lining for baking and for resting the cookies while their glaze sets.
- Small cookie scoop: Helps divide the dough into approximately equal portions for even baking and consistent serving sizes.
- Wire cooling rack: Allows air to circulate around the baked cookies and helps them cool completely before glazing.
- Whisk: Combines the dry ingredients evenly and produces a smooth white glaze without visible sugar lumps.
- Small white dessert plate: Holds an individual finished cookie for serving and displays the soft interior when the cookie is broken open.
Instructions
Step 1: Cream the butter and sugar with eggs and flavorings
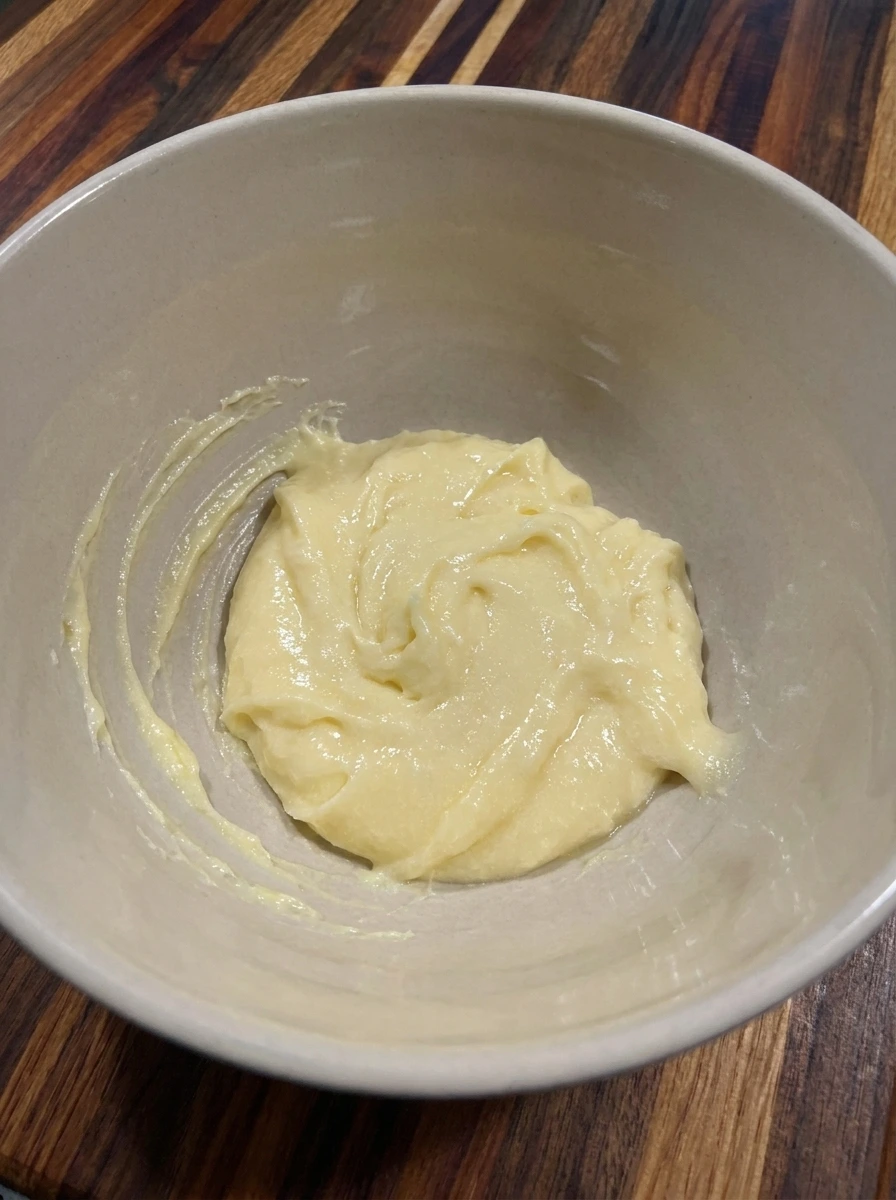
Add the softened unsalted butter and granulated sugar to a large mixing bowl and beat them together until the mixture becomes pale and creamy. The sugar should be evenly distributed through the butter and the mixture should look lighter and fluffier than the original ingredients. Add the 3 eggs one at a time and beat briefly after each addition before mixing in the milk and vanilla extract and almond extract. The mixture will become softer and slightly glossy as the liquids blend with the butter and sugar. Scrape the mixture toward the center and continue mixing until the wet ingredients are mostly combined. A few small variations in texture are normal at this stage because the dry ingredients have not yet been added.
Tip: Use room temperature eggs and softened butter so the ingredients blend smoothly and create a light base for tender cookies.
Step 2: Fold the dry ingredients into the cookie dough
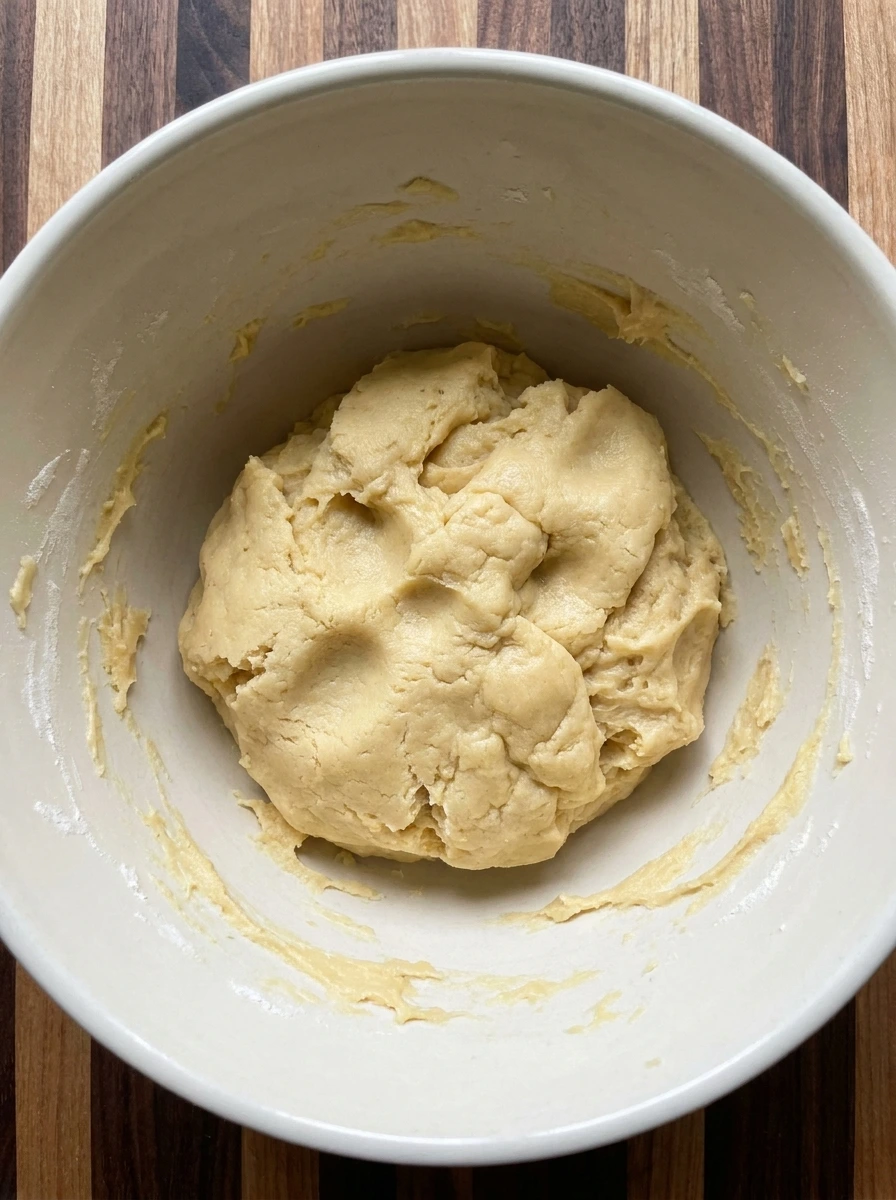
Whisk the all-purpose flour with the baking powder and fine salt in a separate bowl so the leavening ingredients are evenly distributed. Gradually add the dry mixture to the bowl containing the creamy wet ingredients and fold everything together until no dry flour remains. The mixture will change from a loose creamy batter into a thick and soft cookie dough. The dough should be slightly sticky but firm enough to scoop and it should hold soft ridges when gently moved around the bowl. Avoid excessive mixing once the flour disappears because too much mixing can create dense cookies. Cover the dough and refrigerate it for about 20 minutes so it becomes easier to portion and shape.
Tip: Stop mixing as soon as the flour disappears and chill the dough briefly if it feels too sticky to shape into soft rounds.
Step 3: Shape the dough into small cookie rounds
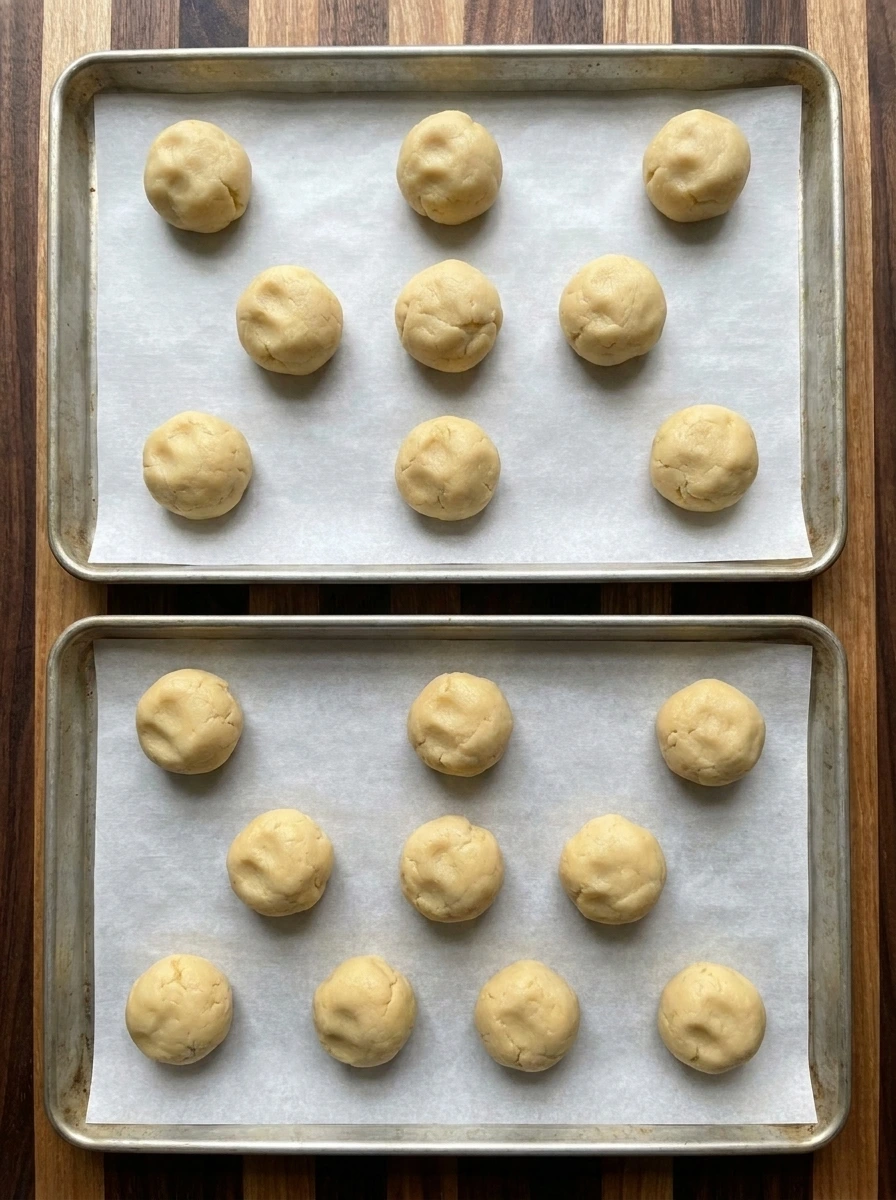
Preheat the oven to 350°F and line two large baking sheets with parchment paper. Divide the chilled dough into 30 approximately equal portions and gently roll each portion into a rounded ball using lightly floured hands if needed. Place 15 dough balls on each prepared baking sheet with about 2 inches of space between them. The balls should have softly rounded tops and slightly uneven shapes rather than being pressed flat or arranged into perfectly identical circles. Keep the dough portions relatively consistent in size so they bake evenly while allowing the small natural differences that give homemade Italian Christmas Cookies their traditional appearance.
Tip: Aim for roughly 1 tablespoon of dough per cookie and leave generous spacing because the rounds will puff slightly while baking.
Step 4: Bake the cookies until softly puffed
Place one baking sheet at a time in the preheated oven and bake for 10 to 12 minutes until the cookies have puffed slightly and developed very light golden color along their bottom edges. The tops should remain mostly pale because Italian Christmas Cookies are meant to be soft rather than deeply browned. Remove the baked cookies from the oven and allow them to rest on the baking sheet for about 5 minutes before transferring them to a cooling rack. As they cool their outer surfaces will become slightly firmer while the centers remain soft and tender. Repeat with the second baking sheet and let all 30 cookies cool completely before glazing. The finished cookies should have slightly uneven domed tops and subtle natural cracks with very light browning underneath.
Tip: Remove the cookies when their bottoms are lightly golden and their tops remain pale because overbaking makes them dry.
Step 5: Mix the vanilla glaze and coat the cooled cookies
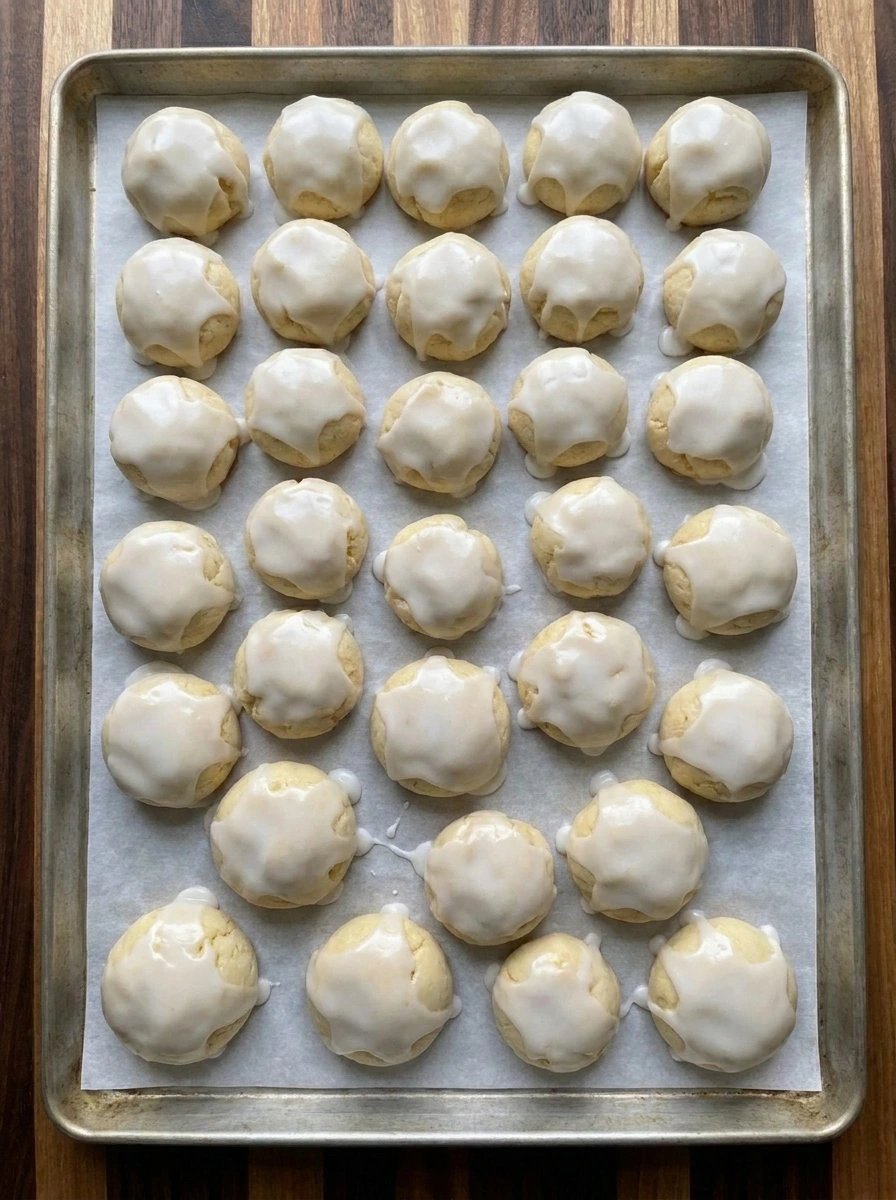
Add the powdered sugar to a medium mixing bowl and gradually stir in the 3 tablespoons of milk and the remaining vanilla extract. Mix until a smooth and thick glaze forms with a consistency that slowly flows from a spoon without becoming watery. After the cookies have cooled completely dip the top of each cookie into the glaze and lift it gently so the coating settles across the domed surface. Allow a little glaze to drip naturally over the edges instead of trying to create a perfectly smooth and uniform layer. Return the glazed cookies to the parchment-lined baking sheets or a clean lined tray with small spaces between them. The cookies should now have soft white tops with slight differences in glaze thickness while their pale golden edges remain partially visible.
Tip: Dip only completely cooled cookies into the glaze and add milk gradually so the coating stays thick enough to set.
Step 6: Decorate with Christmas sprinkles and serve
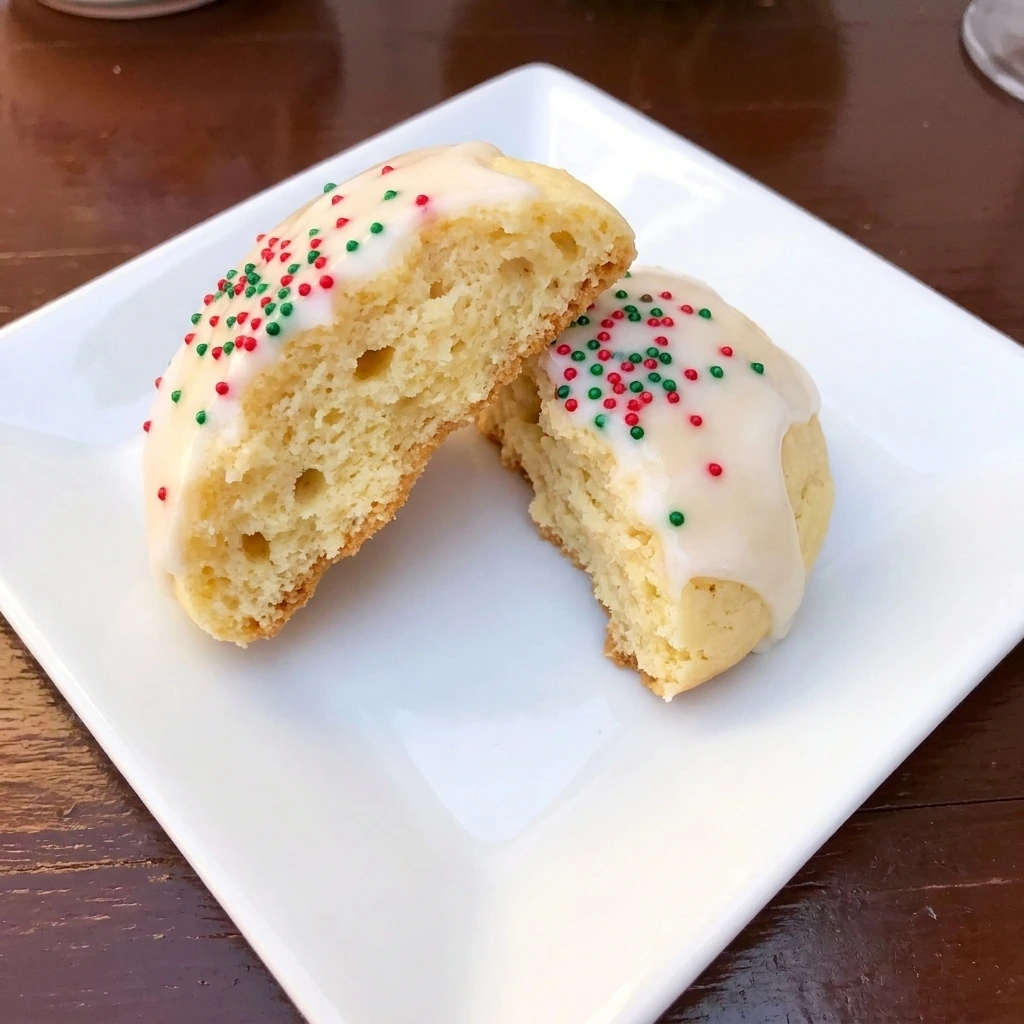
While the vanilla glaze is still soft scatter the red and green Christmas nonpareil sprinkles over the tops of the cookies. Use the full 1/4 cup across all 30 cookies and distribute the sprinkles casually so some cookies have slightly more color than others. Allow the decorated cookies to rest until the glaze has set and no longer feels sticky. The finished cookies should have soft pale centers beneath the thin white coating and delicate golden edges with colorful sprinkles attached to the glaze. Transfer the cookies to a serving platter for sharing and place one finished cookie on a small white dessert plate to enjoy. Break the plated cookie open to reveal its tender fluffy center and the contrast between the soft interior and the lightly set vanilla glaze.
Tip: Add nonpareils immediately after glazing each small batch because they adhere best before the white icing begins to set.
Pro Tips
- Use softened butter instead of melted butter because proper creaming creates a lighter dough and helps the finished cookies stay tender.
- Chill the dough for about 20 minutes before shaping so the cookies hold their rounded form without spreading too much in the oven.
- Watch the cookies closely during the final baking minutes because pale tops and lightly golden bottoms are the key to a soft texture.
- Glaze the cookies only after they are completely cool and add the sprinkles immediately so the colorful decorations adhere properly.
Storage Instructions
Store Italian Christmas Cookies in an airtight container at room temperature for up to 4 days. Allow the vanilla glaze to set completely before stacking the cookies and place parchment paper between layers so the icing does not stick to the cookies underneath. For longer storage keep the glazed cookies in an airtight container in the refrigerator for up to 1 week. Bring them to room temperature before serving because their soft texture and delicate vanilla flavor are more noticeable when they are not cold.
For freezing arrange completely cooled unglazed cookies in a single layer until firm and then transfer them to a freezer-safe container with parchment between layers. Freeze for up to 3 months and thaw at room temperature before decorating with freshly mixed vanilla glaze and Christmas sprinkles. You can also prepare the cookie dough a day ahead and refrigerate it in a covered bowl for up to 24 hours. Allow the dough to soften slightly if necessary before portioning and baking so the cookies maintain their gently rounded homemade shape.
Frequently Asked Questions
Overbaking or adding too much flour can dry them out. Measure flour carefully and remove the cookies when lightly golden.
Yes! Bake them one or two days ahead and store them in an airtight container once the vanilla glaze has completely set.
Yes! Freeze the unglazed cookies for up to three months and thaw them completely before adding fresh glaze and sprinkles.
Yes! Replace the almond extract with additional vanilla or a little lemon extract for a different festive flavor.
See You in the Kitchen
I hope you enjoy all the recipes I share with you including these delicious Italian Christmas Cookies and my Pumpkin Cinnamon Rolls and Cranberry Sauce Coffee Cake Muffins for even more holiday baking ideas.
I hope you try them and enjoy them and rate them and share them with your friends and family!
Print
Italian Christmas Cookies
- Total Time: 1 hour 44 minutes
- Yield: 30 cookies servings
Description
These Italian Christmas Cookies are soft and tender with a delicate vanilla and almond flavor plus a sweet glaze topped with colorful sprinkles. This easy recipe uses simple pantry ingredients and quick baking steps to create the best homemade Christmas treats. Perfect for holiday cookie exchanges and Christmas parties or festive brunch ideas and family baking days. Enjoy these cookies as part of a healthy balanced holiday menu while sharing a classic Italian inspired dessert.
Ingredients
- 3 cups All-purpose flour
- 2 teaspoons Baking powder
- 1/4 teaspoon Fine salt
- 1/2 cup Unsalted butter
- 3/4 cup Granulated sugar
- 3 Large eggs
- 1/4 cup Whole milk
- 2 teaspoons Vanilla extract
- 1/2 teaspoon Almond extract
- 2 cups Powdered sugar
- 3 tablespoons Milk for glaze
- 1/2 teaspoon Vanilla extract for glaze
- 1/4 cup Christmas nonpareil sprinkles
Instructions
- Add the softened unsalted butter and granulated sugar to a large mixing bowl and beat them together until the mixture becomes pale and creamy. The sugar should be evenly distributed through the butter and the mixture should look lighter and fluffier than the original ingredients.
Add the 3 eggs one at a time and beat briefly after each addition before mixing in the milk and vanilla extract and almond extract. The mixture will become softer and slightly glossy as the liquids blend with the butter and sugar.
Scrape the mixture toward the center and continue mixing until the wet ingredients are mostly combined. A few small variations in texture are normal at this stage because the dry ingredients have not yet been added.
- Whisk the all-purpose flour with the baking powder and fine salt in a separate bowl so the leavening ingredients are evenly distributed. Gradually add the dry mixture to the bowl containing the creamy wet ingredients and fold everything together until no dry flour remains.
The mixture will change from a loose creamy batter into a thick and soft cookie dough. The dough should be slightly sticky but firm enough to scoop and it should hold soft ridges when gently moved around the bowl.
Avoid excessive mixing once the flour disappears because too much mixing can create dense cookies. Cover the dough and refrigerate it for about 20 minutes so it becomes easier to portion and shape.
- Preheat the oven to 350°F and line two large baking sheets with parchment paper. Divide the chilled dough into 30 approximately equal portions and gently roll each portion into a rounded ball using lightly floured hands if needed.
Place 15 dough balls on each prepared baking sheet with about 2 inches of space between them. The balls should have softly rounded tops and slightly uneven shapes rather than being pressed flat or arranged into perfectly identical circles.
Keep the dough portions relatively consistent in size so they bake evenly while allowing the small natural differences that give homemade Italian Christmas Cookies their traditional appearance.
- Place one baking sheet at a time in the preheated oven and bake for 10 to 12 minutes until the cookies have puffed slightly and developed very light golden color along their bottom edges. The tops should remain mostly pale because Italian Christmas Cookies are meant to be soft rather than deeply browned.
Remove the baked cookies from the oven and allow them to rest on the baking sheet for about 5 minutes before transferring them to a cooling rack. As they cool their outer surfaces will become slightly firmer while the centers remain soft and tender.
Repeat with the second baking sheet and let all 30 cookies cool completely before glazing. The finished cookies should have slightly uneven domed tops and subtle natural cracks with very light browning underneath.
- Add the powdered sugar to a medium mixing bowl and gradually stir in the 3 tablespoons of milk and the remaining vanilla extract. Mix until a smooth and thick glaze forms with a consistency that slowly flows from a spoon without becoming watery.
After the cookies have cooled completely dip the top of each cookie into the glaze and lift it gently so the coating settles across the domed surface. Allow a little glaze to drip naturally over the edges instead of trying to create a perfectly smooth and uniform layer.
Return the glazed cookies to the parchment-lined baking sheets or a clean lined tray with small spaces between them. The cookies should now have soft white tops with slight differences in glaze thickness while their pale golden edges remain partially visible.
- While the vanilla glaze is still soft scatter the red and green Christmas nonpareil sprinkles over the tops of the cookies. Use the full 1/4 cup across all 30 cookies and distribute the sprinkles casually so some cookies have slightly more color than others.
Allow the decorated cookies to rest until the glaze has set and no longer feels sticky. The finished cookies should have soft pale centers beneath the thin white coating and delicate golden edges with colorful sprinkles attached to the glaze.
Transfer the cookies to a serving platter for sharing and place one finished cookie on a small white dessert plate to enjoy. Break the plated cookie open to reveal its tender fluffy center and the contrast between the soft interior and the lightly set vanilla glaze.
Notes
Pro Tips:
- Use softened butter instead of melted butter because proper creaming creates a lighter dough and helps the finished cookies stay tender.
- Chill the dough for about 20 minutes before shaping so the cookies hold their rounded form without spreading too much in the oven.
- Watch the cookies closely during the final baking minutes because pale tops and lightly golden bottoms are the key to a soft texture.
- Glaze the cookies only after they are completely cool and add the sprinkles immediately so the colorful decorations adhere properly.
Storage: Store Italian Christmas Cookies in an airtight container at room temperature for up to 4 days. Allow the vanilla glaze to set completely before stacking the cookies and place parchment paper between layers so the icing does not stick to the cookies underneath.
For longer storage keep the glazed cookies in an airtight container in the refrigerator for up to 1 week. Bring them to room temperature before serving because their soft texture and delicate vanilla flavor are more noticeable when they are not cold.
For freezing arrange completely cooled unglazed cookies in a single layer until firm and then transfer them to a freezer-safe container with parchment between layers. Freeze for up to 3 months and thaw at room temperature before decorating with freshly mixed vanilla glaze and Christmas sprinkles.
You can also prepare the cookie dough a day ahead and refrigerate it in a covered bowl for up to 24 hours. Allow the dough to soften slightly if necessary before portioning and baking so the cookies maintain their gently rounded homemade shape.
- Prep Time: 35 minutes
- Cook Time: 24 minutes
- Category: Dessert
- Cuisine: Italian-American