

When I say these are Apple Crisp Mini Cheesecakes I mean it! You’d never guess how much cozy apple crisp flavor fits into each little bite and topped with cinnamon apples and a buttery oat crumble then baked until softly set these cheesecakes come out with a creamy center and crisp topping that gives you everything you want in one small dessert.
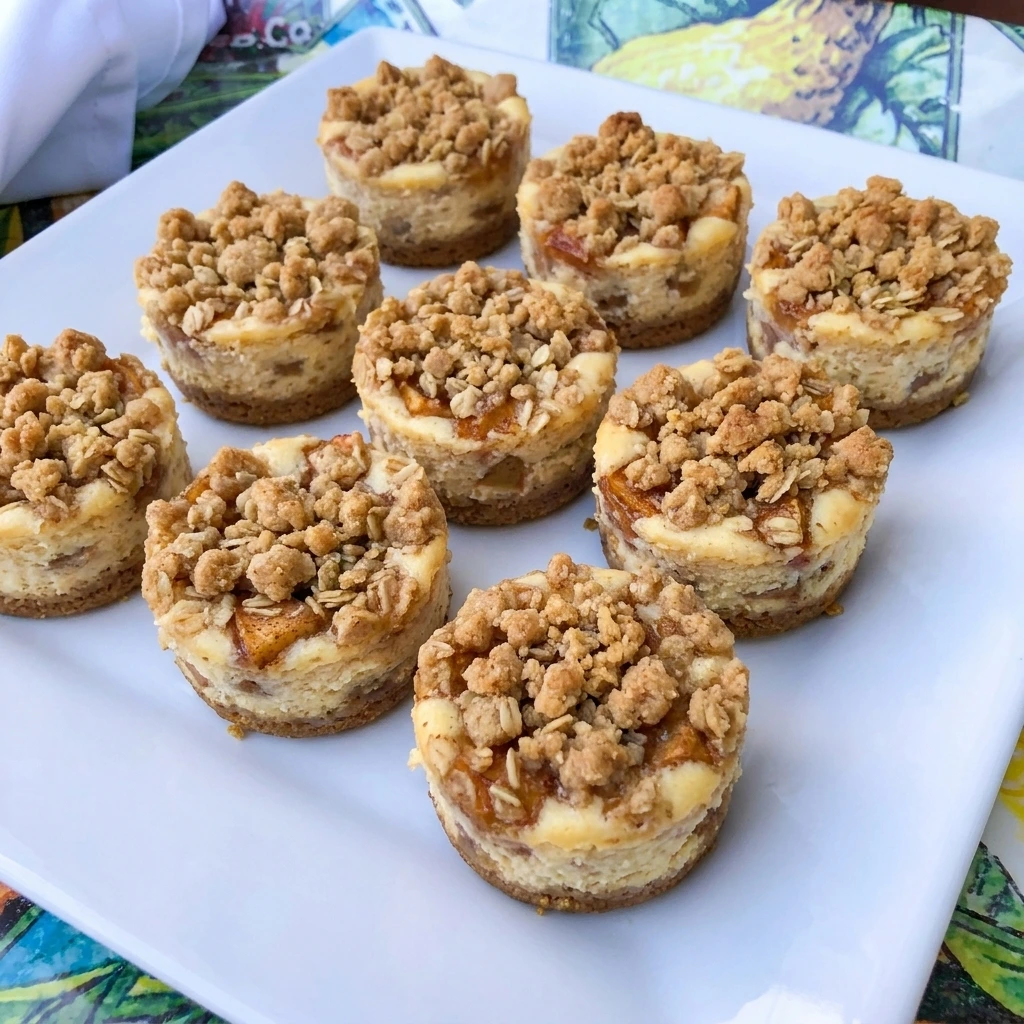
Don’t get me wrong I love a full size cheesecake but baking cheesecake in a muffin tin creates ridiculously creamy little desserts with tender apples and a golden crisp top while these Apple Crisp Mini Cheesecakes really defy all dessert logic because they taste like apple crisp and cheesecake at the same time without feeling fussy and if you love creamy fruit desserts then try our Banana Cheesecake Bars for another easy favorite.
I’m not exaggerating when I say these are REAL GOOD and each one has a crumbly graham base then a soft cheesecake layer then warm cinnamon apple pieces and finally an oat topping that bakes into a lightly golden finish.
Ingredients
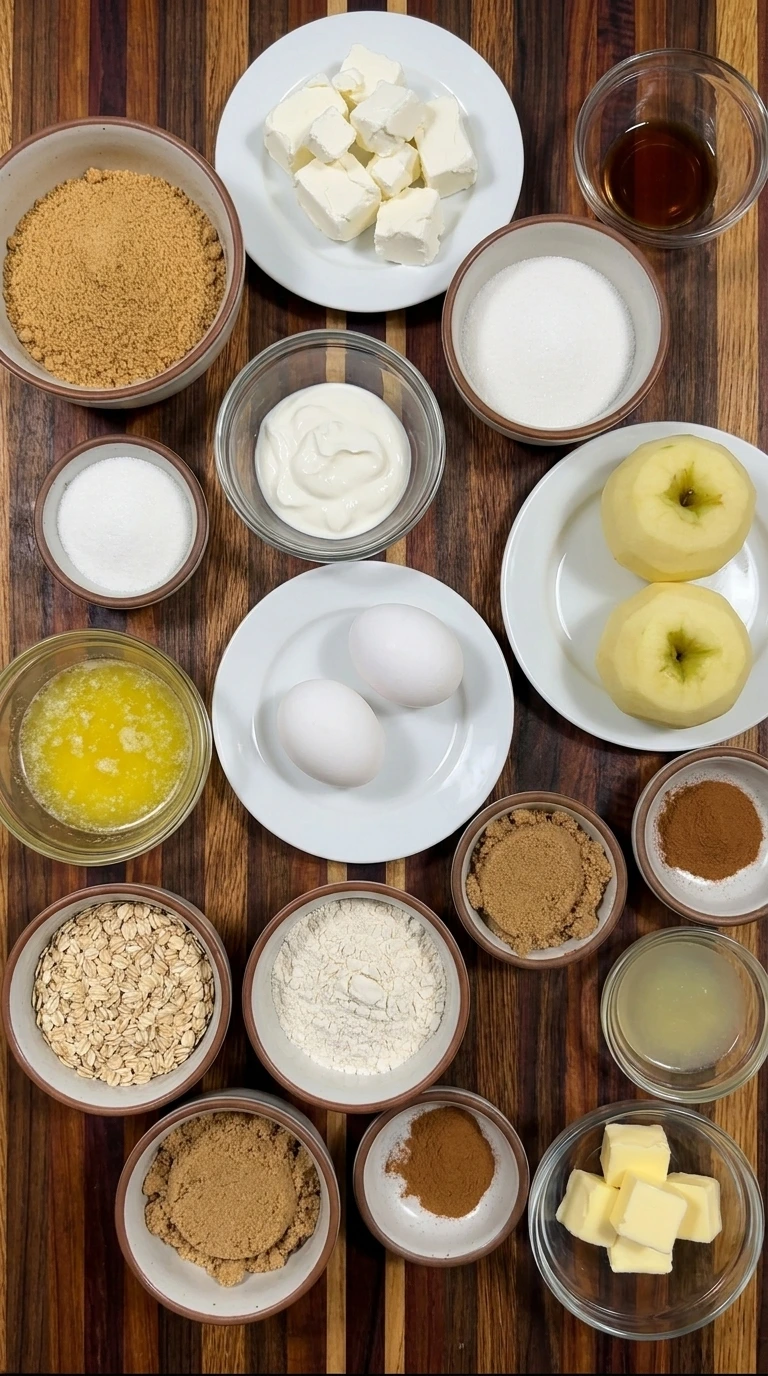
Here is what I use for this recipe :
- Graham cracker crumbs: Forms the sweet crumbly base that supports each mini cheesecake.
- Granulated sugar for crust: Sweetens the graham crust and helps the crumbs hold together after baking.
- Unsalted butter for crust: Moistens the graham crumbs so they press into firm but tender crusts.
- Cream cheese: Creates the rich creamy body of the cheesecake filling.
- Granulated sugar for filling: Sweetens the cheesecake while helping the filling stay smooth.
- Sour cream: Adds gentle tang and keeps the cheesecake filling soft and creamy.
- Large eggs: Set the cheesecake filling during baking while keeping the texture tender.
- Vanilla extract: Rounds out the cream cheese flavor with warm aromatic sweetness.
- Small apples: Provide tender fruit pieces that soften into the cinnamon apple layer.
- Light brown sugar for apples: Coats the apples with caramel like sweetness as they bake.
- Ground cinnamon for apples: Gives the apple layer its classic warm spiced flavor.
- Lemon juice: Brightens the apples and balances the sweetness of the dessert.
- Old fashioned rolled oats: Adds hearty texture and crisp edges to the crumble topping.
- All purpose flour: Provides structure so the crisp topping forms tender crumbly clusters.
- Light brown sugar for topping: Sweetens the oat crumble and encourages a lightly caramelized finish.
- Ground cinnamon for topping: Adds another layer of warm spice to the crisp topping.
- Unsalted butter for topping: Binds the oat mixture into irregular buttery crumbs that brown during baking.
Tools I Use :
- 12 cup muffin tin: Holds exactly 12 individual cheesecakes and supports their shape while baking.
- Paper muffin liners: Make the chilled cheesecakes easier to lift out while keeping the sides neat.
- Large mixing bowl: Provides enough space to blend the cream cheese filling until smooth.
- Medium mixing bowls: Keep the crust mixture and apple mixture and crisp topping separate before assembly.
- Electric hand mixer: Blends the softened cream cheese with sugar and wet ingredients into a smooth filling.
- Chef knife: Cuts the peeled apples into small pieces that soften evenly during baking.
- Cutting board: Provides a stable area for dicing the apples into consistent small pieces.
- Measuring cups and spoons: Measure the crust and filling and apple layer and crumble ingredients accurately.
- Cooling rack: Lets the baked cheesecakes cool evenly before they are transferred to the refrigerator.
Instructions
Step 1: Mix the graham crust
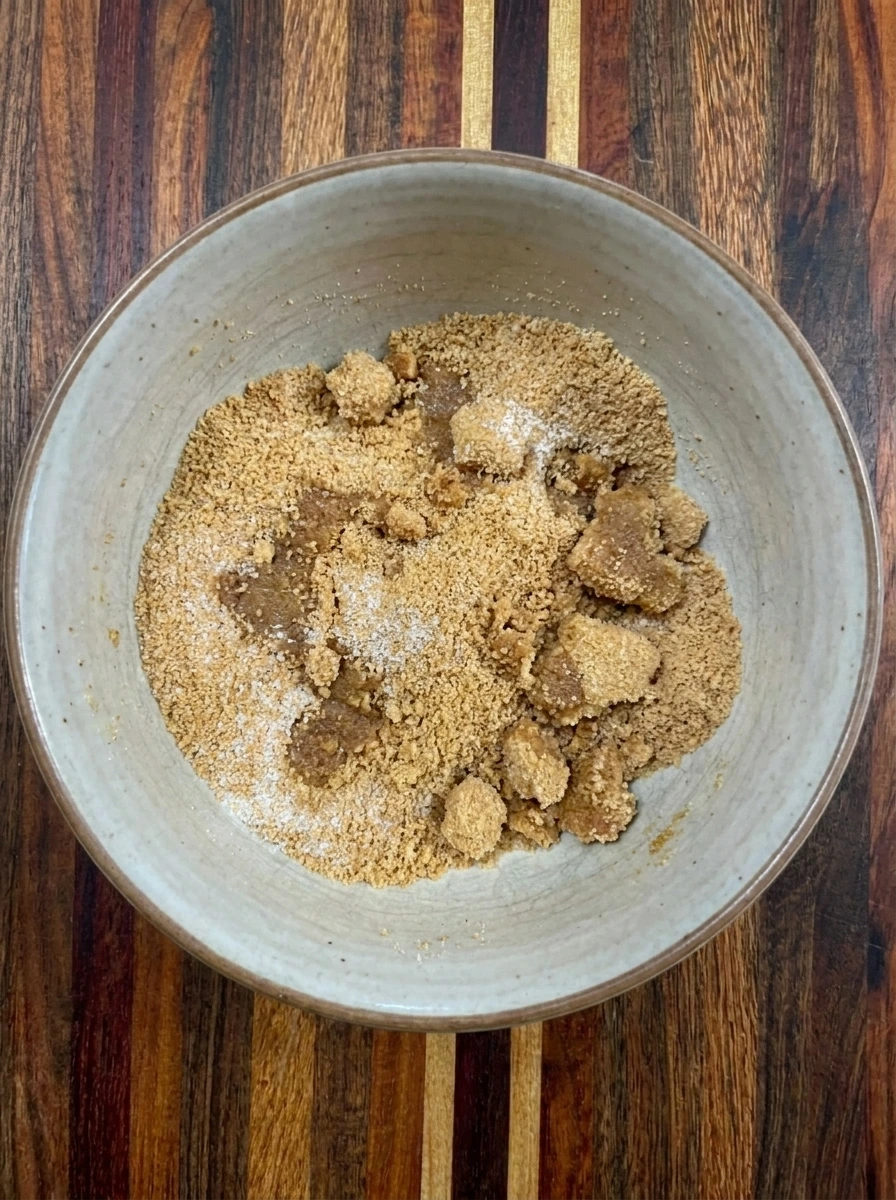
Combine the graham cracker crumbs with the crust sugar and melted butter until the dry crumbs become evenly moistened and small irregular clumps begin to form. The mixture should look sandy yet cohesive with darker buttery patches throughout so it can hold together once pressed.
Tip: The crumbs are ready when a small handful keeps its shape after a gentle squeeze.
Step 2: Press the crusts into 12 cups
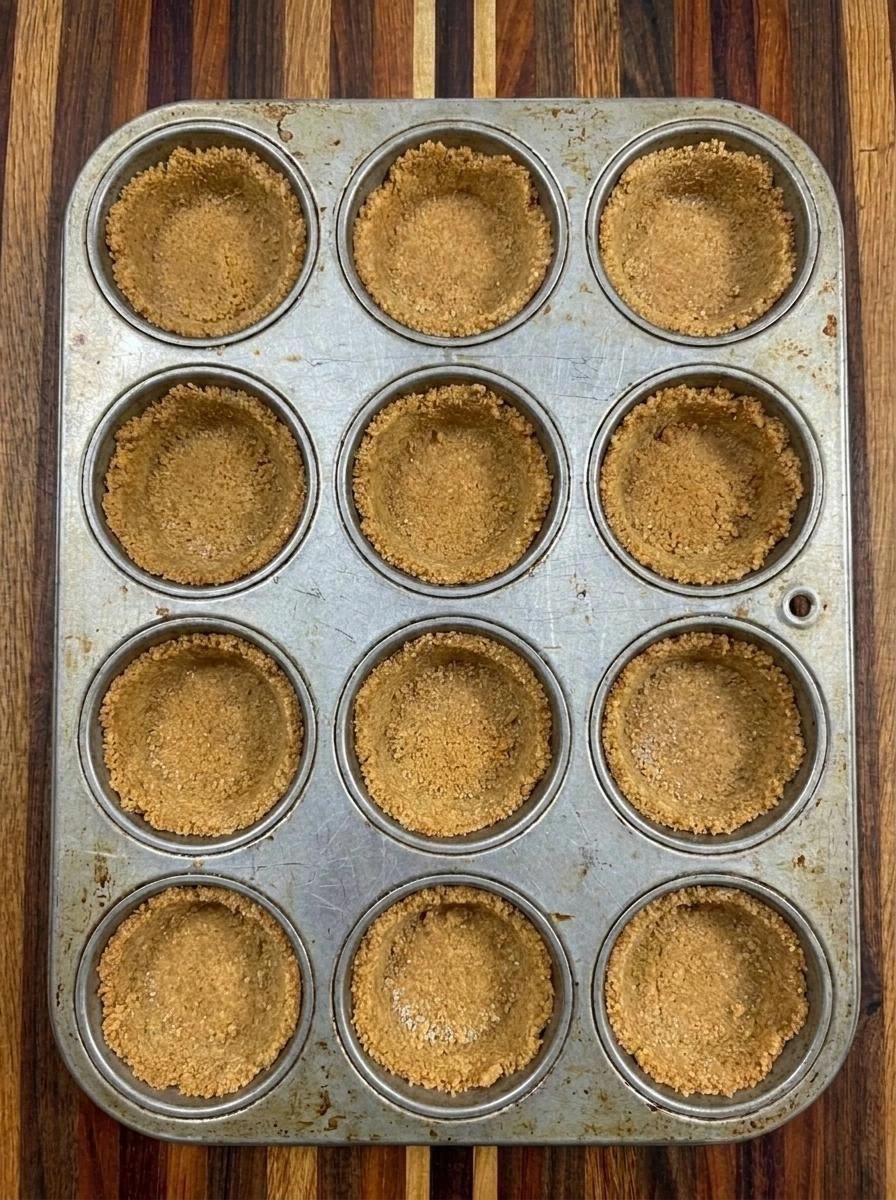
Divide the moistened crumbs among exactly 12 lined muffin cups then press each portion into a compact base with slightly uneven edges and natural differences in thickness. The loose crumb mixture now becomes 12 separate crust rounds with a firmer structure and small rough patches around the edges.
Tip: Keep the crust layer compact but not overly compressed so it stays tender after chilling.
Step 3: Blend the cheesecake filling
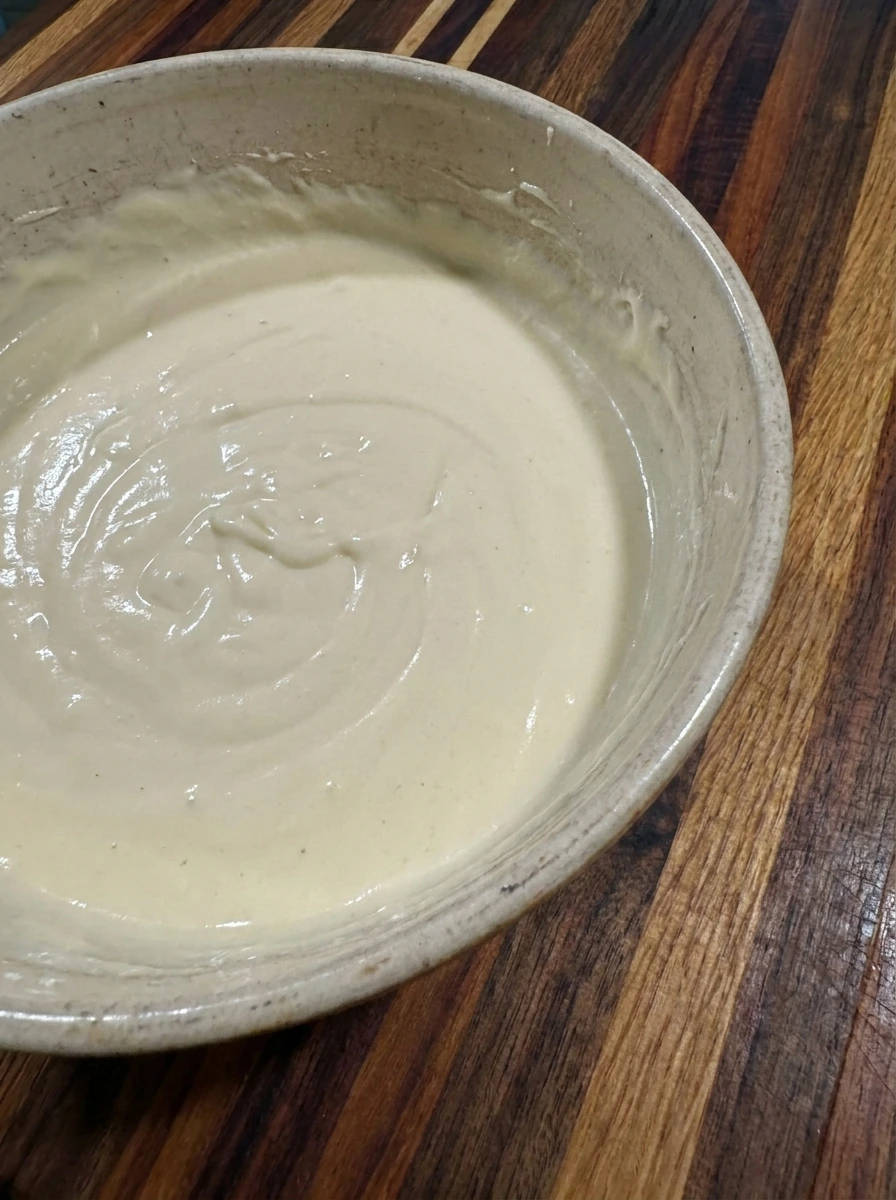
Blend the softened cream cheese with the filling sugar and sour cream then work in the two eggs and vanilla until the mixture changes from thick cream cheese chunks into a smooth pale batter. The finished filling should look creamy and pourable with a few soft ripples rather than whipped or airy texture.
Tip: Blend only until smooth after the eggs go in so the filling stays creamy instead of becoming overly airy.
Step 4: Coat the diced apples with cinnamon

Dice exactly two peeled small apples into small irregular pieces then combine them with the apple brown sugar and apple cinnamon and lemon juice until the dry fruit becomes lightly glossy and speckled with spice. The apple pieces should stay distinct while the sugar begins clinging to their cut surfaces and a little syrup gathers between the pieces.
Tip: Keep the apple pieces small so they soften during baking without disappearing into the cheesecake layer.
Step 5: Rub together the oat crisp topping
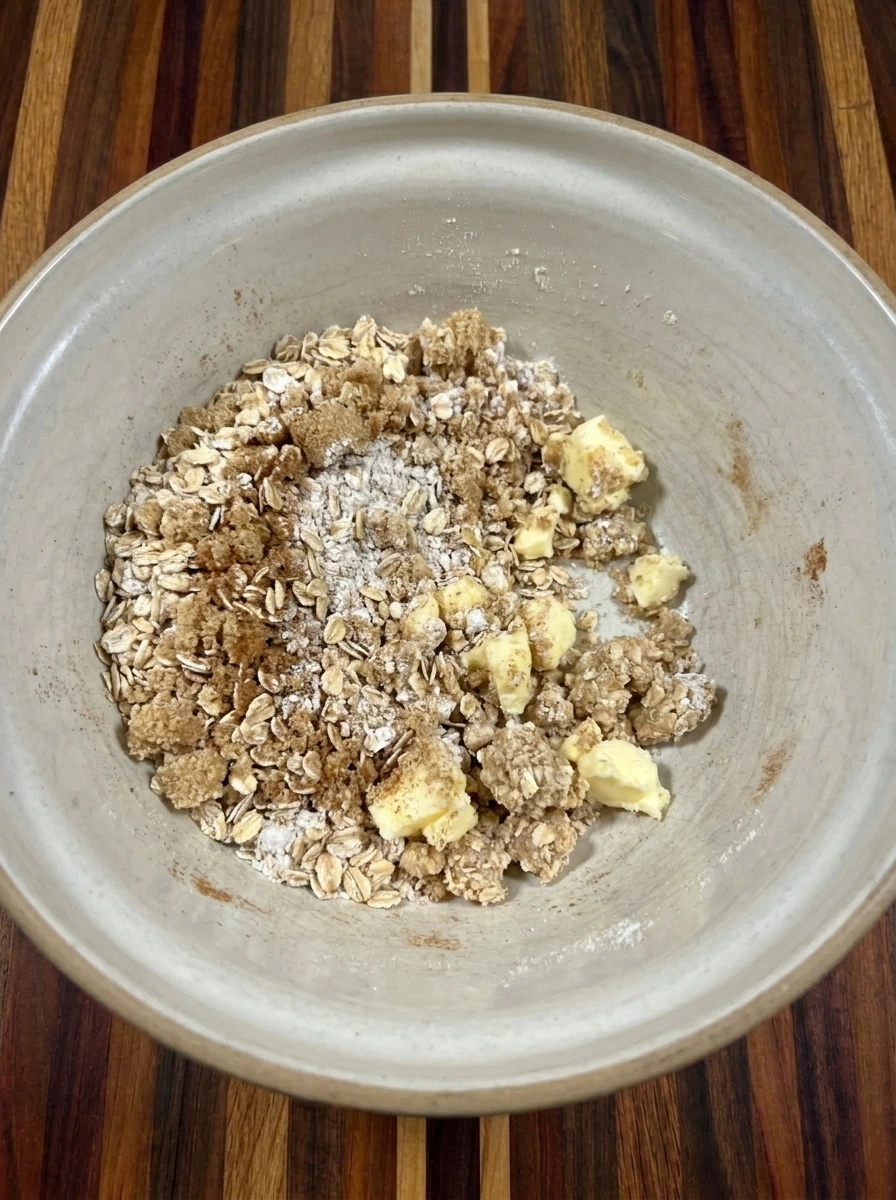
Combine the rolled oats with flour and topping brown sugar and topping cinnamon then work in the cold butter until the dry mixture changes into uneven crumbs and small chunky clusters. The topping should remain irregular with some loose oats and some buttery clumps because those different sizes create a homemade crisp texture.
Tip: Stop once mixed clumps form because a perfectly uniform topping will bake with less rustic texture.
Step 6: Layer the filling apples and crumble
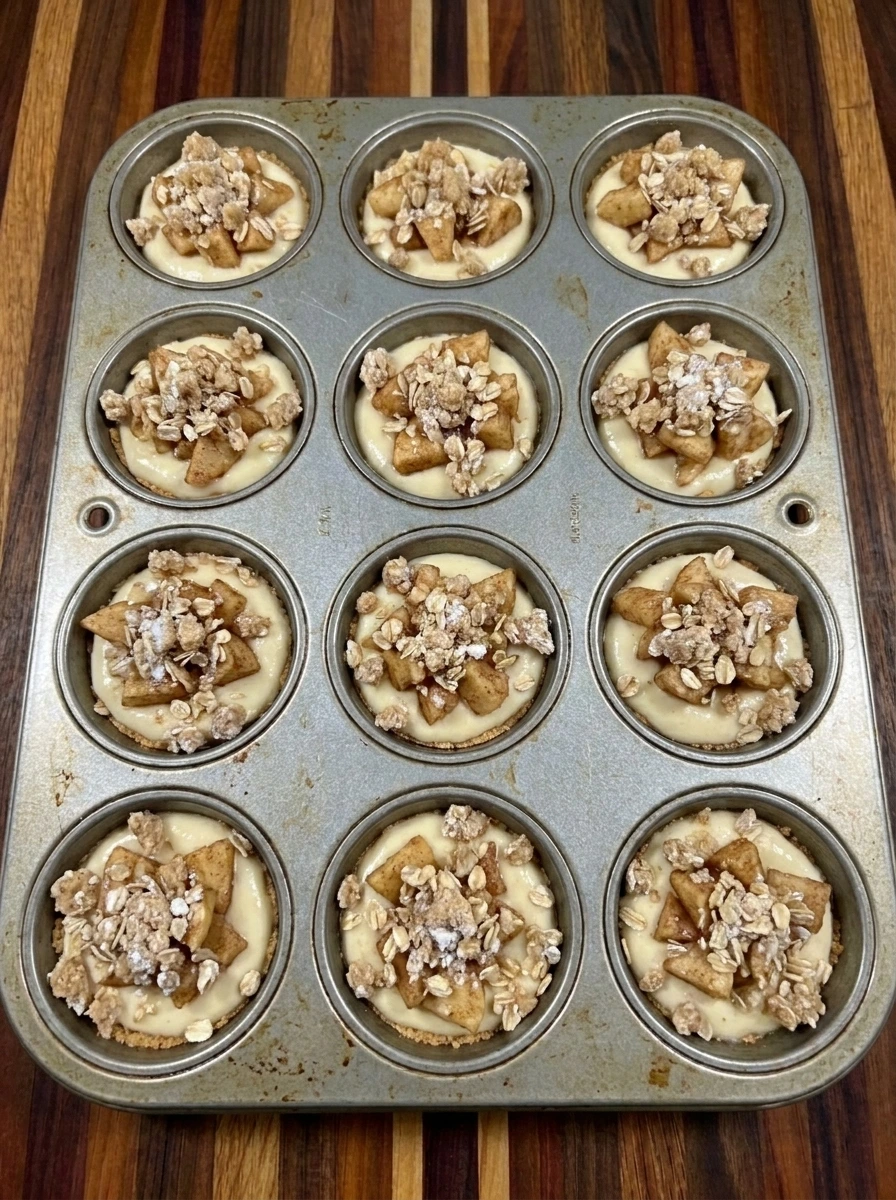
Pour the cheesecake batter over all 12 crusts then scatter the cinnamon apples across the tops and finish with irregular pinches of oat crumble so every cup gains visible creamy and fruity and crumbly layers. The 12 crust bases now become assembled mini cheesecakes with varied apple placement and uneven crumble coverage while some pale filling remains visible around the edges.
Tip: Leave small patches of filling visible so the topping does not completely cover the cheesecake surface.
Step 7: Bake until set and lightly golden
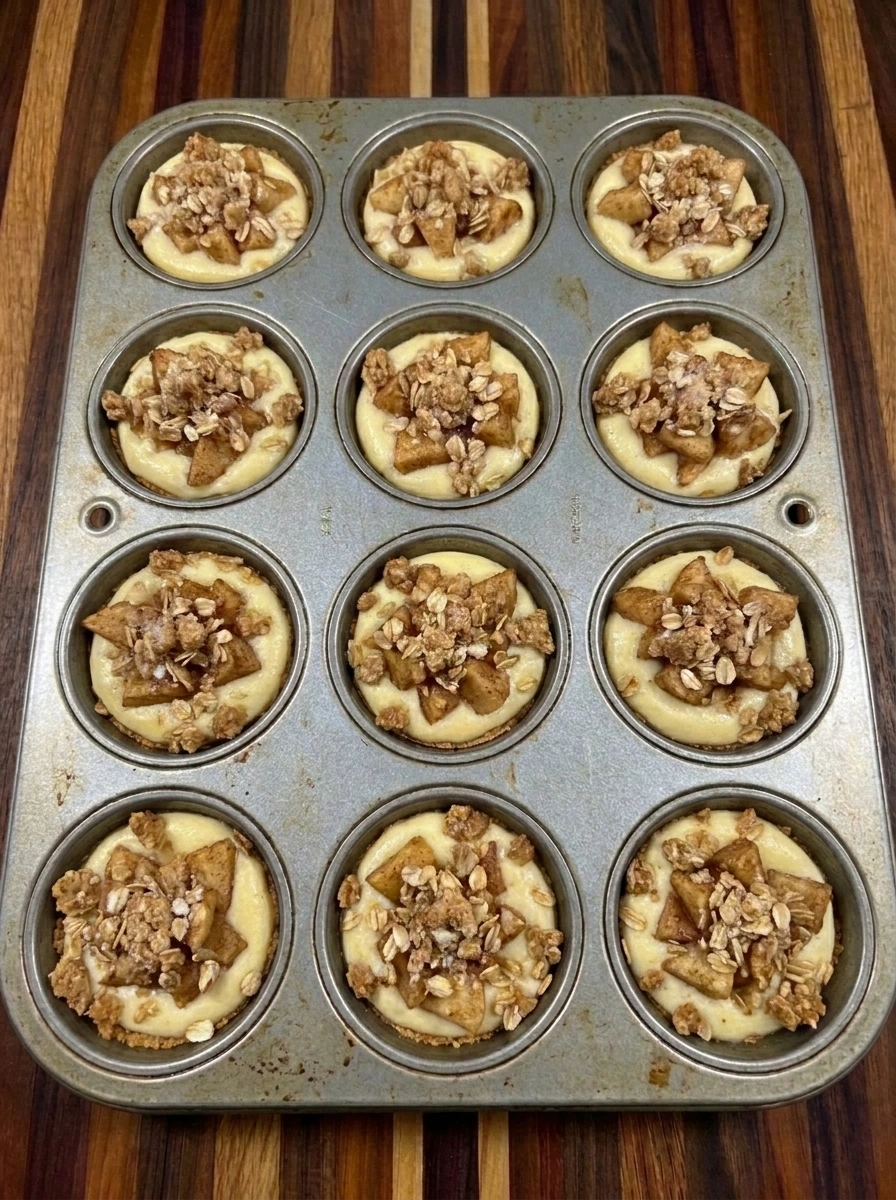
Bake the assembled cheesecakes until the pale filling becomes softly set around the edges while the centers retain a slight softness and the apple pieces look tender and darker. The oat topping should change from pale crumbs into lightly golden clusters with uneven browning while the cheesecake surfaces rise slightly and settle with natural homemade variation.
Tip: Remove them when the centers still have a slight wobble because they continue setting as they cool.
Step 8: Plate one cheesecake and reveal the layers
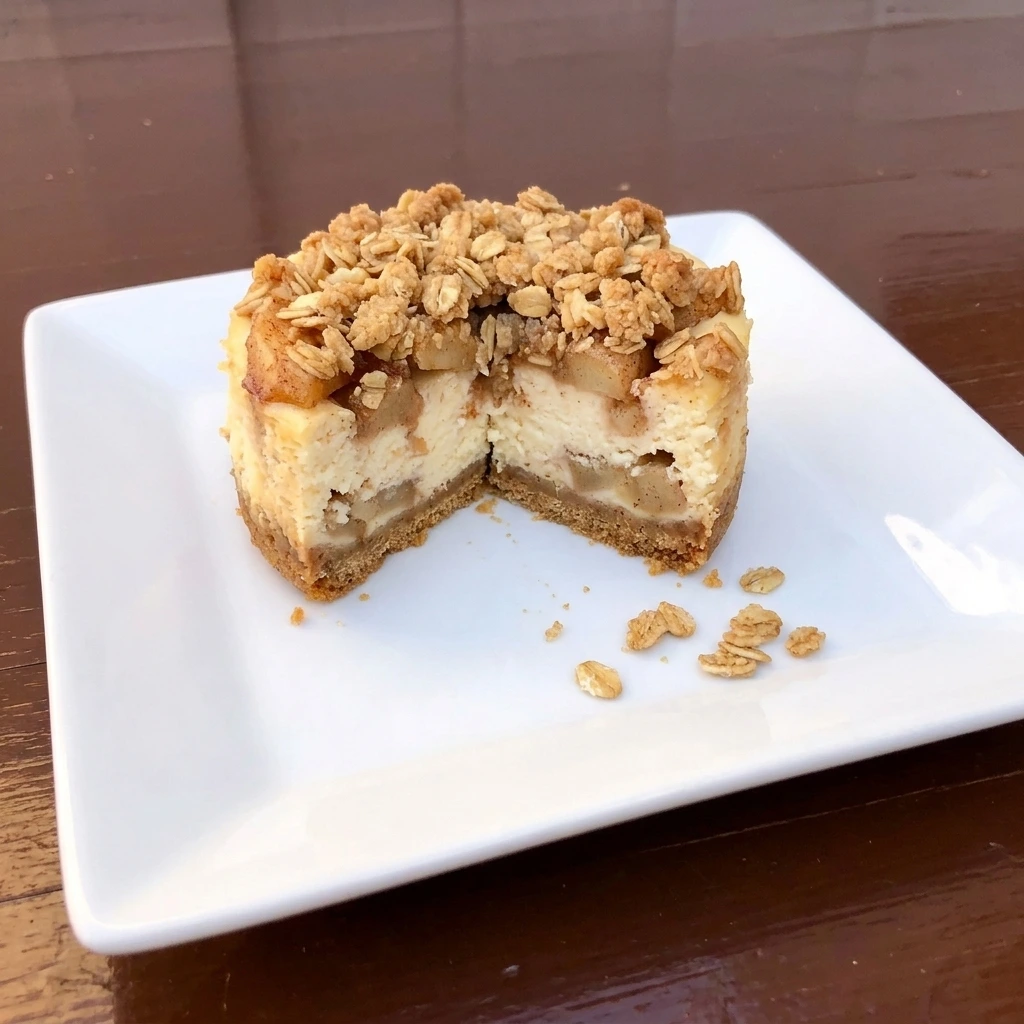
Chill the baked cheesecakes until firm then transfer a single portion to a white plate and cut it open so the graham base and creamy center and tender cinnamon apples and crisp topping are clearly visible. The served cheesecake should look homemade with a slightly uneven cut and a few loose oat crumbs beside the portion while the filling holds its soft creamy structure.
Tip: A fully chilled cheesecake cuts more cleanly while still showing the soft creamy texture inside.
Pro Tips
- Use fully softened cream cheese so the filling blends smoothly and avoids small lumps that can remain after baking.
- Dice the apples quite small so they soften within the short bake time and stay balanced with each creamy cheesecake bite.
- Press the crust firmly but not rock hard so it stays together while still giving each chilled cheesecake a tender base.
- Chill the cheesecakes completely before serving because the filling becomes creamier and the layers hold together much better.
Storage Instructions
Let the mini cheesecakes cool fully before refrigeration because trapped warmth can create moisture and soften the crisp topping. Store the chilled cheesecakes in a covered container in the refrigerator for up to four days and keep them in a single layer when possible so the topping stays intact.
For longer storage freeze the fully chilled cheesecakes in a single layer until firm then transfer them to a freezer safe container and keep them frozen for up to two months. Thaw frozen cheesecakes overnight in the refrigerator then let them sit for about ten minutes before serving so the creamy filling softens slightly while the crust remains structured.
Frequently Asked Questions
Yes they can be baked one day ahead and chilled overnight so the filling sets well and serving is easy.
Firm apples such as Honeycrisp or Granny Smith work well because they soften nicely without turning mushy.
Yes freeze them after chilling and wrap each one well then thaw overnight in the refrigerator before serving.
The edges should look set while the centers still have a slight wobble and the oat topping should look lightly golden.
See You in the Kitchen
These Apple Crisp Mini Cheesecakes are a great way to satisfy your cheesecake and apple crisp cravings without making one large dessert.
I typically make Banana Cheesecake Bars when I want another creamy make ahead treat and I keep Banana Cream Pie in mind for family gatherings that way all of my dessert cravings have an easy answer.
Even my kids love these!
Print
Apple Crisp Mini Cheesecakes
- Total Time: 50 minutes
- Yield: 12 servings
Description
Apple Crisp Mini Cheesecakes are an easy dessert with creamy cheesecake filling and cinnamon apples under a buttery oat crisp topping while these quick little treats are simple to portion and make one of the best ideas for a holiday table or brunch spread or potluck or party and they also fit a healthy balanced lifestyle when enjoyed in sensible portions while making a cozy meal prep treat that can be chilled ahead for stress free entertaining at home.
Ingredients
- 1 1/4 cups Graham cracker crumbs
- 2 tablespoons Granulated sugar for crust
- 4 tablespoons melted Unsalted butter for crust
- 16 ounces softened Cream cheese
- 1/2 cup Granulated sugar for filling
- 1/3 cup Sour cream
- 2 Large eggs
- 1 teaspoon Vanilla extract
- 2 peeled and finely diced Small apples
- 2 tablespoons Light brown sugar for apples
- 1 teaspoon Ground cinnamon for apples
- 1 teaspoon Lemon juice
- 1/3 cup Old fashioned rolled oats
- 1/4 cup All purpose flour
- 1/4 cup Light brown sugar for topping
- 1/2 teaspoon Ground cinnamon for topping
- 3 tablespoons cold and cubed Unsalted butter for topping
Instructions
- Combine the graham cracker crumbs with the crust sugar and melted butter until the dry crumbs become evenly moistened and small irregular clumps begin to form.
The mixture should look sandy yet cohesive with darker buttery patches throughout so it can hold together once pressed.
- Divide the moistened crumbs among exactly 12 lined muffin cups then press each portion into a compact base with slightly uneven edges and natural differences in thickness.
The loose crumb mixture now becomes 12 separate crust rounds with a firmer structure and small rough patches around the edges.
- Blend the softened cream cheese with the filling sugar and sour cream then work in the two eggs and vanilla until the mixture changes from thick cream cheese chunks into a smooth pale batter.
The finished filling should look creamy and pourable with a few soft ripples rather than whipped or airy texture.
- Dice exactly two peeled small apples into small irregular pieces then combine them with the apple brown sugar and apple cinnamon and lemon juice until the dry fruit becomes lightly glossy and speckled with spice.
The apple pieces should stay distinct while the sugar begins clinging to their cut surfaces and a little syrup gathers between the pieces.
- Combine the rolled oats with flour and topping brown sugar and topping cinnamon then work in the cold butter until the dry mixture changes into uneven crumbs and small chunky clusters.
The topping should remain irregular with some loose oats and some buttery clumps because those different sizes create a homemade crisp texture.
- Pour the cheesecake batter over all 12 crusts then scatter the cinnamon apples across the tops and finish with irregular pinches of oat crumble so every cup gains visible creamy and fruity and crumbly layers.
The 12 crust bases now become assembled mini cheesecakes with varied apple placement and uneven crumble coverage while some pale filling remains visible around the edges.
- Bake the assembled cheesecakes until the pale filling becomes softly set around the edges while the centers retain a slight softness and the apple pieces look tender and darker.
The oat topping should change from pale crumbs into lightly golden clusters with uneven browning while the cheesecake surfaces rise slightly and settle with natural homemade variation.
- Chill the baked cheesecakes until firm then transfer a single portion to a white plate and cut it open so the graham base and creamy center and tender cinnamon apples and crisp topping are clearly visible.
The served cheesecake should look homemade with a slightly uneven cut and a few loose oat crumbs beside the portion while the filling holds its soft creamy structure.
Notes
Pro Tips:
- Use fully softened cream cheese so the filling blends smoothly and avoids small lumps that can remain after baking.
- Dice the apples quite small so they soften within the short bake time and stay balanced with each creamy cheesecake bite.
- Press the crust firmly but not rock hard so it stays together while still giving each chilled cheesecake a tender base.
- Chill the cheesecakes completely before serving because the filling becomes creamier and the layers hold together much better.
Storage: Let the mini cheesecakes cool fully before refrigeration because trapped warmth can create moisture and soften the crisp topping.
Store the chilled cheesecakes in a covered container in the refrigerator for up to four days and keep them in a single layer when possible so the topping stays intact.
For longer storage freeze the fully chilled cheesecakes in a single layer until firm then transfer them to a freezer safe container and keep them frozen for up to two months.
Thaw frozen cheesecakes overnight in the refrigerator then let them sit for about ten minutes before serving so the creamy filling softens slightly while the crust remains structured.
- Prep Time: 25 minutes
- Cook Time: 25 minutes
- Category: Dessert
- Cuisine: American