

These Caramel Apple Bars are my fall take on one of the best comfort desserts. They have layers of buttery oat crumble and tender cinnamon apples with plenty of sweet caramel drizzled over the top.
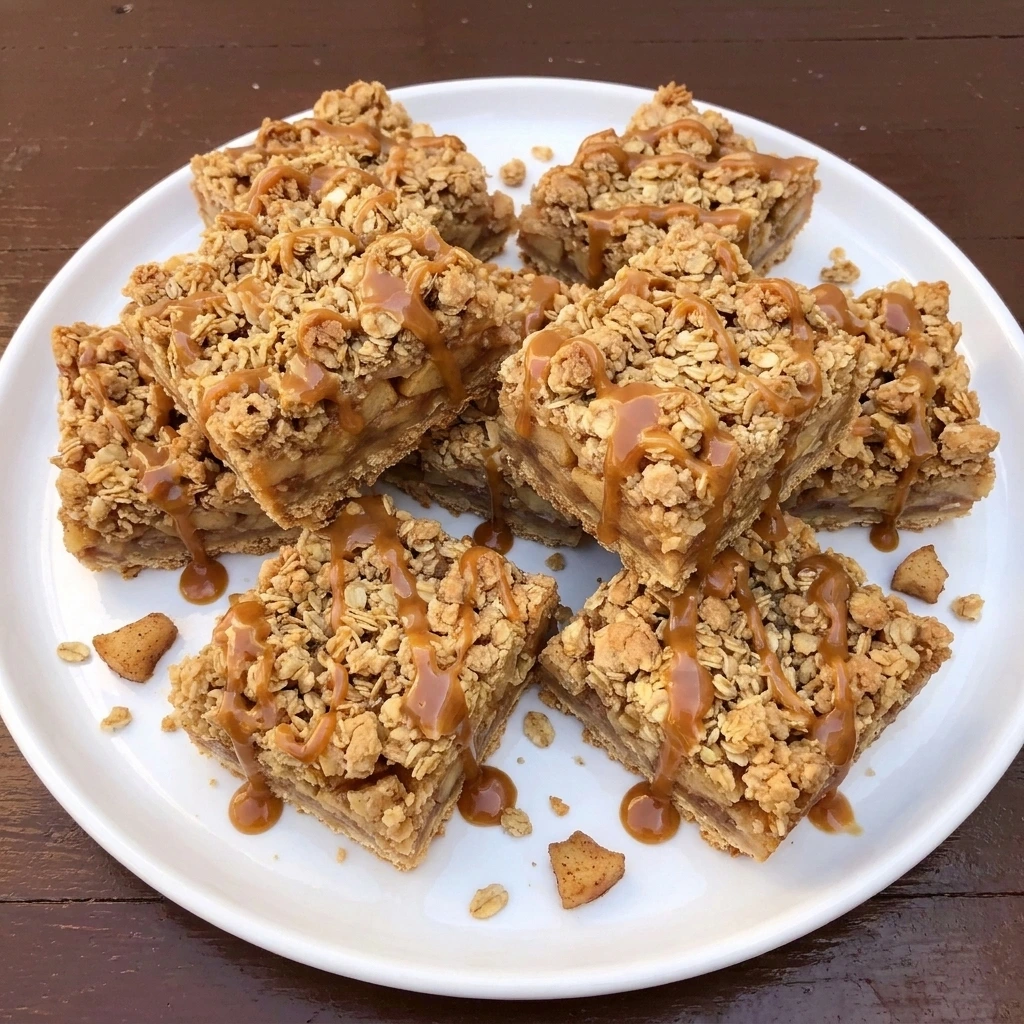
My caramel apple bars recipe starts by tossing fresh apple pieces with cinnamon and sugar. The juicy apples are then layered over a buttery oat crust until they bake into a soft and delicious filling. The other key to these apple bars is the crumble topping. Not only does it have oats but it also has brown sugar and melted butter for that golden homemade texture. Every component of these Caramel Apple Bars is flavorful on its own and that means the whole thing is ridiculously good.
I especially love making these bars when the weather turns cooler and everyone starts asking for cozy homemade desserts. They’re easy to slice and share with friends and family while the combination of warm apples and buttery crumble always feels special. If you enjoy preparing festive desserts for gatherings then you should also try my Peppermint Brownie Cheesecake Bars for another delicious holiday treat.
Ingredients
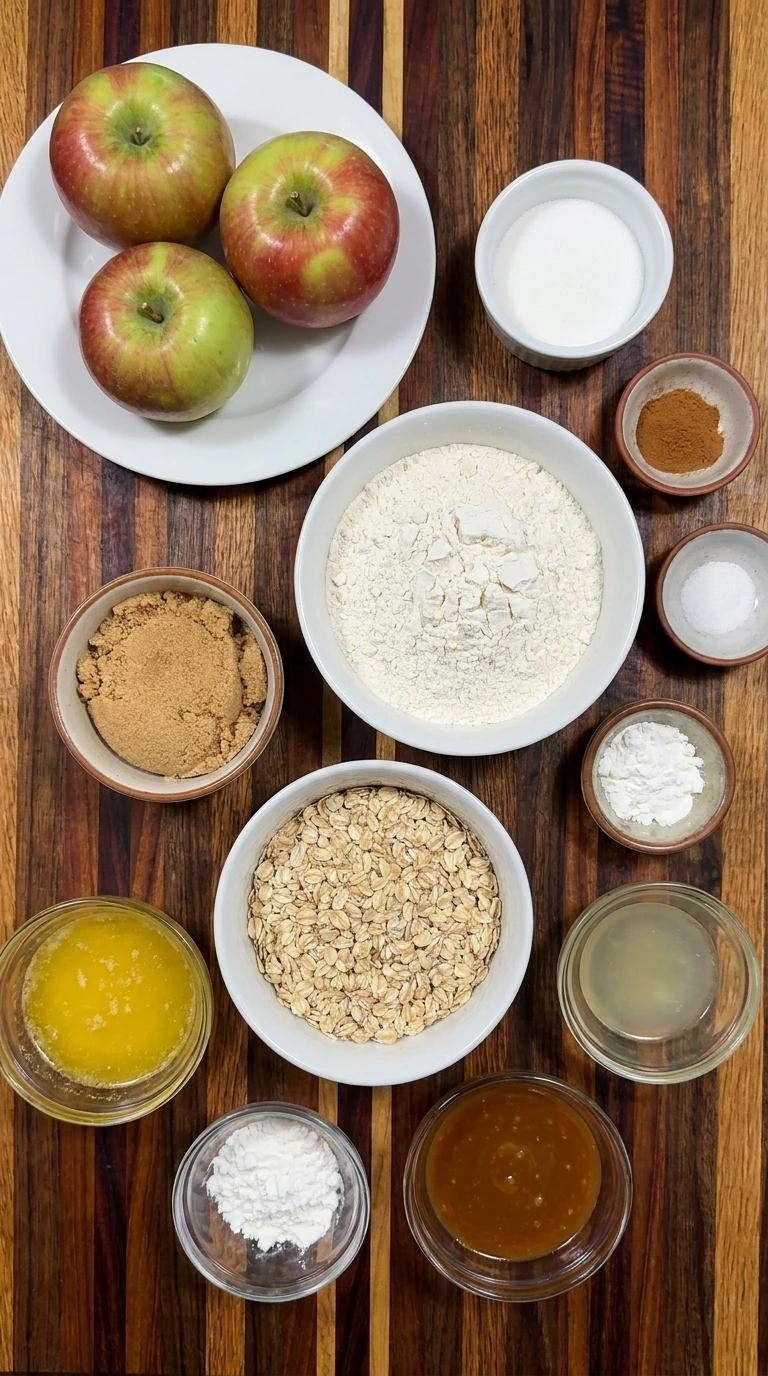
Here is what I use for this recipe :
- All-purpose flour: Provides the structure for the buttery crust and crumb topping while helping both layers hold together after baking.
- Old-fashioned rolled oats: Add a rustic chewy texture to the crumb mixture and create a slightly crisp golden topping.
- Unsalted butter: Melted butter binds the flour and oats together while giving the crust a rich flavor and tender crumb.
- Light brown sugar: Sweetens the oat mixture while adding a mild molasses flavor that complements the caramel and baked apples.
- Salt: Balances the sweetness of the brown sugar and caramel while enhancing the buttery flavor of the crust.
- Fresh apples: Create the tender fruit filling with natural sweetness and gentle tartness while retaining enough texture after baking.
- Granulated sugar: Helps sweeten the apple filling and encourages the fruit to soften as its natural juices release during baking.
- Ground cinnamon: Adds a warm fall spice flavor that complements the fresh apples and sweet caramel.
- Fresh lemon juice: Adds brightness to balance the sweetness and helps slow browning of the chopped apples before baking.
- Cornstarch: Thickens the released apple juices during baking so the filling stays soft without making the crust excessively soggy.
- Thick caramel sauce: Creates the signature sweet caramel finish and adds a glossy layer over the golden crumble and tender apple filling.
Tools I Use :
- 8-inch square baking pan: Holds the layered oat crust and apple filling while allowing the bars to bake into a thick sliceable dessert.
- Parchment paper: Lines the baking pan to reduce sticking and makes lifting the finished dessert easier after cooling.
- Large mixing bowl: Provides enough space to combine the flour and oats with brown sugar and melted butter into a loose crumble.
- Medium mixing bowl: Holds the chopped apples while they are coated with cinnamon and sugar and lemon juice and cornstarch.
- Measuring cups and spoons: Help portion the dry ingredients and liquids accurately for a balanced crust and fruit filling.
- Kitchen scale: Provides accurate measurements for the butter and apples when more consistent baking results are desired.
- Sharp knife: Cuts the apples into small pieces and slices the cooled dessert into individual bars.
- Cutting board: Provides a stable area for coring and chopping the fresh apples.
- Mixing spoon or spatula: Combines the crumble ingredients and gently tosses the apples without crushing the fruit.
- Small microwave-safe bowl or saucepan: Melts the butter gently before it is incorporated into the dry crumble ingredients.
- Wire cooling rack: Supports the baking pan while the finished bars cool and their fruit filling becomes firm enough to slice.
- Oven: Bakes the layered dessert until the oat topping becomes golden and the apple filling softens and thickens.
Instructions
Step 1: Dice and coat the fresh apples
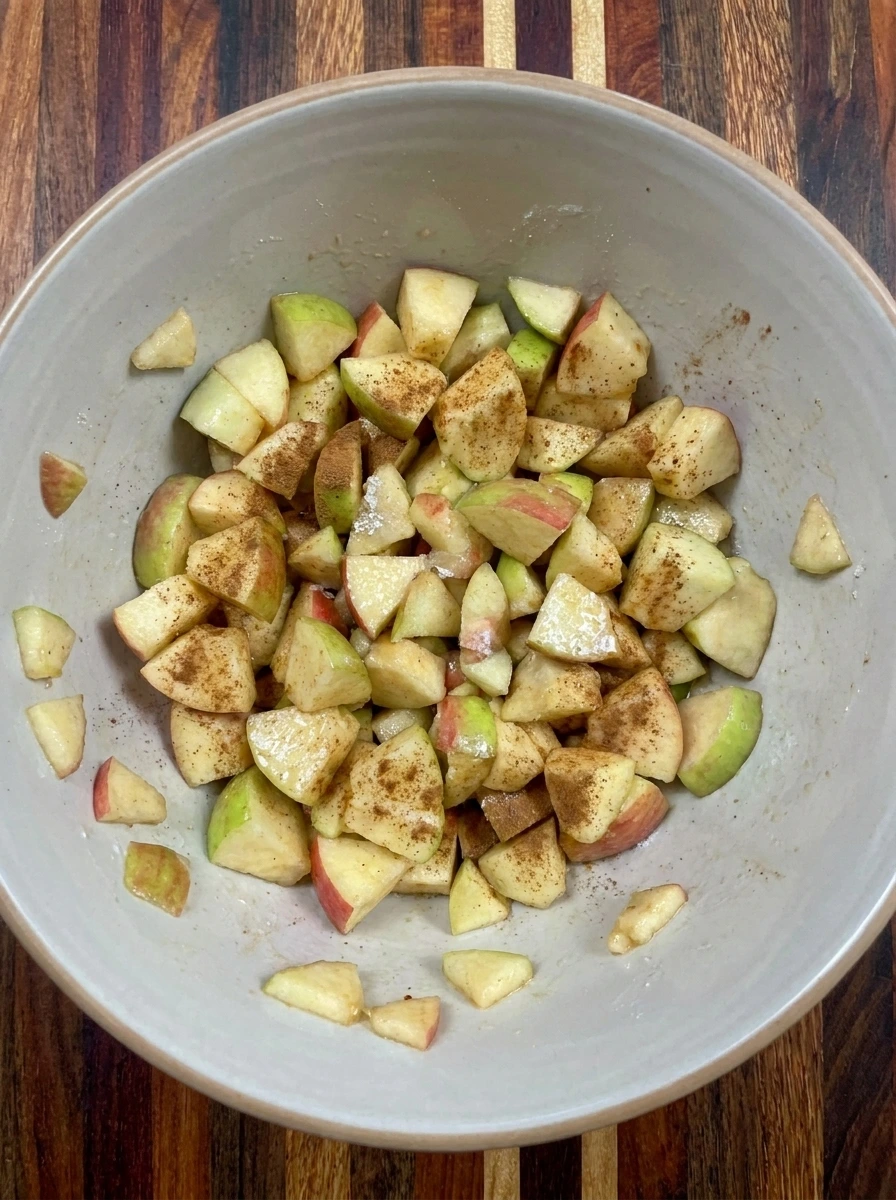
Core the 3 medium apples and cut them into small pieces approximately 1/2 inch wide. Keep the pieces relatively similar in size while allowing a few irregular shapes for a natural homemade texture. Place the chopped apples into a medium mixing bowl. Add the granulated sugar along with the ground cinnamon and lemon juice. Sprinkle the cornstarch over the apples and gently toss everything together until the fruit has a light coating. The apple pieces should look slightly glossy with cinnamon distributed across their surfaces. Set the coated apples aside while preparing the oat crumble. The sugar will begin drawing a little moisture from the fruit and the cornstarch will help those juices thicken during baking.
Tip: Choose firm apples such as Granny Smith or Honeycrisp because they soften nicely while keeping enough structure for clean dessert bars.
Step 2: Mix the buttery oat crumble
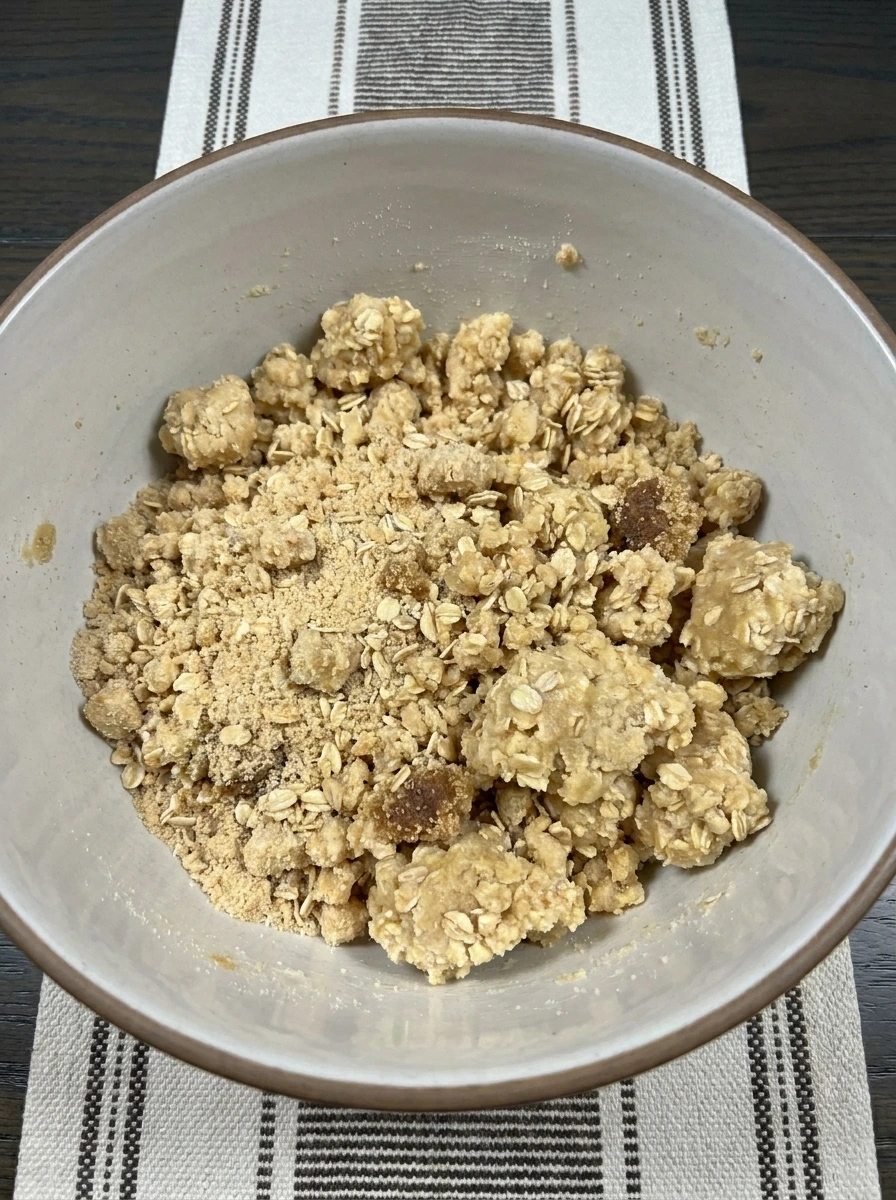
Combine the all-purpose flour with the rolled oats and packed brown sugar in a large mixing bowl. Add the salt and gently stir the dry ingredients together until the brown sugar is distributed throughout the mixture. Pour the melted butter over the dry ingredients and mix until coarse moist crumbs begin to form. The finished mixture should contain a combination of small sandy crumbs and larger soft clusters that hold their shape when gently pressed. Avoid overmixing because the crumble should remain loose rather than becoming a smooth dough. This mixture will create both the sturdy bottom crust and the golden crumb topping.
Tip: Mix the crumble just until moist clusters form because overworking it can create a dense crust instead of a tender buttery texture.
Step 3: Press the oat mixture into the baking pan
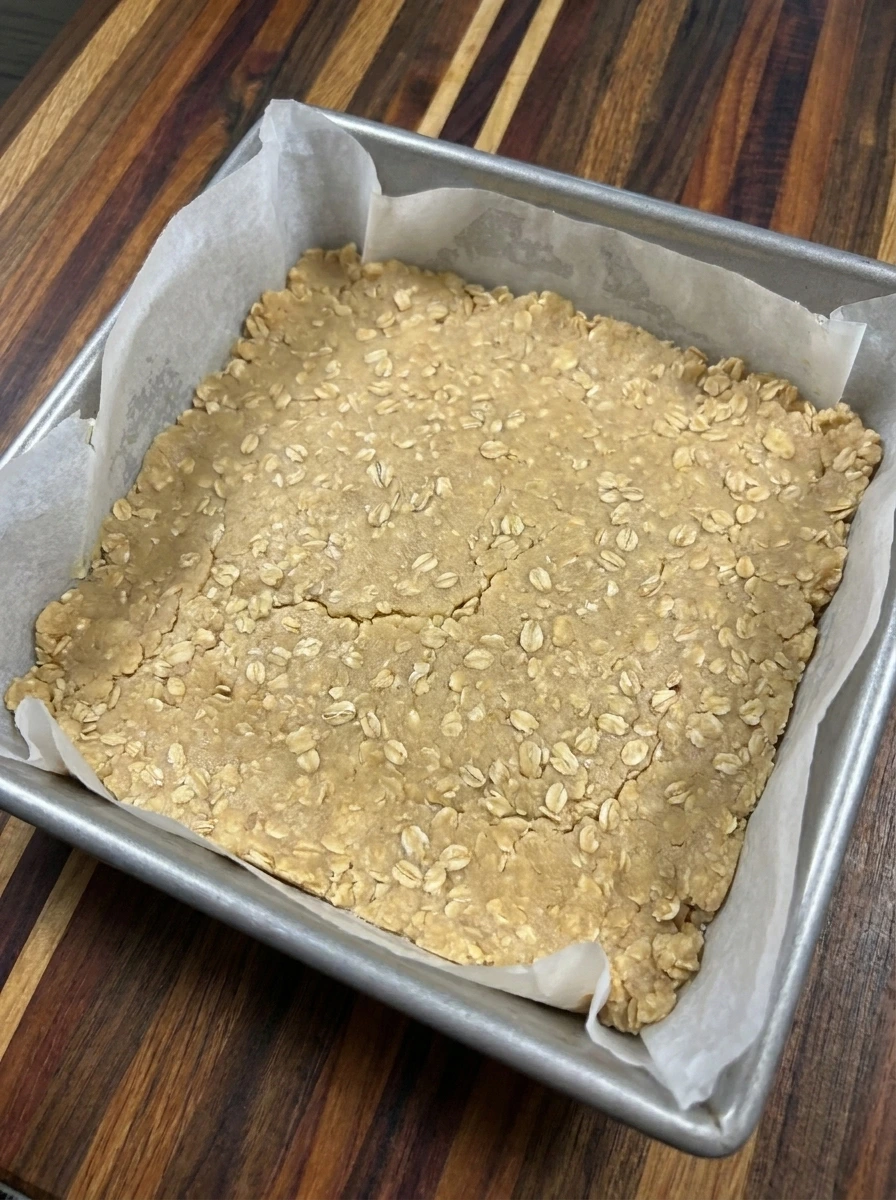
Line an 8-inch square baking pan with parchment paper and leave a little overhang on two sides to make removing the bars easier. Transfer approximately two-thirds of the prepared oat crumble into the lined pan. Spread the mixture across the bottom and press it firmly into an even base. The surface should look compact with visible oats and a few natural variations in thickness near the edges. Keep the remaining one-third of the crumble mixture aside for the topping. The pressed crust will support the tender apple filling and help the bars stay together when sliced.
Tip: Press the bottom crust firmly into the corners so the bars hold their shape while keeping the reserved crumble loose for a crisp topping.
Step 4: Layer the apples and scatter the crumble
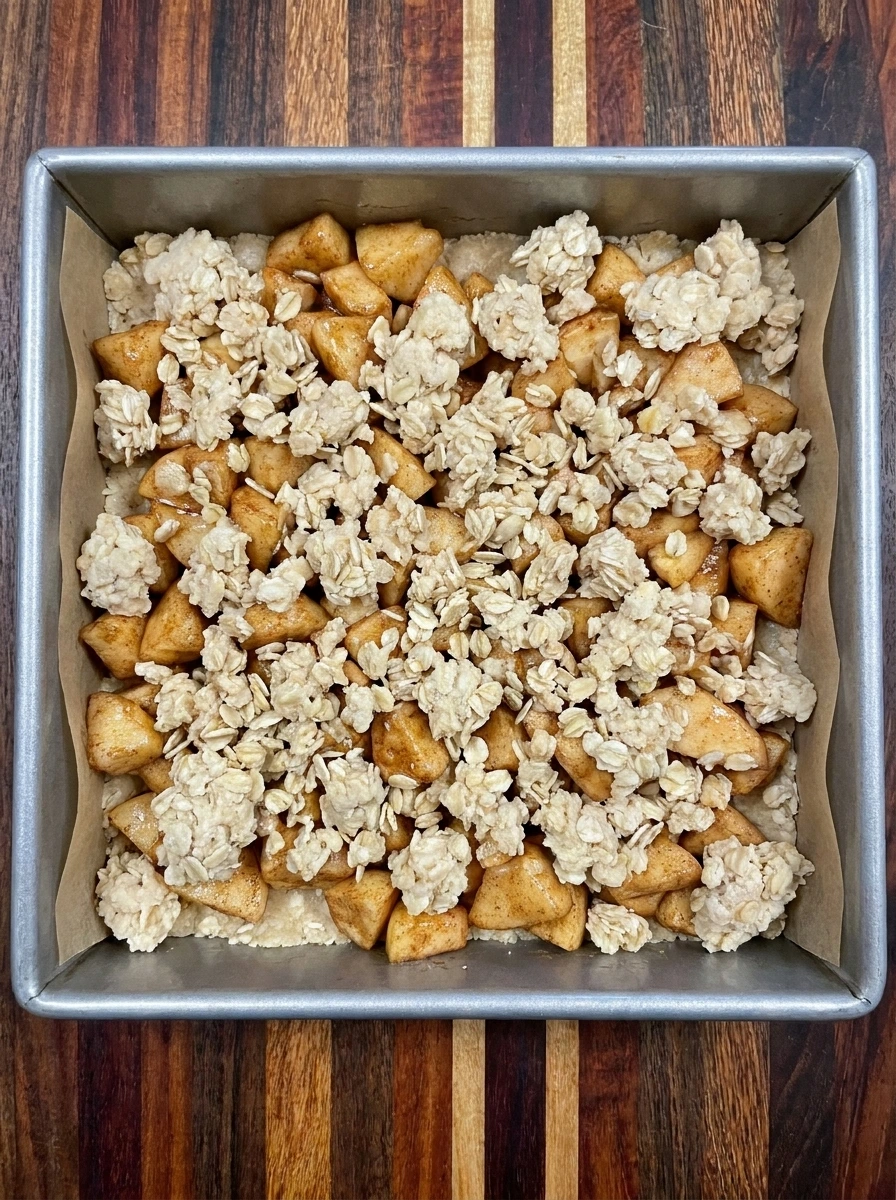
Spoon the prepared cinnamon apple mixture over the pressed oat crust. Spread the apples into a relatively even layer while allowing the fruit pieces to overlap naturally. Include any thickened juices remaining in the bowl. Scatter the reserved one-third of the oat crumble over the apple filling. Leave small spaces between the crumb clusters so some cinnamon-coated apple pieces remain visible underneath. The assembled bars should show a clear bottom crust followed by a generous layer of apples and an uneven crumb topping. The mixture is now ready for baking.
Tip: Leave small gaps in the crumble topping so moisture can escape and the apples can soften without making the bars excessively wet.
Step 5: Bake until the crumble turns golden
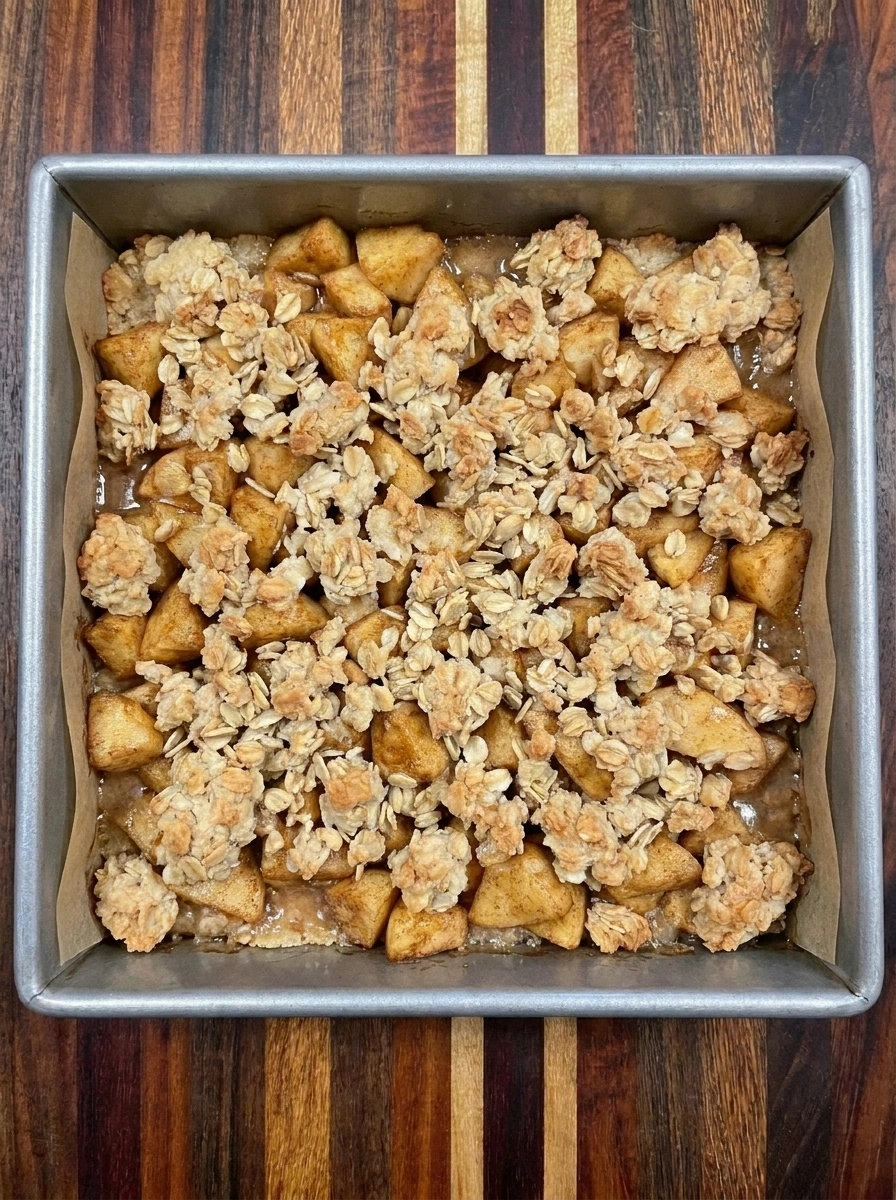
Preheat the oven to 350°F or 175°C. Place the assembled baking pan on the center rack and bake for approximately 35 to 40 minutes until the topping develops a golden-brown color. The apple filling should become tender while small pockets of thickened fruit juices bubble between the crumb clusters. The crumble will develop slightly darker edges and the exposed apple pieces should appear soft and glossy. Remove the baked bars from the oven and let them cool in the pan until no longer hot. The filling will begin setting as the dessert cools and the crust will become firmer.
Tip: Look for bubbling apple juices and lightly browned oat clusters rather than relying only on the timer because oven temperatures can vary.
Step 6: Drizzle caramel over the cooled bars
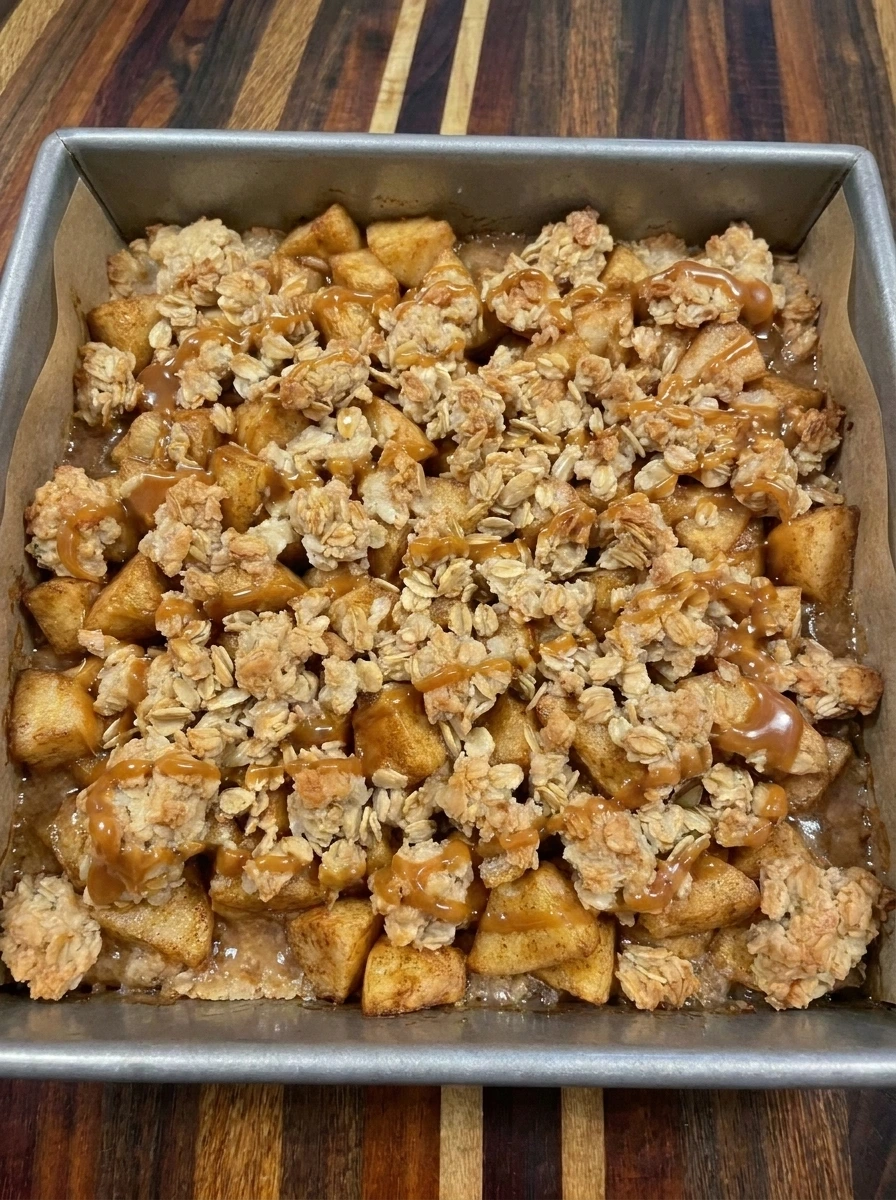
Allow the baked apple bars to cool until the filling is set and the pan is comfortable to handle. For cleaner slices let them cool completely before adding the final topping. Drizzle the thick caramel sauce over the baked crumble in loose overlapping ribbons. Move the drizzle across the surface in different directions so the caramel settles naturally into the uneven oat clusters. Let the caramel settle briefly before lifting the dessert from the pan using the parchment overhang. The finished slab should reveal a golden crust and tender apple layer beneath the glossy caramel topping.
Tip: Use thick caramel sauce instead of a very thin syrup so the drizzle stays visible on the crumble rather than soaking into the crust.
Step 7: Slice and serve a caramel apple bar
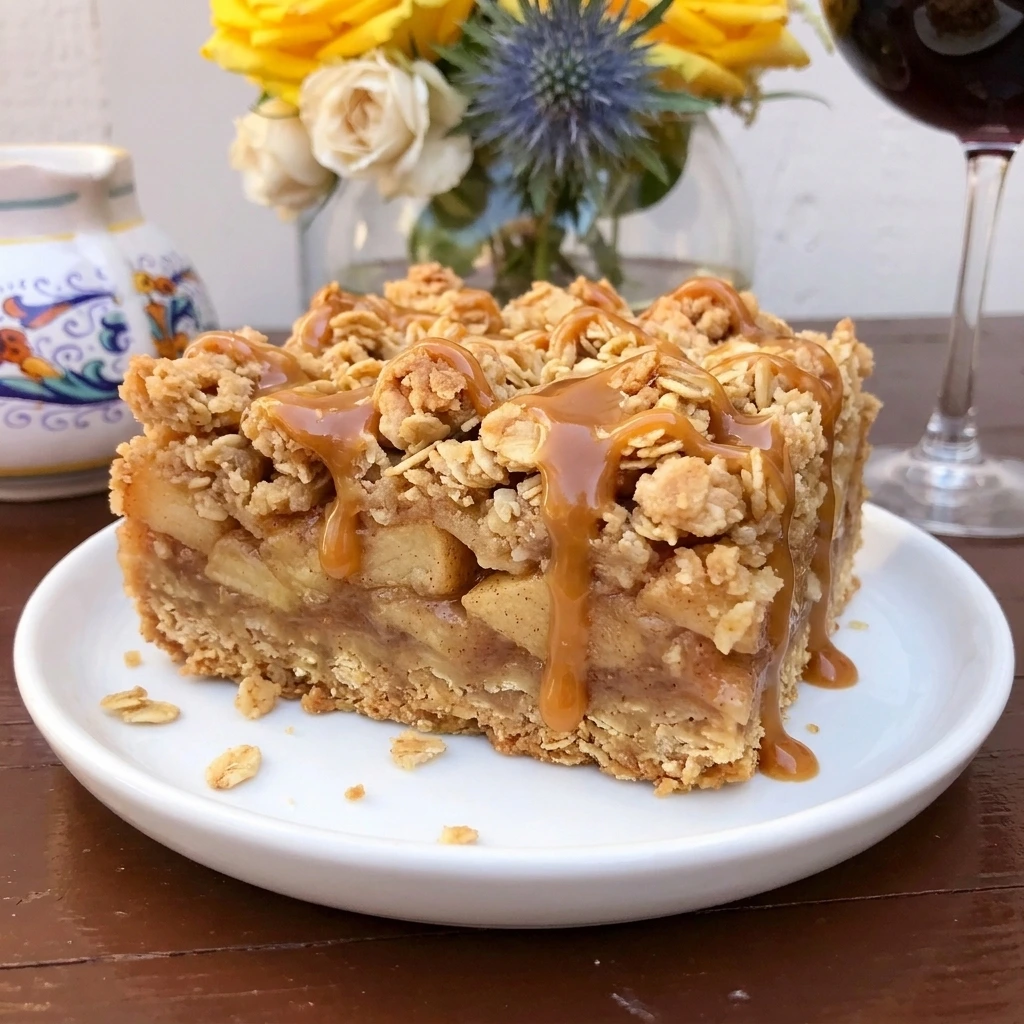
Lift the completely cooled dessert from the baking pan and cut it into 9 approximately equal square bars. Use a sharp knife and wipe the blade between cuts if the caramel begins sticking. Transfer one bar onto a small white serving plate. Turn the portion slightly so the cut edge reveals the buttery oat crust and tender cinnamon apple filling beneath the golden crumb topping. Serve the bar as it is or allow a little of the existing caramel drizzle to settle along one side. The finished dessert should have a firm base with a soft apple center and a crumbly golden top.
Tip: Cool the bars completely before slicing because the fruit filling needs time to set and warm bars can crumble when lifted from the pan.
Pro Tips
- Use firm baking apples such as Granny Smith or Honeycrisp so the filling becomes tender without turning into applesauce.
- Keep the apple pieces fairly small and similar in size so they soften evenly and stay neatly layered inside each dessert bar.
- Reserve enough oat mixture for the topping and scatter it in loose clusters to create a rustic finish with visible apples.
- Let the baked bars cool completely before cutting because the apple juices thicken as they cool and the crust becomes sturdier.
Storage Instructions
Room Temperature Storage: Once the Caramel Apple Bars have cooled completely you can keep them in an airtight container at cool room temperature for up to one day. Place parchment paper between layers to prevent the caramel topping from sticking to other bars and keep the container away from direct heat. Refrigerator Storage: For longer storage place the bars in a tightly sealed container and refrigerate for up to 4 days. The cool temperature helps the apple filling stay firm while keeping the buttery oat crust together. Allow the bars to sit at room temperature for about 15 minutes before serving if you prefer a softer texture.
Freezer Storage: To freeze the bars allow them to cool fully and cut them into individual portions before wrapping each piece tightly. Place the wrapped bars in a freezer-safe container and freeze for up to 3 months. For the best appearance consider freezing the bars without the caramel drizzle and adding the sauce after thawing. Thawing and Reheating: Transfer frozen bars to the refrigerator and allow them to thaw overnight before serving. For a warm dessert place an individual portion in a 300°F oven for approximately 8 to 10 minutes until gently warmed through. Add fresh caramel drizzle after reheating if needed because the original topping may soften.
Frequently Asked Questions
Granny Smith and Honeycrisp apples work well because they retain texture and provide a balanced sweet and tart flavor.
Yes you can bake them one day ahead and refrigerate after cooling. Add caramel before serving for the nicest finish.
Yes the cooled bars can be frozen for up to 3 months. Wrap them individually and thaw overnight in the refrigerator.
Use the listed cornstarch and avoid overly juicy apples. Bake until the fruit bubbles and let the bars cool fully.
See You in the Kitchen
I hope you enjoy all the recipes I share with you including these delicious Caramel Apple Bars and my Peppermint Brownie Cheesecake Bars and Croissant Breakfast Casserole for your next family gathering.
I hope you try these Caramel Apple Bars and enjoy them and rate them and share them with your friends and family!
Print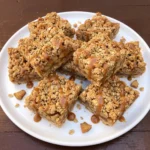
Caramel Apple Bars
- Total Time: 1 hour
- Yield: 9 servings
Description
These Caramel Apple Bars are one of the best easy dessert ideas for fall baking and holiday gatherings. Tender cinnamon apples sit between a buttery oat crust and a golden crumble topping while sweet caramel adds the perfect finishing touch. This quick and simple homemade treat makes a wonderful addition to brunch tables and potluck parties. Made with fresh fruit and familiar pantry staples these bars offer a healthy dose of apple goodness alongside rich dessert flavors.
Ingredients
- 1 1/2 cups All-purpose flour
- 1 cup Old-fashioned rolled oats
- 3/4 cup (170 g) Unsalted butter
- 2/3 cup packed Light brown sugar
- 1/4 teaspoon Salt
- 3 medium apples (about 450 g after coring) Fresh apples
- 2 tablespoons Granulated sugar
- 1 teaspoon Ground cinnamon
- 1 tablespoon Fresh lemon juice
- 1 tablespoon Cornstarch
- 1/2 cup Thick caramel sauce
Instructions
- Core the 3 medium apples and cut them into small pieces approximately 1/2 inch wide. Keep the pieces relatively similar in size while allowing a few irregular shapes for a natural homemade texture. Place the chopped apples into a medium mixing bowl.
Add the granulated sugar along with the ground cinnamon and lemon juice. Sprinkle the cornstarch over the apples and gently toss everything together until the fruit has a light coating. The apple pieces should look slightly glossy with cinnamon distributed across their surfaces.
Set the coated apples aside while preparing the oat crumble. The sugar will begin drawing a little moisture from the fruit and the cornstarch will help those juices thicken during baking.
- Combine the all-purpose flour with the rolled oats and packed brown sugar in a large mixing bowl. Add the salt and gently stir the dry ingredients together until the brown sugar is distributed throughout the mixture.
Pour the melted butter over the dry ingredients and mix until coarse moist crumbs begin to form. The finished mixture should contain a combination of small sandy crumbs and larger soft clusters that hold their shape when gently pressed.
Avoid overmixing because the crumble should remain loose rather than becoming a smooth dough. This mixture will create both the sturdy bottom crust and the golden crumb topping.
- Line an 8-inch square baking pan with parchment paper and leave a little overhang on two sides to make removing the bars easier. Transfer approximately two-thirds of the prepared oat crumble into the lined pan.
Spread the mixture across the bottom and press it firmly into an even base. The surface should look compact with visible oats and a few natural variations in thickness near the edges.
Keep the remaining one-third of the crumble mixture aside for the topping. The pressed crust will support the tender apple filling and help the bars stay together when sliced.
- Spoon the prepared cinnamon apple mixture over the pressed oat crust. Spread the apples into a relatively even layer while allowing the fruit pieces to overlap naturally. Include any thickened juices remaining in the bowl.
Scatter the reserved one-third of the oat crumble over the apple filling. Leave small spaces between the crumb clusters so some cinnamon-coated apple pieces remain visible underneath.
The assembled bars should show a clear bottom crust followed by a generous layer of apples and an uneven crumb topping. The mixture is now ready for baking.
- Preheat the oven to 350°F or 175°C. Place the assembled baking pan on the center rack and bake for approximately 35 to 40 minutes until the topping develops a golden-brown color.
The apple filling should become tender while small pockets of thickened fruit juices bubble between the crumb clusters. The crumble will develop slightly darker edges and the exposed apple pieces should appear soft and glossy.
Remove the baked bars from the oven and let them cool in the pan until no longer hot. The filling will begin setting as the dessert cools and the crust will become firmer.
- Allow the baked apple bars to cool until the filling is set and the pan is comfortable to handle. For cleaner slices let them cool completely before adding the final topping.
Drizzle the thick caramel sauce over the baked crumble in loose overlapping ribbons. Move the drizzle across the surface in different directions so the caramel settles naturally into the uneven oat clusters.
Let the caramel settle briefly before lifting the dessert from the pan using the parchment overhang. The finished slab should reveal a golden crust and tender apple layer beneath the glossy caramel topping.
- Lift the completely cooled dessert from the baking pan and cut it into 9 approximately equal square bars. Use a sharp knife and wipe the blade between cuts if the caramel begins sticking.
Transfer one bar onto a small white serving plate. Turn the portion slightly so the cut edge reveals the buttery oat crust and tender cinnamon apple filling beneath the golden crumb topping.
Serve the bar as it is or allow a little of the existing caramel drizzle to settle along one side. The finished dessert should have a firm base with a soft apple center and a crumbly golden top.
Notes
Pro Tips:
- Use firm baking apples such as Granny Smith or Honeycrisp so the filling becomes tender without turning into applesauce.
- Keep the apple pieces fairly small and similar in size so they soften evenly and stay neatly layered inside each dessert bar.
- Reserve enough oat mixture for the topping and scatter it in loose clusters to create a rustic finish with visible apples.
- Let the baked bars cool completely before cutting because the apple juices thicken as they cool and the crust becomes sturdier.
Storage: Room Temperature Storage: Once the Caramel Apple Bars have cooled completely you can keep them in an airtight container at cool room temperature for up to one day. Place parchment paper between layers to prevent the caramel topping from sticking to other bars and keep the container away from direct heat.
Refrigerator Storage: For longer storage place the bars in a tightly sealed container and refrigerate for up to 4 days. The cool temperature helps the apple filling stay firm while keeping the buttery oat crust together. Allow the bars to sit at room temperature for about 15 minutes before serving if you prefer a softer texture.
Freezer Storage: To freeze the bars allow them to cool fully and cut them into individual portions before wrapping each piece tightly. Place the wrapped bars in a freezer-safe container and freeze for up to 3 months. For the best appearance consider freezing the bars without the caramel drizzle and adding the sauce after thawing.
Thawing and Reheating: Transfer frozen bars to the refrigerator and allow them to thaw overnight before serving. For a warm dessert place an individual portion in a 300°F oven for approximately 8 to 10 minutes until gently warmed through. Add fresh caramel drizzle after reheating if needed because the original topping may soften.
- Prep Time: 20 minutes
- Cook Time: 40 minutes
- Category: Dessert
- Cuisine: American