Our family discovered these Banana Cheesecake Bars during the height of summer. Our boys were hosting a cousin from Detroit at our remote lake cottage where they frolicked in the lake during the day and toasted marshmallows around the bonfire every night.

That was one of my best weeks of the year and this easy dessert quickly became one of my favorite cheesecake recipes. The creamy texture also reminds me of our Pumpkin Cheesecake Dip although these bars bring a sweet banana flavor that feels perfect for warm afternoons.
I will never forget the first time I made these and the look on the kids’ faces when they tasted them. Read on as I show you how to make this unforgettable family dessert.
Ingredients

Here is what I use for this recipe and you can adjust nuts or spices based on preference:
- Graham cracker crumbs: They create a crisp and sturdy base that supports the creamy cheesecake filling.
- Unsalted butter: It binds the crumbs together and adds rich flavor to the baked crust.
- Granulated sugar: It sweetens both the crust and the filling while helping the top develop gentle color.
- Cream cheese: It forms the thick and creamy structure of the cheesecake layer.
- Ripe bananas: They provide natural sweetness and a soft banana flavor throughout the filling.
- Large eggs: They set the filling during baking and give the bars a smooth sliceable texture.
- Sour cream: It softens the cream cheese mixture and adds a gentle tang that balances the sweetness.
- Vanilla extract: It rounds out the banana flavor and adds warm aromatic depth.
- All purpose flour: It stabilizes the filling and helps each chilled bar hold a clean shape.
- Ground cinnamon: It adds subtle warmth that complements the ripe banana filling.
- Banana slices: They provide a fresh finishing touch for the individual plated portions.
Tools You’ll Need
- Rectangular ceramic baking dish: It holds the crust and filling while promoting even baking and easy portioning.
- Large mixing bowl: It provides enough space to blend the cream cheese and banana filling smoothly.
- Medium mixing bowl: It keeps the graham cracker mixture contained while the butter coats every crumb.
- Electric mixer: It softens the cream cheese and creates a smooth filling with minimal lumps.
- Rubber spatula: It folds the filling evenly and helps transfer the mixture without unnecessary waste.
- Measuring cups and spoons: They ensure accurate proportions for the crust and filling so the bars set correctly.
- Sharp knife: It cuts the chilled slab into defined portions while preserving the visible layers.
Instructions
Step 1: Press the graham cracker crust
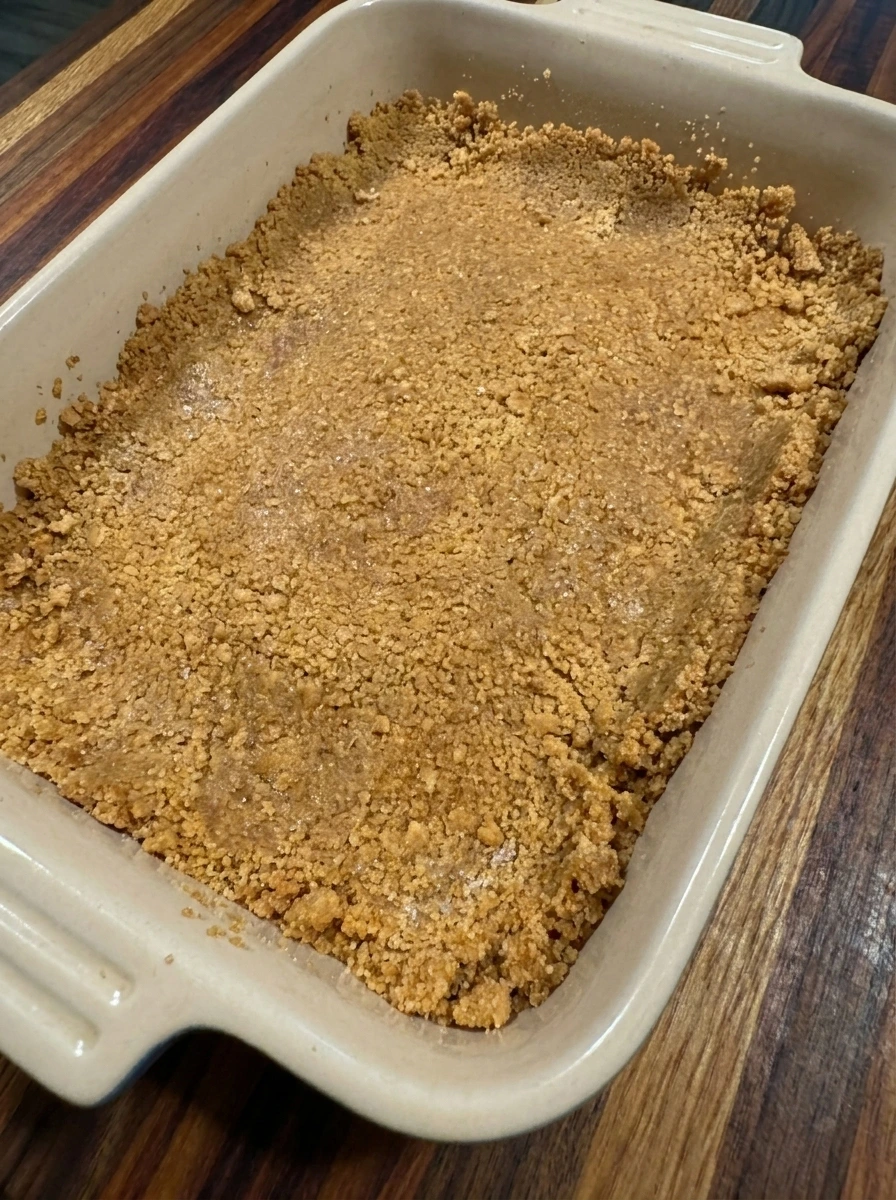
Combine the graham cracker crumbs with melted butter and part of the sugar until the mixture resembles damp sand. Press the crumbs into an uneven compact layer so the base reaches the edges while keeping a naturally homemade texture.
Tip: Press firmly around the edges because a compact crust is easier to lift and slice after the bars have chilled.
Step 2: Blend the banana cheesecake filling
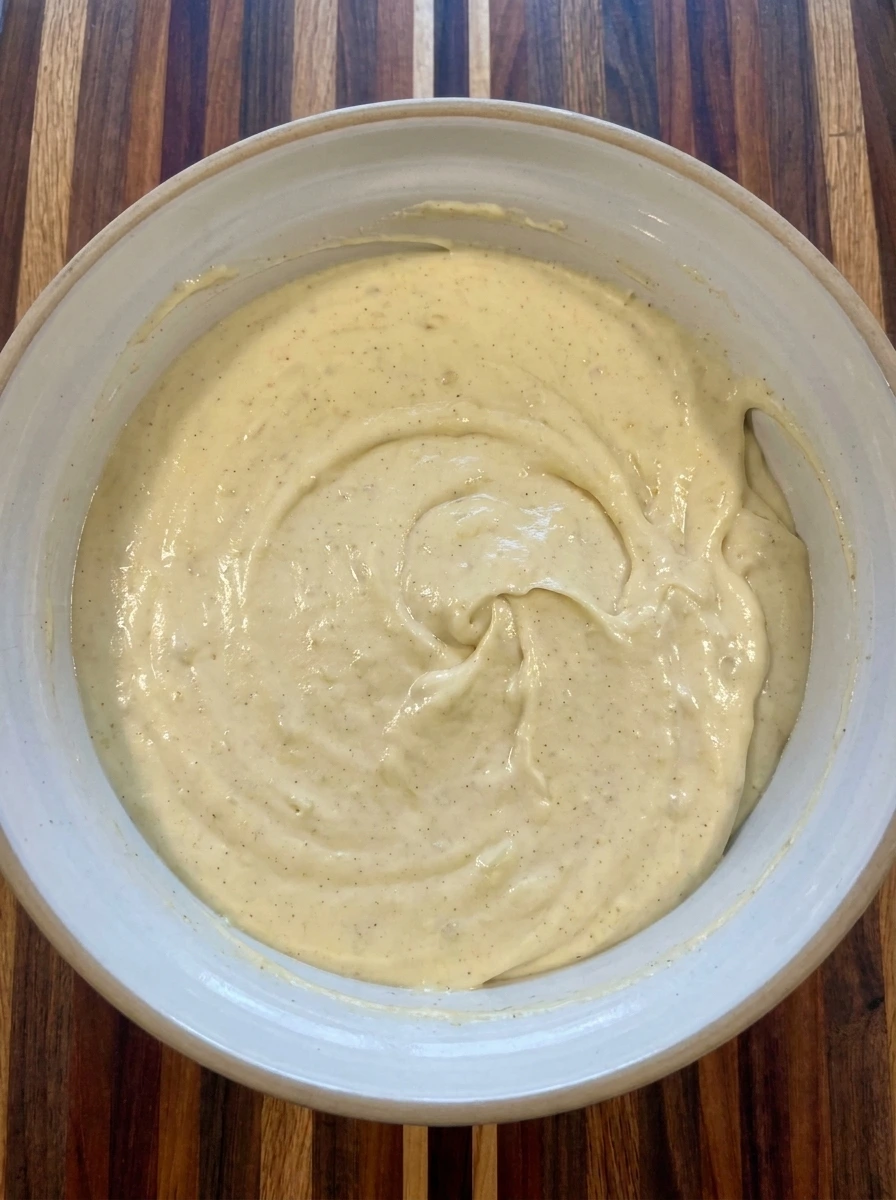
Beat the softened cream cheese with the remaining sugar until the mixture changes from dense blocks into a smooth thick cream. Fold in the mashed bananas and eggs and sour cream and vanilla and flour and cinnamon until pale yellow streaks become fully blended.
Tip: Use room temperature cream cheese so the banana filling becomes smooth without stubborn lumps or overmixing.
Step 3: Layer the filling over the crust

Pour the banana cheesecake mixture over the pressed crust so the pale filling spreads from the center toward the corners. Leave faint swirls and slight variations in thickness instead of making the surface perfectly level.
Tip: Pour slowly near the center because the filling will spread naturally without disturbing the crumb crust underneath.
Step 4: Bake until softly set

Bake the layered dessert until the edges look firm and slightly golden while the center remains softly set. The surface should change from glossy batter to a matte creamy top with a few natural ripples and small browned patches.
Tip: Remove the bars while the center still has a slight wobble because they continue setting as the baking dish cools.
Step 5: Chill and slice the bars
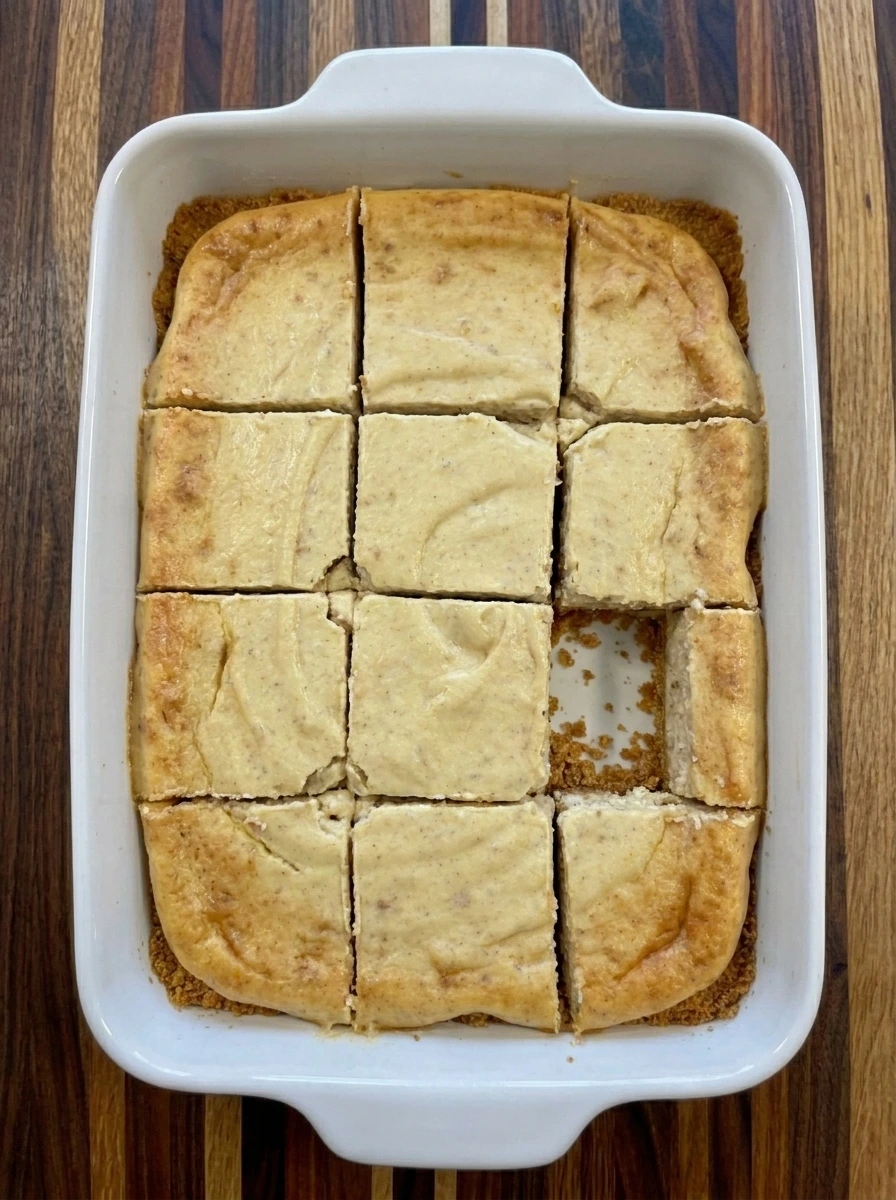
Cool the baked cheesecake completely and chill it until the creamy center becomes firm enough to cut. Slice the slab into twelve slightly irregular bars so the crumb crust and smooth banana layer remain clearly visible.
Tip: Chill for at least three hours because cold cheesecake gives cleaner layers and prevents the centers from collapsing.
Step 6: Serve one bar with banana

Transfer one chilled bar to a white plate and angle it slightly so the creamy filling and crumb crust can both be seen. Finish with one banana slice placed casually on top for a fresh final contrast.
Tip: Add the banana slice just before serving because fresh banana can darken when it sits for too long.
Pro Tips
- Choose bananas covered with brown speckles because their deeper sweetness gives the filling a stronger natural banana flavor.
- Line the baking dish with parchment so the chilled slab lifts out easily and the crust stays intact during slicing.
- Avoid overbaking because the center should remain slightly soft when removed and will become firm during chilling.
- Wipe the knife between cuts so each bar shows a cleaner banana layer while still keeping a homemade appearance.
Storage Instructions
Place chilled Banana Cheesecake Bars in a tightly covered container and keep them in the refrigerator. They remain creamy and fresh for up to four days. Separate stacked bars with parchment so the soft tops do not stick together. Keep fresh banana slices off the stored bars because they can darken and release moisture. For longer storage wrap each plain bar securely and place the portions in a freezer safe container. Freeze them for up to two months. Thaw frozen bars overnight in the refrigerator before serving. Add fresh banana slices only after the bars are fully thawed.
Frequently Asked Questions
Yes they can be chilled overnight and sliced the following day for easy serving.
Use soft bananas with brown speckles because they mash smoothly and provide stronger flavor.
Yes freeze individual bars well wrapped for up to two months and thaw them in the refrigerator.
They may need more chilling time or they may have been sliced before the filling fully set.
See You in the Kitchen
I hope you try these Banana Cheesecake Bars soon because they are a simple recipe that looks beautiful and tastes incredible and makes every occasion a little more special.
Do not forget to share your results or save this recipe for later and then try our Cranberry White Chocolate Cookies or Apple Pie Overnight Oats because each one is worth keeping.
Print
Banana Cheesecake Bars
- Total Time: 55 minutes
- Yield: 12 servings
Description
These Banana Cheesecake Bars combine a buttery graham cracker crust with a smooth banana cream cheese filling and a lightly golden top. This easy and quick dessert offers simple ideas for brunch or a holiday potluck and it is one of the best party treats to prepare ahead. Ripe bananas add natural sweetness while portioned squares make serving effortless. For a healthy balance enjoy one chilled bar with fresh fruit after a weeknight dinner or during meal prep.
Ingredients
- 2 cups Graham cracker crumbs
- 6 tablespoons melted Unsalted butter
- 3/4 cup divided Granulated sugar
- 16 ounces softened Cream cheese
- 2 medium mashed Ripe bananas
- 2 Large eggs
- 1/2 cup Sour cream
- 1 teaspoon Vanilla extract
- 2 tablespoons All purpose flour
- 1/2 teaspoon Ground cinnamon
- 12 thin slices Banana slices
Instructions
- Combine the graham cracker crumbs with melted butter and part of the sugar until the mixture resembles damp sand. Press the crumbs into an uneven compact layer so the base reaches the edges while keeping a naturally homemade texture.
- Beat the softened cream cheese with the remaining sugar until the mixture changes from dense blocks into a smooth thick cream. Fold in the mashed bananas and eggs and sour cream and vanilla and flour and cinnamon until pale yellow streaks become fully blended.
- Pour the banana cheesecake mixture over the pressed crust so the pale filling spreads from the center toward the corners. Leave faint swirls and slight variations in thickness instead of making the surface perfectly level.
- Bake the layered dessert until the edges look firm and slightly golden while the center remains softly set. The surface should change from glossy batter to a matte creamy top with a few natural ripples and small browned patches.
- Cool the baked cheesecake completely and chill it until the creamy center becomes firm enough to cut. Slice the slab into twelve slightly irregular bars so the crumb crust and smooth banana layer remain clearly visible.
- Transfer one chilled bar to a white plate and angle it slightly so the creamy filling and crumb crust can both be seen. Finish with one banana slice placed casually on top for a fresh final contrast.
Notes
Pro Tips:
- Choose bananas covered with brown speckles because their deeper sweetness gives the filling a stronger natural banana flavor.
- Line the baking dish with parchment so the chilled slab lifts out easily and the crust stays intact during slicing.
- Avoid overbaking because the center should remain slightly soft when removed and will become firm during chilling.
- Wipe the knife between cuts so each bar shows a cleaner banana layer while still keeping a homemade appearance.
Storage: Place chilled Banana Cheesecake Bars in a tightly covered container and keep them in the refrigerator. They remain creamy and fresh for up to four days. Separate stacked bars with parchment so the soft tops do not stick together. Keep fresh banana slices off the stored bars because they can darken and release moisture. For longer storage wrap each plain bar securely and place the portions in a freezer safe container. Freeze them for up to two months. Thaw frozen bars overnight in the refrigerator before serving. Add fresh banana slices only after the bars are fully thawed.
- Prep Time: 20 minutes
- Cook Time: 35 minutes
- Category: Dessert
- Cuisine: American