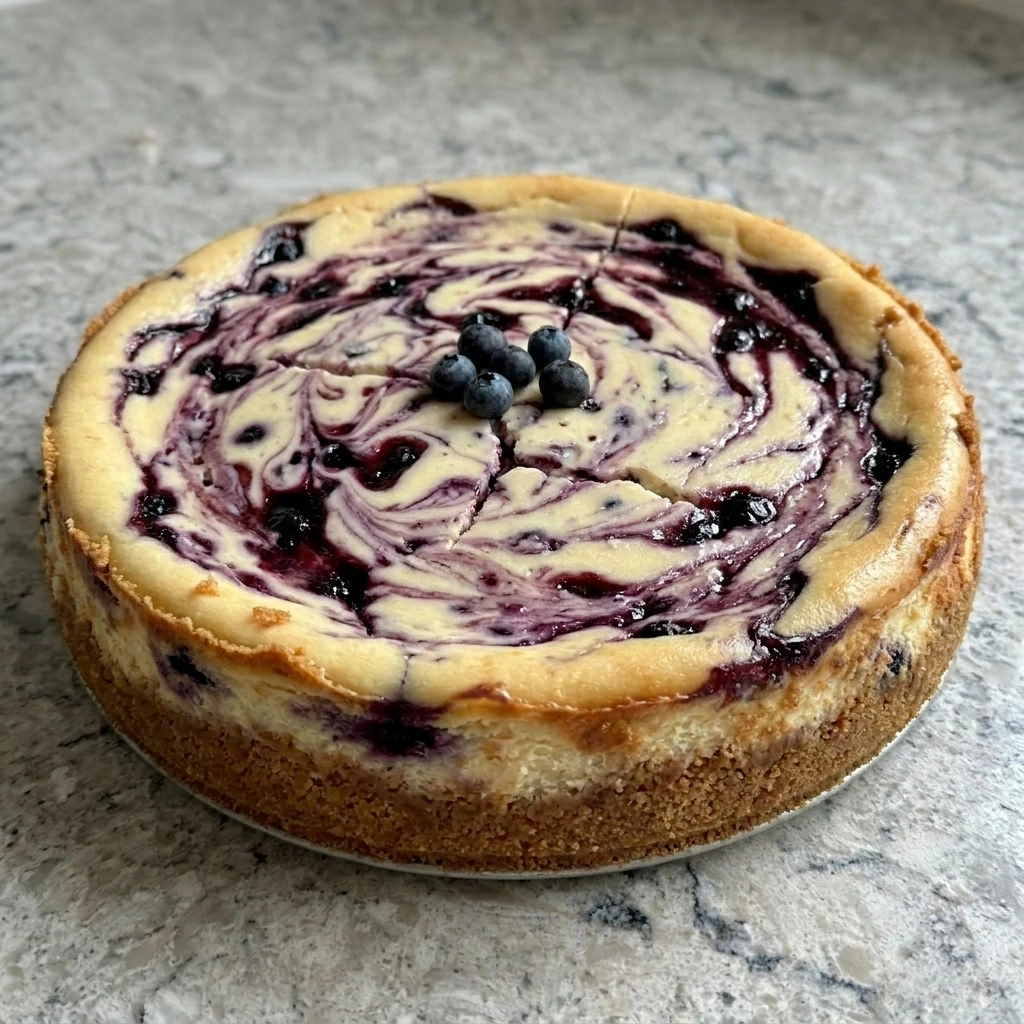
Creamy Huckleberry Cheesecake gives one of the best berry desserts I have ever tasted and it has a soft rich filling with a buttery crumb crust and a bright purple huckleberry swirl and Today I will show how I make my Creamy Huckleberry Cheesecake at home easily just with some easy to find ingredients. Just To know that my Creamy Huckleberry Cheesecake turned out so smooth and so creamy almost like a bakery one and I really love this dessert and Also I tried the same berry flavor in Old Fashioned Huckleberry Cobbler and the taste was even better so I will leave some tasty other variations below you can try using the same berry idea and same cozy dessert feeling.
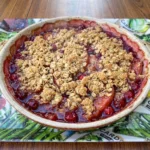
Usually cheesecake is served after a family lunch or at a small holiday table and it is so incredible! I recommend anyone to enjoy it and if you want another chilled berry dessert you can try Raspberry Icebox Cake too.
Also for my recipe I use a cake pan for baking and chilling but I recommend using a smaller pan if you want taller slices instead. Simply press your crust and add the creamy filling and swirl the huckleberries until it bakes into a soft set cheesecake.
Ingredients
Here is what I use for this recipe and you can adjust nuts or spices based on preference:
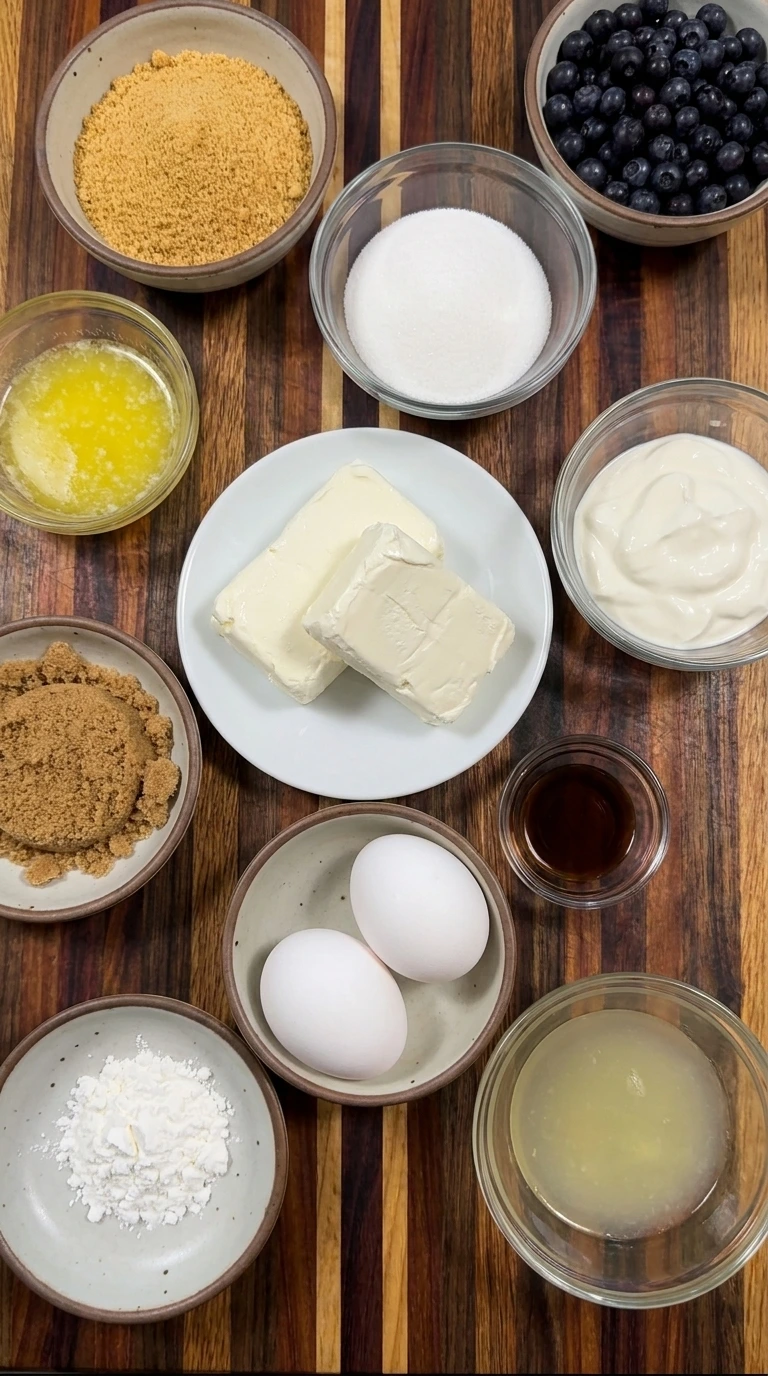
- Graham cracker crumbs: Forms the sweet crumb base and gives the cheesecake a buttery crunchy foundation.
- Unsalted butter: Moistens the crumbs and helps the crust hold together after pressing and baking.
- Brown sugar: Adds gentle caramel sweetness to the crust and helps it brown around the edges.
- Cream cheese: Creates the thick creamy body of the cheesecake filling.
- Granulated sugar: Sweetens the filling and balances the tart huckleberries.
- Sour cream: Adds tang and keeps the filling soft and velvety.
- Eggs: Set the cheesecake as it bakes and give the slice a smooth custard texture.
- Vanilla extract: Rounds out the cream cheese flavor with warm sweetness.
- Fresh or frozen huckleberries: Creates the purple berry sauce and adds bright tart pockets through the cheesecake.
- Lemon juice: Brightens the berry sauce and keeps the filling from tasting too heavy.
- Cornstarch: Thickens the huckleberry sauce so it swirls cleanly through the filling.
Tools You’ll Need
- Mixing bowl: Combines the crust mixture and blends the cheesecake filling smoothly.
- Cake pan: Holds the crust and filling while the cheesecake bakes and sets.
- Saucepan: Cooks the huckleberries into a thick swirl sauce.
- Measuring cups and spoons: Keeps ingredient amounts accurate for proper texture and sweetness.
- Rubber spatula: Scrapes and folds the filling without leaving streaks behind.
Instructions
Step 1: Press the crumb crust
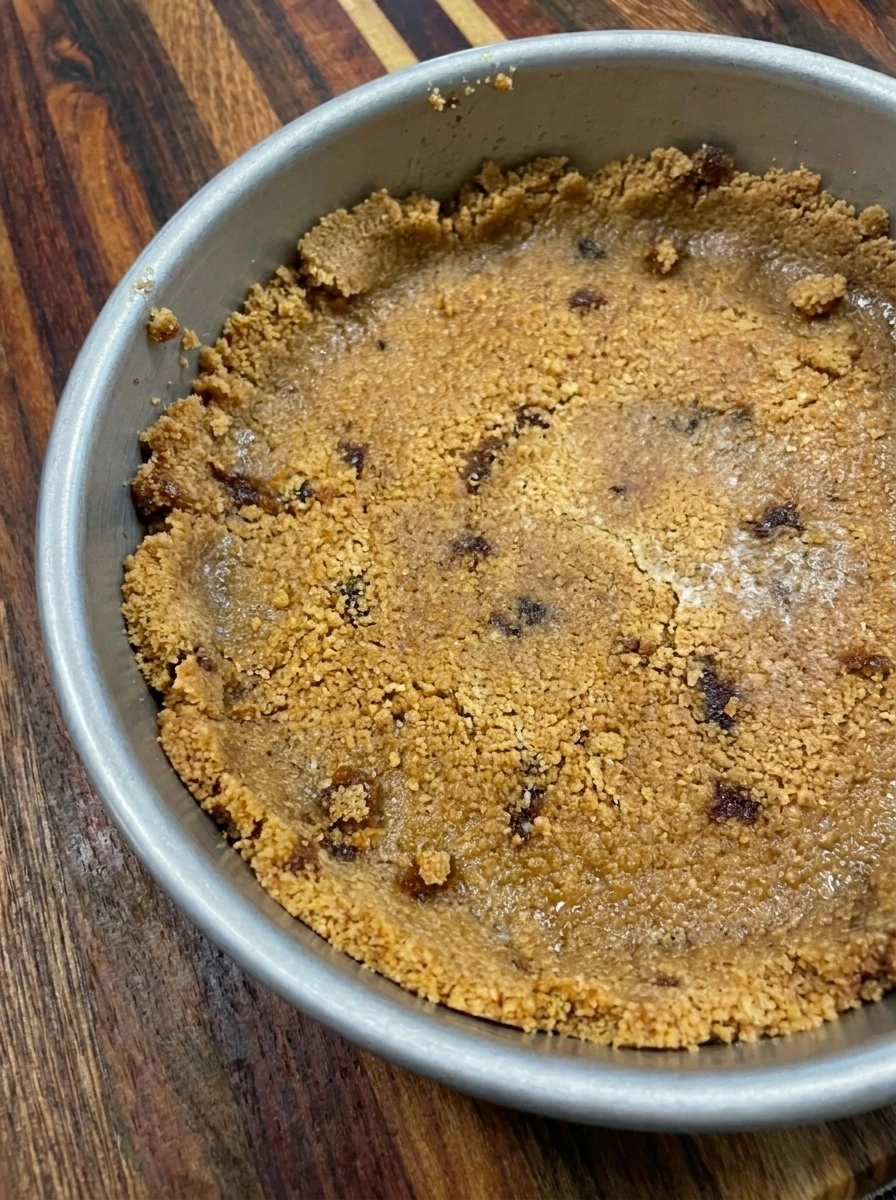
The graham cracker crumbs turn darker and sandy as the melted butter and brown sugar soak through them. The mixture changes from loose crumbs into a damp golden crust that clumps together and presses into the pan with uneven edges.
Tip: Press the crust firmly but leave a few uneven edges so the baked cheesecake looks homemade and not too perfect.
Step 2: Blend the creamy filling
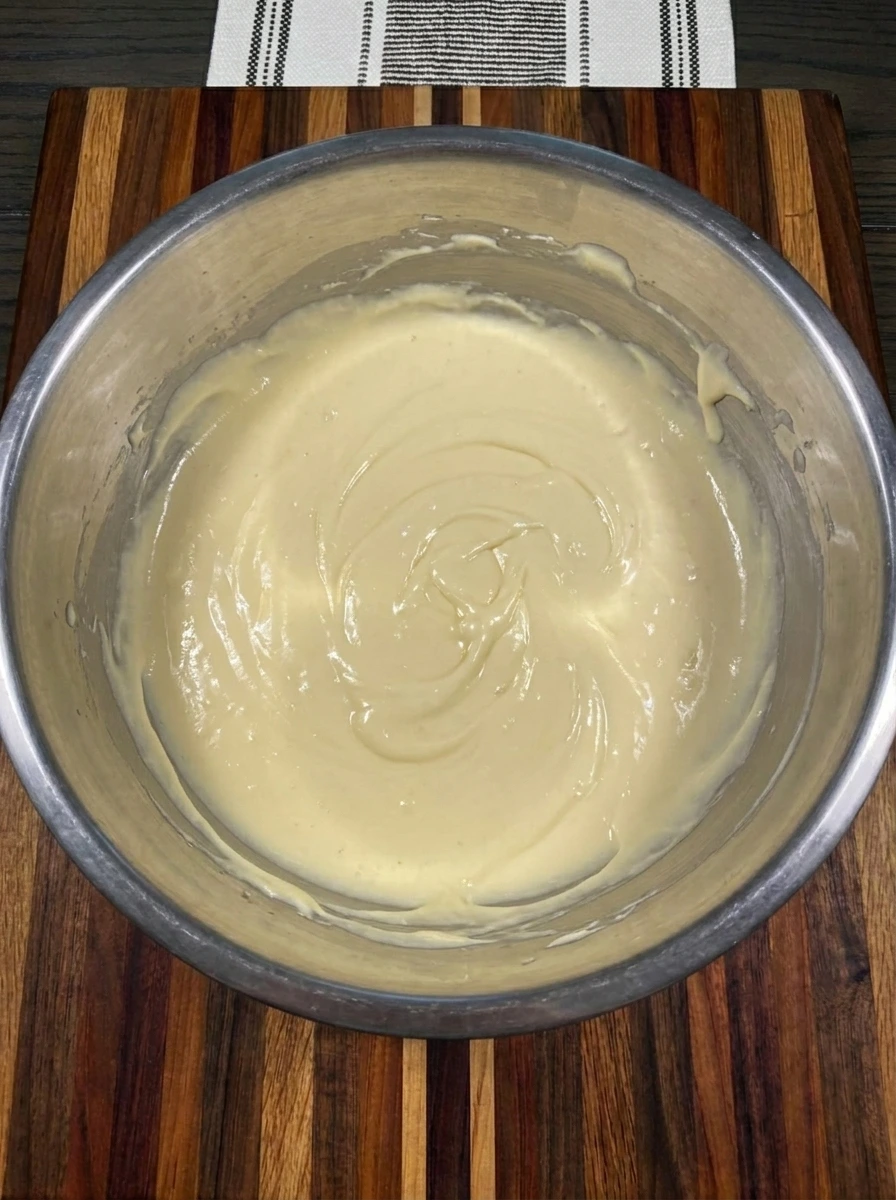
The cream cheese and sugar smooth out into a thick pale mixture. The sour cream and eggs fold in and the filling changes from dense cream cheese into a glossy pourable batter with a few soft ripples.
Tip: Use softened cream cheese so the filling turns smooth quickly and keeps the final cheesecake creamy instead of lumpy.
Step 3: Cook the huckleberry sauce
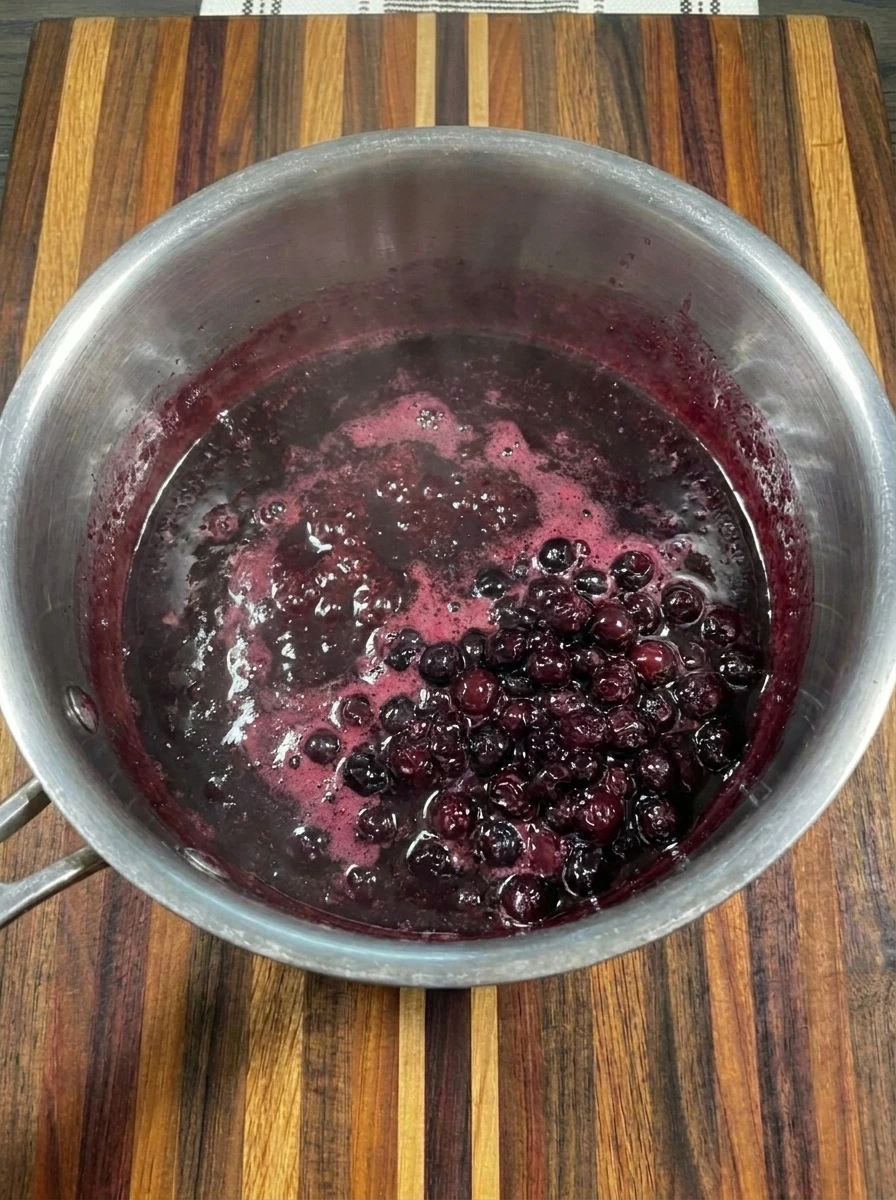
The huckleberries soften and burst as the lemon juice and sugar pull out their deep purple juices. The cornstarch thickens the berries into a glossy sauce with whole berries still showing through the darker syrup.
Tip: Stop cooking once the sauce coats the berries so the swirl stays bright and does not disappear into the filling.
Step 4: Pour and swirl the cheesecake
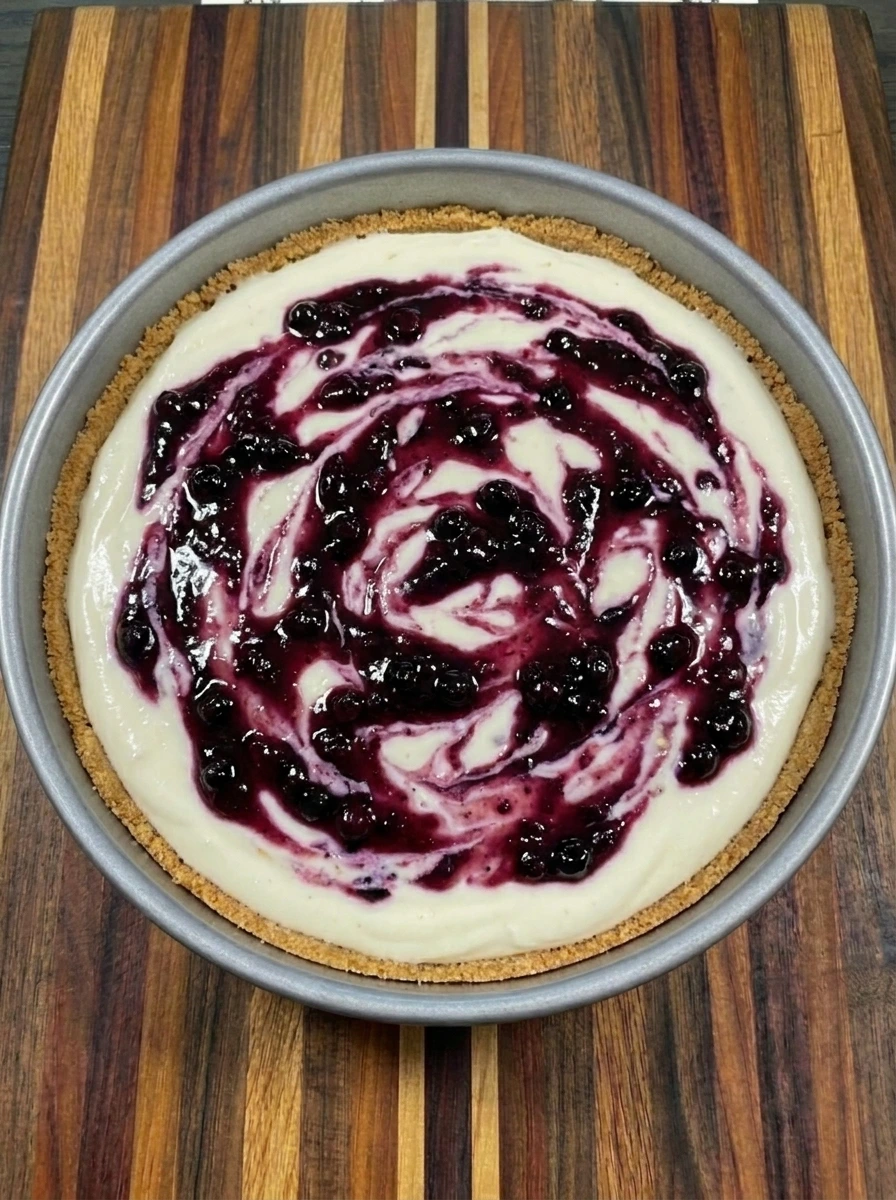
The creamy filling moves from the bowl into the crust and spreads into a thick pale layer. Spoonfuls of huckleberry sauce streak across the top and drag into purple ribbons that look uneven and naturally swirled.
Tip: Drag the sauce only a few times so the top keeps clear purple ribbons instead of turning fully blended.
Step 5: Bake until softly set
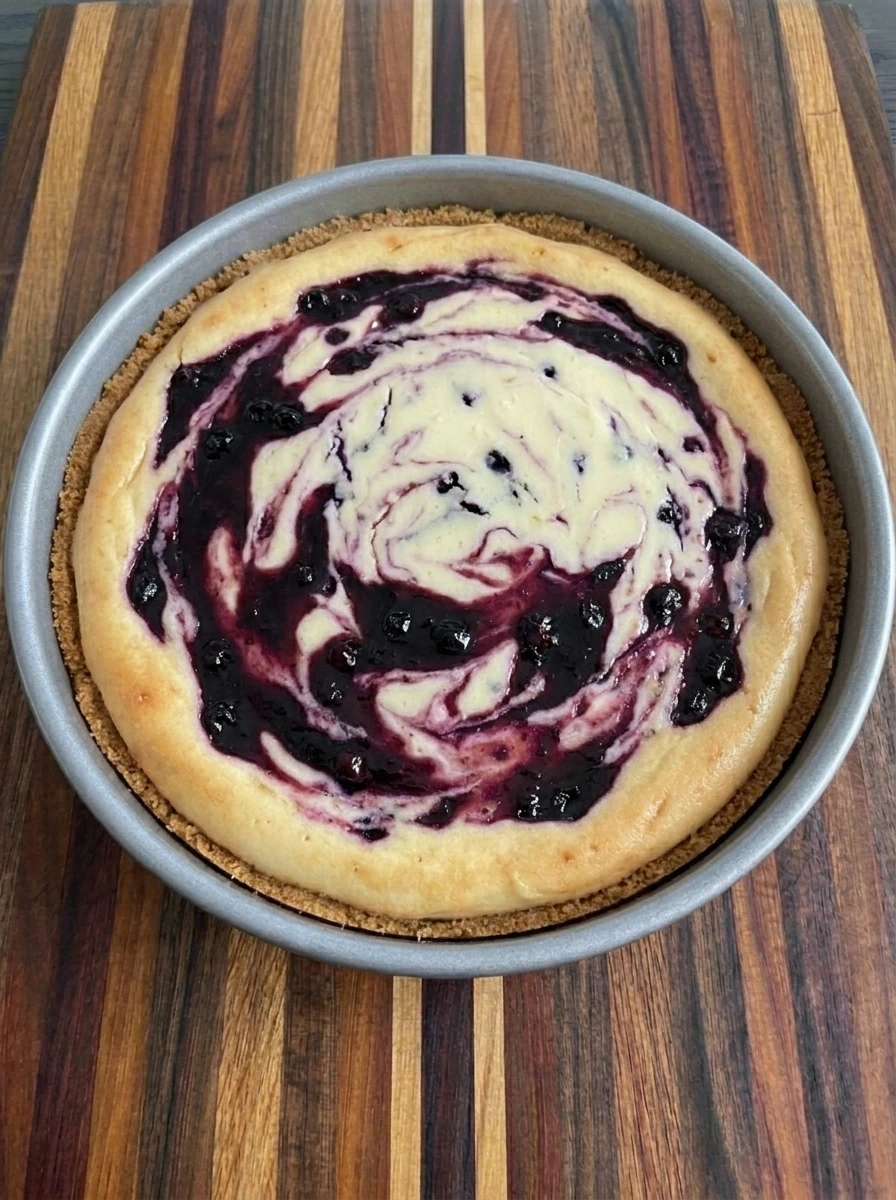
The cheesecake changes from shiny batter into a softly set dessert with a satin top. The edges turn lightly golden and puff a little while the center stays creamy with small cracks and darker purple berry streaks.
Tip: Let the center stay slightly soft because it firms as it cools and gives the slice a creamy smooth texture.
Step 6: Serve a creamy slice
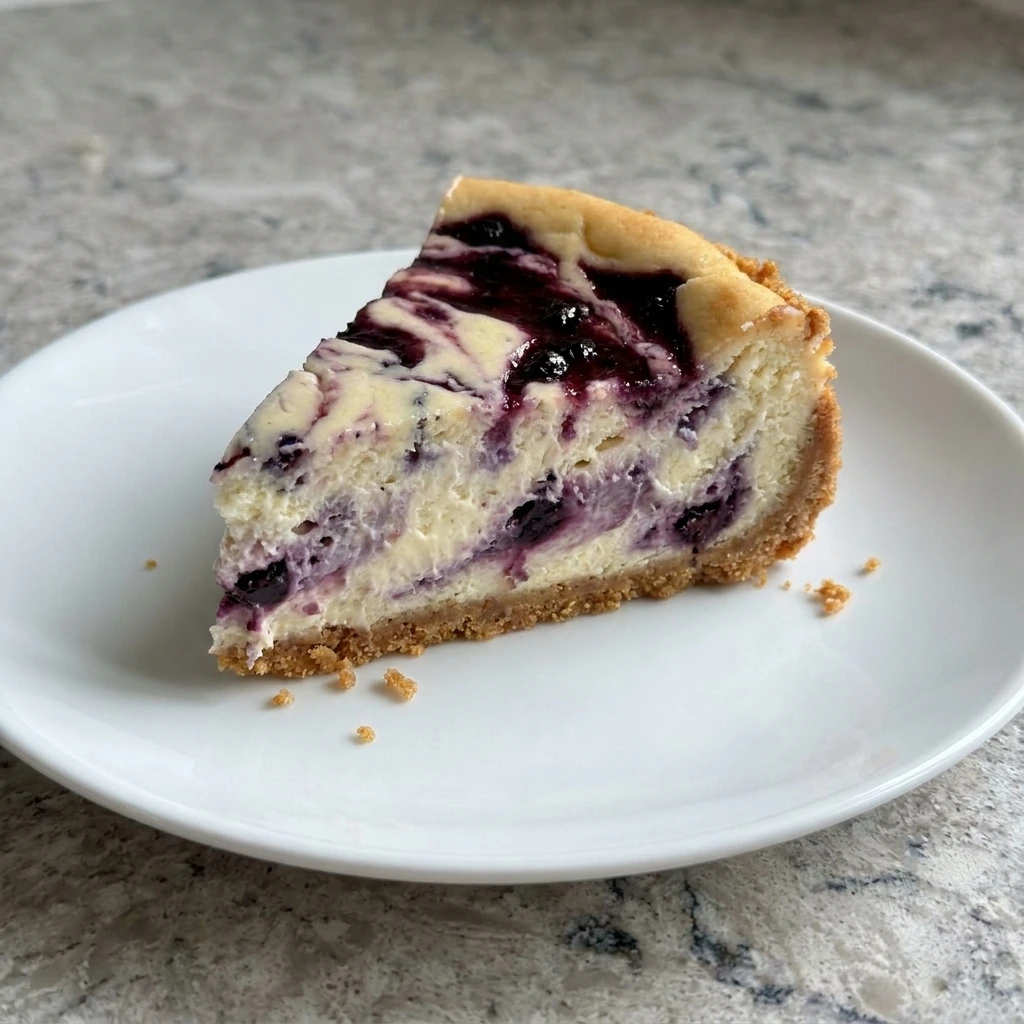
A single slice separates from the cheesecake and shows the buttery crust beneath the creamy filling. The inside looks soft and dense with purple berry streaks and uneven swirls across the top for a homemade finished look.
Tip: Slice after chilling so the layers stay neat while the filling still looks creamy and soft inside.
Pro Tips
- Use room temperature cream cheese so the filling blends smooth and keeps the finished cheesecake soft and creamy.
- Cool the berry sauce before swirling so it stays in ribbons instead of sinking too deeply into the filling.
- Do not over swirl the huckleberries because a few uneven purple streaks make every slice look prettier.
- Chill the cheesecake well before slicing so the crust stays firm and the filling cuts into clean creamy pieces.
Storage Instructions
Store Creamy Huckleberry Cheesecake covered in the refrigerator after it cools completely. It keeps best when the surface is protected so the creamy top does not dry out. For clean slices chill the cheesecake before covering it tightly. This helps the crust firm up and keeps the berry swirl from smearing. Leftover slices can be stored in a sealed container for up to 4 days. Place parchment between slices if stacking so the tops stay neat. You can freeze individual slices for longer storage. Wrap each slice well and thaw overnight in the refrigerator before serving.
Frequently Asked Questions
Yes use frozen berries without thawing and cook the sauce until thick and glossy.
Chill it at least 4 hours so the filling firms and slices cleanly.
Yes make it one day ahead and keep it covered in the refrigerator.
It tastes rich and tangy with sweet cream cheese and bright tart berry swirls.
See You in the Kitchen
I hope you try this Creamy Huckleberry Cheesecake soon!
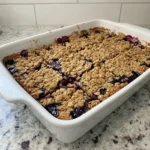
It is a simple recipe that looks beautiful and tastes incredible and makes every occasion a little more special with the same berry comfort you will love in Old Fashioned Huckleberry Cobbler and Raspberry Lemon Loaf Cake.
Don’t forget to share your results or save this recipe for later it is one worth keeping.
Print
Creamy Huckleberry Cheesecake
- Total Time: 45 minutes
- Yield: 4 servings
Description
Creamy Huckleberry Cheesecake is an easy dessert with quick prep and simple steps that still feels like the best treat for brunch and holiday tables. It works for potluck plans and party ideas because every slice looks pretty with purple berry swirls. The filling is rich yet balanced so it can fit a healthy homemade dessert mindset when served in small slices after weeknight dinner.
Ingredients
- 1 cup Graham cracker crumbs
- 4 tablespoons melted Unsalted butter
- 2 tablespoons Brown sugar
- 12 ounces softened Cream cheese
- 1/2 cup Granulated sugar
- 1/3 cup Sour cream
- 2 large Eggs
- 1 teaspoon Vanilla extract
- 1 cup Fresh or frozen huckleberries
- 1 tablespoon Lemon juice
- 1 teaspoon Cornstarch
Instructions
- The graham cracker crumbs turn darker and sandy as the melted butter and brown sugar soak through them. The mixture changes from loose crumbs into a damp golden crust that clumps together and presses into the pan with uneven edges.
- The cream cheese and sugar smooth out into a thick pale mixture. The sour cream and eggs fold in and the filling changes from dense cream cheese into a glossy pourable batter with a few soft ripples.
- The huckleberries soften and burst as the lemon juice and sugar pull out their deep purple juices. The cornstarch thickens the berries into a glossy sauce with whole berries still showing through the darker syrup.
- The creamy filling moves from the bowl into the crust and spreads into a thick pale layer. Spoonfuls of huckleberry sauce streak across the top and drag into purple ribbons that look uneven and naturally swirled.
- The cheesecake changes from shiny batter into a softly set dessert with a satin top. The edges turn lightly golden and puff a little while the center stays creamy with small cracks and darker purple berry streaks.
- A single slice separates from the cheesecake and shows the buttery crust beneath the creamy filling. The inside looks soft and dense with purple berry streaks and uneven swirls across the top for a homemade finished look.
Notes
Pro Tips:
- Use room temperature cream cheese so the filling blends smooth and keeps the finished cheesecake soft and creamy.
- Cool the berry sauce before swirling so it stays in ribbons instead of sinking too deeply into the filling.
- Do not over swirl the huckleberries because a few uneven purple streaks make every slice look prettier.
- Chill the cheesecake well before slicing so the crust stays firm and the filling cuts into clean creamy pieces.
Storage: Store Creamy Huckleberry Cheesecake covered in the refrigerator after it cools completely. It keeps best when the surface is protected so the creamy top does not dry out. For clean slices chill the cheesecake before covering it tightly. This helps the crust firm up and keeps the berry swirl from smearing. Leftover slices can be stored in a sealed container for up to 4 days. Place parchment between slices if stacking so the tops stay neat. You can freeze individual slices for longer storage. Wrap each slice well and thaw overnight in the refrigerator before serving.
- Prep Time: 15 minutes
- Cook Time: 30 minutes
- Category: Dessert
- Cuisine: American