I honestly havent really shared many huckleberry based recipes in my blog but this Wild Huckleberry Crumble Bars recipe was one I had to share. This recipe is inspired by cozy summer baking and is easy to prepare and make.
Its a super tasty dessert packed full of juicy berries and is quite filling. When people think about huckleberry crumble bars they probably assume they need fresh wild berries from a mountain patch.
But trust me on this when its prepared in the right way it offers a bright and buttery taste thats very satisfying and if you love berry desserts you should try Old Fashioned Huckleberry Cobbler too. This recipe is super tasty and quick to make and I recommend this dessert for those who want to enjoy a homemade berry bar with simple pantry ingredients.
Ingredients
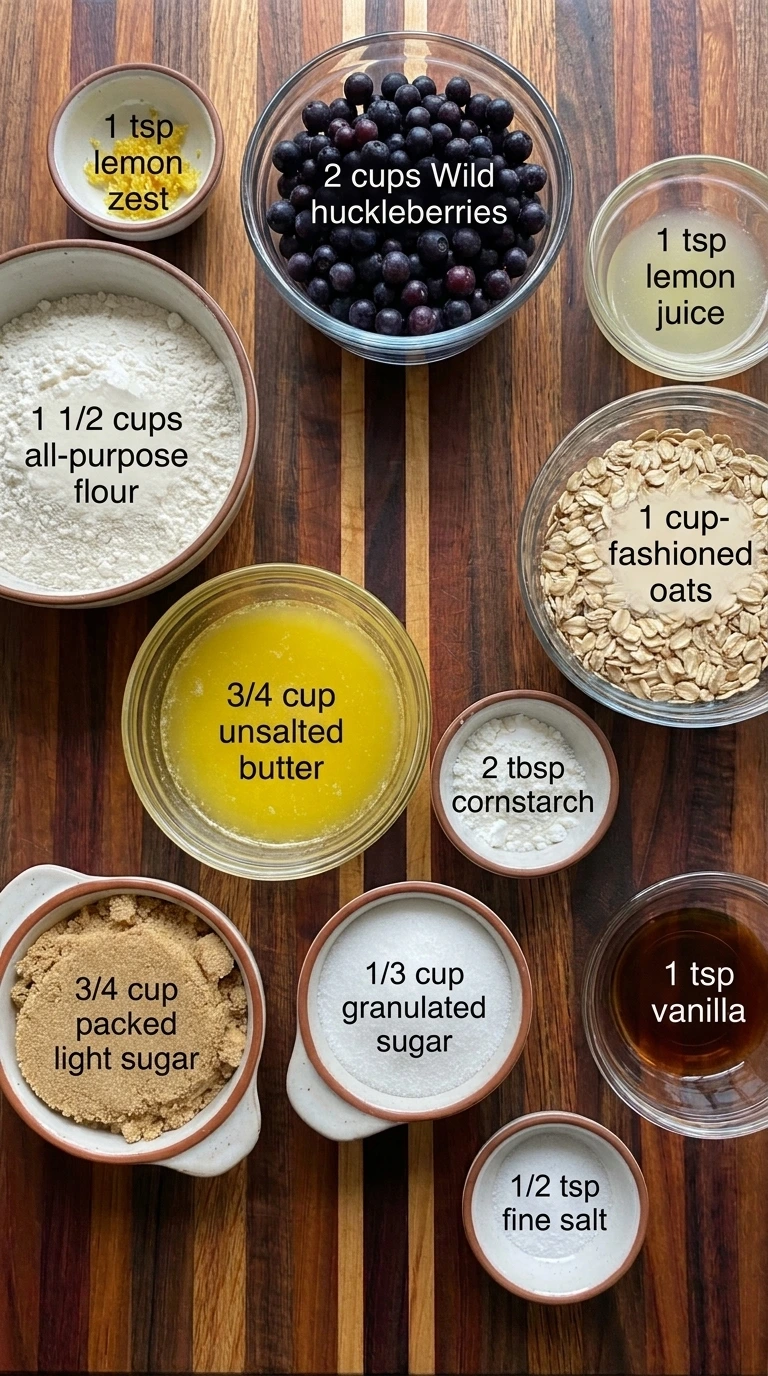
Here is what I use for this recipe and you can adjust nuts or spices based on preference:
- Wild huckleberries: Creates the bright tart berry filling and turns jammy as the bars bake.
- All purpose flour: Builds the tender crumble base and helps the topping hold its rustic crumb.
- Old fashioned oats: Adds chewy texture and gives the crumble topping a hearty bakery style bite.
- Light brown sugar: Sweetens the crumble and adds a warm caramel flavor to the baked edges.
- Granulated sugar: Balances the tart huckleberries and helps the fruit layer turn glossy.
- Unsalted butter: Moistens the crumble mixture and helps the crust bake golden and crisp.
- Cornstarch: Thickens the berry juices so the filling slices cleanly after cooling.
- Lemon juice: Brightens the huckleberry flavor and keeps the fruit layer lively.
- Lemon zest: Adds fresh citrus aroma that lifts the sweet crumble and berry filling.
- Vanilla extract: Rounds out the berry flavor and adds gentle bakery sweetness.
- Fine salt: Balances the sweetness and makes the buttery crumble taste fuller.
Tools You’ll Need
- Mixing bowl: Holds the crumble mixture and berry filling while ingredients are combined.
- Ceramic baking dish: Bakes the crust and berry filling into structured crumble bars.
- Measuring cups and spoons: Keeps the fruit and crumble ingredients balanced for clean slices.
- Flexible spatula: Folds the berry filling gently and spreads it without crushing every berry.
- Parchment paper: Lines the baking dish so the cooled bars lift out cleanly.
- Cooling rack: Helps the baked bars cool evenly so the filling can set before slicing.
Instructions
Step 1: Mix the oat crumble
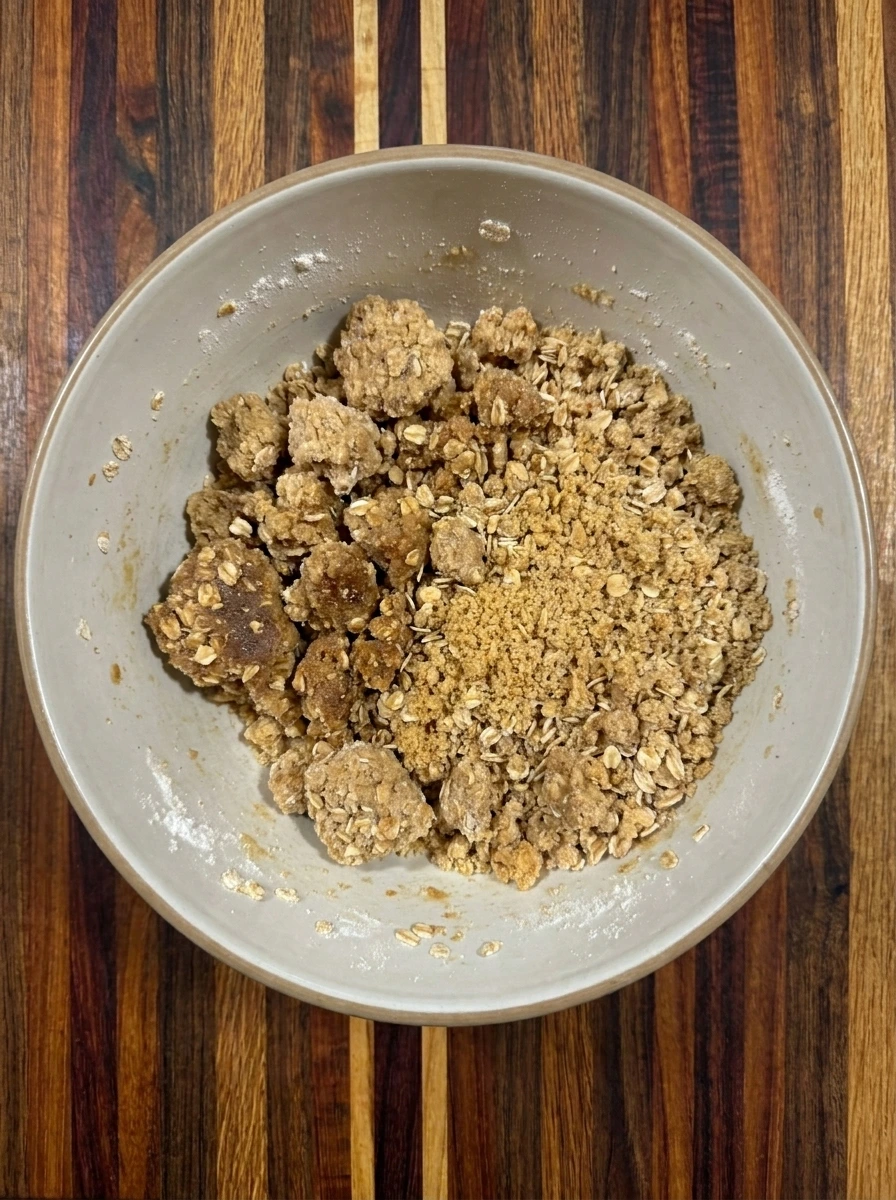
The flour and oats and brown sugar and salt are combined until the dry mixture looks speckled and uneven. Melted butter and vanilla soak into the crumbs and turn the mixture from loose powder into damp clusters with sandy edges.
Tip: Stop mixing when the crumble forms small and large clumps because uneven texture makes the best topping.
Step 2: Press the crust layer
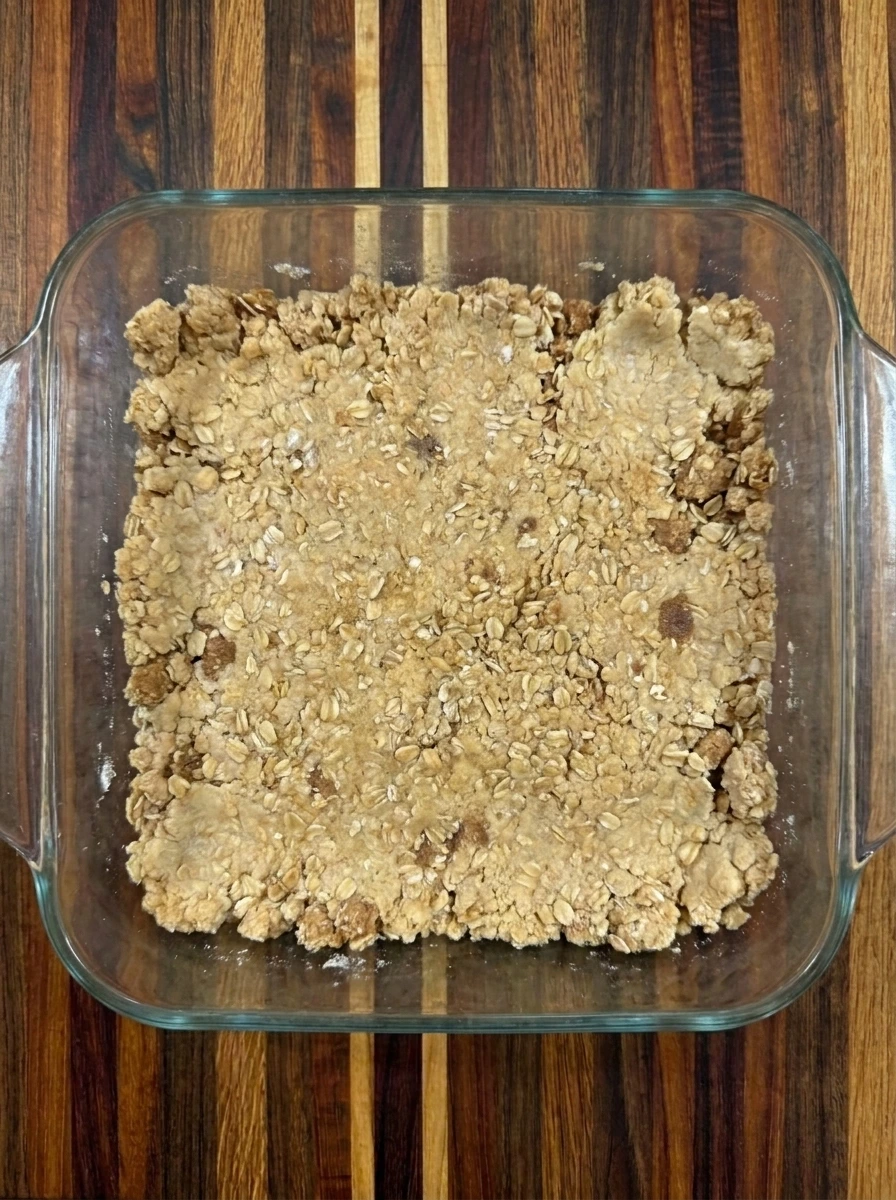
Half of the crumble is pressed into the bottom of the baking dish and changes from loose clusters into a firm uneven base. The surface stays rustic with small dips and thicker corners so the bars look homemade after baking.
Tip: Press the base firmly but not perfectly smooth so the crust holds together and still keeps a tender bite.
Step 3: Coat the huckleberry filling
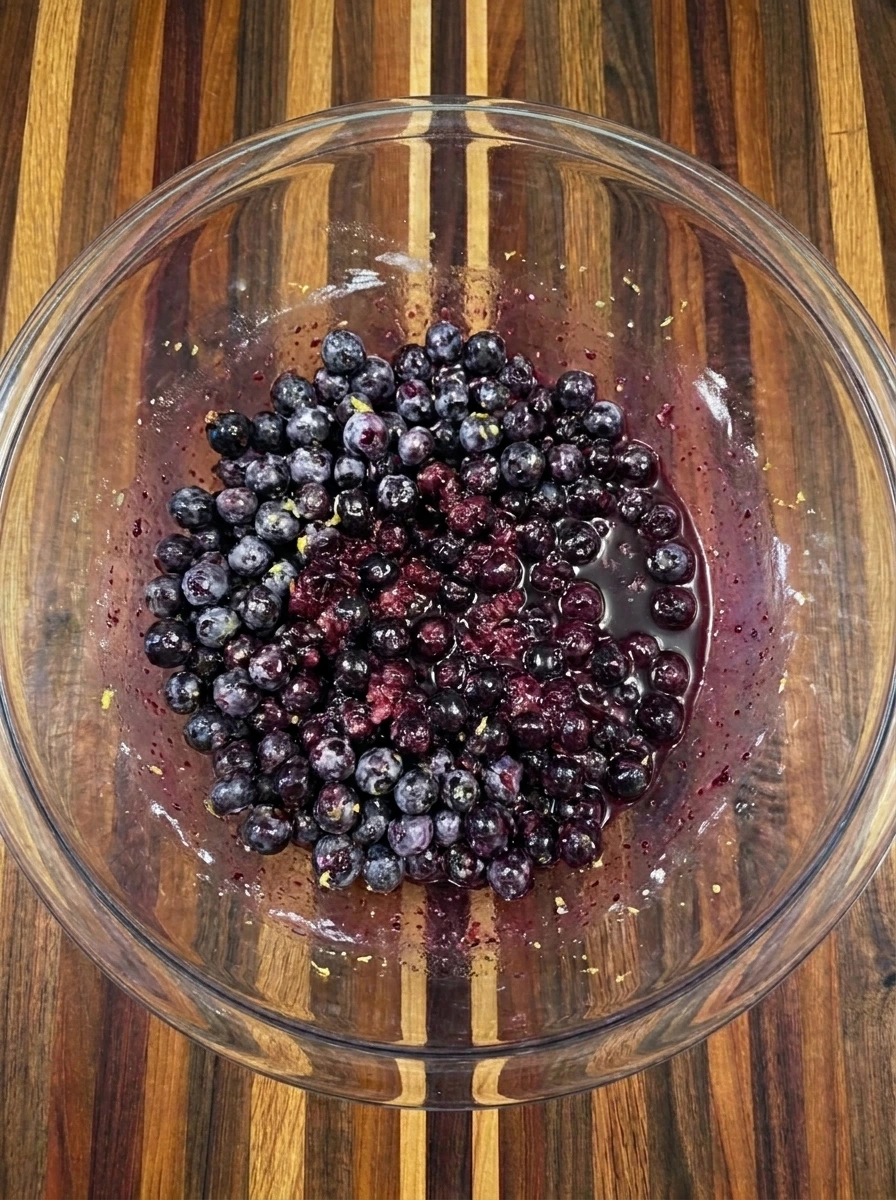
The huckleberries are folded with granulated sugar and cornstarch and lemon juice and zest until the berries look glossy. Some berries remain whole while a few stain the sugar purple and create a lightly thickened fruit coating.
Tip: Fold gently so some berries stay whole while a few burst enough to tint the filling naturally.
Step 4: Layer the berries and crumbs
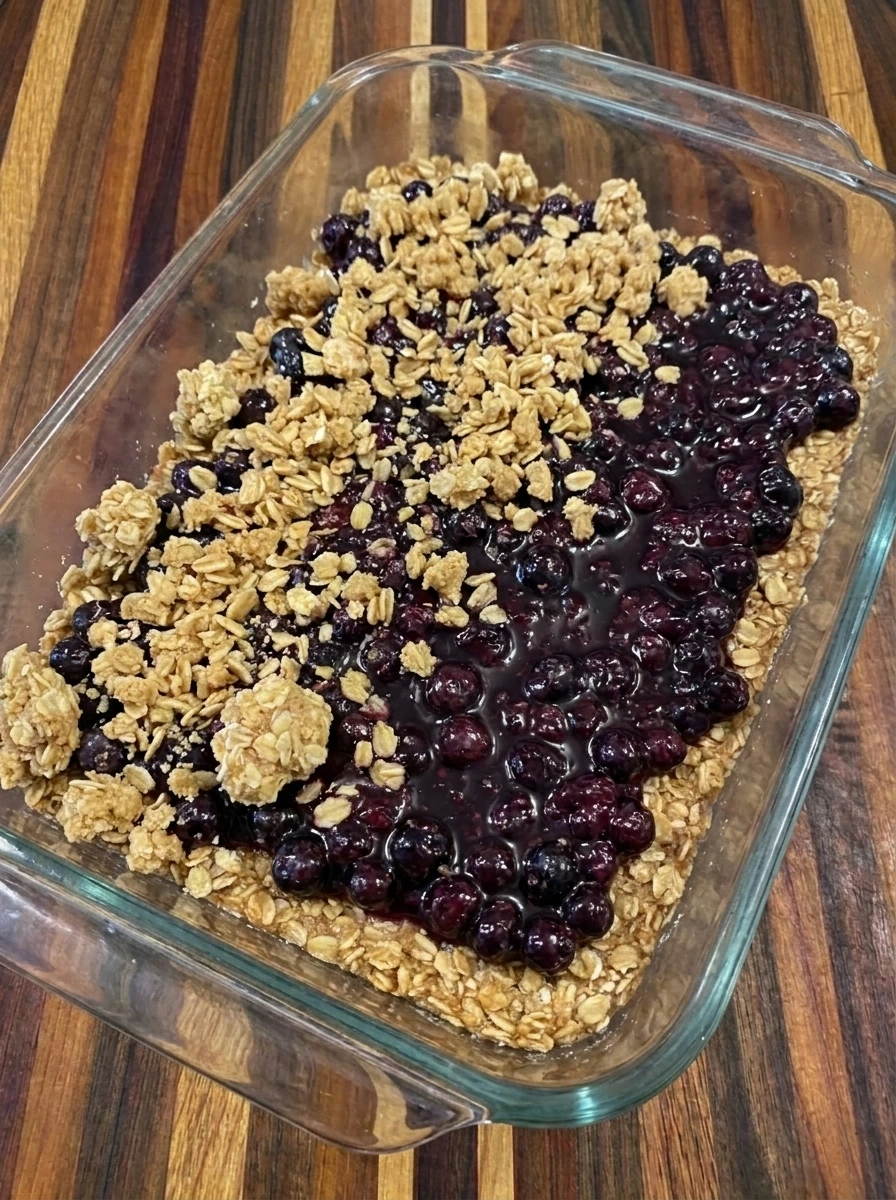
The glossy huckleberry filling is spread over the pressed crust and shifts the dish from a plain base into a purple fruit layer. The remaining crumble is scattered over the berries so small pockets of fruit stay visible between rough oat clusters.
Tip: Leave a few berry pockets uncovered so the finished bars show jammy purple spots under the topping.
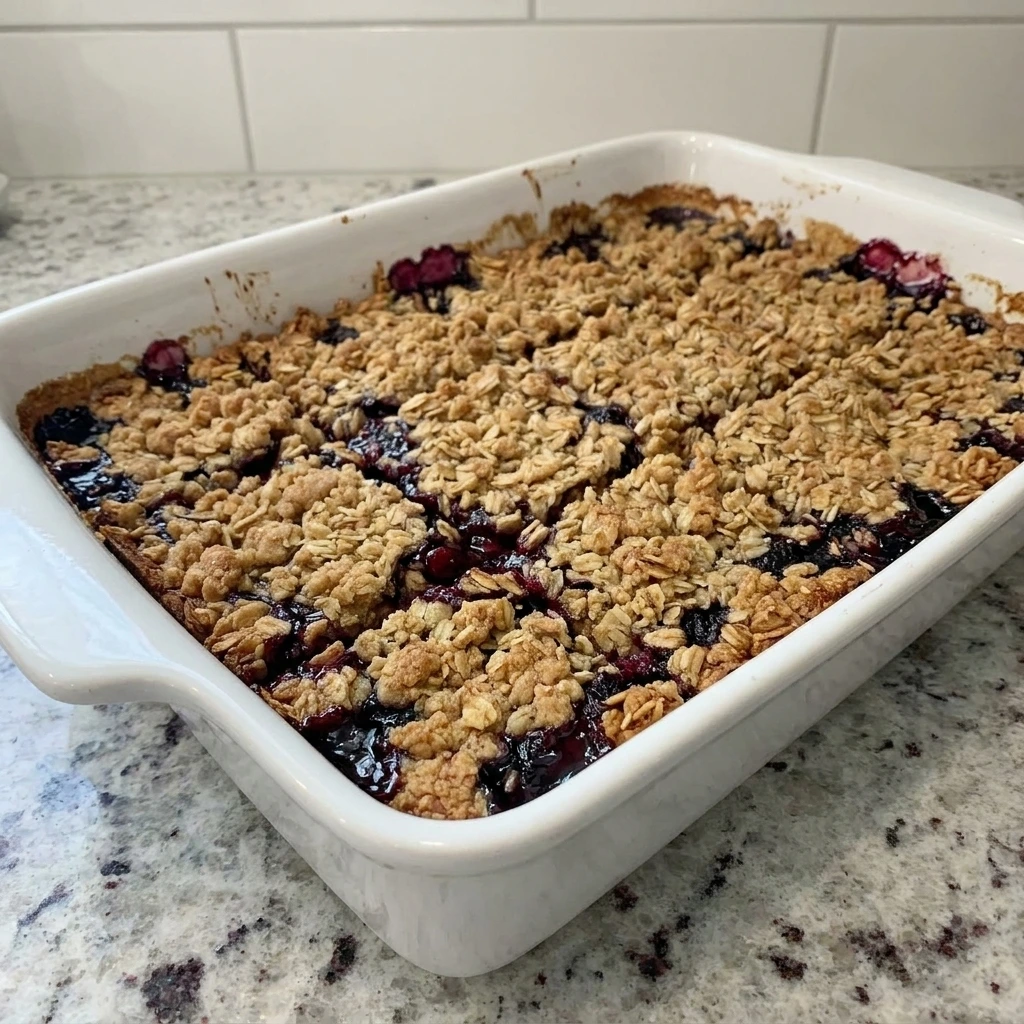
Step 5: Bake until golden and bubbling
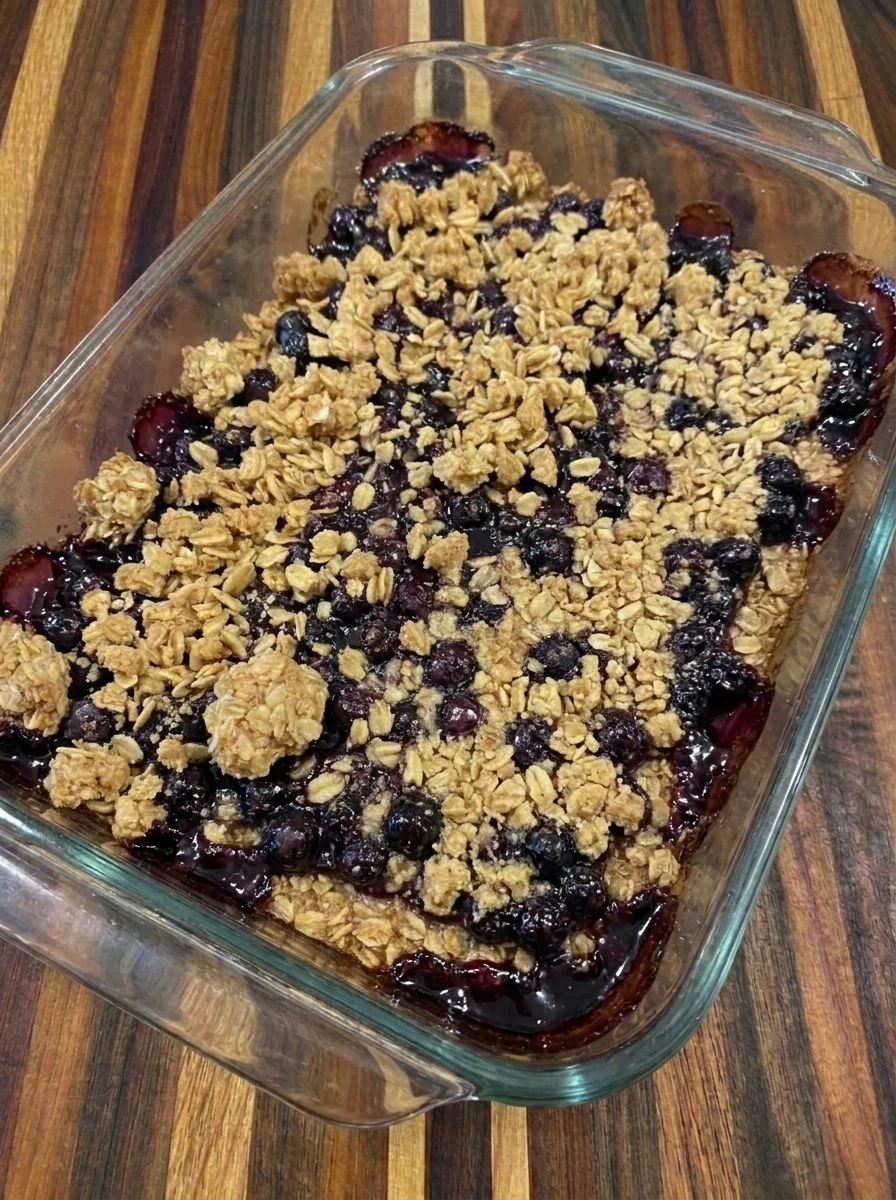
The bars bake until the crumble turns golden in uneven patches and the huckleberry filling bubbles through the cracks. The fruit thickens around the edges and stains the crumb topping in small purple spots while the center settles into a soft bar structure.
Tip: Look for bubbling fruit around the edges and scattered golden crumbs before removing the pan from the oven.
Step 6: Slice and serve one bar
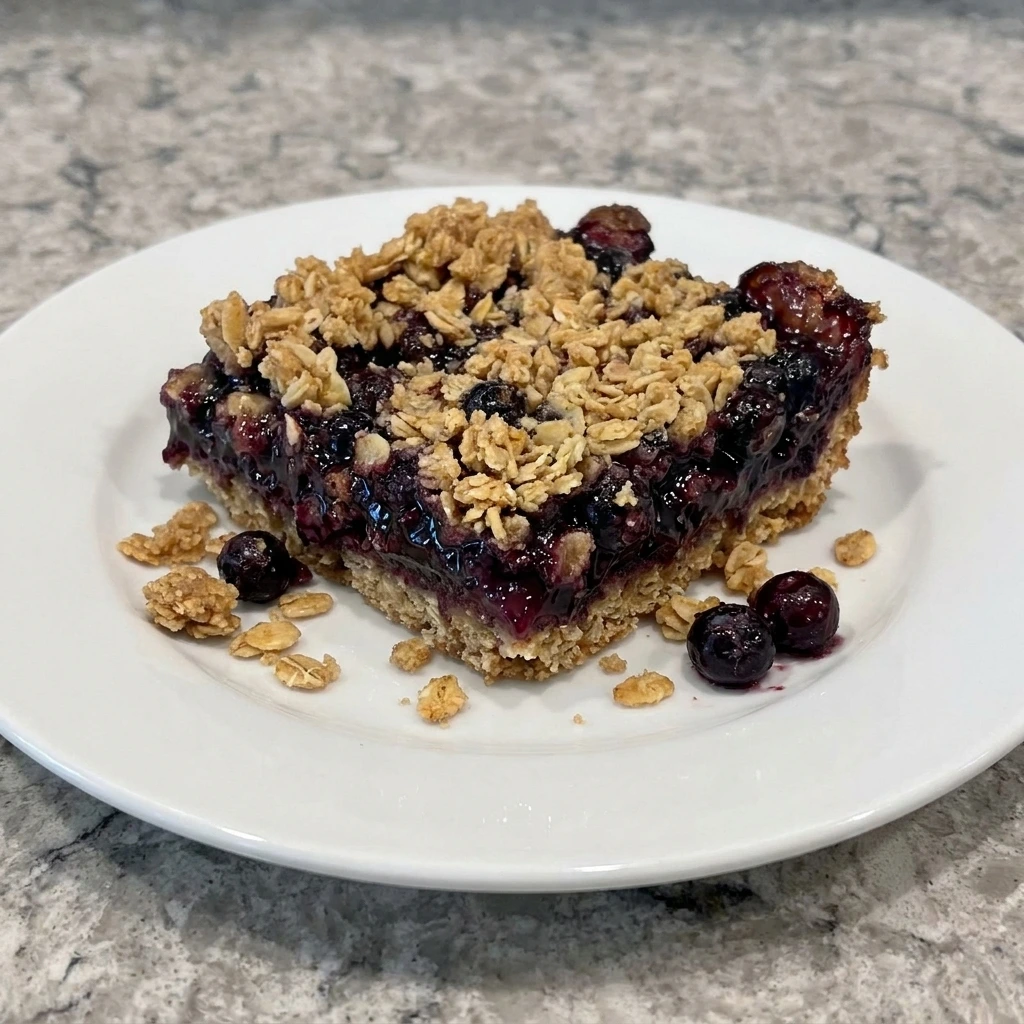
A single cooled bar is lifted onto a plate and the inside shows a thick purple berry layer between the crumbly base and golden topping. The edges look slightly messy and the crumbs fall naturally around the slice so the serving feels homemade and fresh.
Tip: Use a cooled bar for the cleanest slice and let a few crumbs fall naturally for a homemade finish.
Pro Tips
- Chill the bars before slicing so the berry layer firms up and the crumble stays neat with rustic edges.
- Use frozen huckleberries straight from the freezer so the filling stays thick and the crumbs do not turn purple.
- Press only half the crumble firmly into the pan and scatter the rest loosely so the top bakes uneven and crisp.
- Let the pan cool until warm not hot because the fruit needs time to set before you lift out clean pieces.
Storage Instructions
Store cooled Wild Huckleberry Crumble Bars in an airtight container once the berry layer has fully set. Keep them at room temperature for up to one day when your kitchen is cool and the bars will stay tender with a crumbly top. For longer storage place the bars in the refrigerator for up to four days and separate layers with parchment so the topping does not stick. Freeze tightly wrapped bars for up to two months and thaw them in the refrigerator before serving so the fruit layer keeps its structure.
Frequently Asked Questions
Yes. Use frozen berries without thawing and add the starch so the filling bakes thick and bright.
Cool them fully before slicing because the berry layer sets as the pan rests and the base becomes firm.
Yes. They are sweet and fruity yet sturdy enough for brunch trays and casual potluck plates.
Yes. Bake them one day ahead and chill them so the layers slice neatly when served.
See You in the Kitchen
These Wild Huckleberry Crumble Bars are a great way to satisfy your berry dessert cravings without making a full pie.
I typically cut them once they are fully cool and that way all of my dessert pieces will be ready at the same time and if you love this recipe try Raspberry Oatmeal Bars or Raspberry Icebox Cake next.
Even my kids love this one!
Print
Wild Huckleberry Crumble Bars
- Total Time: 45 minutes
- Yield: 4 servings
Description
Wild Huckleberry Crumble Bars are an easy and quick dessert with simple crumble layers and the best berry filling for healthy-ish ideas at brunch or potluck. Buttery oats bake around wild huckleberries into tender bars that slice cleanly and still feel homemade. Serve them for holiday trays and party sweets or pack them for meal prep when you want something bright and cozy without extra work and a fruity treat that still feels practical and family friendly.
Ingredients
- 2 cups Wild huckleberries
- 1 1/2 cups All purpose flour
- 1 cup Old fashioned oats
- 3/4 cup packed Light brown sugar
- 1/3 cup Granulated sugar
- 3/4 cup melted Unsalted butter
- 2 tablespoons Cornstarch
- 1 tablespoon Lemon juice
- 1 teaspoon Lemon zest
- 1 teaspoon Vanilla extract
- 1/2 teaspoon Fine salt
Instructions
- The flour and oats and brown sugar and salt are combined until the dry mixture looks speckled and uneven. Melted butter and vanilla soak into the crumbs and turn the mixture from loose powder into damp clusters with sandy edges.
- Half of the crumble is pressed into the bottom of the baking dish and changes from loose clusters into a firm uneven base. The surface stays rustic with small dips and thicker corners so the bars look homemade after baking.
- The huckleberries are folded with granulated sugar and cornstarch and lemon juice and zest until the berries look glossy. Some berries remain whole while a few stain the sugar purple and create a lightly thickened fruit coating.
- The glossy huckleberry filling is spread over the pressed crust and shifts the dish from a plain base into a purple fruit layer. The remaining crumble is scattered over the berries so small pockets of fruit stay visible between rough oat clusters.
- The bars bake until the crumble turns golden in uneven patches and the huckleberry filling bubbles through the cracks. The fruit thickens around the edges and stains the crumb topping in small purple spots while the center settles into a soft bar structure.
- A single cooled bar is lifted onto a plate and the inside shows a thick purple berry layer between the crumbly base and golden topping. The edges look slightly messy and the crumbs fall naturally around the slice so the serving feels homemade and fresh.
Notes
Pro Tips:
- Chill the bars before slicing so the berry layer firms up and the crumble stays neat with rustic edges.
- Use frozen huckleberries straight from the freezer so the filling stays thick and the crumbs do not turn purple.
- Press only half the crumble firmly into the pan and scatter the rest loosely so the top bakes uneven and crisp.
- Let the pan cool until warm not hot because the fruit needs time to set before you lift out clean pieces.
Storage: Store cooled Wild Huckleberry Crumble Bars in an airtight container once the berry layer has fully set. Keep them at room temperature for up to one day when your kitchen is cool and the bars will stay tender with a crumbly top. For longer storage place the bars in the refrigerator for up to four days and separate layers with parchment so the topping does not stick. Freeze tightly wrapped bars for up to two months and thaw them in the refrigerator before serving so the fruit layer keeps its structure.
- Prep Time: 15 minutes
- Cook Time: 30 minutes
- Category: Dessert
- Cuisine: American