Seriously and no joke this is the best Mini S’mores Cookie Cups recipe. It is the one my family asks me to make whenever we want a cozy dessert without building a campfire. It is a classic treat with simple and delicious ingredients. Soft graham cookie cups are filled with creamy chocolate and fluffy marshmallows before they are toasted until golden.
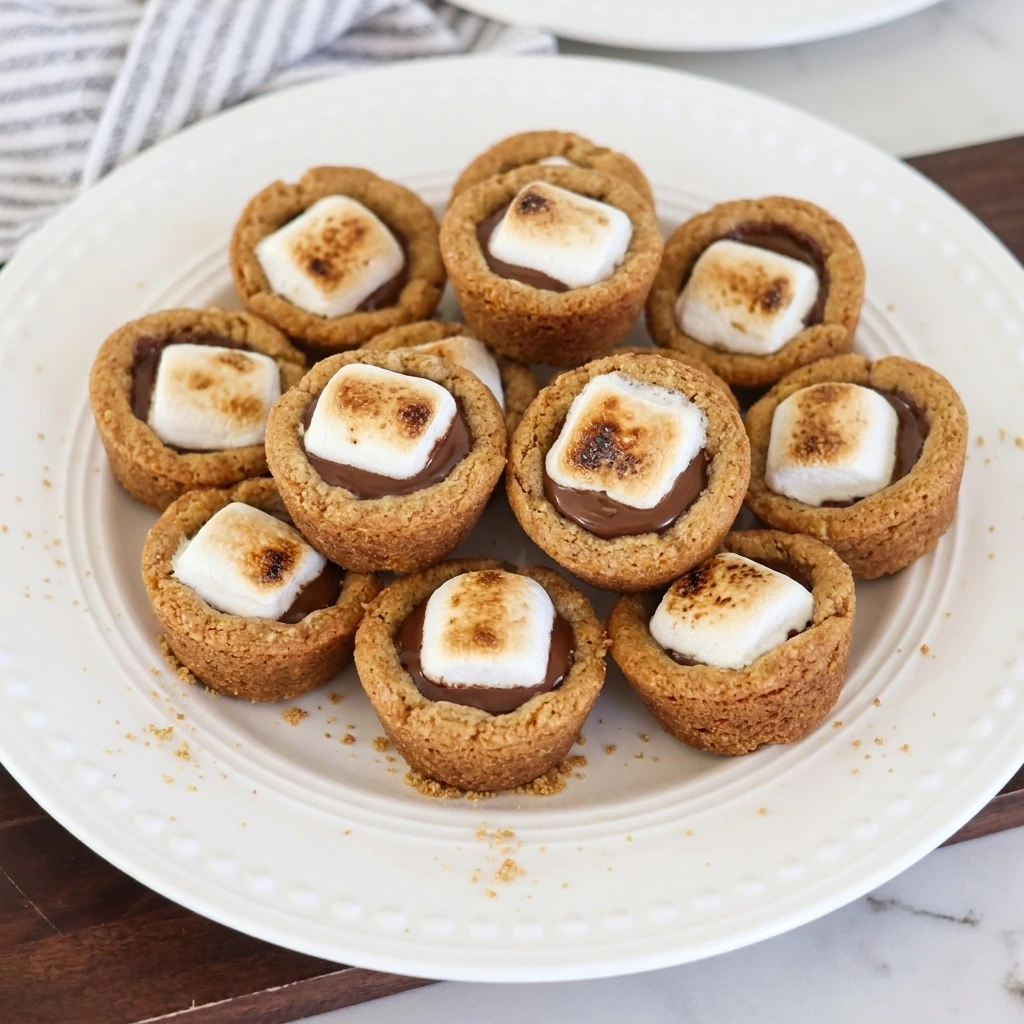
Perfect for parties or holiday trays with some fresh berries on the side. A batch of Mini S’mores Cookie Cups is one of my go-to easy desserts. Not only does it make for a super delicious treat but it creates neat little portions that are easy to serve. Also there are no complicated methods or unusual ingredients needed.
And party prep is a cinch. I often bake the cookie shells earlier in the day before filling and toasting them shortly before serving. If you enjoy warm homemade bakes then try our Fig Muffins for another simple treat. With just a few basic ingredients probably already in the fridge and pantry you can whip up these cookie cups for a holiday platter or potluck table or even pack them into a dessert box for a fun party treat.
Ingredients
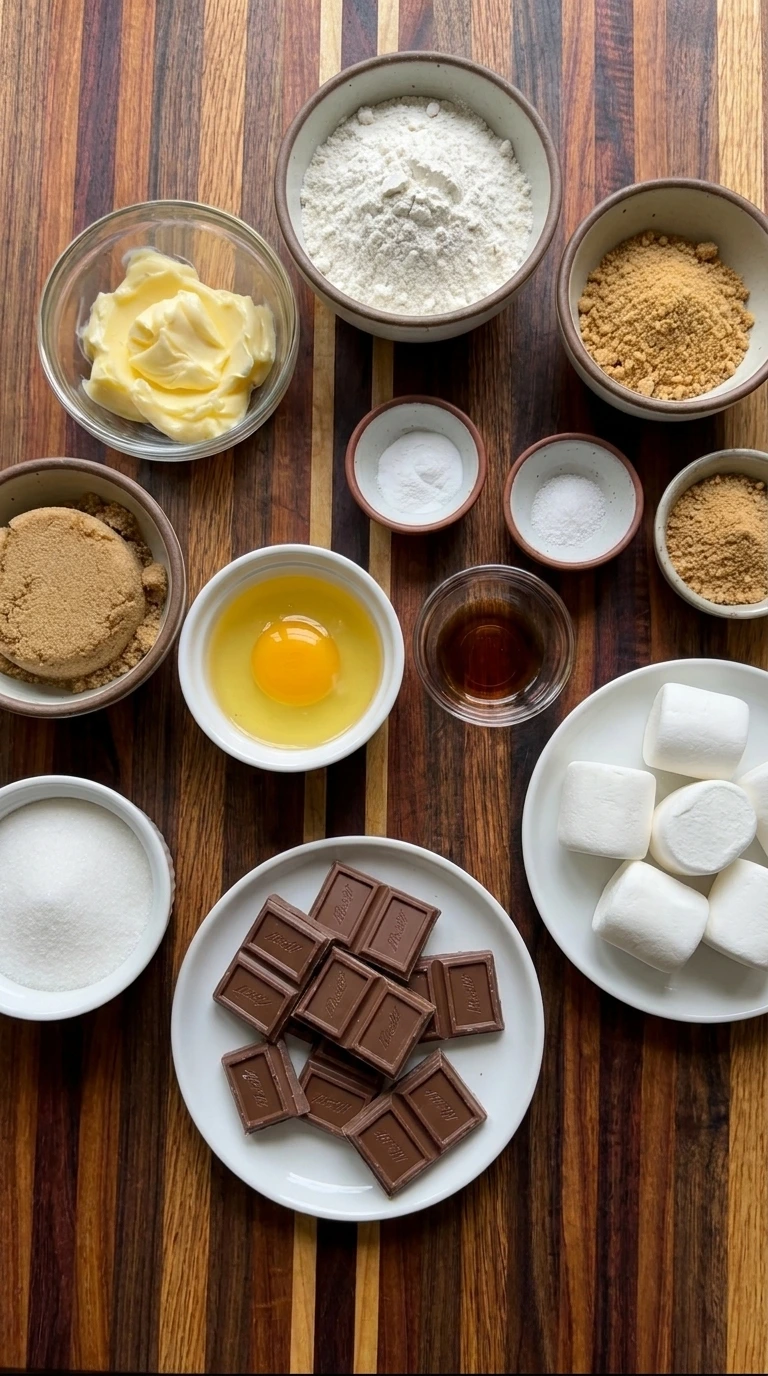
Here is what I use for this recipe and you can adjust nuts or spices based on preference:
- Unsalted butter: Creates a rich cookie dough while helping the baked cups remain tender around the edges.
- Light brown sugar: Adds caramel sweetness while providing moisture that keeps the cookie shells soft.
- Granulated sugar: Sweetens the dough while encouraging lightly crisp and golden cookie edges.
- Large egg: Binds the dough together while helping each cookie cup hold its shape during baking.
- Vanilla extract: Adds warm flavor that complements the graham crumbs plus chocolate and marshmallows.
- All-purpose flour: Provides the structure needed for sturdy cookie cups that can support the filling.
- Graham cracker crumbs: Creates the familiar toasted graham flavor associated with traditional campfire s’mores.
- Baking soda: Helps the cookie dough rise slightly while keeping the finished shells pleasantly tender.
- Fine salt: Balances the sweetness while sharpening the flavors of the chocolate and graham crumbs.
- Milk chocolate squares: Melt inside the warm cookie cups to form a creamy and recognizable s’mores center.
- Large marshmallows: Create exactly 12 fluffy toppings that soften and toast over the melted chocolate.
- Graham cracker crumbs: Add a lightly crunchy finish while making the toasted tops look naturally homemade.
Tools You’ll Need
- Large mixing bowl: Provides enough space to cream the butter and sugars before combining the complete graham cookie dough.
- Electric mixer: Blends the butter and sugars into a light mixture while incorporating the egg evenly.
- Measuring cups and spoons: Ensure accurate proportions so the cookie shells bake with the correct texture and structure.
- 12-cavity mini muffin tin: Shapes the dough into exactly 12 small cups while supporting their sides during baking.
- Small cookie scoop: Divides the dough into reasonably consistent portions while allowing natural handmade variation.
- Cooling rack: Allows air to circulate around the baked cups so their bases remain firm rather than damp.
Instructions
Step 1: Cream the butter and sugars

Beat the softened butter with the light brown sugar and granulated sugar until the separate ingredients become one pale and fluffy mixture. The mixture should look slightly uneven around the edges while soft ridges form through the center.
Tip: Use properly softened butter so the sugars blend smoothly without making the mixture greasy or overly loose.
Step 2: Mix the graham cookie dough

Blend the egg and vanilla into the creamed mixture until glossy streaks disappear. Fold in the flour and graham cracker crumbs and baking soda and salt until a thick tan dough forms. The finished dough should look soft and slightly crumbly with darker graham flecks scattered throughout.
Tip: Stop mixing as soon as no dry flour remains so the baked cookie cups stay tender rather than dense.
Step 3: Shape the dough into cookie cups

Divide the dough into exactly 12 uneven portions and press one portion into each cavity. Shape the dough across the bottom and partly up the sides to create shallow wells. The cups should have irregular rims and slightly different depths so they look naturally handmade.
Tip: Keep the bases slightly thicker than the sides so the chocolate filling does not break through after baking.
Step 4: Bake the graham cookie shells
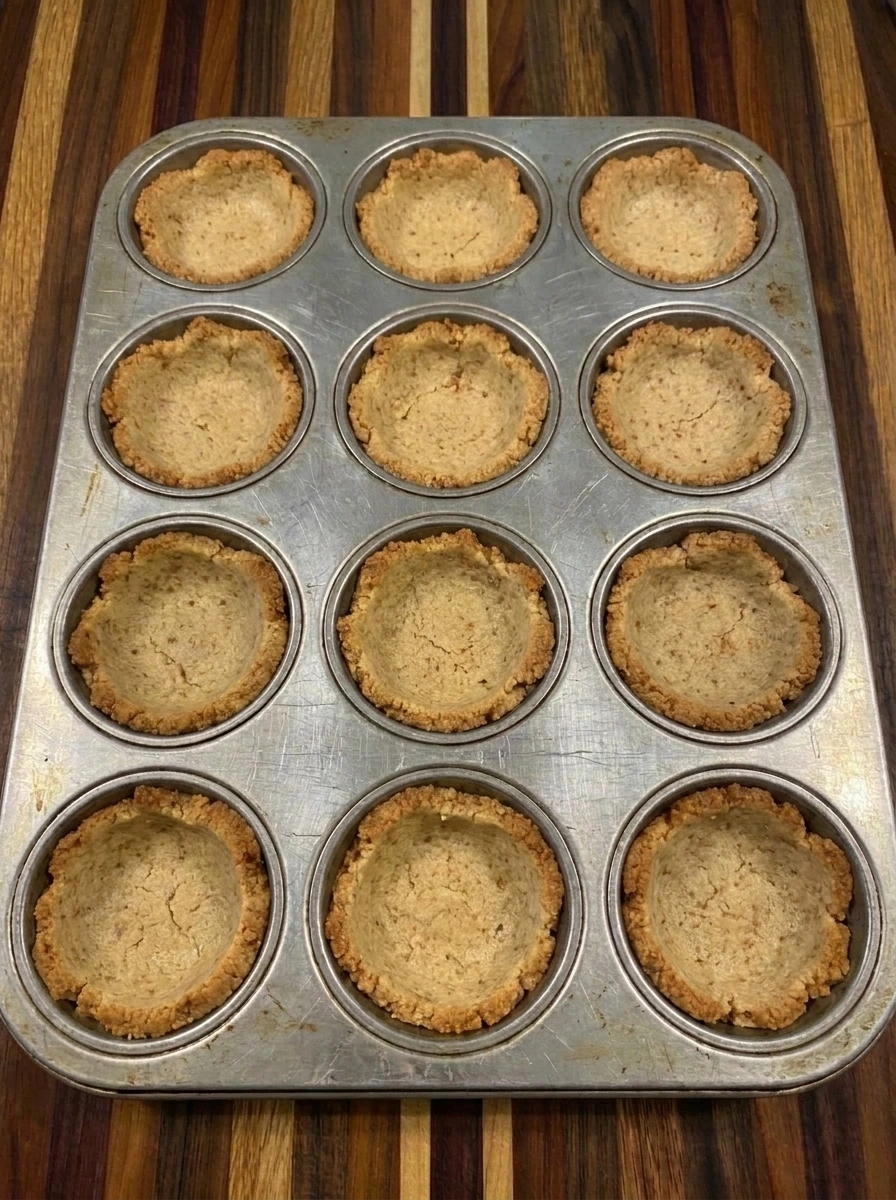
Bake the shaped dough until the rims become lightly golden and the centers puff before settling into soft wells. Press the centers down gently while the shells remain warm if they rise too high. The baked shells should show uneven browning with firm edges and tender centers.
Tip: Remove the shells when the edges are golden because they continue to firm as they cool in the muffin tin.
Step 5: Melt chocolate inside the warm cups
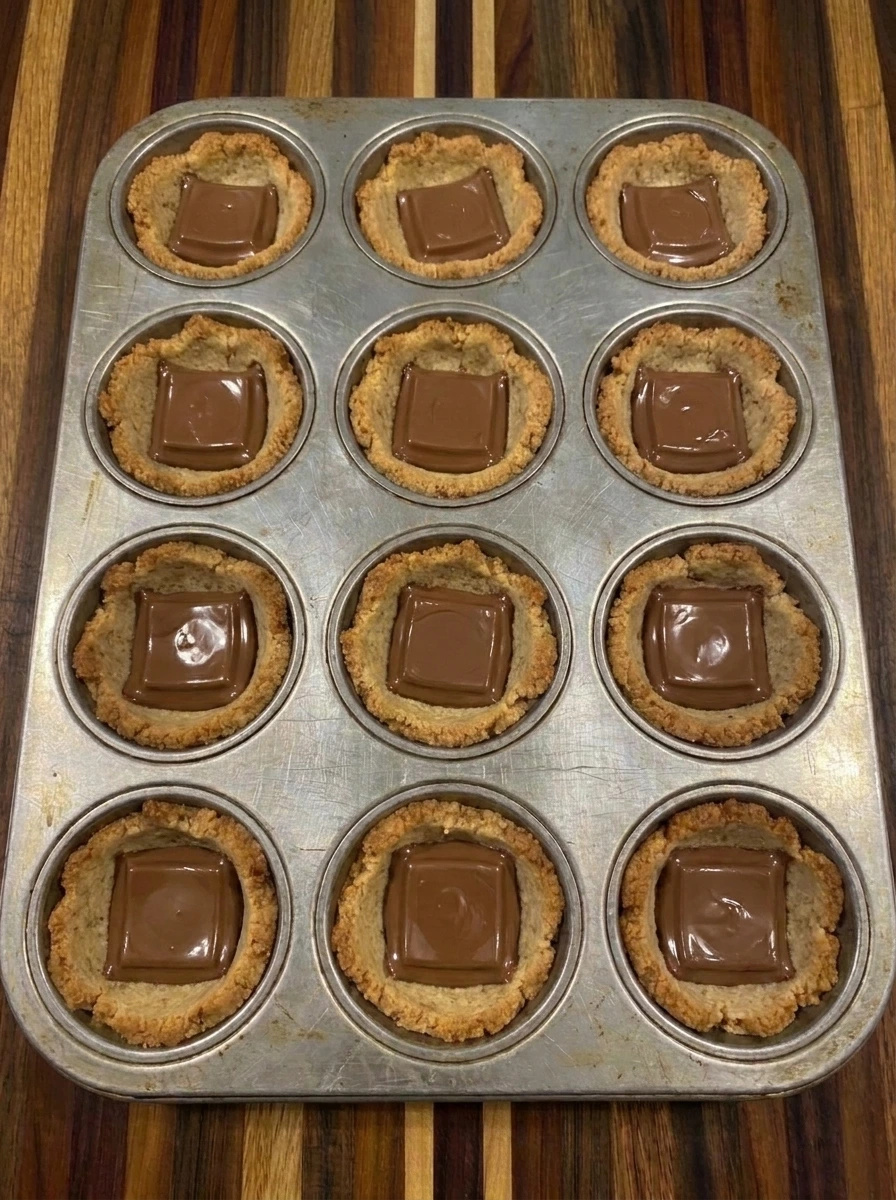
Place exactly one milk chocolate square into each of the 12 warm cookie shells. Return the filled cups to the heat briefly until the chocolate softens and turns glossy. The squares should lose their sharp corners while remaining visible inside the golden cookie wells.
Tip: Add the chocolate while the shells are warm so it begins melting evenly without overbaking the cookie bases.
Step 6: Toast the marshmallow toppings
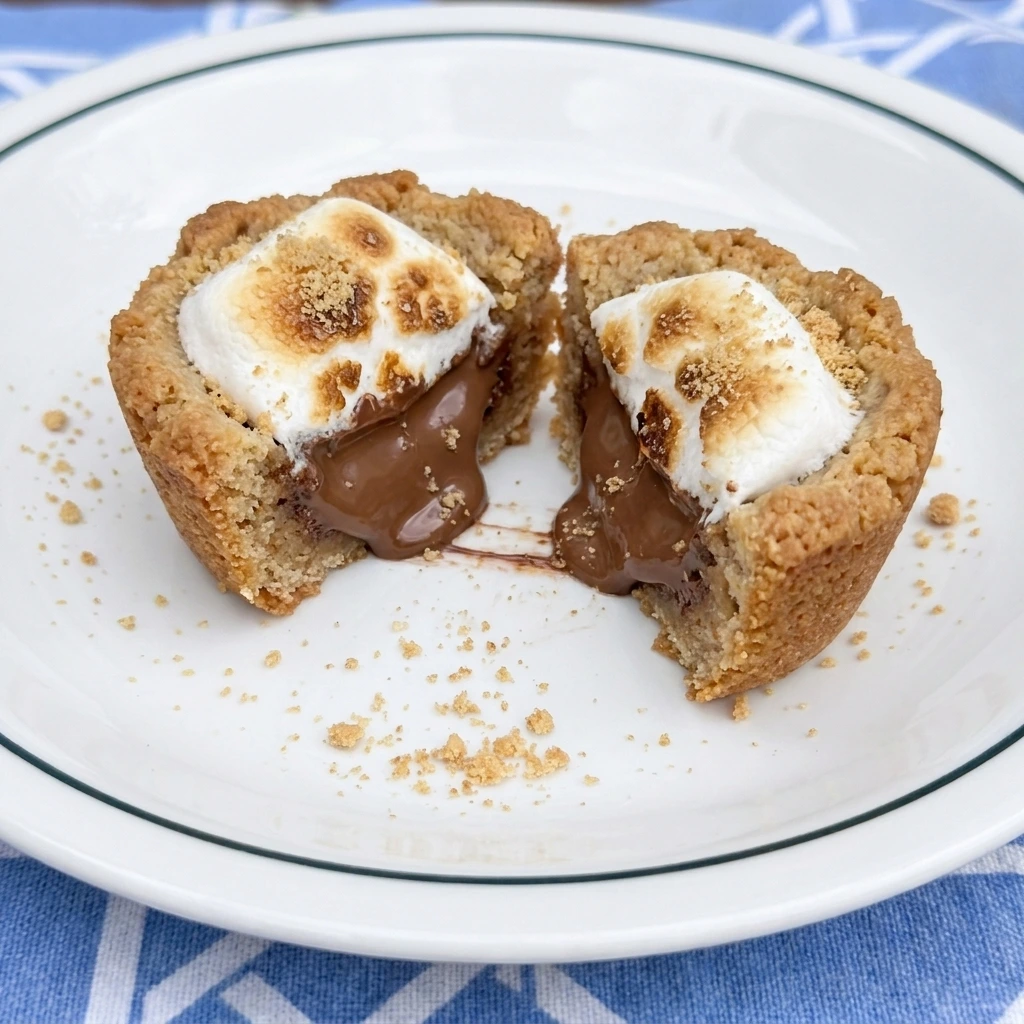
Place one marshmallow half over the softened chocolate in each cup and toast until the tops expand and develop irregular golden patches. Finish with an uneven scattering of graham cracker crumbs. Transfer one cup to a white plate and cut it open so the soft cookie shell and melted chocolate center remain visible beneath the toasted marshmallow.
Tip: Watch the marshmallows closely because their surfaces can change from pale to deeply toasted within seconds.
Pro Tips
- Press the dough slightly thicker across each base so the warm chocolate stays contained inside every cookie cup.
- Bake only until the rims turn golden because the tender centers continue setting while the muffin tin cools.
- Add chocolate while the shells remain warm so each square softens smoothly without needing excessive extra heat.
- Toast the marshmallows just before serving so the tops stay fluffy while the chocolate beneath remains soft.
Storage Instructions
Allow the Mini S’mores Cookie Cups to cool completely before storing them so trapped warmth does not create excess moisture. Place the cups in a single loose layer inside an airtight container. Store the finished cups at room temperature for up to two days. The marshmallow topping will gradually become firmer although the cookie shell and chocolate center will remain enjoyable. For longer storage freeze the baked cookie shells without chocolate or marshmallows for up to one month. Thaw the shells at room temperature before filling and toasting them. To refresh assembled cups warm them briefly until the chocolate begins to soften. Avoid prolonged heating because the marshmallow may melt away from the cookie shell.
Frequently Asked Questions
Bake the empty shells one day ahead then add chocolate and marshmallows shortly before serving.
Grease every muffin cavity lightly and let the baked cups cool briefly before loosening the edges.
Yes dark or semisweet chocolate works well and creates a less sweet contrast with the marshmallows.
Warm individual cups briefly until the chocolate softens while avoiding overheating the marshmallow.
See You in the Kitchen
These Mini S’mores Cookie Cups are a great way to satisfy your campfire dessert cravings without building a fire.
I typically prepare the cookie shells at the same time I make a batch of Fig Oatmeal Bake and that way all of my holiday or brunch treats will be ready at the same time.
Even my kids love these alongside Chicken Parmesan Toast Bites at a family party!
Print
Mini S’mores Cookie Cups
- Total Time: 34 minutes
- Yield: 12 servings
Description
These Mini S’mores Cookie Cups turn a campfire favorite into an easy handheld dessert with soft graham cookie shells plus melted chocolate and toasted marshmallows. They are quick enough for a weeknight dinner treat and simple enough for holiday baking or meal prep. Serve the best warm cups at a potluck plus brunch or party. For a healthy balance pair each rich little cup with fresh berries or sliced fruit.
Ingredients
- 1/2 cup softened Unsalted butter
- 1/2 cup packed Light brown sugar
- 1/4 cup Granulated sugar
- 1 Large egg
- 1 teaspoon Vanilla extract
- 1 cup All-purpose flour
- 3/4 cup Graham cracker crumbs
- 1/2 teaspoon Baking soda
- 1/4 teaspoon Fine salt
- 12 small squares Milk chocolate squares
- 6 halved crosswise Large marshmallows
- 2 tablespoons for finishing Graham cracker crumbs
Instructions
- Beat the softened butter with the light brown sugar and granulated sugar until the separate ingredients become one pale and fluffy mixture. The mixture should look slightly uneven around the edges while soft ridges form through the center.
- Blend the egg and vanilla into the creamed mixture until glossy streaks disappear. Fold in the flour and graham cracker crumbs and baking soda and salt until a thick tan dough forms. The finished dough should look soft and slightly crumbly with darker graham flecks scattered throughout.
- Divide the dough into exactly 12 uneven portions and press one portion into each cavity. Shape the dough across the bottom and partly up the sides to create shallow wells. The cups should have irregular rims and slightly different depths so they look naturally handmade.
- Bake the shaped dough until the rims become lightly golden and the centers puff before settling into soft wells. Press the centers down gently while the shells remain warm if they rise too high. The baked shells should show uneven browning with firm edges and tender centers.
- Place exactly one milk chocolate square into each of the 12 warm cookie shells. Return the filled cups to the heat briefly until the chocolate softens and turns glossy. The squares should lose their sharp corners while remaining visible inside the golden cookie wells.
- Place one marshmallow half over the softened chocolate in each cup and toast until the tops expand and develop irregular golden patches. Finish with an uneven scattering of graham cracker crumbs. Transfer one cup to a white plate and cut it open so the soft cookie shell and melted chocolate center remain visible beneath the toasted marshmallow.
Notes
Pro Tips:
- Press the dough slightly thicker across each base so the warm chocolate stays contained inside every cookie cup.
- Bake only until the rims turn golden because the tender centers continue setting while the muffin tin cools.
- Add chocolate while the shells remain warm so each square softens smoothly without needing excessive extra heat.
- Toast the marshmallows just before serving so the tops stay fluffy while the chocolate beneath remains soft.
Storage: Allow the Mini S’mores Cookie Cups to cool completely before storing them so trapped warmth does not create excess moisture. Place the cups in a single loose layer inside an airtight container. Store the finished cups at room temperature for up to two days. The marshmallow topping will gradually become firmer although the cookie shell and chocolate center will remain enjoyable. For longer storage freeze the baked cookie shells without chocolate or marshmallows for up to one month. Thaw the shells at room temperature before filling and toasting them. To refresh assembled cups warm them briefly until the chocolate begins to soften. Avoid prolonged heating because the marshmallow may melt away from the cookie shell.
- Prep Time: 20 minutes
- Cook Time: 14 minutes
- Category: Dessert
- Cuisine: American