Seriously and no joke this is the best Halloween Ghost Madeleines recipe. It is the one my mom and before that my grandma would have made for years. It is a classic recipe with simple and delicious ingredients. Tender vanilla madeleines are covered with smooth white chocolate and finished with tiny dark chocolate ghost faces.
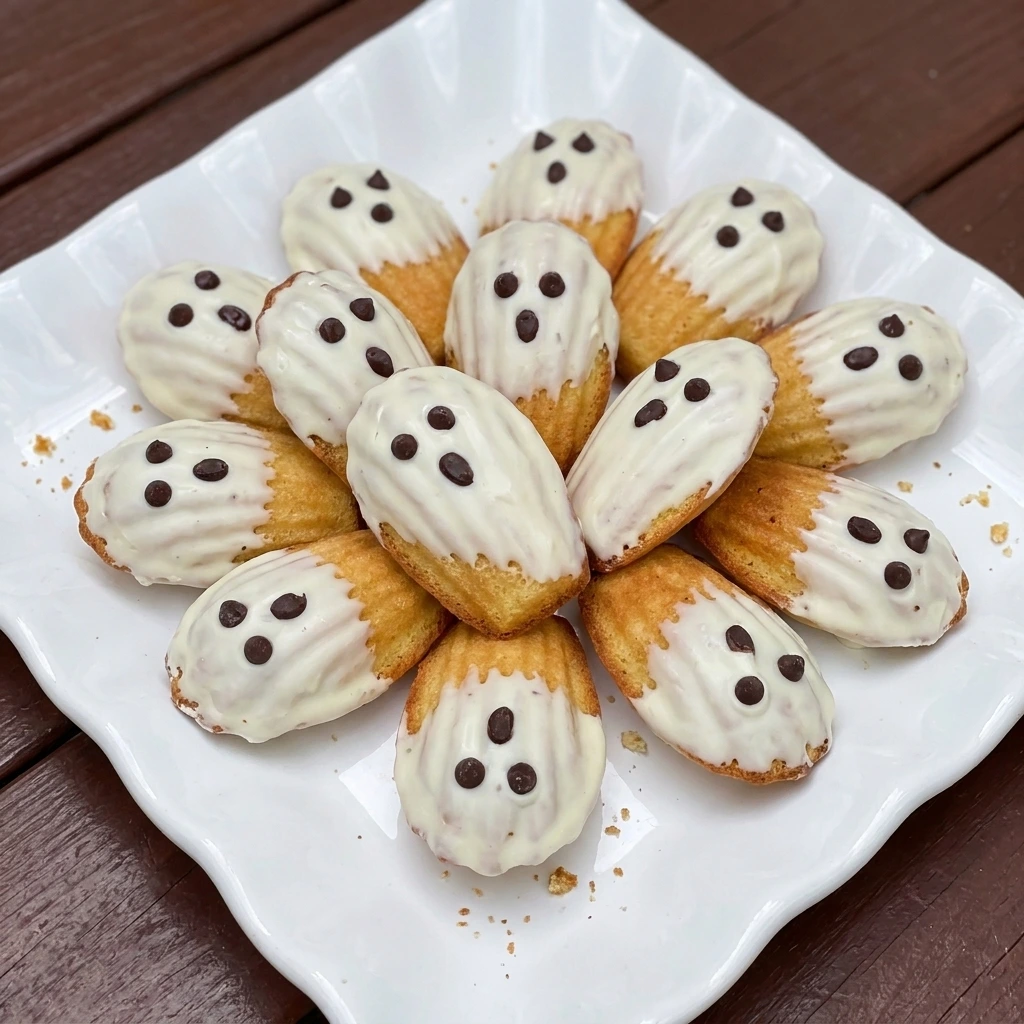
They are perfect for Halloween dessert trays or sweet party treats with warm apple cider on the side. A batch of Halloween Ghost Madeleines is one of my go-to easy holiday desserts. Not only does it make for a super delicious treat but each little cake has a soft center and lightly crisp edges. Also there are no complicated decorating methods or unusual ingredients needed.
And party prep is a cinch. I often bake the madeleines one day ahead before coating them alongside a batch of Mini Oreo Cheesecake Cups for the dessert table. With just a few basic ingredients probably already in the fridge and pantry you can whip up these cakes and coat them with white chocolate and even give every ghost a different expression for a playful homemade dish.
Ingredients
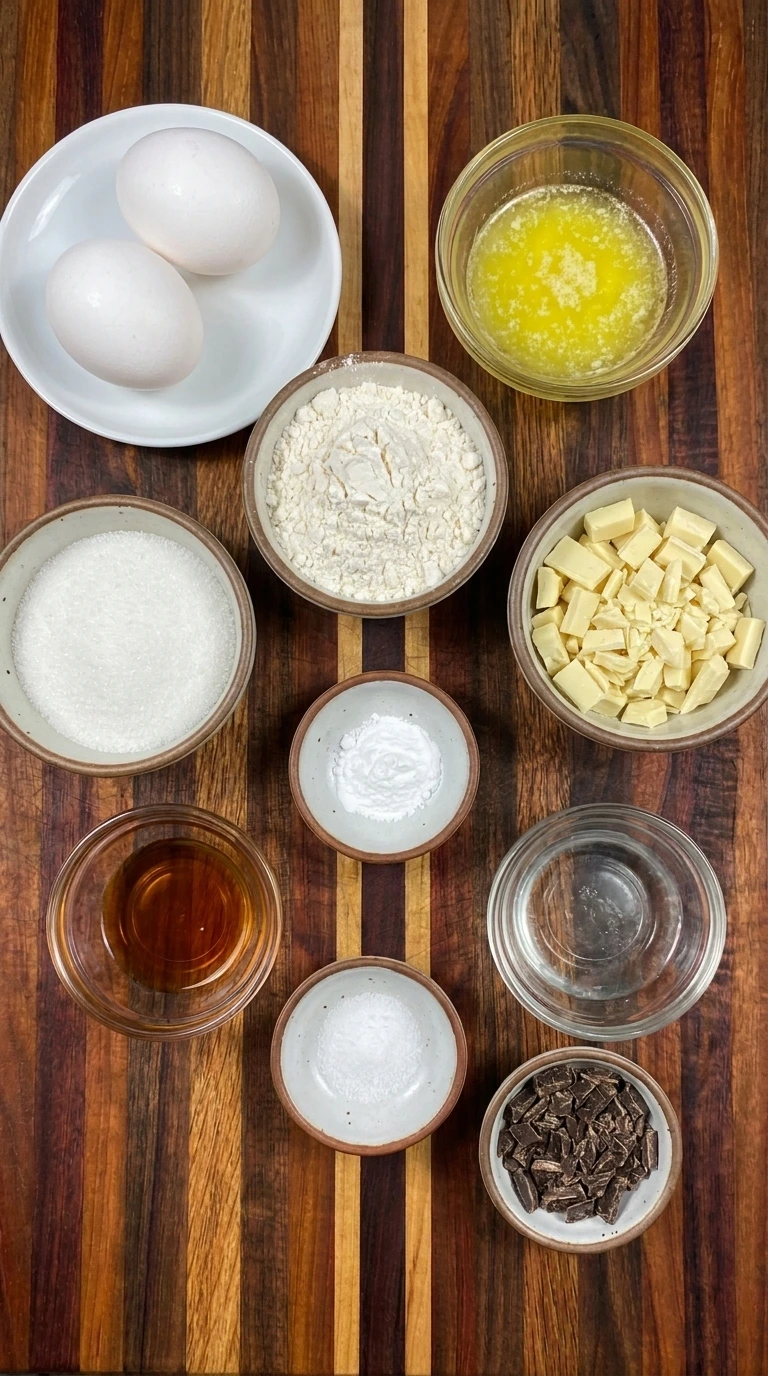
Here is what I use for this recipe and you can adjust nuts or spices based on preference:
- Large eggs: The eggs create structure and help the batter become airy enough for tender madeleines.
- Granulated sugar: The sugar sweetens the cakes and helps the edges develop a delicate golden finish.
- Vanilla extract: The vanilla adds a warm bakery style flavor that complements the white chocolate coating.
- All purpose flour: The flour provides the main structure while keeping the small cakes soft and light.
- Baking powder: The baking powder gives the batter enough lift to form rounded centers during baking.
- Fine salt: The salt balances the sweetness and strengthens the vanilla and chocolate flavors.
- Unsalted butter: The butter adds richness and creates moist centers with lightly crisp shell shaped edges.
- White chocolate: The white chocolate forms the pale ghost coating and gives each madeleine a smooth sweet shell.
- Coconut oil: The coconut oil loosens the melted chocolate so the coating spreads in a thin even layer.
- Dark chocolate: The dark chocolate creates contrasting eyes and mouths for the finished ghost faces.
Tools You’ll Need
- Large mixing bowl: Provides enough room to whip the eggs and fold the batter without spilling.
- Electric mixer: Whips the eggs and sugar until pale and thick enough to create a light crumb.
- Fine mesh sieve: Breaks up flour and baking powder clumps before they are folded into the egg mixture.
- Flexible spatula: Folds the dry ingredients and butter gently while preserving air in the batter.
- Twelve cavity madeleine pan: Shapes the batter into traditional shells while encouraging crisp ridged edges.
- Small heat safe bowl: Holds the white chocolate and coconut oil while they melt into a smooth coating.
- Piping bag: Controls the melted dark chocolate when adding small ghost eyes and mouths.
- Cooling rack: Allows air to circulate around the baked cakes so they cool without becoming damp.
Instructions
Step 1: Whip the eggs with sugar
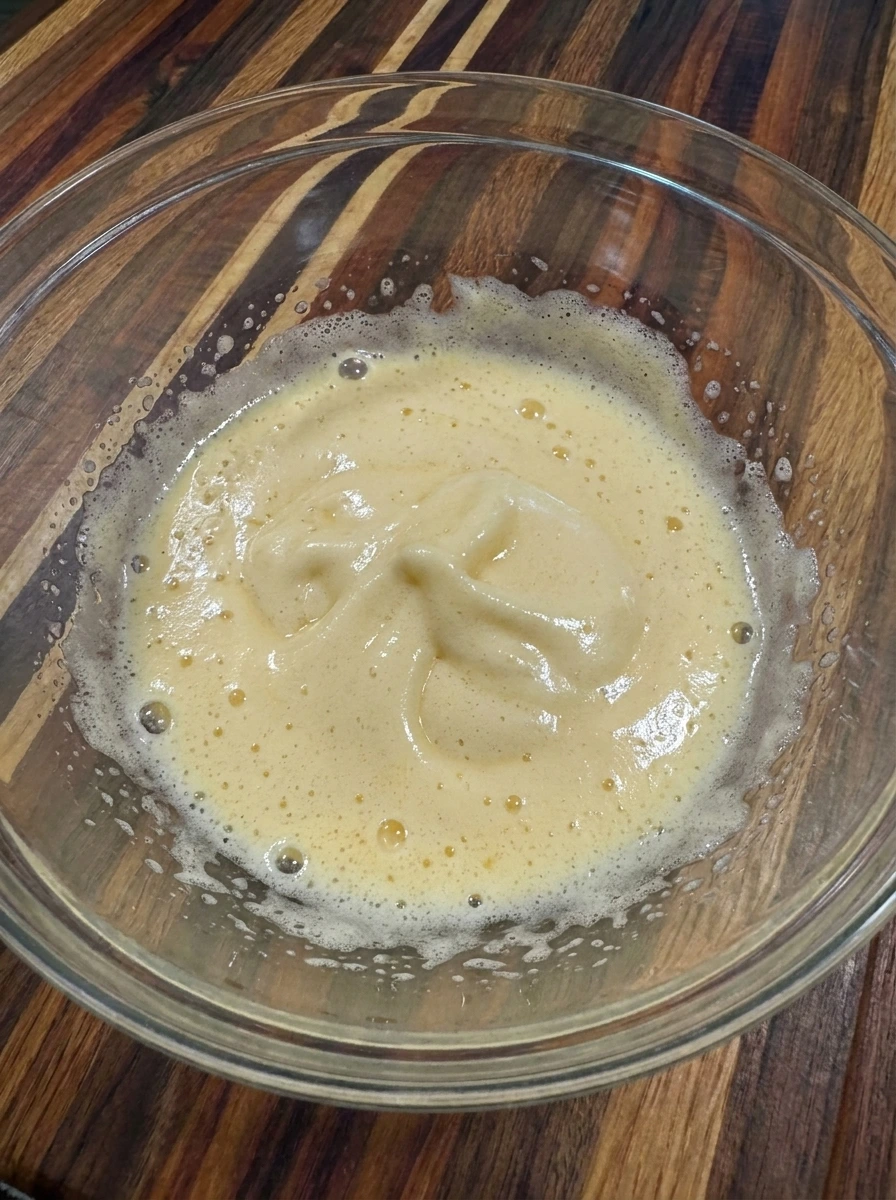
Beat the two eggs with the granulated sugar until the mixture changes from deep yellow and loose to pale and thick. The finished mixture should fall back in soft ribbons and hold faint trails across the surface. Mix in the vanilla so the liquid looks evenly blended while a few natural bubbles remain around the edges.
Tip: Whip until visible ribbons linger briefly because this trapped air helps the madeleines bake with light and tender centers.
Step 2: Fold in the flour and butter
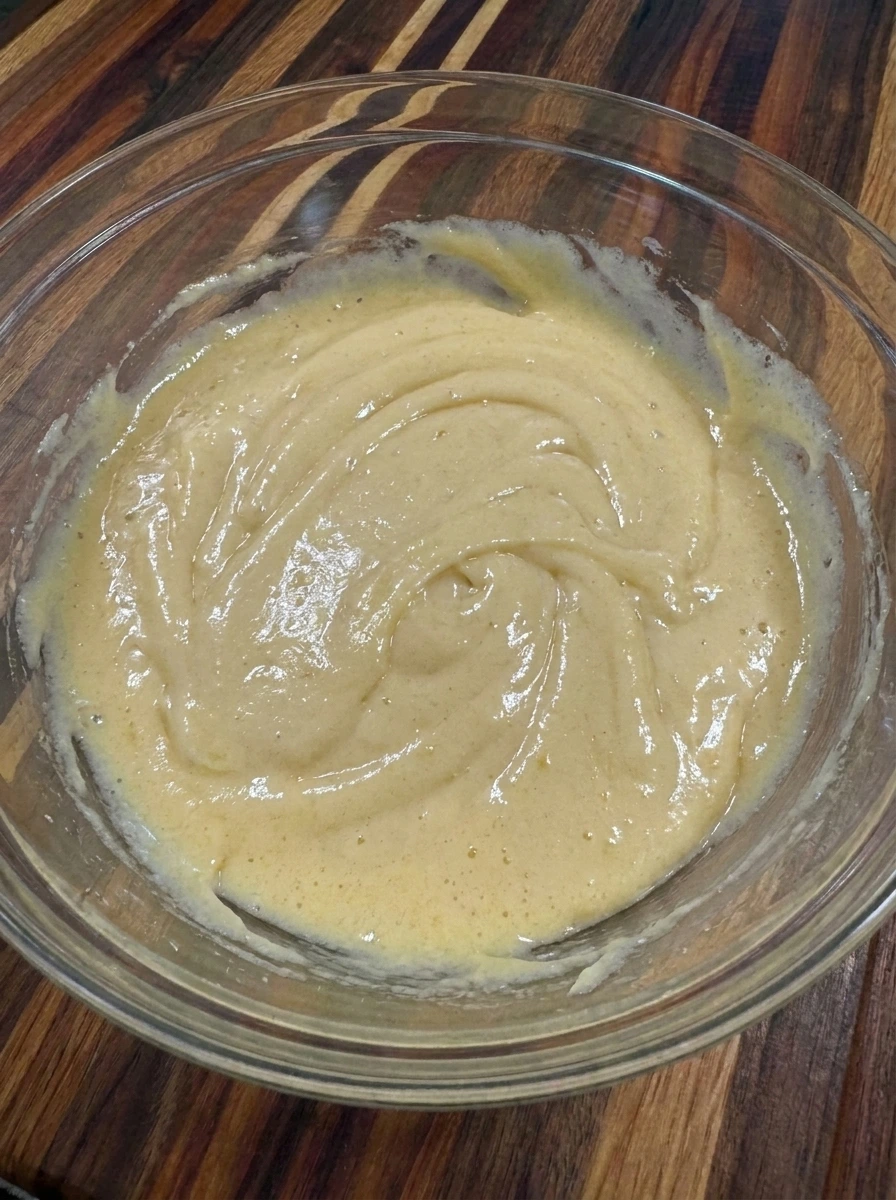
Fold the flour and baking powder and salt into the pale egg mixture until only a few dry streaks remain. Pour in the cooled melted butter and continue folding until the batter becomes glossy and thick. The finished batter should look smooth but not perfectly uniform while a few soft folds and tiny air bubbles remain visible.
Tip: Fold gently and stop as soon as the flour disappears because vigorous mixing can remove the air needed for a delicate crumb.
Step 3: Portion the chilled batter
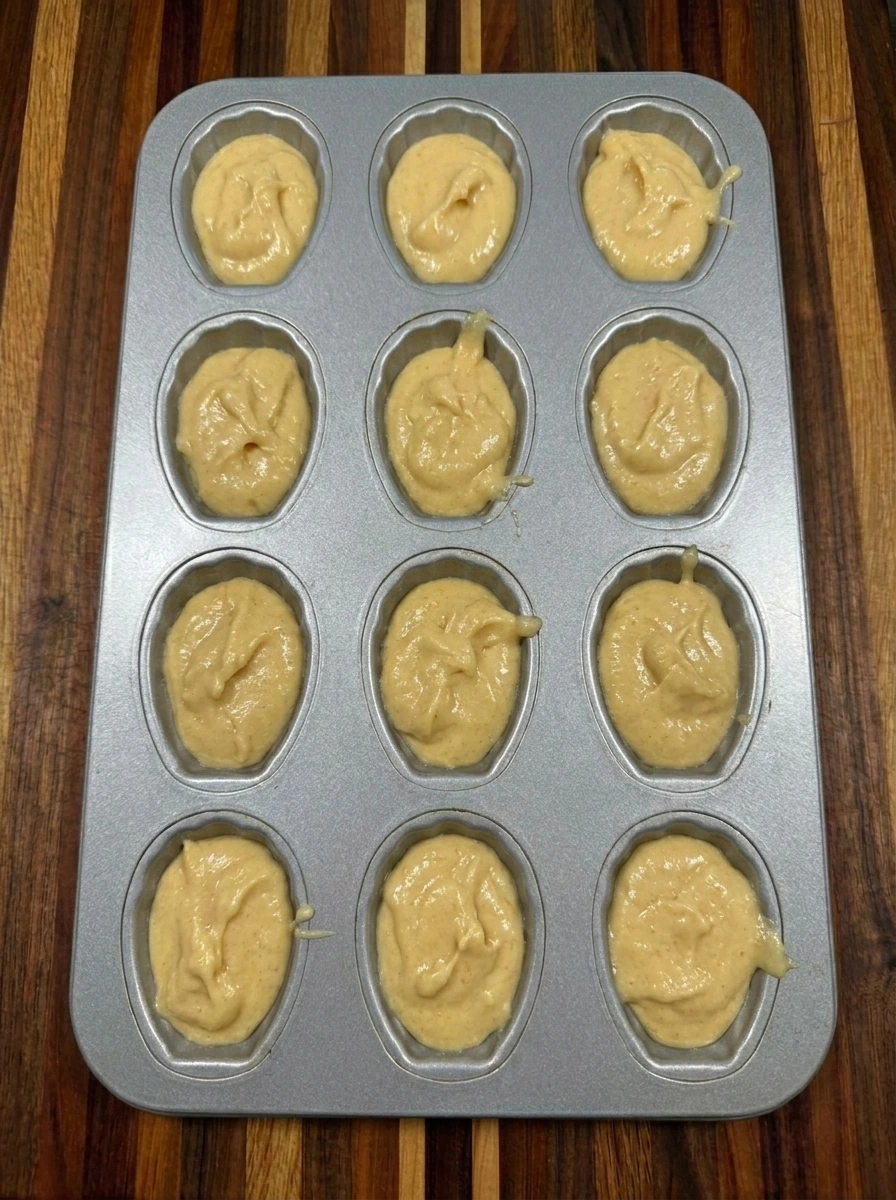
Chill the batter until it becomes firmer and holds deeper folds instead of spreading immediately. Divide it unevenly among twelve shell shaped cavities so each cavity is about three quarters full. The portions should have slightly irregular peaks and natural differences while remaining similar enough to bake at the same rate.
Tip: Chilled batter creates a stronger contrast with the hot oven which encourages the traditional rounded madeleine centers.
Step 4: Bake until golden
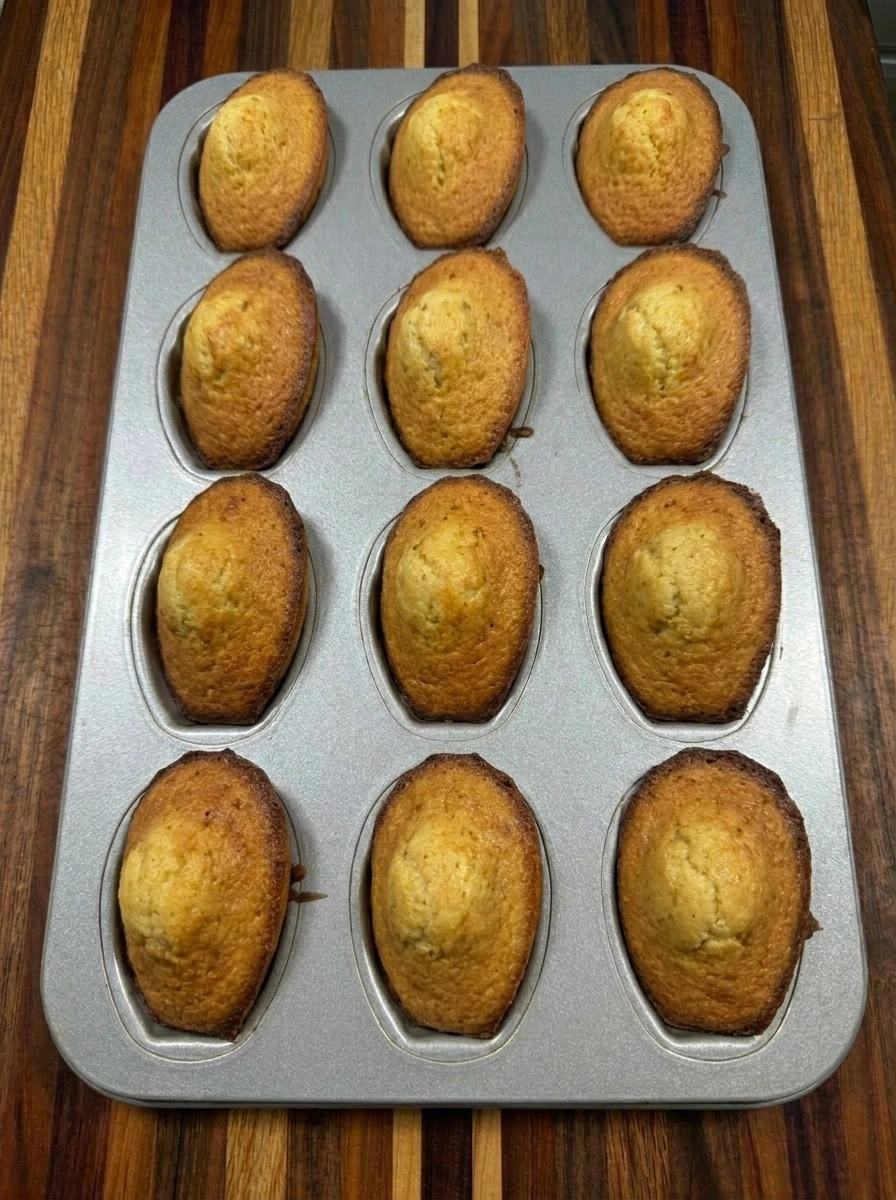
Bake the twelve portions until they rise into softly rounded cakes and the thin edges turn golden brown. The centers should spring back gently while a few cakes develop deeper color along one side. Let the madeleines settle until they release cleanly and reveal defined shell ridges with small homemade variations.
Tip: Remove the cakes when the centers spring back because extra baking can dry the delicate crumb and darken the thin edges.
Step 5: Coat with white chocolate
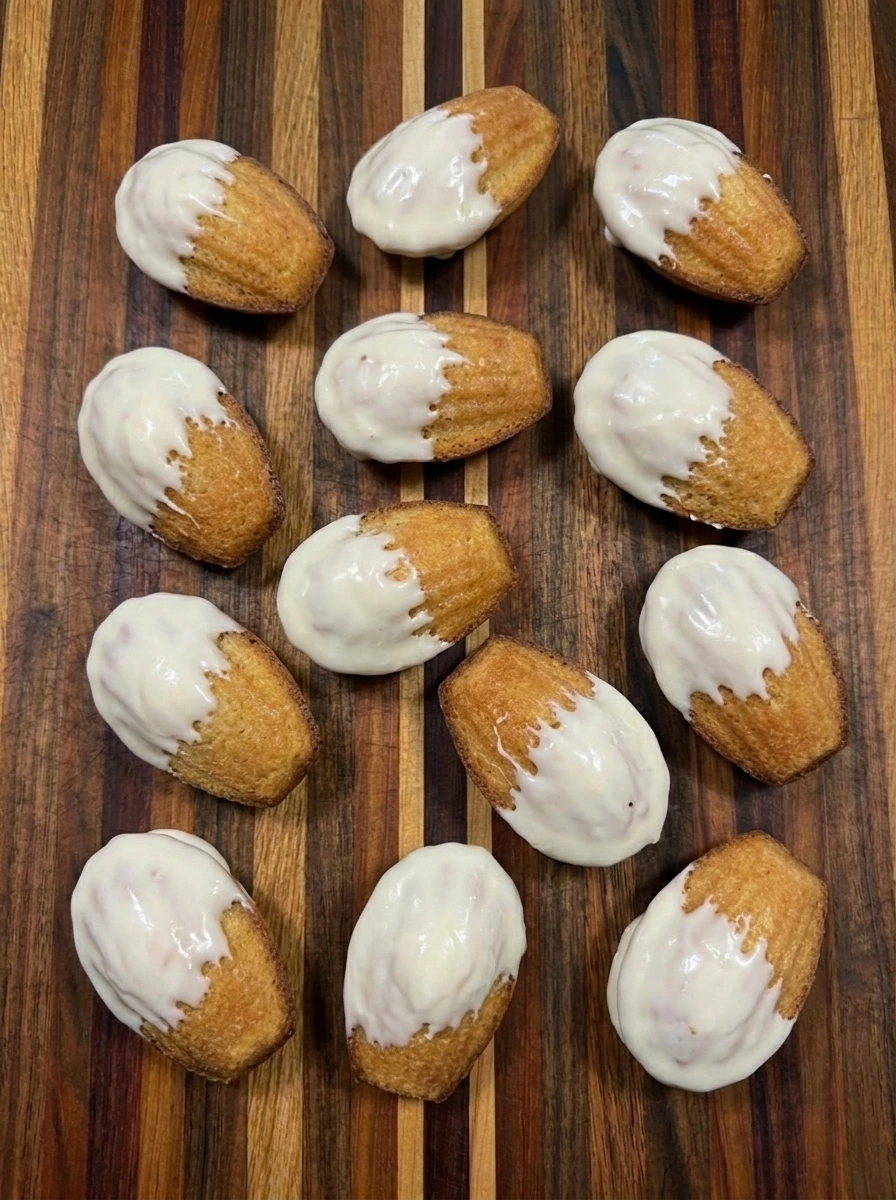
Combine the chopped white chocolate with the coconut oil until the mixture changes into a smooth fluid coating. Dip the rounded end of each cooled madeleine so the chocolate spreads into an irregular ghost shape. Arrange all twelve coated cakes apart from one another while allowing a few natural drips and thin translucent patches to remain.
Tip: Let the cakes cool completely before dipping so the white chocolate sets cleanly instead of sliding from the warm surface.
Step 6: Add ghost faces and serve
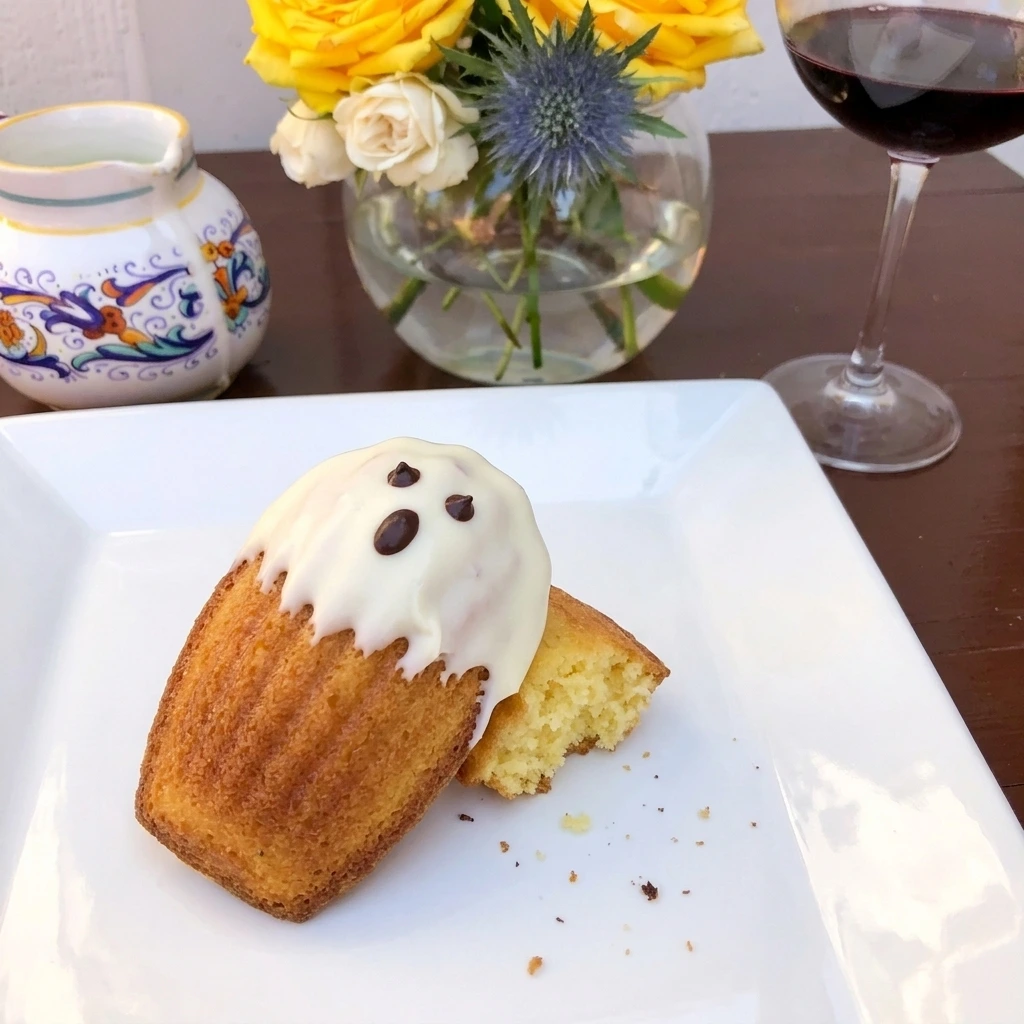
Dot the set white chocolate with melted dark chocolate to create two eyes and one mouth on each ghost. Vary the size and angle of the expressions so the twelve finished cakes look playful and naturally homemade. Transfer one madeleine to a white plate and tilt it slightly so the golden shell edge and tender interior remain visible beneath the set coating.
Tip: Use different eye and mouth shapes for every ghost because small variations make the finished dessert feel playful and homemade.
Pro Tips
- Bring the eggs close to room temperature before whipping because warmer eggs expand more easily and create a lighter batter.
- Chill the finished batter before baking so the cakes rise with rounded centers while their delicate edges become lightly crisp.
- Cool every madeleine completely before coating because trapped warmth can make the white chocolate thin and slide away.
- Pipe the eyes and mouths only after the white coating sets so the dark chocolate details stay distinct and do not bleed.
Storage Instructions
Store the decorated madeleines in a single loose layer inside an airtight container. Keep parchment between layers when stacking is unavoidable so the ghost faces remain intact. The finished cakes will stay fresh at cool room temperature for up to two days. Move them to the refrigerator when the room is warm because the white chocolate may soften.
Refrigerated madeleines can be stored for up to five days. Let them rest at room temperature before serving so the butter rich crumb becomes tender again. Freeze the undecorated cakes for up to two months in a sealed freezer container. Thaw them completely before adding the white chocolate coating and dark chocolate faces.
Frequently Asked Questions
Yes and the plain cakes can be baked two days early before being coated and decorated closer to serving.
Dense cakes usually result from underwhipped eggs or overmixed batter which removes the trapped air.
Yes and white candy melts provide a firmer coating although the flavor will differ from white chocolate.
Coat every cavity lightly with butter and flour while paying special attention to the narrow shell ridges.
See You in the Kitchen
These Halloween Ghost Madeleines are a great way to satisfy your holiday dessert cravings without ordering an elaborate bakery treat.
I typically prepare Chocolate Dipped Strawberry Crackers at the same time I decorate my ghost cakes and that way all of my party desserts will be ready at the same time.
Even my kids love this one alongside Peanut Butter Pretzel Energy Balls.
Print
Halloween Ghost Madeleines
- Total Time: 1 hour 7 minutes
- Yield: 4 servings
Description
Halloween Ghost Madeleines are an easy and quick dessert with a simple vanilla cake base and a smooth white chocolate ghost coating. They are one of the best ideas for a Halloween party and holiday brunch while still feeling lighter and healthy enough for a small treat. Make them for meal prep before a busy celebration or bring them to a potluck where their playful faces and tender centers will disappear fast. Each cake has a soft center and crisp golden edges.
Ingredients
- 2 Large eggs
- 1/2 cup Granulated sugar
- 1 teaspoon Vanilla extract
- 3/4 cup All purpose flour
- 1/2 teaspoon Baking powder
- 1/4 teaspoon Fine salt
- 6 tablespoons melted and cooled Unsalted butter
- 8 ounces chopped White chocolate
- 1 teaspoon Coconut oil
- 1 ounce melted Dark chocolate
Instructions
- Beat the two eggs with the granulated sugar until the mixture changes from deep yellow and loose to pale and thick. The finished mixture should fall back in soft ribbons and hold faint trails across the surface. Mix in the vanilla so the liquid looks evenly blended while a few natural bubbles remain around the edges.
- Fold the flour and baking powder and salt into the pale egg mixture until only a few dry streaks remain. Pour in the cooled melted butter and continue folding until the batter becomes glossy and thick. The finished batter should look smooth but not perfectly uniform while a few soft folds and tiny air bubbles remain visible.
- Chill the batter until it becomes firmer and holds deeper folds instead of spreading immediately. Divide it unevenly among twelve shell shaped cavities so each cavity is about three quarters full. The portions should have slightly irregular peaks and natural differences while remaining similar enough to bake at the same rate.
- Bake the twelve portions until they rise into softly rounded cakes and the thin edges turn golden brown. The centers should spring back gently while a few cakes develop deeper color along one side. Let the madeleines settle until they release cleanly and reveal defined shell ridges with small homemade variations.
- Combine the chopped white chocolate with the coconut oil until the mixture changes into a smooth fluid coating. Dip the rounded end of each cooled madeleine so the chocolate spreads into an irregular ghost shape. Arrange all twelve coated cakes apart from one another while allowing a few natural drips and thin translucent patches to remain.
- Dot the set white chocolate with melted dark chocolate to create two eyes and one mouth on each ghost. Vary the size and angle of the expressions so the twelve finished cakes look playful and naturally homemade. Transfer one madeleine to a white plate and tilt it slightly so the golden shell edge and tender interior remain visible beneath the set coating.
Notes
Pro Tips:
- Bring the eggs close to room temperature before whipping because warmer eggs expand more easily and create a lighter batter.
- Chill the finished batter before baking so the cakes rise with rounded centers while their delicate edges become lightly crisp.
- Cool every madeleine completely before coating because trapped warmth can make the white chocolate thin and slide away.
- Pipe the eyes and mouths only after the white coating sets so the dark chocolate details stay distinct and do not bleed.
Storage: Store the decorated madeleines in a single loose layer inside an airtight container. Keep parchment between layers when stacking is unavoidable so the ghost faces remain intact. The finished cakes will stay fresh at cool room temperature for up to two days. Move them to the refrigerator when the room is warm because the white chocolate may soften. Refrigerated madeleines can be stored for up to five days. Let them rest at room temperature before serving so the butter rich crumb becomes tender again. Freeze the undecorated cakes for up to two months in a sealed freezer container. Thaw them completely before adding the white chocolate coating and dark chocolate faces.
- Prep Time: 25 minutes
- Cook Time: 12 minutes
- Category: Dessert
- Cuisine: French American