This No Bake Pumpkin Cheesecake Balls recipe is an easy and comforting dessert that comes together so quickly without the oven! With creamy pumpkin filling and warm fall spices and a delicate white chocolate shell.
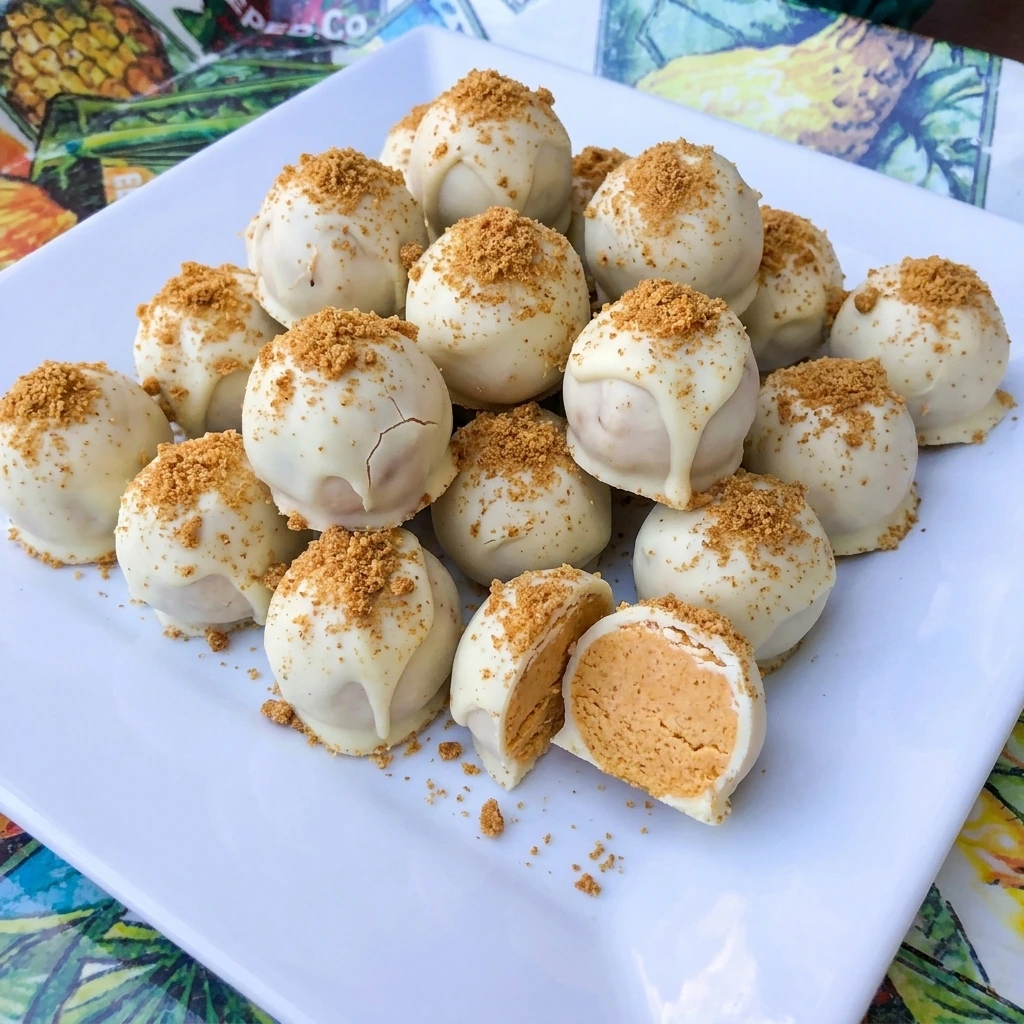
We love fall because it means that easy treats like these No Bake Pumpkin Cheesecake Balls are back on the table alongside Mini Oreo Cheesecake Cups. Comforting desserts and especially those that are simple to portion and easy to share are my favorite kinds of treats.
Ingredients
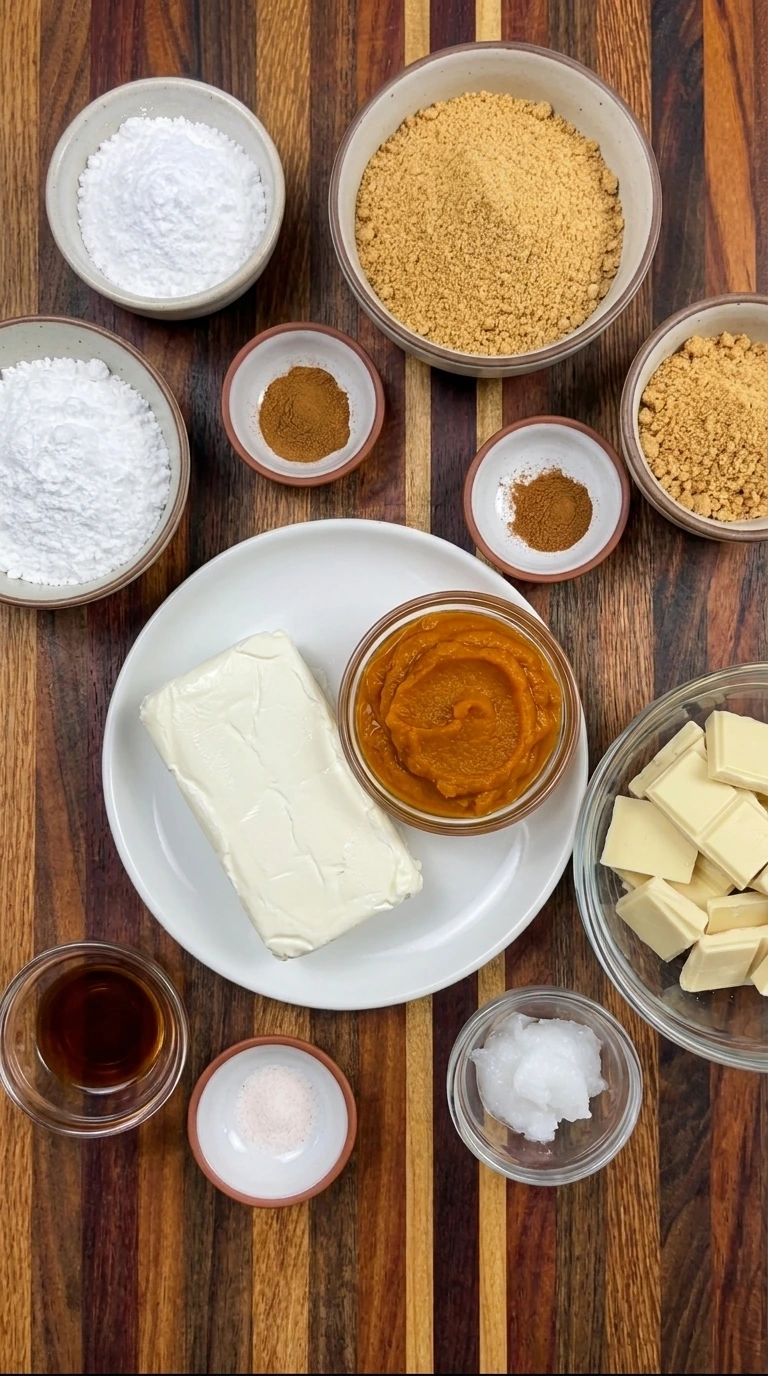
Here is what I use for this recipe and you can adjust nuts or spices based on preference:
- Cream cheese: Use full fat cream cheese softened to room temperature so the filling becomes smooth and holds its shape after chilling.
- Pumpkin puree: Use plain pumpkin puree to provide natural pumpkin flavor and a soft orange color without added sweeteners or spices.
- Graham cracker crumbs: Use one and one half cups to structure the filling and reserve one half cup for a rustic crumb coating.
- Powdered sugar: Powdered sugar sweetens the filling while dissolving smoothly so the cheesecake center does not feel grainy.
- Pumpkin pie spice: Use one teaspoon in the filling and reserve one half teaspoon to season the exterior crumb topping.
- Vanilla extract: Vanilla rounds out the tangy cream cheese and supports the warm pumpkin flavor.
- Fine salt: A small amount of salt balances the sweetness and strengthens the flavor of the pumpkin and spices.
- White chocolate: Melted white chocolate forms a thin sweet shell that becomes firm after the cheesecake balls are chilled.
- Coconut oil: Coconut oil loosens the melted chocolate so it coats each chilled ball in a thinner and more even layer.
Tools You’ll Need
- Large mixing bowl: Provides enough space to blend the cream cheese and pumpkin before folding in the dry ingredients.
- Electric hand mixer: Blends the softened cream cheese into a smooth filling without leaving large white lumps.
- Flexible spatula: Scrapes the bowl and folds the graham crumbs evenly through the pumpkin mixture.
- Shallow container: Holds the filling in a thin layer so it chills evenly and becomes firm enough to shape.
- Small cookie scoop: Divides the chilled filling into eighteen similar portions while allowing natural size variations.
- Baking tray: Supports the shaped balls during chilling and catches excess white chocolate during coating.
- Parchment paper: Prevents the soft filling and chocolate coating from sticking to the baking tray.
- Microwave safe bowl: Allows the white chocolate and coconut oil to melt gradually into a fluid coating.
Instructions
Step 1: Blend the pumpkin cheesecake filling
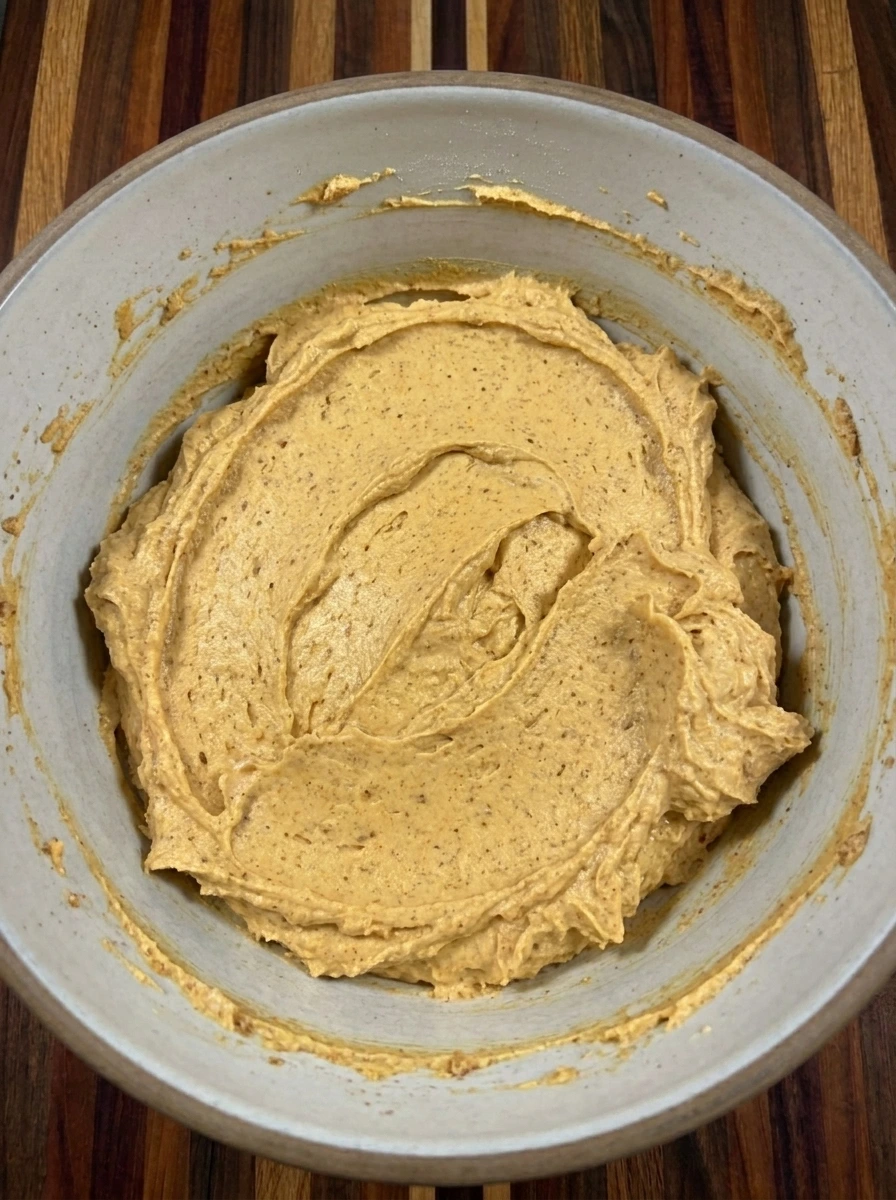
Beat the softened cream cheese with the pumpkin puree and powdered sugar until the separate white and orange ingredients become a thick pale orange mixture. Fold in the vanilla and salt and one teaspoon of pumpkin pie spice so warm brown specks appear throughout the filling. Add one and one half cups of graham cracker crumbs and mix until the loose creamy filling becomes dense and scoopable. The finished mixture should look slightly uneven with visible crumb flecks and soft ridges across the surface.
Tip: Blot watery pumpkin puree before mixing because excess moisture can leave the filling too soft to shape after chilling.
Step 2: Chill the filling until firm
Spread the soft filling into a shallow uneven layer so the mixture cools more evenly. Chill it until the glossy surface becomes matte and the soft ridges become firm enough to hold their shape. The chilled mixture should remain creamy while looking noticeably denser than before. A pressed area should leave a clean indentation instead of slowly flowing back into place.
Tip: Spread the filling into a shallow layer before chilling so the center firms at the same rate as the edges.
Step 3: Shape eighteen cheesecake balls
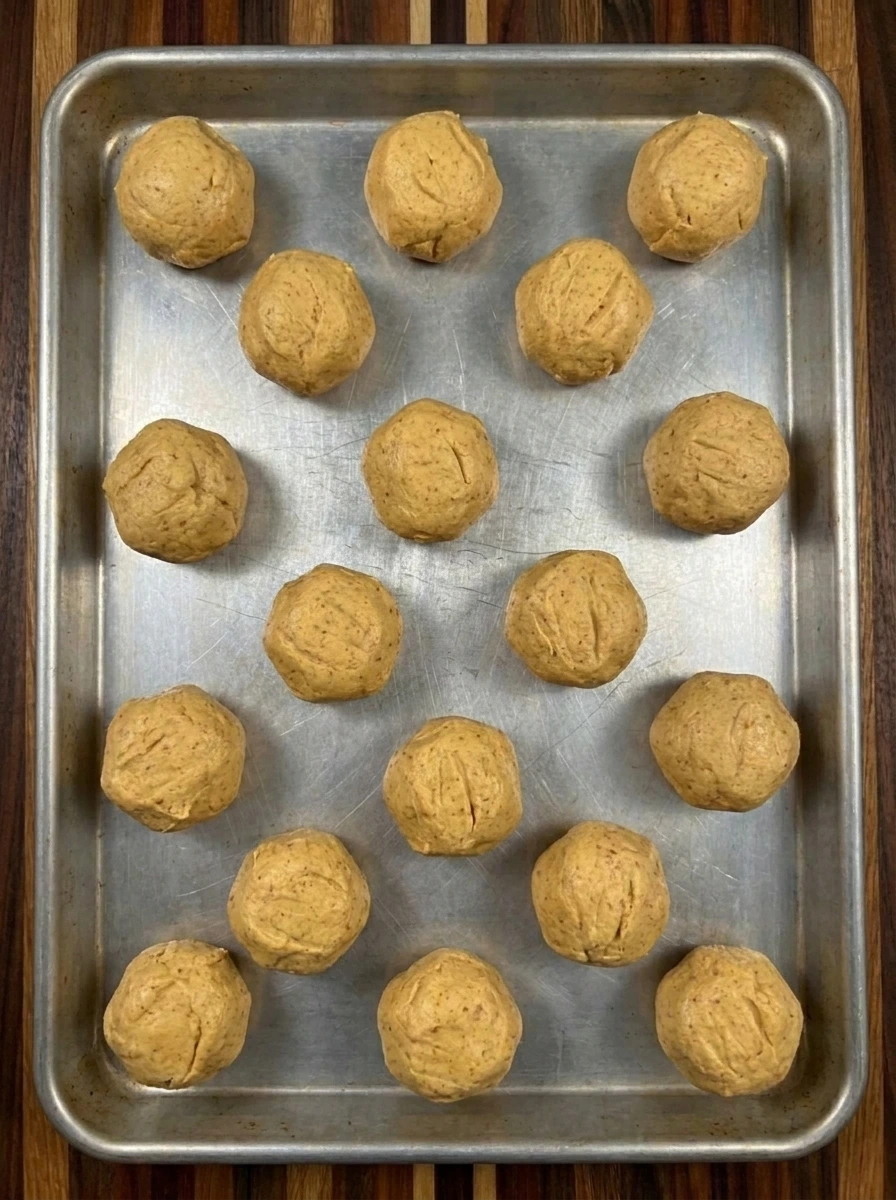
Divide the chilled mixture into exactly eighteen portions and gently form each portion into a small ball. Keep the shapes slightly irregular so they look handmade rather than perfectly round. Place the eighteen balls loosely across a lined baking tray with uneven spacing and a few pieces sitting closer together. Chill them again until their surfaces feel firm and no longer flatten against the tray.
Tip: Wipe your hands between every few balls because a clean surface makes shaping easier without creating perfect commercial shapes.
Step 4: Coat the chilled balls in white chocolate
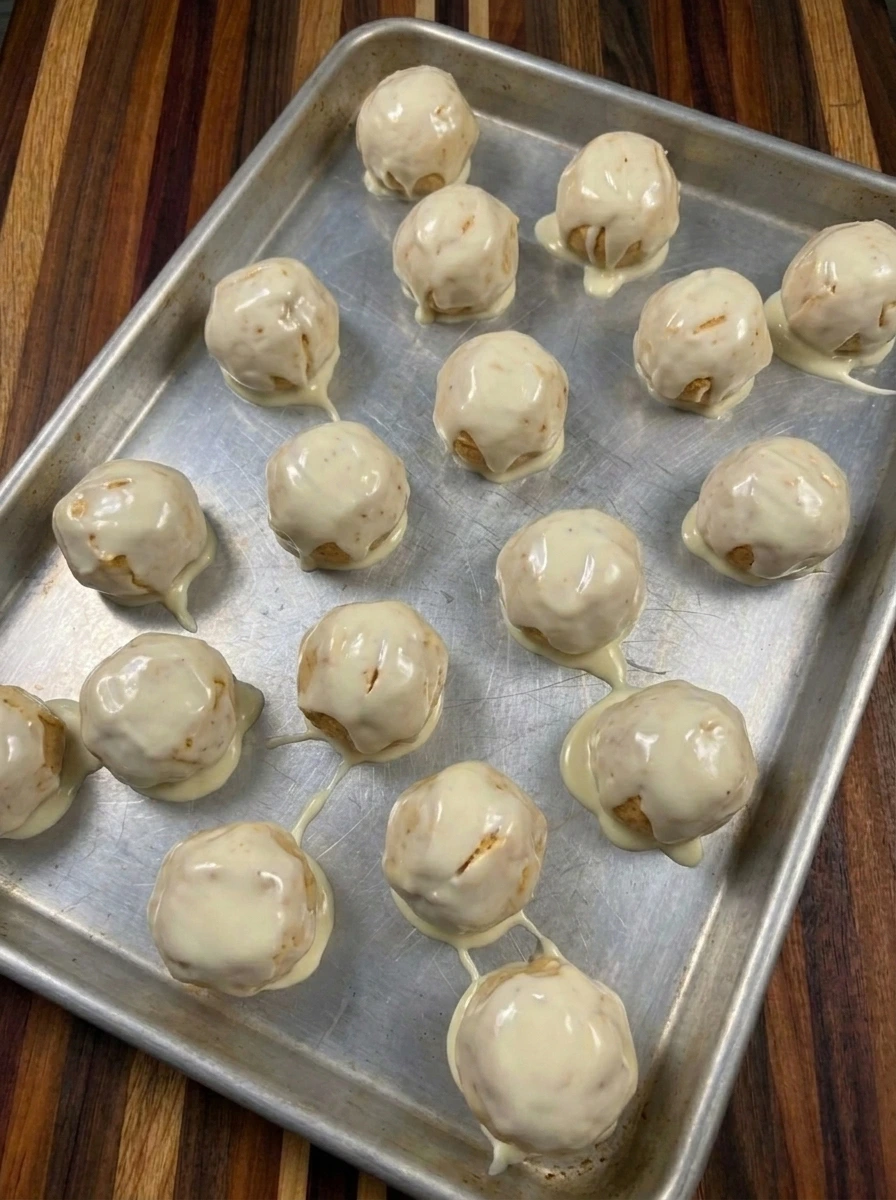
Combine the melted white chocolate with the coconut oil until the coating flows in a thin smooth ribbon. Dip each of the eighteen chilled balls so most of the orange surface becomes covered while a few tiny patches remain naturally uneven near the base. Return the coated balls to the baking tray in a shuffled arrangement. Let excess chocolate settle into irregular drips and small pools so each shell develops a different homemade shape.
Tip: Keep the cheesecake balls cold while dipping because firm centers are less likely to soften or break in the warm coating.
Step 5: Finish with spiced graham crumbs
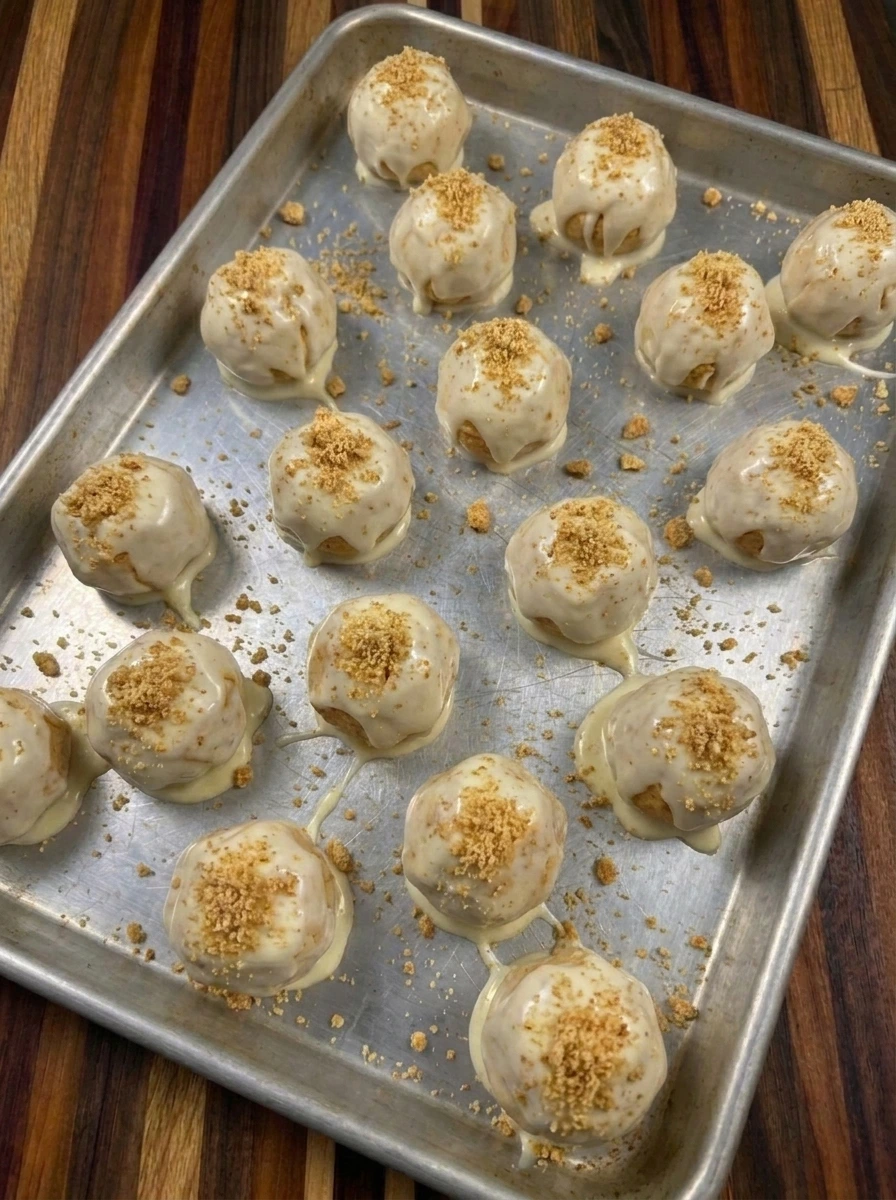
Mix the reserved one half cup of graham cracker crumbs with the remaining pumpkin pie spice. Scatter the mixture over the eighteen balls while the white chocolate remains slightly soft so crumb clusters cling unevenly to their tops and sides. Chill the finished balls until the glossy coating becomes firm and softly matte. The completed batch should have irregular shells and nonuniform crumb coverage and small variations in white and golden brown color.
Tip: Scatter the crumbs before the chocolate fully sets so some pieces cling in clusters while other areas stay naturally bare.
Step 6: Serve one chilled cheesecake ball
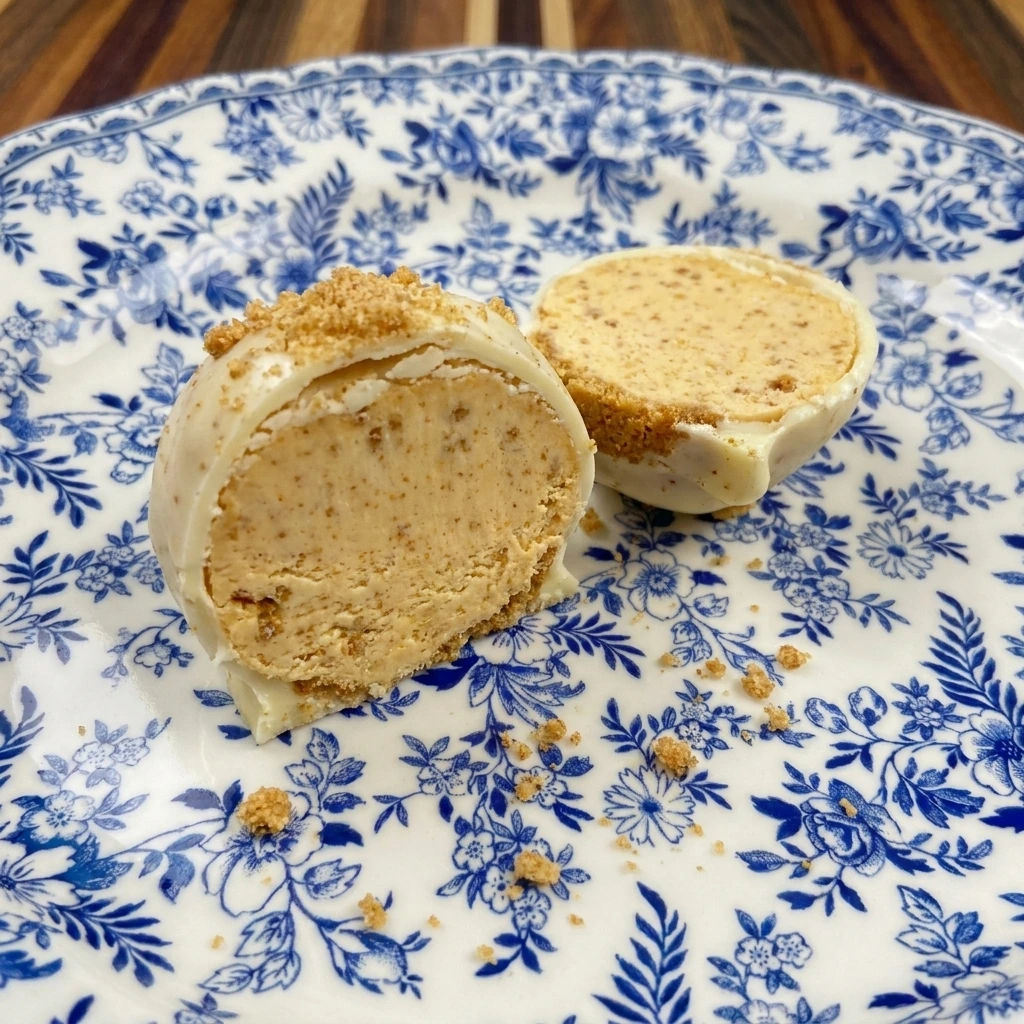
Transfer one finished cheesecake ball to a white plate and cut it into two uneven halves. Turn one half slightly forward so the creamy orange center and tiny crumb flecks remain clearly visible beneath the thin white shell. Leave a few loose graham crumbs around the portion and allow one small chocolate fragment to rest beside it. The plated serving should look chilled and creamy and naturally imperfect rather than polished or symmetrical.
Tip: Let the plated ball rest for three minutes before cutting so the center becomes creamy while the shell stays firm.
Pro Tips
- Use block style full fat cream cheese because spreadable cream cheese contains more moisture and may prevent firm shaping.
- Measure the pumpkin puree carefully and blot it when needed so the filling stays creamy without becoming sticky or loose.
- Chill the shaped balls before dipping because very cold centers help the warm white chocolate form a thin clean shell.
- Store the finished batch in one layer when possible so the delicate chocolate shells do not crack under extra weight.
Storage Instructions
Store the finished cheesecake balls in an airtight container in the refrigerator. Arrange them in one layer or separate additional layers with parchment so the shells remain intact. The refrigerated balls keep their best texture for up to three days. Allow them to rest outside the refrigerator for two or three minutes before serving so the centers soften slightly. For longer storage freeze the fully set balls in a single layer before transferring them to a sealed container. Thaw them overnight in the refrigerator so condensation forms gradually and the coating stays firm.
Frequently Asked Questions
Yes. Prepare them up to three days ahead and refrigerate them in a tightly covered container until serving.
The pumpkin may contain excess moisture or the filling may need more chilling before it can be shaped.
Yes. Freeze them in a sealed container for up to one month and thaw them overnight in the refrigerator.
Serve them chilled so the centers stay creamy and the white chocolate shells remain pleasantly firm.
See You in the Kitchen
I hope you try these No Bake Pumpkin Cheesecake Balls soon!
They are a simple recipe that looks beautiful and tastes incredible and makes every occasion a little more special alongside Chocolate Dipped Strawberry Crackers or Peanut Butter Pretzel Energy Balls.
Do not forget to share your results or save this recipe for later because it is one worth keeping.
Print
No Bake Pumpkin Cheesecake Balls
- Total Time: 2 hours 25 minutes
- Yield: 18 servings
Description
These No Bake Pumpkin Cheesecake Balls are an easy fall dessert with creamy pumpkin filling and a lightly spiced cookie coating. The quick method keeps every step simple while the best texture comes from a short chill. They are a healthy portion controlled treat idea for meal prep and they also fit a holiday table or potluck or brunch or party. Make them ahead for sweet snack ideas that feel festive without turning on the oven. Each bite feels festive and cozy.
Ingredients
- 8 ounces Cream cheese
- 1/2 cup Pumpkin puree
- 2 cups divided Graham cracker crumbs
- 3/4 cup Powdered sugar
- 1 1/2 teaspoons divided Pumpkin pie spice
- 1 teaspoon Vanilla extract
- 1/8 teaspoon Fine salt
- 12 ounces White chocolate
- 1 tablespoon Coconut oil
Instructions
- Beat the softened cream cheese with the pumpkin puree and powdered sugar until the separate white and orange ingredients become a thick pale orange mixture. Fold in the vanilla and salt and one teaspoon of pumpkin pie spice so warm brown specks appear throughout the filling. Add one and one half cups of graham cracker crumbs and mix until the loose creamy filling becomes dense and scoopable. The finished mixture should look slightly uneven with visible crumb flecks and soft ridges across the surface.
- Spread the soft filling into a shallow uneven layer so the mixture cools more evenly. Chill it until the glossy surface becomes matte and the soft ridges become firm enough to hold their shape. The chilled mixture should remain creamy while looking noticeably denser than before. A pressed area should leave a clean indentation instead of slowly flowing back into place.
- Divide the chilled mixture into exactly eighteen portions and gently form each portion into a small ball. Keep the shapes slightly irregular so they look handmade rather than perfectly round. Place the eighteen balls loosely across a lined baking tray with uneven spacing and a few pieces sitting closer together. Chill them again until their surfaces feel firm and no longer flatten against the tray.
- Combine the melted white chocolate with the coconut oil until the coating flows in a thin smooth ribbon. Dip each of the eighteen chilled balls so most of the orange surface becomes covered while a few tiny patches remain naturally uneven near the base. Return the coated balls to the baking tray in a shuffled arrangement. Let excess chocolate settle into irregular drips and small pools so each shell develops a different homemade shape.
- Mix the reserved one half cup of graham cracker crumbs with the remaining pumpkin pie spice. Scatter the mixture over the eighteen balls while the white chocolate remains slightly soft so crumb clusters cling unevenly to their tops and sides. Chill the finished balls until the glossy coating becomes firm and softly matte. The completed batch should have irregular shells and nonuniform crumb coverage and small variations in white and golden brown color.
- Transfer one finished cheesecake ball to a white plate and cut it into two uneven halves. Turn one half slightly forward so the creamy orange center and tiny crumb flecks remain clearly visible beneath the thin white shell. Leave a few loose graham crumbs around the portion and allow one small chocolate fragment to rest beside it. The plated serving should look chilled and creamy and naturally imperfect rather than polished or symmetrical.
Notes
Pro Tips:
- Use block style full fat cream cheese because spreadable cream cheese contains more moisture and may prevent firm shaping.
- Measure the pumpkin puree carefully and blot it when needed so the filling stays creamy without becoming sticky or loose.
- Chill the shaped balls before dipping because very cold centers help the warm white chocolate form a thin clean shell.
- Store the finished batch in one layer when possible so the delicate chocolate shells do not crack under extra weight.
Storage: Store the finished cheesecake balls in an airtight container in the refrigerator. Arrange them in one layer or separate additional layers with parchment so the shells remain intact. The refrigerated balls keep their best texture for up to three days. Allow them to rest outside the refrigerator for two or three minutes before serving so the centers soften slightly. For longer storage freeze the fully set balls in a single layer before transferring them to a sealed container. Thaw them overnight in the refrigerator so condensation forms gradually and the coating stays firm.
- Prep Time: 25 minutes
- Cook Time: 0 minute
- Category: Dessert
- Cuisine: American