


When you want something different from traditional layered desserts this Classic Italian Tiramisu offers a delicious twist. This homemade tiramisu recipe is creamy and simple and packed with rich coffee flavor which makes it perfect for cozy family dinners or holiday gatherings.
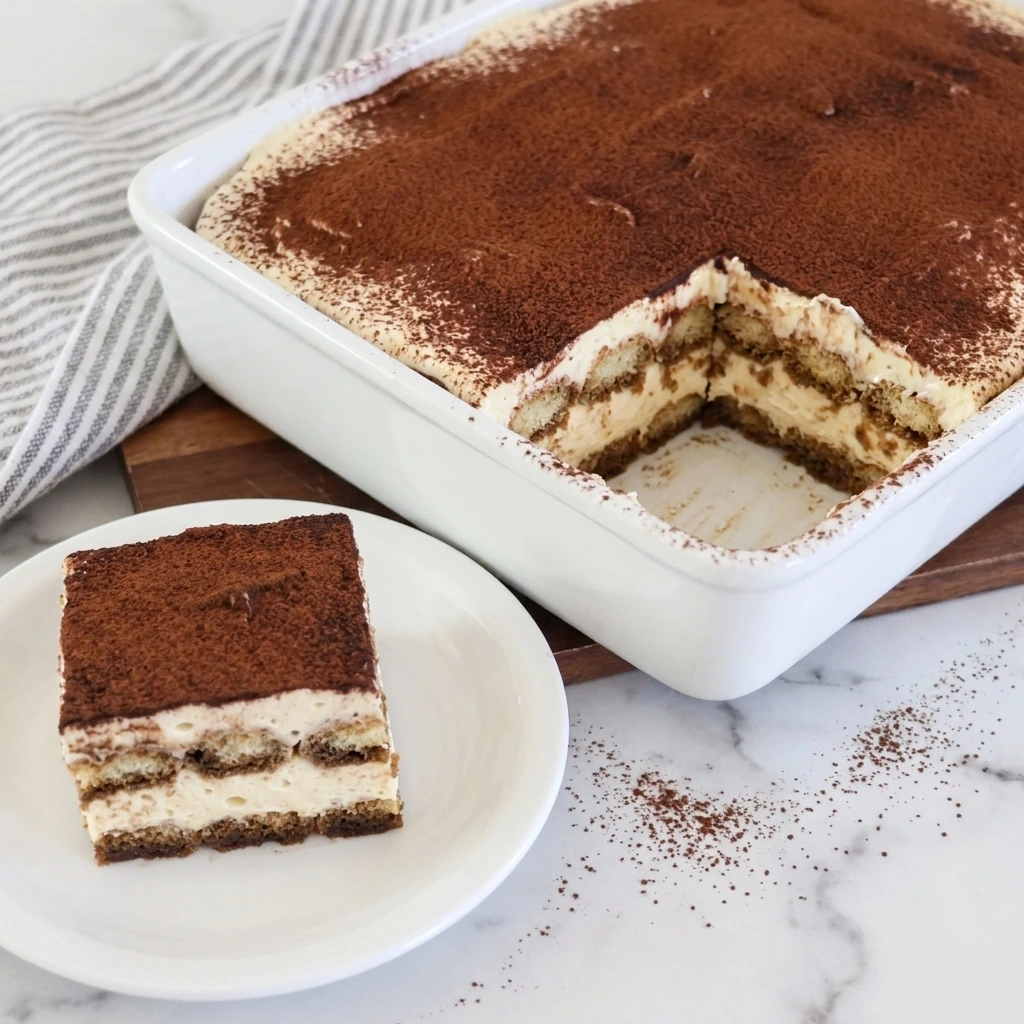
This recipe is perfect for Christmas dinner or Thanksgiving celebrations or a birthday party or as a sweet treat after a weeknight dinner. If you want more homemade dessert ideas then also check out this Chocolate Yule Log for another delicious treat that everyone can enjoy.
What I love most about Classic Italian Tiramisu is how the soft coffee-soaked ladyfingers work together with the smooth mascarpone filling to create beautiful layers. You do not need an oven or complicated baking skills and the dessert actually tastes better after resting in the refrigerator.
Ingredients
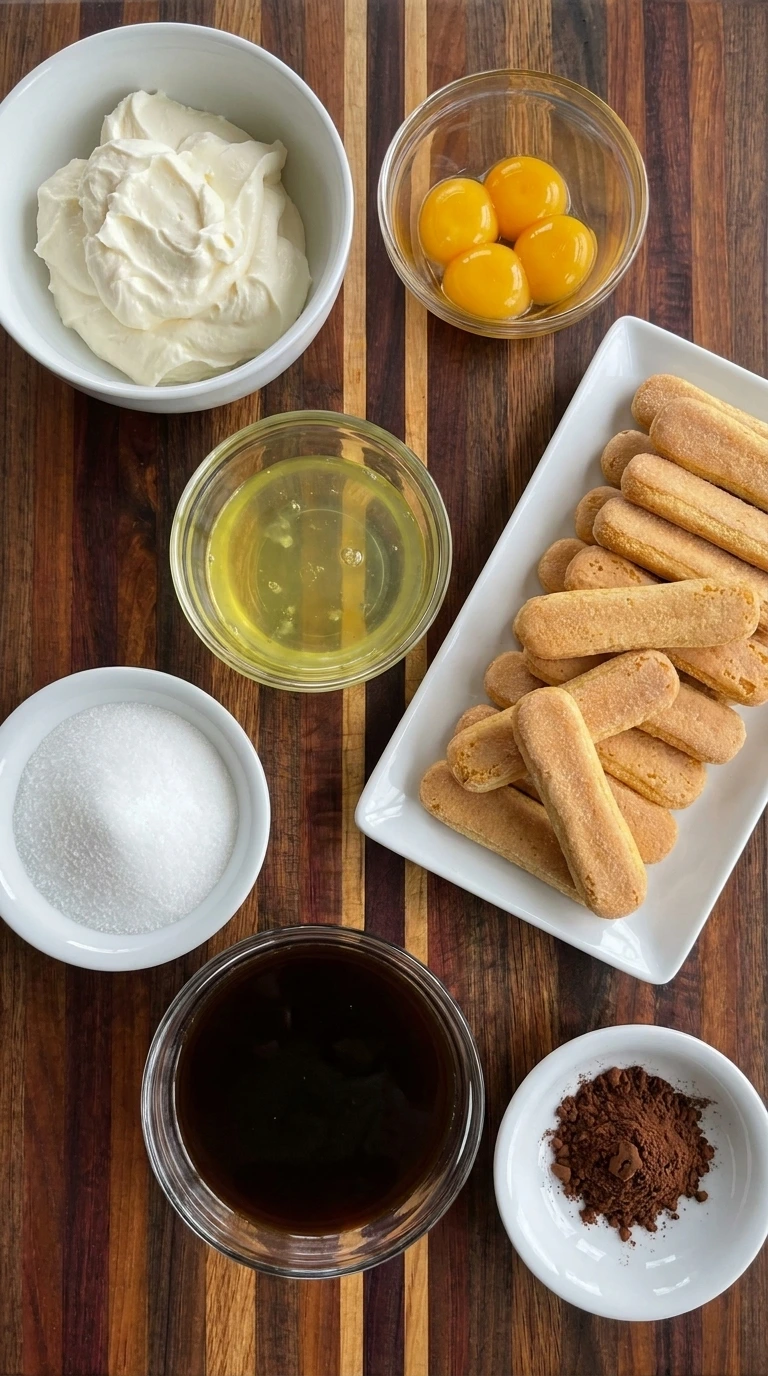
Here is what I use for this recipe :
- Mascarpone cheese: Provides the rich and creamy foundation of the tiramisu filling while creating a smooth texture that holds its shape between the layers. Use full-fat mascarpone for the best traditional result.
- Pasteurized egg yolks: Create richness and a silky custard-like consistency while helping the sugar blend smoothly into the mascarpone filling. Use pasteurized eggs because the filling is not cooked.
- Pasteurized egg whites: Add lightness and volume to the mascarpone cream when whipped into firm peaks and gently folded into the filling. Use pasteurized eggs suitable for uncooked preparations.
- Granulated sugar: Sweetens the mascarpone mixture and balances the slightly bitter coffee flavor while helping the egg yolks develop a thick and creamy texture during whipping.
- Savoiardi ladyfinger biscuits: Form the recognizable sponge layers of traditional tiramisu while absorbing the espresso and gradually softening into a tender cake-like texture during refrigeration.
- Strong brewed espresso: Provides the classic deep coffee flavor while moistening the ladyfinger biscuits. Brew the espresso in advance and allow it to cool completely before assembling the dessert.
- Unsweetened cocoa powder: Creates the traditional bittersweet chocolate finish while giving the pale mascarpone cream a contrasting dark brown surface. Dust it over the dessert immediately before serving.
Tools I Use :
- Large mixing bowls: Provide separate spaces for whipping the pasteurized egg yolks and egg whites while allowing enough room to incorporate air and combine the mascarpone filling.
- Electric hand mixer: Whips the sweetened egg yolks until thick and pale while also creating firm egg white peaks that give the mascarpone filling its light texture.
- Silicone spatula: Gently folds the whipped egg whites into the mascarpone mixture while preserving air and helps spread the cream between the biscuit layers.
- Shallow bowl: Holds the cooled espresso so the ladyfinger biscuits can be dipped quickly and evenly without becoming excessively saturated.
- 8-inch square ceramic or glass dish: Holds the alternating ladyfinger and mascarpone layers while allowing the assembled dessert to chill and set into neat serving portions.
- Measuring cups and measuring spoons: Help measure the espresso and sugar and cocoa powder accurately so the dessert maintains a balanced sweetness and consistent texture.
- Fine-mesh sieve: Distributes the unsweetened cocoa powder into a delicate and even coating while preventing large clumps from falling onto the finished dessert.
- Plastic wrap or fitted lid: Protects the assembled tiramisu during refrigeration and prevents the mascarpone cream from absorbing unwanted refrigerator odors.
- Sharp knife and serving spatula: Create clean cuts through the chilled biscuit and mascarpone layers and help transfer individual portions to serving plates.
Instructions
Step 1: Whip the egg yolks with sugar
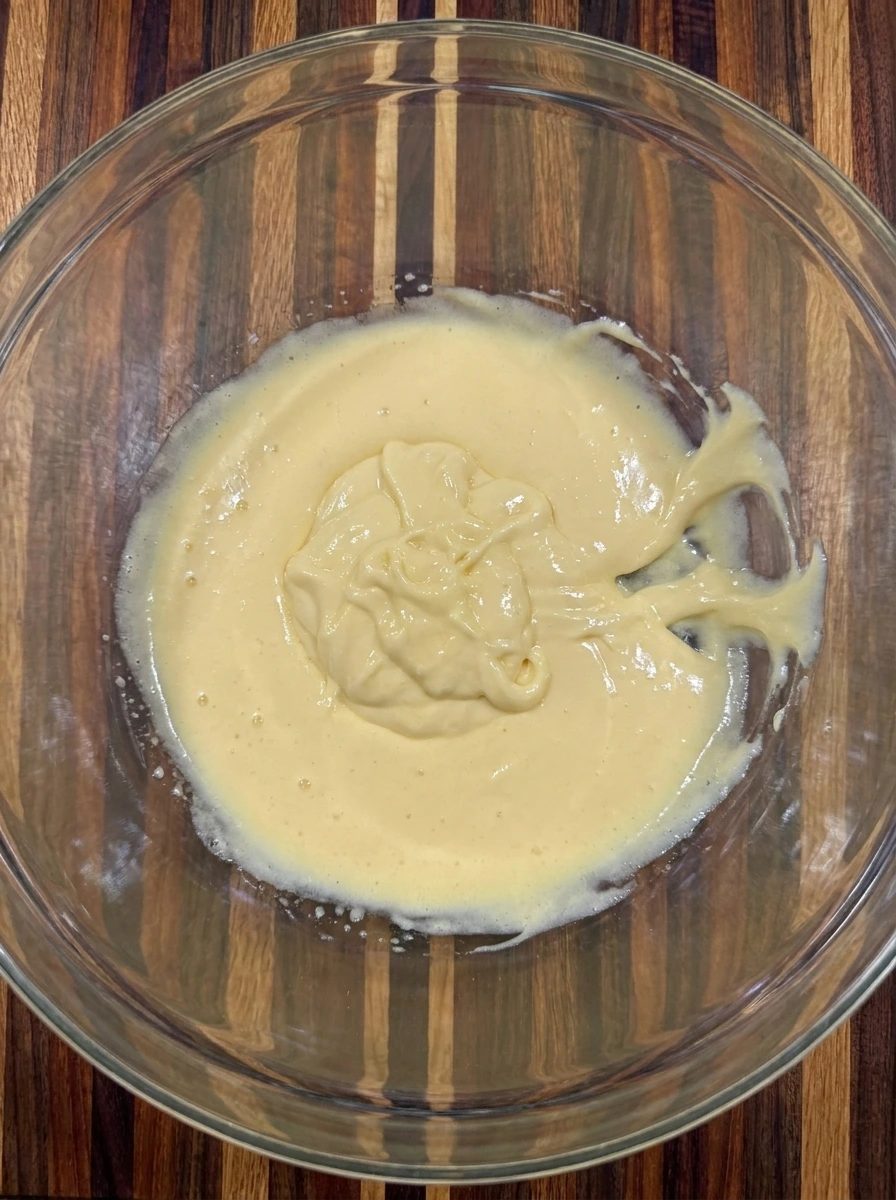
Place the four pasteurized egg yolks into a large mixing bowl and add the granulated sugar. Beat the ingredients together until the mixture becomes noticeably lighter and thicker. The deep yellow yolks should gradually change into a pale yellow cream with a smooth and slightly fluffy consistency. Continue whipping for approximately 4 to 5 minutes until the mixture forms soft ribbons when lifted. Some fine air bubbles may remain visible around the edges while the center becomes glossy and creamy. This creates the rich base that gives Classic Italian Tiramisu its traditional texture.
Tip: Use room-temperature pasteurized egg yolks and whip until pale and thick because properly aerated yolks create a lighter mascarpone filling.
Step 2: Blend mascarpone into the egg mixture
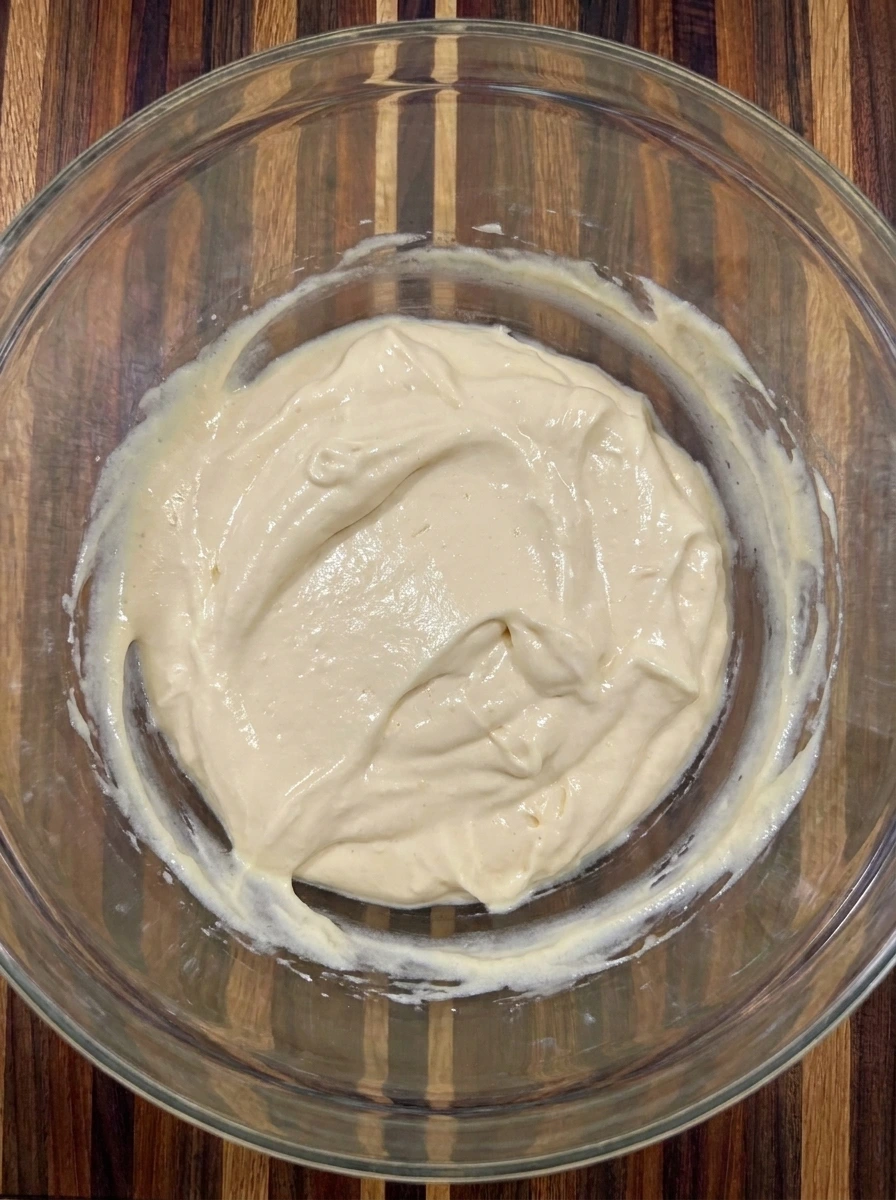
Add the mascarpone cheese to the whipped egg yolk mixture in several portions. Gently combine the ingredients until the thick yellow cream transforms into a smooth ivory-colored filling. The mascarpone should blend evenly while preserving the light consistency created during the previous step. Avoid excessive mixing because mascarpone can become loose or grainy when overworked. The finished mixture should look thick and creamy with a few natural folds across the surface. Scrape the sides as needed so the cheese becomes incorporated without leaving large unmixed patches.
Tip: Allow the mascarpone to soften briefly before mixing and combine gently to prevent a grainy filling or a mixture that becomes too loose.
Step 3: Whip the egg whites into firm peaks
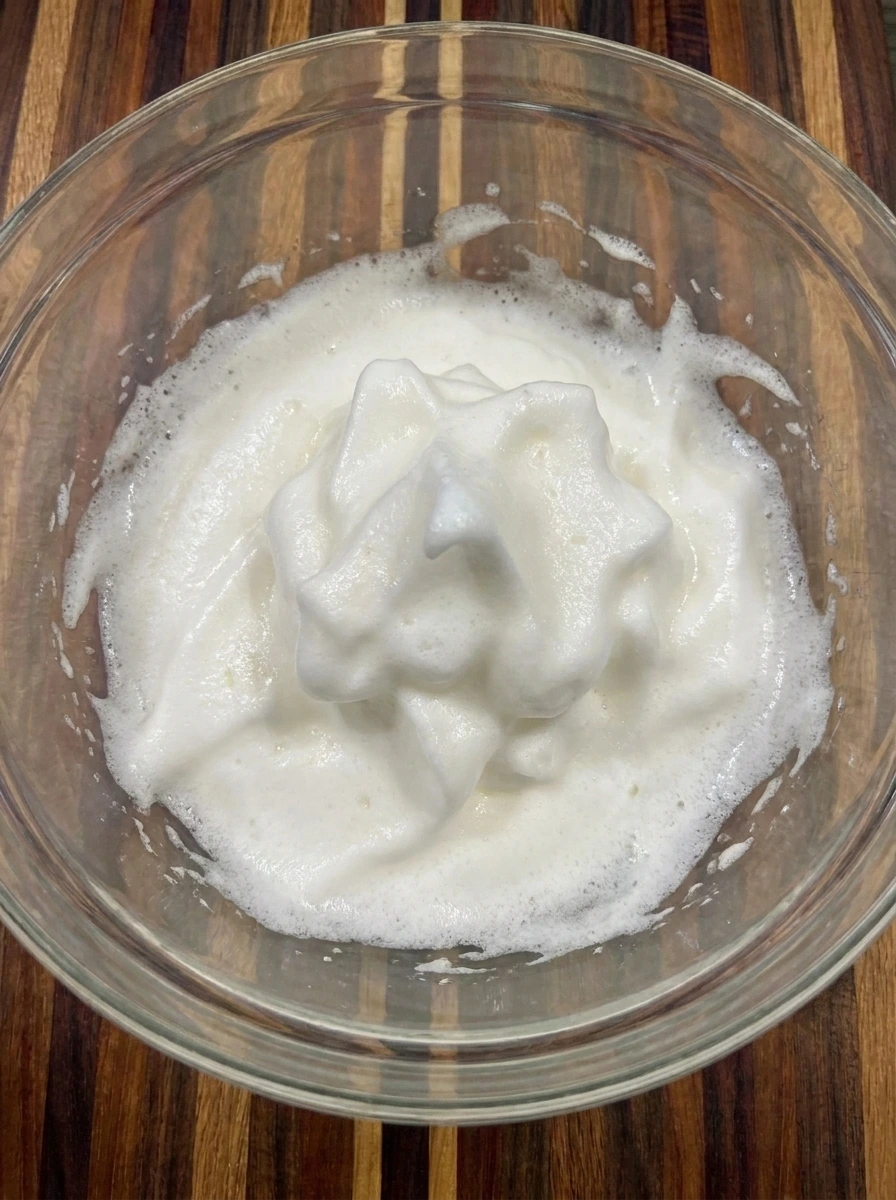
Place the four pasteurized egg whites in a separate clean mixing bowl. Whip them until they change from a translucent liquid into a bright white foam. Continue beating until the foam thickens and develops firm peaks that retain their shape when lifted. The finished egg whites should appear airy and voluminous with uneven soft ridges and slightly glossy peaks. Stop once the peaks hold firmly because overwhipped egg whites become dry and difficult to fold smoothly into the mascarpone mixture.
Tip: Use a completely clean and dry bowl and whip the pasteurized egg whites until firm peaks form so the filling stays light and airy.
Step 4: Fold the whipped egg whites into mascarpone cream
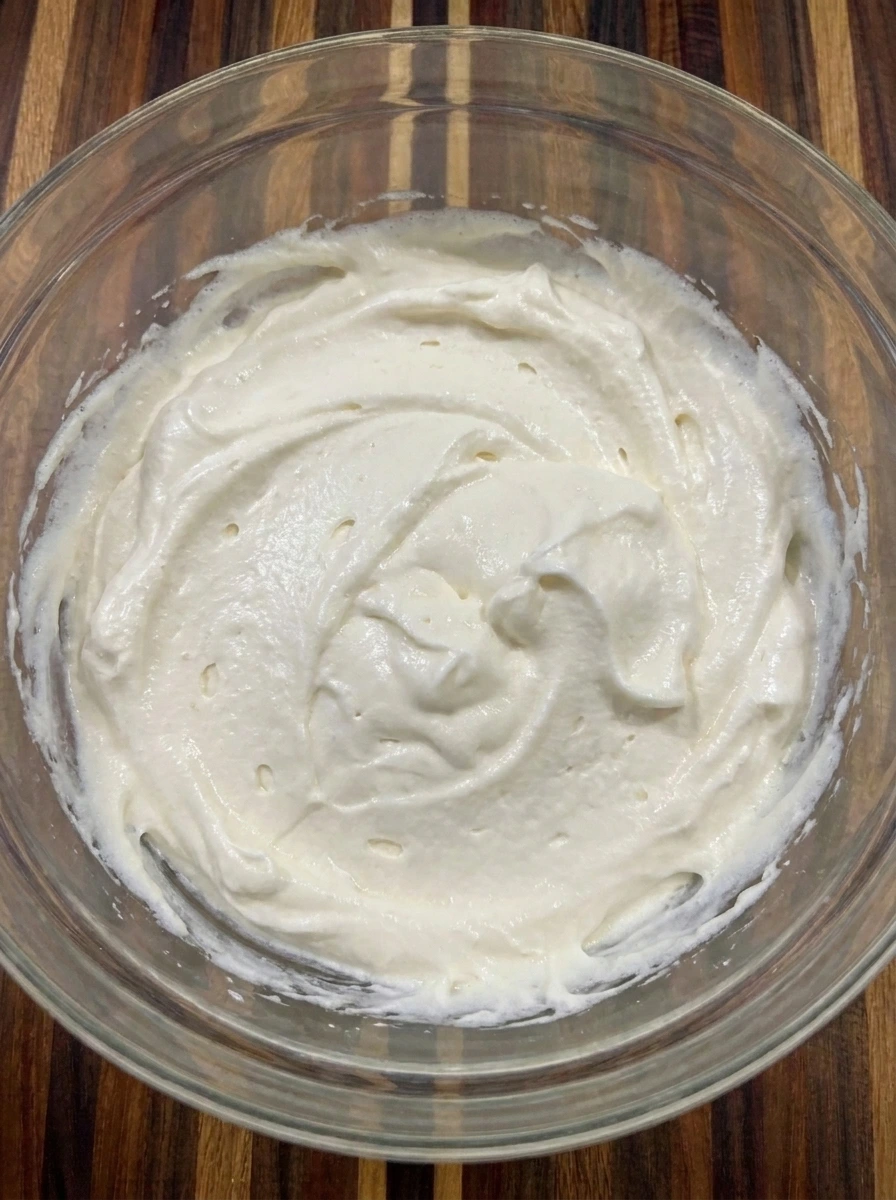
Transfer the whipped egg whites into the bowl containing the mascarpone mixture in three portions. Gently fold the whites into the cream using broad movements that lift the heavier mixture over the fluffy foam. Continue until the filling becomes evenly pale and noticeably lighter in texture. The finished mascarpone filling should look airy and thick with gentle folds and small natural air pockets. A few faint white streaks can remain during folding but the final mixture should appear mostly uniform. Avoid vigorous stirring because it would remove the air needed for a soft and delicate tiramisu.
Tip: Fold the whipped whites into the mascarpone cream in three additions and use gentle lifting motions to preserve the airy texture.
Step 5: Dip the ladyfingers and build the first layer
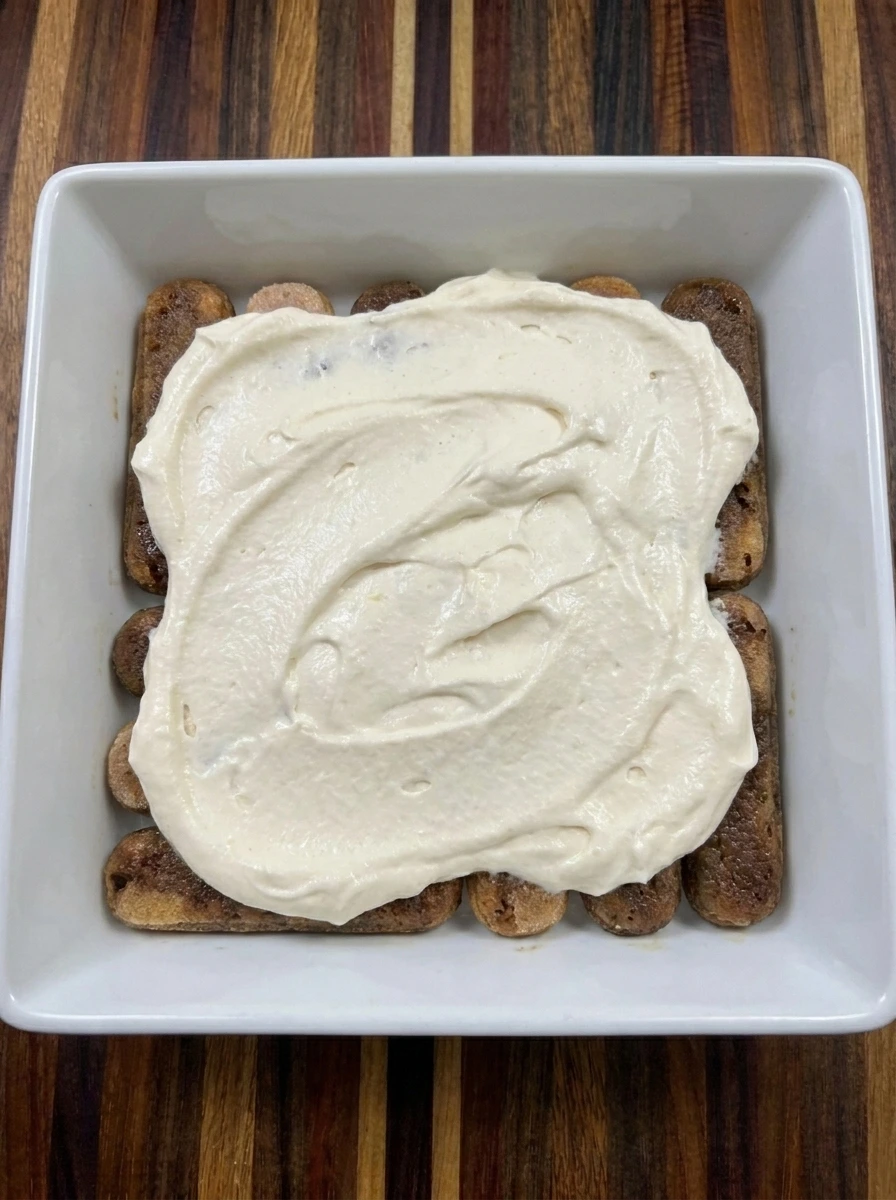
Pour the completely cooled espresso into a shallow bowl. Quickly dip 12 ladyfinger biscuits into the coffee for approximately one second on each side. The biscuits should absorb some liquid while retaining enough firmness to hold their shape during assembly. Arrange the dipped biscuits in the bottom of an approximately 8-inch square ceramic dish with their edges touching naturally. Spread half of the mascarpone filling over the biscuits and allow the cream to settle into the small spaces between them. The first layer should show softened golden-brown biscuits beneath a thick uneven coating of pale cream.
Tip: Dip each ladyfinger very briefly in cooled espresso because over-soaking can make the layers soggy and difficult to slice cleanly.
Step 6: Add the final ladyfinger and mascarpone layers
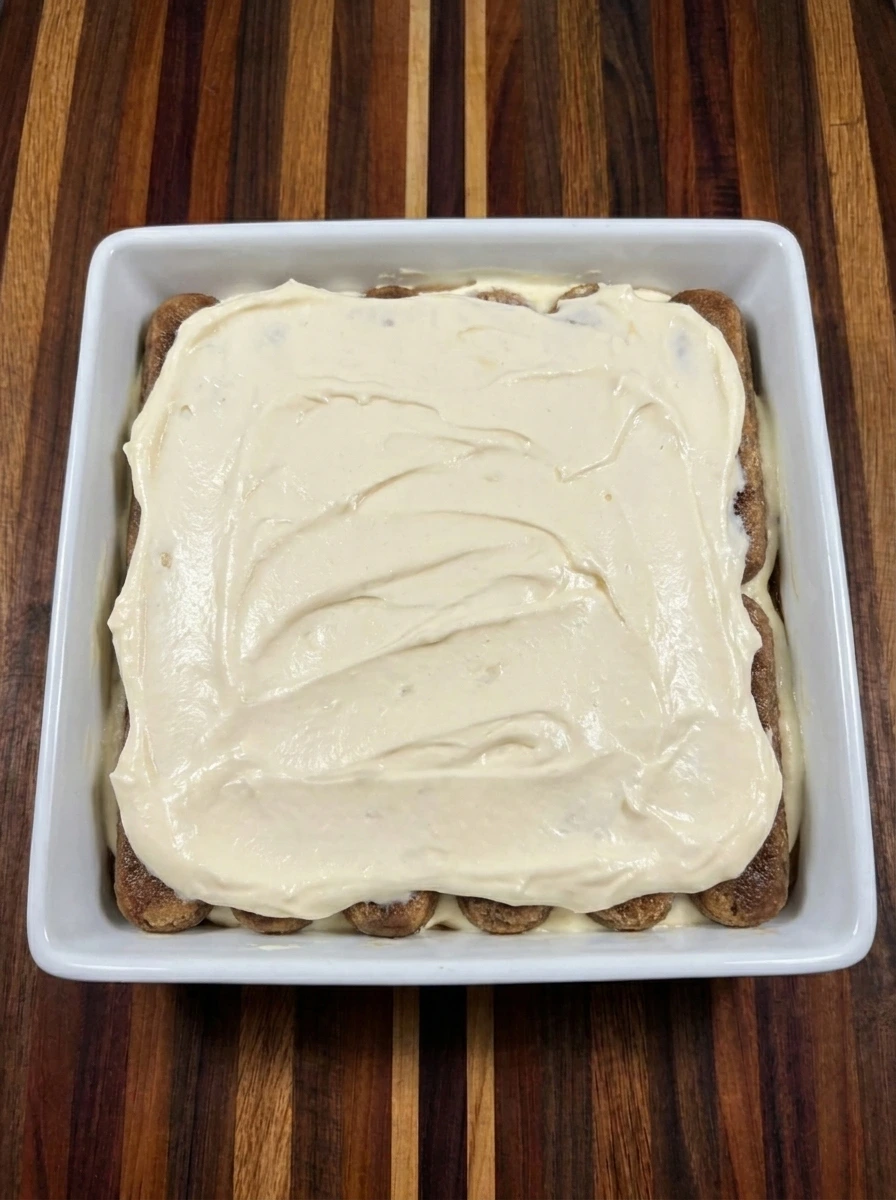
Quickly dip the remaining 12 ladyfinger biscuits into the cooled espresso and arrange them over the first mascarpone layer. Place the biscuits in a slightly staggered arrangement while keeping the overall surface covered. Spread the remaining mascarpone cream over the top and gently smooth it into a thick upper layer. Cover the dish and refrigerate for at least 4 hours or preferably overnight. During this resting period the coffee-soaked biscuits soften into tender sponge-like layers while the mascarpone cream firms enough to hold a slice. The surface should remain pale ivory with gentle uneven swirls and soft ridges before the final cocoa coating is added.
Tip: Refrigerate the assembled tiramisu for at least four hours or preferably overnight so the biscuits soften and the layers become sliceable.
Step 7: Dust with cocoa and serve a chilled tiramisu slice
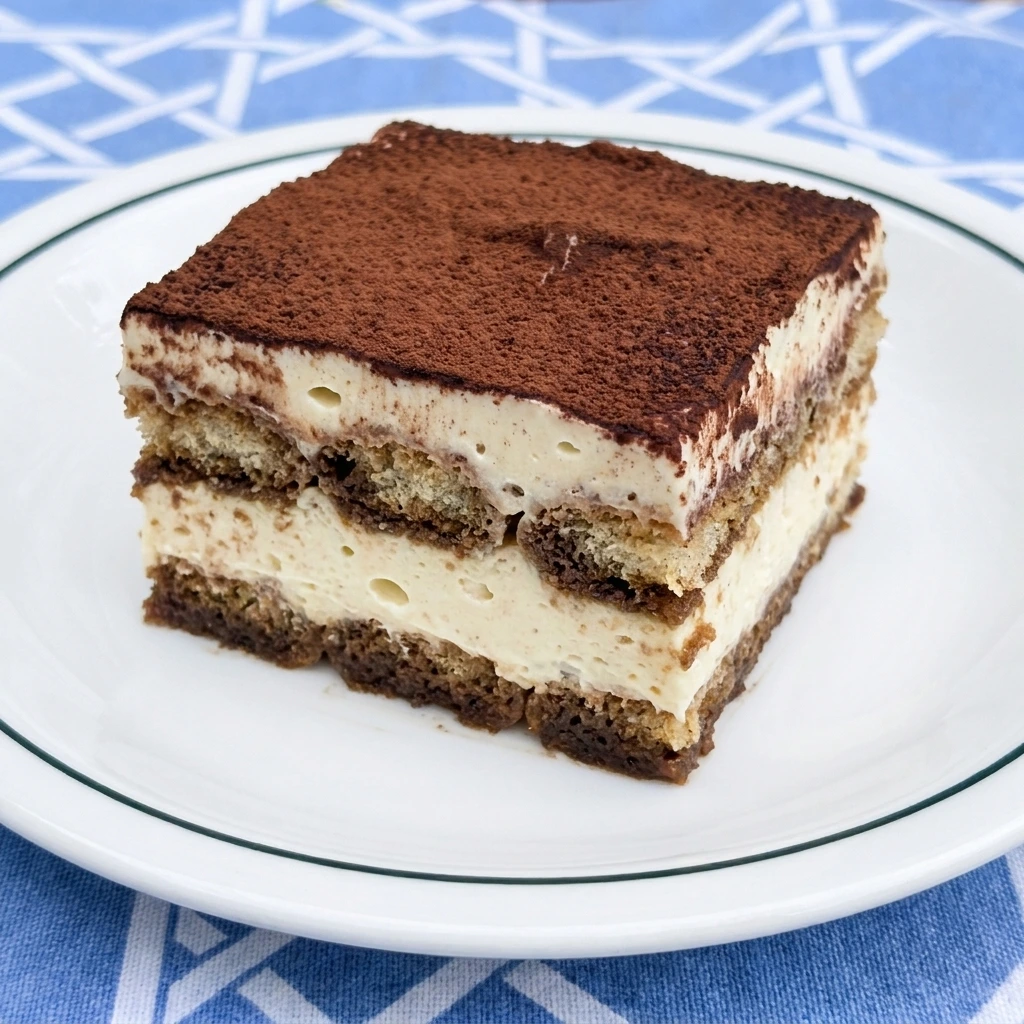
Remove the chilled tiramisu from the refrigerator and evenly dust the top with the unsweetened cocoa powder. The dark cocoa should create a thin velvety layer over the pale cream with a few naturally uneven patches. Cut the dessert into nine portions and carefully lift one square from the dish. Transfer the single portion to a white dessert plate and allow the alternating coffee-brown biscuit layers and thick ivory mascarpone cream to remain visible along the cut sides. The biscuits should look tender and fully softened while the filling holds its shape with slightly irregular edges. Serve immediately while the dessert is cold and the cocoa finish remains fresh.
Tip: Dust cocoa powder over the tiramisu just before serving and use a clean cutting motion to reveal the delicate layers without crushing them.
Pro Tips
- Choose traditional dry Savoiardi biscuits rather than soft sponge fingers because they absorb espresso while maintaining better structure.
- Use completely cooled espresso when dipping the biscuits because warm coffee can soften them too quickly and damage the layers.
- Use pasteurized eggs suitable for uncooked desserts and keep the filling refrigerated because this traditional version is not cooked.
- Allow the finished tiramisu to chill overnight when possible because the flavors blend and the mascarpone layers become easier to slice.
Storage Instructions
Store leftover Classic Italian Tiramisu in the refrigerator immediately after serving. Keep the dessert in its original ceramic or glass dish and cover it tightly with plastic wrap or a fitted lid. Refrigerate at 40°F or below and enjoy within 2 to 3 days when prepared with pasteurized eggs and properly handled ingredients. For individual portions transfer each slice into a clean airtight food storage container. Separate the portions carefully so the mascarpone layers remain intact. The biscuits will continue absorbing moisture during storage and may gradually become softer while the creamy filling settles.
Freezing Classic Italian Tiramisu is possible although the mascarpone texture may change after thawing. Freeze individual portions in airtight freezer-safe containers for up to 1 month for the best quality. Thaw overnight in the refrigerator and never leave the dessert at room temperature for extended periods. For the freshest presentation add the cocoa powder shortly before serving whenever possible. Refrigerated cocoa may absorb moisture and develop darker patches over time. Do not reheat tiramisu because the mascarpone filling is designed to be served chilled and warming can cause the layers to lose their structure.
Frequently Asked Questions
Yes and this recipe contains no alcohol. Strong brewed espresso provides the traditional coffee flavor without adding liqueur.
Refrigerate the assembled dessert for at least four hours or preferably overnight so the cream sets and the biscuits soften.
Yes and preparing it the day before is ideal. Keep it covered in the refrigerator and add the cocoa topping before serving.
Over-soaked ladyfingers or loose mascarpone cream can cause excess moisture. Dip biscuits briefly and chill thoroughly.
See You in the Kitchen
This Classic Italian Tiramisu is a great way to satisfy your Italian dessert cravings without stopping at a bakery to pick up something sweet.
I typically prepare my tiramisu the night before a family dinner and that way all of my dessert layers will be perfectly chilled and ready to serve at the same time and if you want more sweet ideas you can also try my Cinnamon Apple Turnover Wreath or cranberry orange bread for another homemade treat.
Even my kids love this one when made with decaffeinated coffee!
Print
Classic Italian Tiramisu
- Total Time: 4 hours 30 minutes
- Yield: 9 servings
Description
Classic Italian Tiramisu is an easy and delicious no-bake dessert made with delicate espresso-soaked ladyfingers and rich mascarpone cream. This quick and simple recipe brings authentic Italian flavors to your table and makes one of the best dessert ideas for a holiday dinner or birthday party or weekend brunch. With carefully layered ingredients and a dusting of cocoa powder this homemade treat feels special and offers a satisfying alternative to many healthy dessert ideas.
Ingredients
- 16 oz (450 g) Mascarpone cheese
- 4 large Pasteurized egg yolks
- 4 large Pasteurized egg whites
- 1/2 cup (100 g) Granulated sugar
- 24 biscuits (about 200 to 240 g) Savoiardi ladyfinger biscuits
- 1 1/2 cups (360 ml) Strong brewed espresso
- 2 tablespoons (10 g) Unsweetened cocoa powder
Instructions
- Place the four pasteurized egg yolks into a large mixing bowl and add the granulated sugar. Beat the ingredients together until the mixture becomes noticeably lighter and thicker. The deep yellow yolks should gradually change into a pale yellow cream with a smooth and slightly fluffy consistency.
Continue whipping for approximately 4 to 5 minutes until the mixture forms soft ribbons when lifted. Some fine air bubbles may remain visible around the edges while the center becomes glossy and creamy. This creates the rich base that gives Classic Italian Tiramisu its traditional texture.
- Add the mascarpone cheese to the whipped egg yolk mixture in several portions. Gently combine the ingredients until the thick yellow cream transforms into a smooth ivory-colored filling. The mascarpone should blend evenly while preserving the light consistency created during the previous step.
Avoid excessive mixing because mascarpone can become loose or grainy when overworked. The finished mixture should look thick and creamy with a few natural folds across the surface. Scrape the sides as needed so the cheese becomes incorporated without leaving large unmixed patches.
- Place the four pasteurized egg whites in a separate clean mixing bowl. Whip them until they change from a translucent liquid into a bright white foam. Continue beating until the foam thickens and develops firm peaks that retain their shape when lifted.
The finished egg whites should appear airy and voluminous with uneven soft ridges and slightly glossy peaks. Stop once the peaks hold firmly because overwhipped egg whites become dry and difficult to fold smoothly into the mascarpone mixture.
- Transfer the whipped egg whites into the bowl containing the mascarpone mixture in three portions. Gently fold the whites into the cream using broad movements that lift the heavier mixture over the fluffy foam. Continue until the filling becomes evenly pale and noticeably lighter in texture.
The finished mascarpone filling should look airy and thick with gentle folds and small natural air pockets. A few faint white streaks can remain during folding but the final mixture should appear mostly uniform. Avoid vigorous stirring because it would remove the air needed for a soft and delicate tiramisu.
- Pour the completely cooled espresso into a shallow bowl. Quickly dip 12 ladyfinger biscuits into the coffee for approximately one second on each side. The biscuits should absorb some liquid while retaining enough firmness to hold their shape during assembly.
Arrange the dipped biscuits in the bottom of an approximately 8-inch square ceramic dish with their edges touching naturally. Spread half of the mascarpone filling over the biscuits and allow the cream to settle into the small spaces between them. The first layer should show softened golden-brown biscuits beneath a thick uneven coating of pale cream.
- Quickly dip the remaining 12 ladyfinger biscuits into the cooled espresso and arrange them over the first mascarpone layer. Place the biscuits in a slightly staggered arrangement while keeping the overall surface covered. Spread the remaining mascarpone cream over the top and gently smooth it into a thick upper layer.
Cover the dish and refrigerate for at least 4 hours or preferably overnight. During this resting period the coffee-soaked biscuits soften into tender sponge-like layers while the mascarpone cream firms enough to hold a slice. The surface should remain pale ivory with gentle uneven swirls and soft ridges before the final cocoa coating is added.
- Remove the chilled tiramisu from the refrigerator and evenly dust the top with the unsweetened cocoa powder. The dark cocoa should create a thin velvety layer over the pale cream with a few naturally uneven patches. Cut the dessert into nine portions and carefully lift one square from the dish.
Transfer the single portion to a white dessert plate and allow the alternating coffee-brown biscuit layers and thick ivory mascarpone cream to remain visible along the cut sides. The biscuits should look tender and fully softened while the filling holds its shape with slightly irregular edges. Serve immediately while the dessert is cold and the cocoa finish remains fresh.
Notes
Pro Tips:
- Choose traditional dry Savoiardi biscuits rather than soft sponge fingers because they absorb espresso while maintaining better structure.
- Use completely cooled espresso when dipping the biscuits because warm coffee can soften them too quickly and damage the layers.
- Use pasteurized eggs suitable for uncooked desserts and keep the filling refrigerated because this traditional version is not cooked.
- Allow the finished tiramisu to chill overnight when possible because the flavors blend and the mascarpone layers become easier to slice.
Storage: Store leftover Classic Italian Tiramisu in the refrigerator immediately after serving. Keep the dessert in its original ceramic or glass dish and cover it tightly with plastic wrap or a fitted lid. Refrigerate at 40°F or below and enjoy within 2 to 3 days when prepared with pasteurized eggs and properly handled ingredients.
For individual portions transfer each slice into a clean airtight food storage container. Separate the portions carefully so the mascarpone layers remain intact. The biscuits will continue absorbing moisture during storage and may gradually become softer while the creamy filling settles.
Freezing Classic Italian Tiramisu is possible although the mascarpone texture may change after thawing. Freeze individual portions in airtight freezer-safe containers for up to 1 month for the best quality. Thaw overnight in the refrigerator and never leave the dessert at room temperature for extended periods.
For the freshest presentation add the cocoa powder shortly before serving whenever possible. Refrigerated cocoa may absorb moisture and develop darker patches over time. Do not reheat tiramisu because the mascarpone filling is designed to be served chilled and warming can cause the layers to lose their structure.
- Prep Time: 30 minutes
- Cook Time: 0 minute
- Category: Dessert
- Cuisine: Italian