

You guys! When my mom tasted these Chocolate Peppermint Cookies she said…” I think that’s one of the best things you’ve ever done”! I have to say that they’re one of my top five Christmas favorites! A Saturday morning baking experiment turned into the best Chocolate Peppermint Cookies ever! They have the same soft and chewy texture as a bakery-style chocolate cookie but they’re made with simple ingredients and packed with rich cocoa flavor and crunchy peppermint pieces.

These cookies are sweetened with brown sugar and granulated sugar while their base is all-purpose flour and cocoa powder. I think you all know I’m a chocolate lover and I’ve already baked Peanut Butter Blossoms and so many chocolate treats before. I rarely love a recipe that doesn’t have chocolate in the name but these are just to die for! The recipe makes 12 cookies and I typically like to make things in smaller batches since I do so much baking. However if you have a bigger group or want to make more then you can double the batch and make 24!
These cookies can be a dessert or you can pair them with some hot chocolate and coffee for a tasty afternoon treat. They’re also great for holiday meal prep because you can make a large batch and store them in the freezer before taking them out whenever you need a sweet Christmas treat during the week!
Ingredients
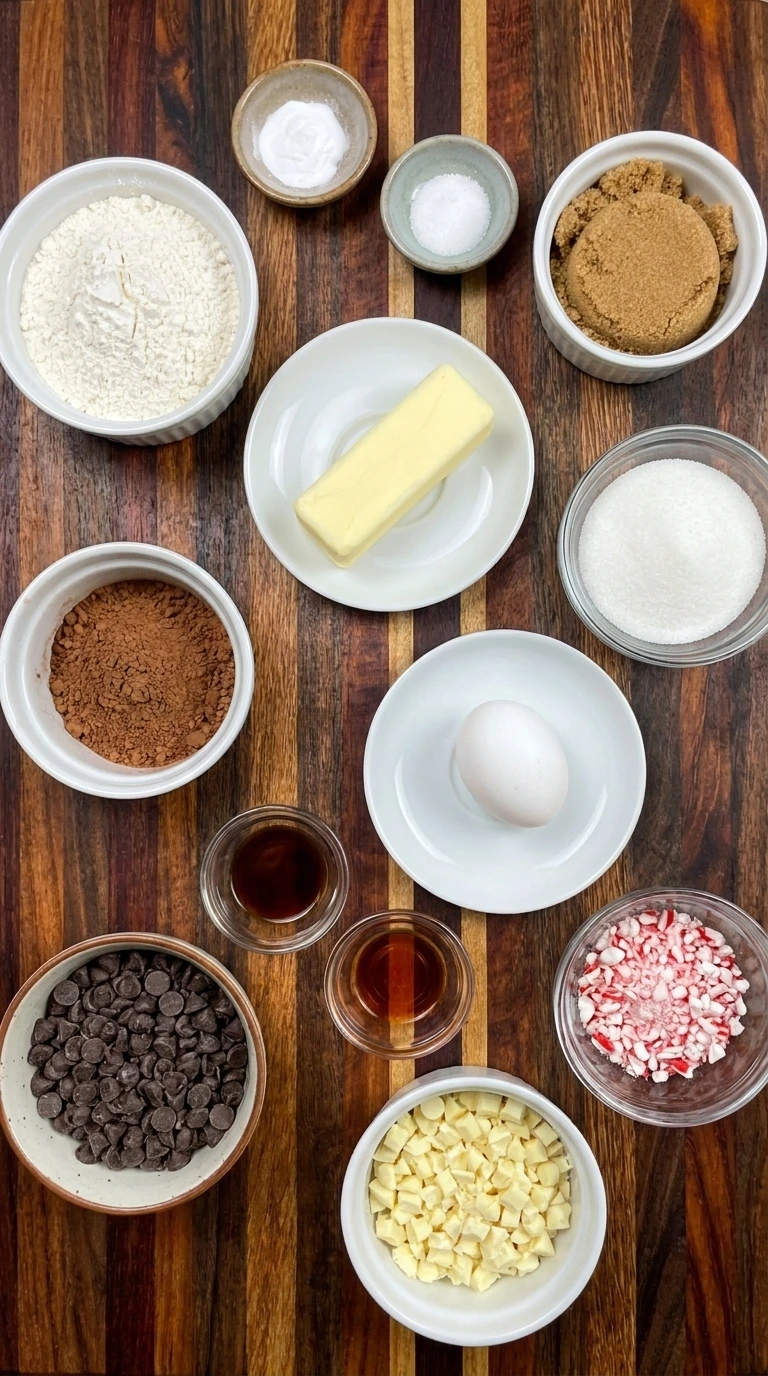
Here is what I use for this recipe :
- All-purpose flour: Provides the structure that holds the cookies together while keeping their centers tender and chewy.
- Unsweetened cocoa powder: Creates the deep chocolate flavor and dark brown color that make these peppermint cookies rich and fudgy.
- Baking soda: Helps the cookie dough rise slightly and spread into soft cookies with gently cracked surfaces.
- Fine salt: Balances the sweetness of the sugars and peppermint candy while highlighting the chocolate flavor.
- Unsalted butter: Adds richness and moisture while creating a tender cookie texture when creamed with the sugars.
- Light brown sugar: Adds moisture and a gentle caramel flavor that helps produce chewy centers and soft edges.
- Granulated sugar: Sweetens the chocolate dough and encourages light spreading and slightly crisp cookie edges.
- Large egg: Binds the dough ingredients together and helps create a soft and cohesive cookie structure.
- Vanilla extract: Adds a warm background flavor that balances the cocoa and complements the cool peppermint.
- Peppermint extract: Adds concentrated peppermint flavor throughout the chocolate dough without making the cookies overly minty.
- Semisweet chocolate chips: Create small pockets of melted chocolate throughout the cookies for a rich and indulgent texture.
- White chocolate: Melts into a smooth drizzle that contrasts with the dark cookies and helps hold the peppermint topping.
- Crushed peppermint candy canes: Provide festive red and white color and a crisp peppermint crunch that finishes each chocolate cookie.
Tools I Use :
- Large mixing bowl: Holds the butter and sugars and remaining dough ingredients while providing enough space for mixing without spilling.
- Medium mixing bowl: Allows the flour and cocoa powder and baking soda and salt to be combined evenly before they enter the wet mixture.
- Electric hand mixer: Creams the softened butter and sugars into a lighter mixture and incorporates the egg and flavor extracts efficiently.
- Rubber spatula: Scrapes the bowl and gently folds the chocolate chips into the dough without excessive mixing.
- Measuring cups and spoons: Measure the dry ingredients and flavor extracts accurately to maintain the correct cookie texture and peppermint intensity.
- Cookie scoop: Divides the dough into 12 approximately equal portions for consistent baking and manageable cookie sizes.
- Baking sheet: Provides a flat heat-resistant cooking surface that allows the cookie portions to spread and bake evenly.
- Parchment paper: Prevents the chocolate cookie dough from sticking to the baking sheet and makes cleanup easier.
- Wire cooling rack: Allows air to circulate around the baked cookies so they cool before the melted white chocolate is applied.
- Microwave-safe bowl: Holds the white chocolate during gentle melting and makes it easier to create a smooth topping.
- Small food-safe bag or piping bag: Controls the flow of melted white chocolate while creating thin irregular decorative lines across the cookies.
- Small white dessert plate: Presents one finished cookie and a broken section so the soft interior and decorative topping remain visible.
Instructions
Step 1: Cream the butter and sugars with the egg
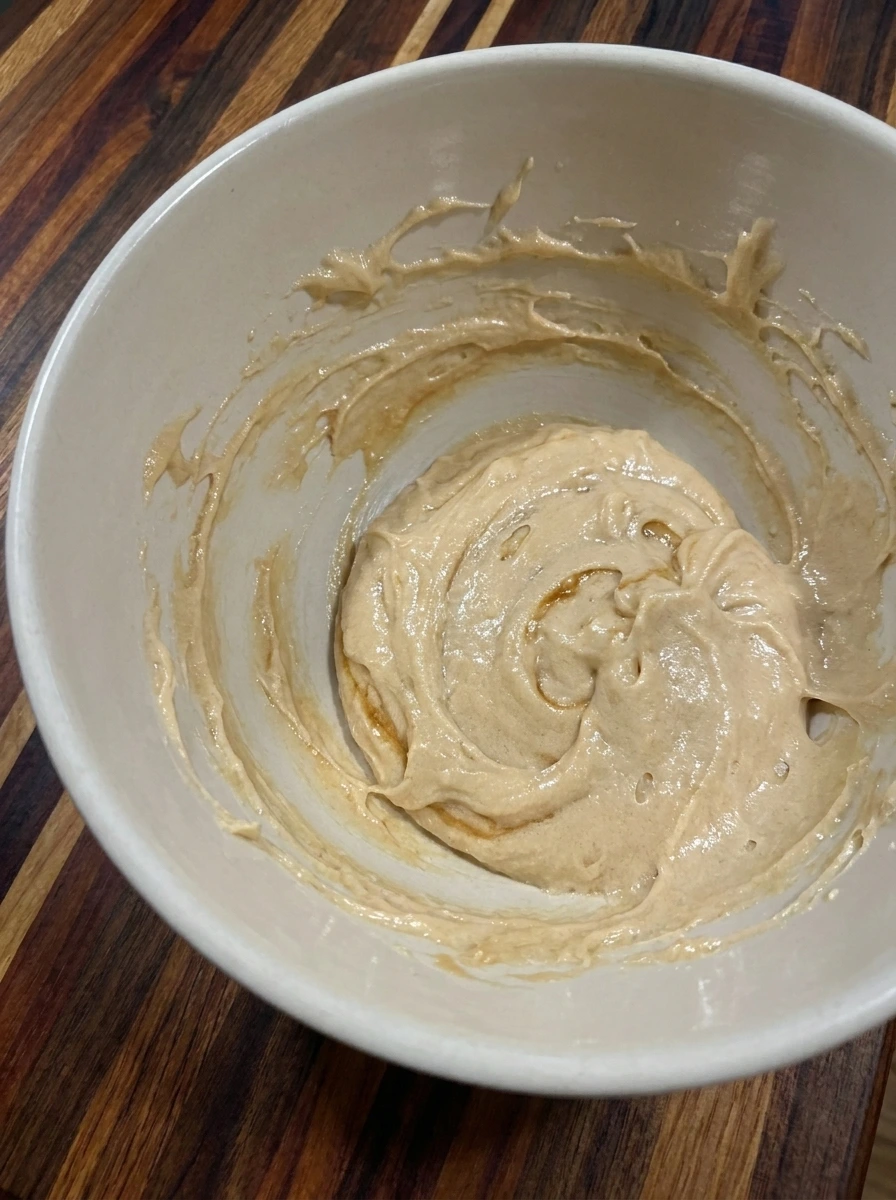
Place the softened butter in a large mixing bowl along with the light brown sugar and granulated sugar. Beat the ingredients together for about 2 minutes until the mixture becomes lighter in color and develops a soft and creamy texture. Scrape down the sides as needed so the butter and sugar combine evenly. Add the egg along with the vanilla extract and peppermint extract. Beat until everything becomes a smooth and cohesive mixture with a slightly glossy appearance. The finished mixture should be thick and creamy with no large visible streaks of butter.
Tip: Use softened butter rather than melted butter because creaming helps create a softer cookie with better structure and a chewy center.
Step 2: Fold the cocoa mixture and chocolate chips into the dough
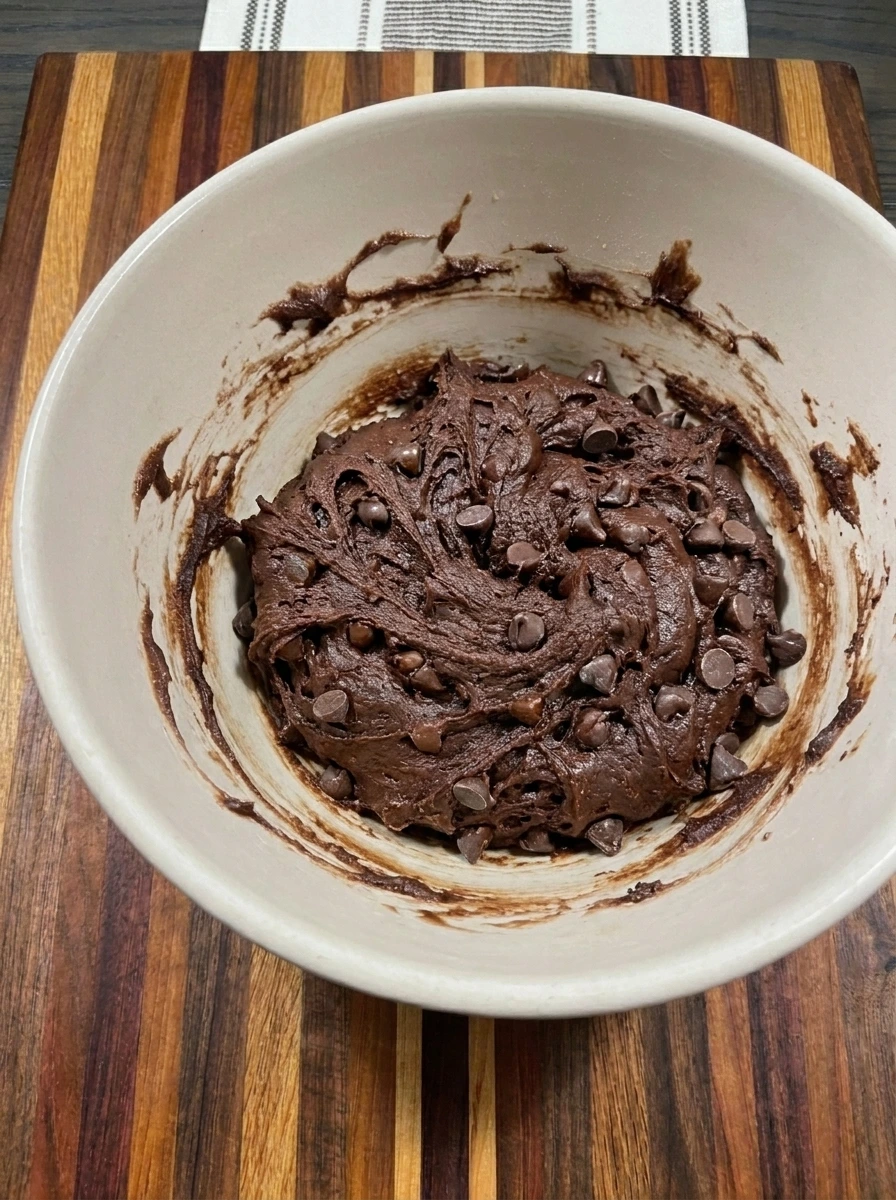
Whisk the all-purpose flour together with the cocoa powder and baking soda and salt in a separate bowl. Add the dry mixture to the creamy butter mixture and gently combine until a thick chocolate dough forms. Stop mixing when the flour disappears because working the dough too much can make the baked cookies tough. Fold in the semisweet chocolate chips until they are distributed throughout the chocolate dough. The mixture will become darker and considerably thicker with small chocolate pieces appearing through the surface. Some uneven streaks and ridges are completely normal at this stage.
Tip: Mix only until the dry ingredients disappear because overmixing can make the finished cookies dense instead of soft and tender.
Step 3: Scoop the chocolate dough into cookie portions
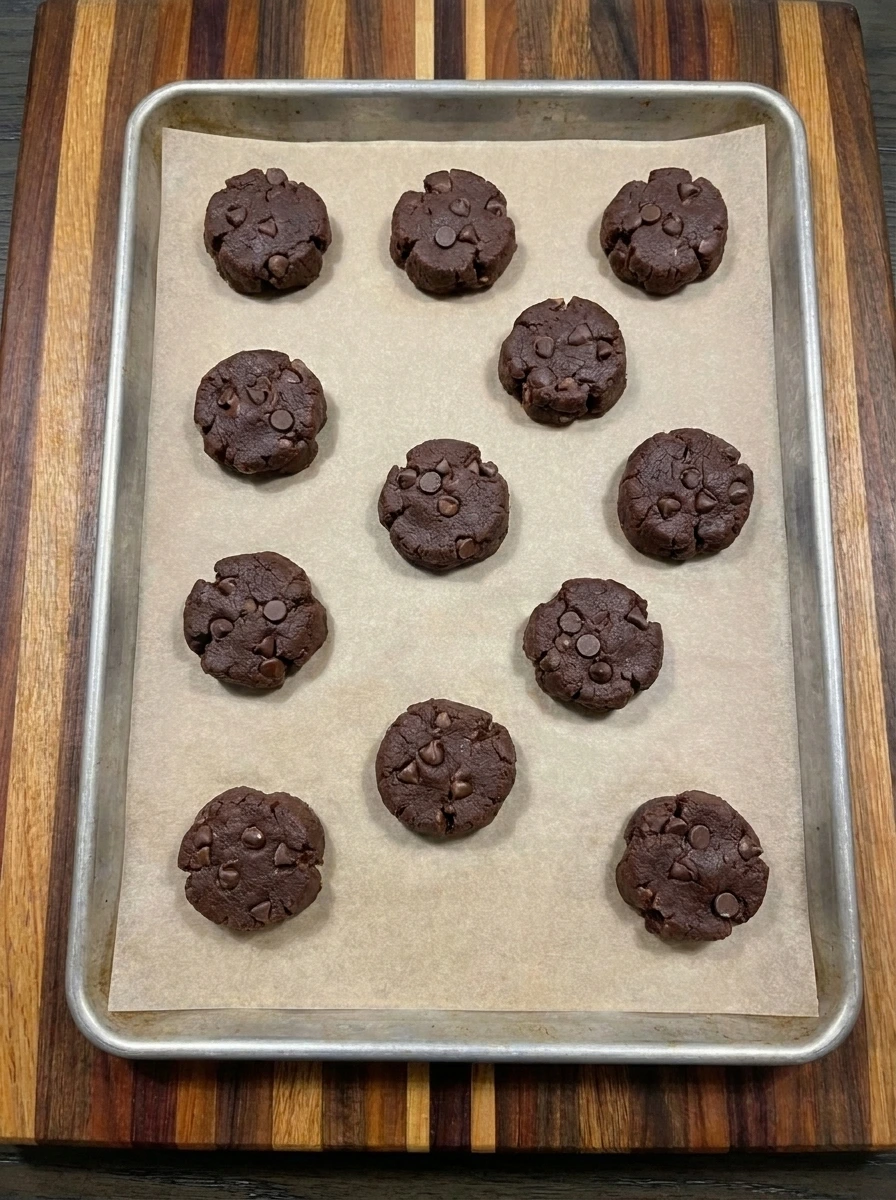
Divide the chocolate cookie dough into 12 roughly equal portions using about 2 tablespoons of dough for each cookie. Roll each portion loosely into a ball and place the dough portions on a parchment-lined baking sheet. Leave about 2 inches between the portions so they have room to spread as they bake. Gently press the tops just enough to create thick rounded disks. The portions should still look slightly rough with a few visible chocolate chips and irregular edges. Meanwhile preheat the oven to 350°F or 175°C so it is ready for the shaped cookies.
Tip: Keep the dough portions roughly equal in weight but avoid pressing them too flat so the centers stay thick and soft after baking.
Step 4: Bake the cookies until the edges are set
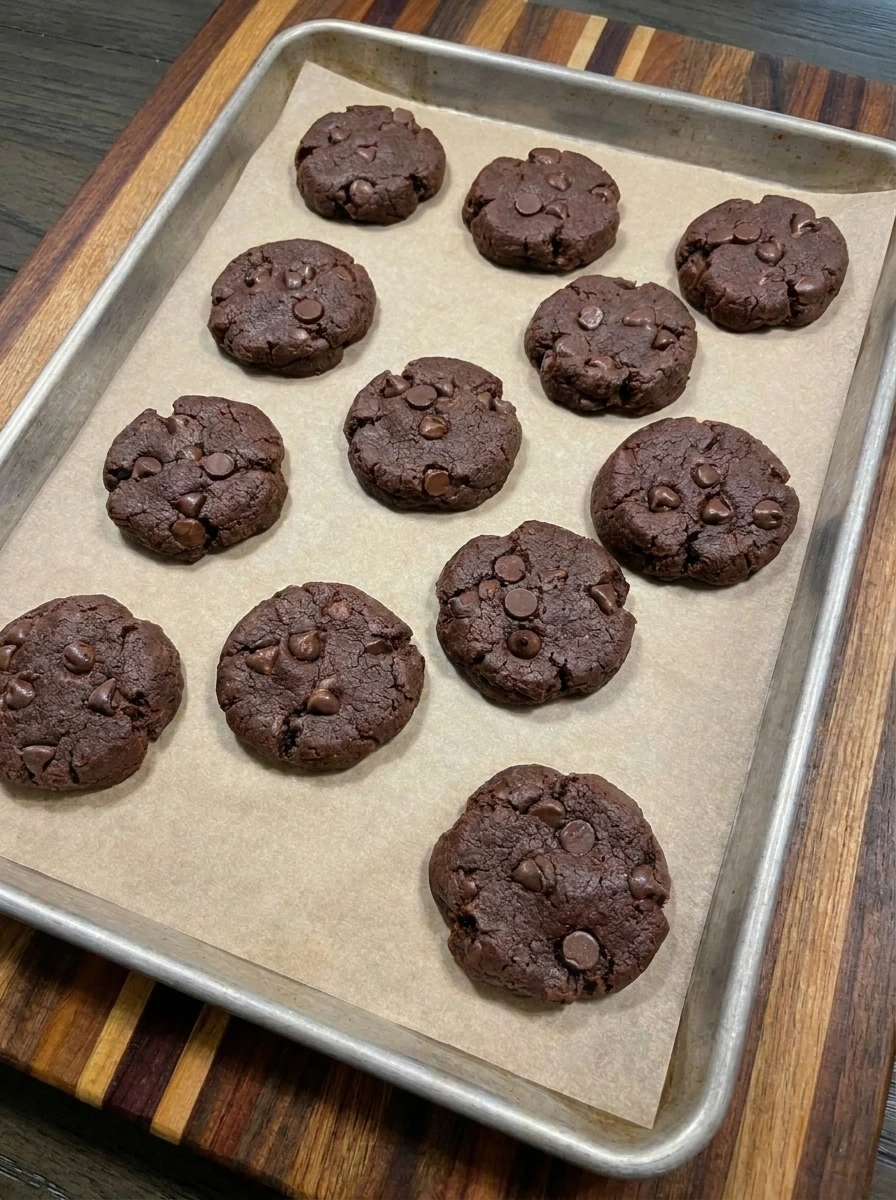
Place the baking sheet in the preheated oven and bake the cookies for 10 to 12 minutes. The dough portions will spread into thick round cookies while their surfaces develop soft cracks and slightly firmer edges. The centers may still look a little soft when the cookies are ready to come out. Remove the baking sheet from the oven and allow the cookies to cool on the tray for 5 minutes before transferring them to a cooling rack. Let them cool for another 10 minutes before adding the chocolate topping. As the cookies cool their centers become firmer while remaining soft and chewy.
Tip: Remove the cookies when the edges are set but the centers still look slightly soft because residual heat finishes the baking process.
Step 5: Drizzle white chocolate and sprinkle crushed peppermint
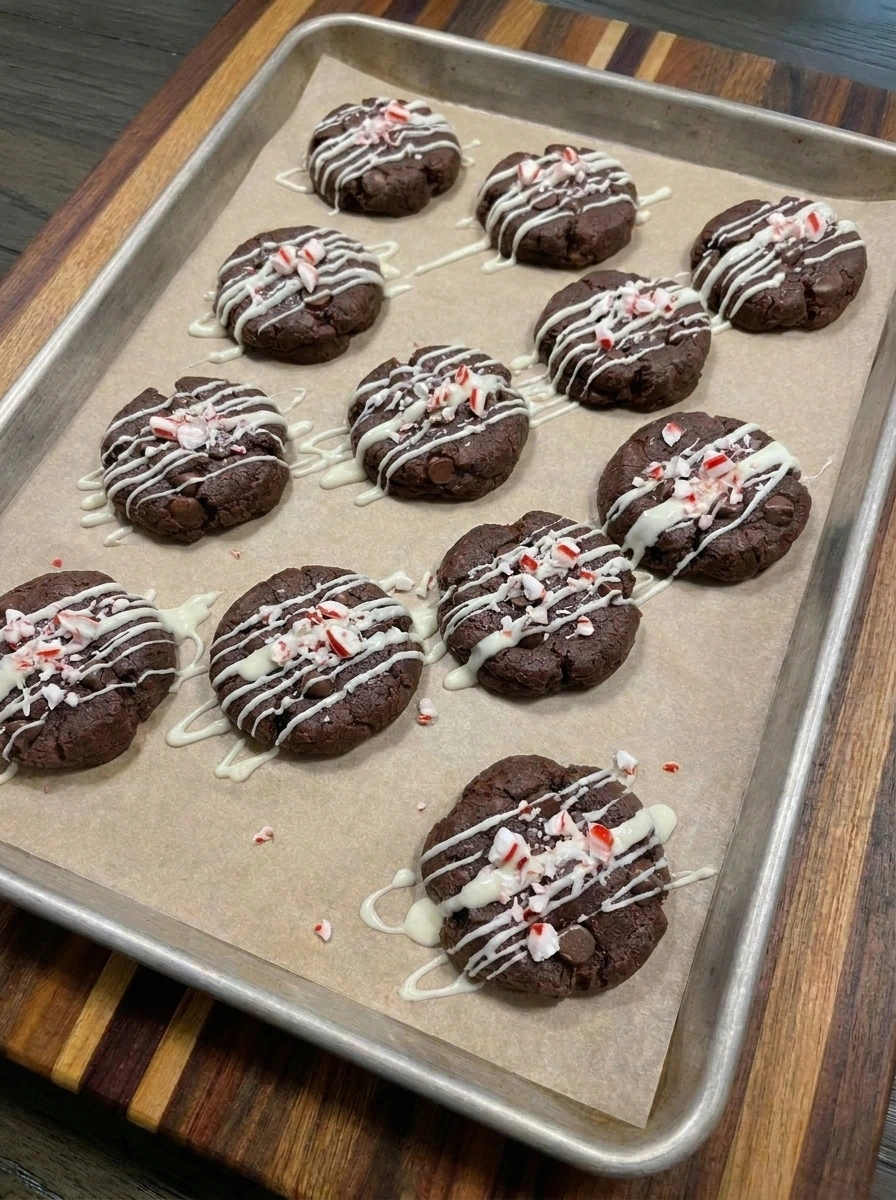
Melt the white chocolate in a microwave-safe bowl using 20-second intervals and stir between each interval until completely smooth. Once the baked cookies are cool enough for the topping to hold its shape drizzle the melted white chocolate loosely across each cookie. Allow some lines to be thin while others form slightly thicker streaks. Immediately scatter the crushed peppermint candy over the melted white chocolate. Some pieces should settle into the chocolate while others rest against the dark cookie surfaces. Leave the cookies undisturbed until the white chocolate becomes firm so the peppermint pieces remain attached.
Tip: Sprinkle the crushed peppermint immediately after drizzling because the candy pieces adhere best before the white chocolate firms.
Step 6: Serve one finished chocolate peppermint cookie
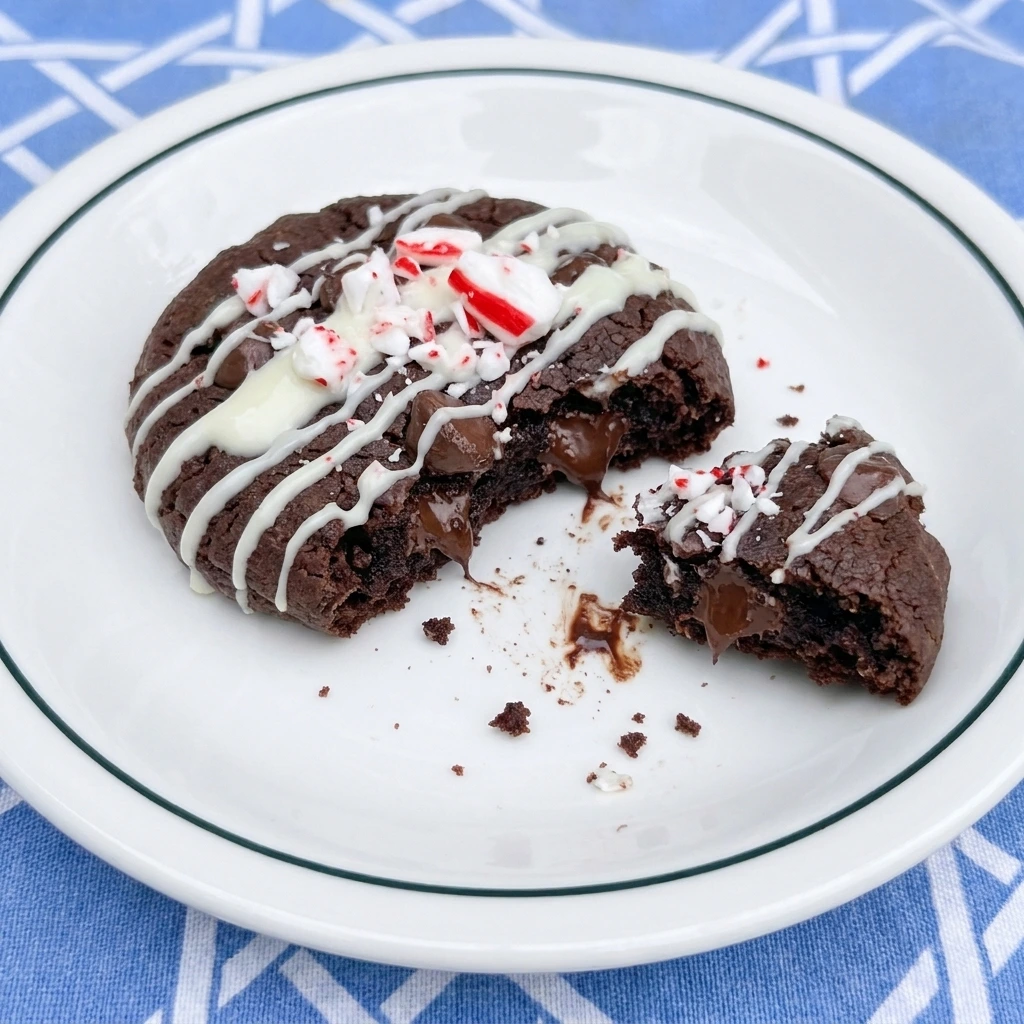
Once the white chocolate has set transfer one finished Chocolate Peppermint Cookie onto a small white dessert plate. Choose a cookie with visible chocolate cracks and a generous scattering of crushed peppermint candy. The white chocolate should be firm enough to hold the topping while the cookie remains soft inside. Break or cut a small section from the cookie and rest it beside the larger portion to reveal the fudgy interior and melted chocolate pockets. Serve at room temperature for the best combination of soft chocolate texture and crisp peppermint crunch.
Tip: Serve the cookies at room temperature so the chocolate centers stay pleasantly soft and the peppermint topping remains crunchy.
Pro Tips
- Use room-temperature butter and eggs so the dough combines smoothly and produces soft cookies with evenly baked centers.
- Measure the cocoa powder carefully and avoid packing it tightly because too much cocoa can make the finished cookies dry.
- Crush the peppermint candy into mixed small pieces rather than fine powder so every cookie has a noticeable festive crunch.
- Allow the cookies to cool before adding white chocolate because a very hot surface can make the drizzle run off the edges.
Storage Instructions
Room Temperature Storage: Allow the Chocolate Peppermint Cookies to cool completely and make sure the white chocolate has fully set before storing them. Place the cookies in an airtight container with parchment paper between the layers to prevent the decorated surfaces from sticking together. Keep them at cool room temperature for up to 4 days and avoid placing the container near direct heat because the chocolate topping can soften. Refrigerator Storage: If your kitchen is particularly warm then you can store the decorated cookies in the refrigerator for up to 1 week.
Arrange them in a covered container and separate the layers with parchment paper. Bring the cookies to room temperature before serving so their centers regain a softer texture and their chocolate flavor becomes more noticeable. Freezer Storage: Arrange the completely cooled cookies in a single layer and freeze them until firm before transferring them into a freezer-safe container.
Use parchment paper between layers to protect the white chocolate and peppermint topping. Freeze for up to 2 months for the best flavor and texture. Thaw the cookies inside their covered container at room temperature to reduce moisture collecting on the chocolate decorations. Make-Ahead Dough: Prepare the cookie dough and store it tightly covered in the refrigerator for up to 48 hours before baking.
You can also portion the dough into 12 balls and freeze them until firm before transferring them to a freezer-safe bag for up to 2 months. Bake the frozen portions directly from the freezer and allow an additional 1 to 2 minutes if needed. Add the white chocolate and peppermint topping only after the baked cookies have cooled.
Frequently Asked Questions
Yes! Prepare the dough up to 48 hours ahead and refrigerate it in a covered container until ready to bake.
Absolutely! Freeze the fully cooled cookies in an airtight container for up to 2 months for the best quality.
The butter may have been too warm or the flour may have been undermeasured. Chill soft dough before baking.
Yes! Crushed hard peppermint candies work well as a topping. Add them after baking for the best crunch.
See You in the Kitchen
I hope you enjoy all the recipes I share with you including these delicious Chocolate Peppermint Cookies and my festive Christmas Tree Puff Pastry recipe.
I hope you try them alongside my Peanut Butter Blossoms and enjoy them and rate them and share them with your friends and family!
Print
Chocolate Peppermint Cookies
- Total Time: 47 minutes
- Yield: 12 servings
Description
These easy Chocolate Peppermint Cookies combine rich cocoa and melty chocolate chips with cool peppermint flavor for the best festive dessert. The simple dough comes together with everyday baking ingredients and the quick baking time makes these cookies perfect for holiday parties and Christmas cookie exchanges. If you need sweet ideas for family gatherings or a homemade gift then these chewy cookies offer a delicious treat that fits alongside healthy holiday snack options.
Ingredients
- 1 cup (125 g) All-purpose flour
- 1/3 cup (28 g) Unsweetened cocoa powder
- 1/2 teaspoon Baking soda
- 1/4 teaspoon Fine salt
- 1/2 cup (113 g) softened Unsalted butter
- 1/2 cup (100 g) packed Light brown sugar
- 1/4 cup (50 g) Granulated sugar
- 1 Large egg
- 1/2 teaspoon Vanilla extract
- 1/4 teaspoon Peppermint extract
- 1/2 cup (85 g) Semisweet chocolate chips
- 1/3 cup (55 g) chopped or in melting wafers White chocolate
- 1/4 cup (30 g) Crushed peppermint candy canes
Instructions
- Place the softened butter in a large mixing bowl along with the light brown sugar and granulated sugar. Beat the ingredients together for about 2 minutes until the mixture becomes lighter in color and develops a soft and creamy texture. Scrape down the sides as needed so the butter and sugar combine evenly.
Add the egg along with the vanilla extract and peppermint extract. Beat until everything becomes a smooth and cohesive mixture with a slightly glossy appearance. The finished mixture should be thick and creamy with no large visible streaks of butter.
- Whisk the all-purpose flour together with the cocoa powder and baking soda and salt in a separate bowl. Add the dry mixture to the creamy butter mixture and gently combine until a thick chocolate dough forms. Stop mixing when the flour disappears because working the dough too much can make the baked cookies tough.
Fold in the semisweet chocolate chips until they are distributed throughout the chocolate dough. The mixture will become darker and considerably thicker with small chocolate pieces appearing through the surface. Some uneven streaks and ridges are completely normal at this stage.
- Divide the chocolate cookie dough into 12 roughly equal portions using about 2 tablespoons of dough for each cookie. Roll each portion loosely into a ball and place the dough portions on a parchment-lined baking sheet. Leave about 2 inches between the portions so they have room to spread as they bake.
Gently press the tops just enough to create thick rounded disks. The portions should still look slightly rough with a few visible chocolate chips and irregular edges. Meanwhile preheat the oven to 350°F or 175°C so it is ready for the shaped cookies.
- Place the baking sheet in the preheated oven and bake the cookies for 10 to 12 minutes. The dough portions will spread into thick round cookies while their surfaces develop soft cracks and slightly firmer edges. The centers may still look a little soft when the cookies are ready to come out.
Remove the baking sheet from the oven and allow the cookies to cool on the tray for 5 minutes before transferring them to a cooling rack. Let them cool for another 10 minutes before adding the chocolate topping. As the cookies cool their centers become firmer while remaining soft and chewy.
- Melt the white chocolate in a microwave-safe bowl using 20-second intervals and stir between each interval until completely smooth. Once the baked cookies are cool enough for the topping to hold its shape drizzle the melted white chocolate loosely across each cookie. Allow some lines to be thin while others form slightly thicker streaks.
Immediately scatter the crushed peppermint candy over the melted white chocolate. Some pieces should settle into the chocolate while others rest against the dark cookie surfaces. Leave the cookies undisturbed until the white chocolate becomes firm so the peppermint pieces remain attached.
- Once the white chocolate has set transfer one finished Chocolate Peppermint Cookie onto a small white dessert plate. Choose a cookie with visible chocolate cracks and a generous scattering of crushed peppermint candy. The white chocolate should be firm enough to hold the topping while the cookie remains soft inside.
Break or cut a small section from the cookie and rest it beside the larger portion to reveal the fudgy interior and melted chocolate pockets. Serve at room temperature for the best combination of soft chocolate texture and crisp peppermint crunch.
Notes
Pro Tips:
- Use room-temperature butter and eggs so the dough combines smoothly and produces soft cookies with evenly baked centers.
- Measure the cocoa powder carefully and avoid packing it tightly because too much cocoa can make the finished cookies dry.
- Crush the peppermint candy into mixed small pieces rather than fine powder so every cookie has a noticeable festive crunch.
- Allow the cookies to cool before adding white chocolate because a very hot surface can make the drizzle run off the edges.
Storage: Room Temperature Storage: Allow the Chocolate Peppermint Cookies to cool completely and make sure the white chocolate has fully set before storing them. Place the cookies in an airtight container with parchment paper between the layers to prevent the decorated surfaces from sticking together. Keep them at cool room temperature for up to 4 days and avoid placing the container near direct heat because the chocolate topping can soften.
Refrigerator Storage: If your kitchen is particularly warm then you can store the decorated cookies in the refrigerator for up to 1 week. Arrange them in a covered container and separate the layers with parchment paper. Bring the cookies to room temperature before serving so their centers regain a softer texture and their chocolate flavor becomes more noticeable.
Freezer Storage: Arrange the completely cooled cookies in a single layer and freeze them until firm before transferring them into a freezer-safe container. Use parchment paper between layers to protect the white chocolate and peppermint topping. Freeze for up to 2 months for the best flavor and texture. Thaw the cookies inside their covered container at room temperature to reduce moisture collecting on the chocolate decorations.
Make-Ahead Dough: Prepare the cookie dough and store it tightly covered in the refrigerator for up to 48 hours before baking. You can also portion the dough into 12 balls and freeze them until firm before transferring them to a freezer-safe bag for up to 2 months. Bake the frozen portions directly from the freezer and allow an additional 1 to 2 minutes if needed. Add the white chocolate and peppermint topping only after the baked cookies have cooled.
- Prep Time: 20 minutes
- Cook Time: 12 minutes
- Category: Dessert
- Cuisine: American