I honestly havent really shared many individual veggie snack recipes in my blog but these Creamy Ranch Veggie Cups were one I had to share. This recipe is inspired by classic party trays and is easy to prepare and make. It is a super tasty snack packed full of fresh vegetables and is quite refreshing.
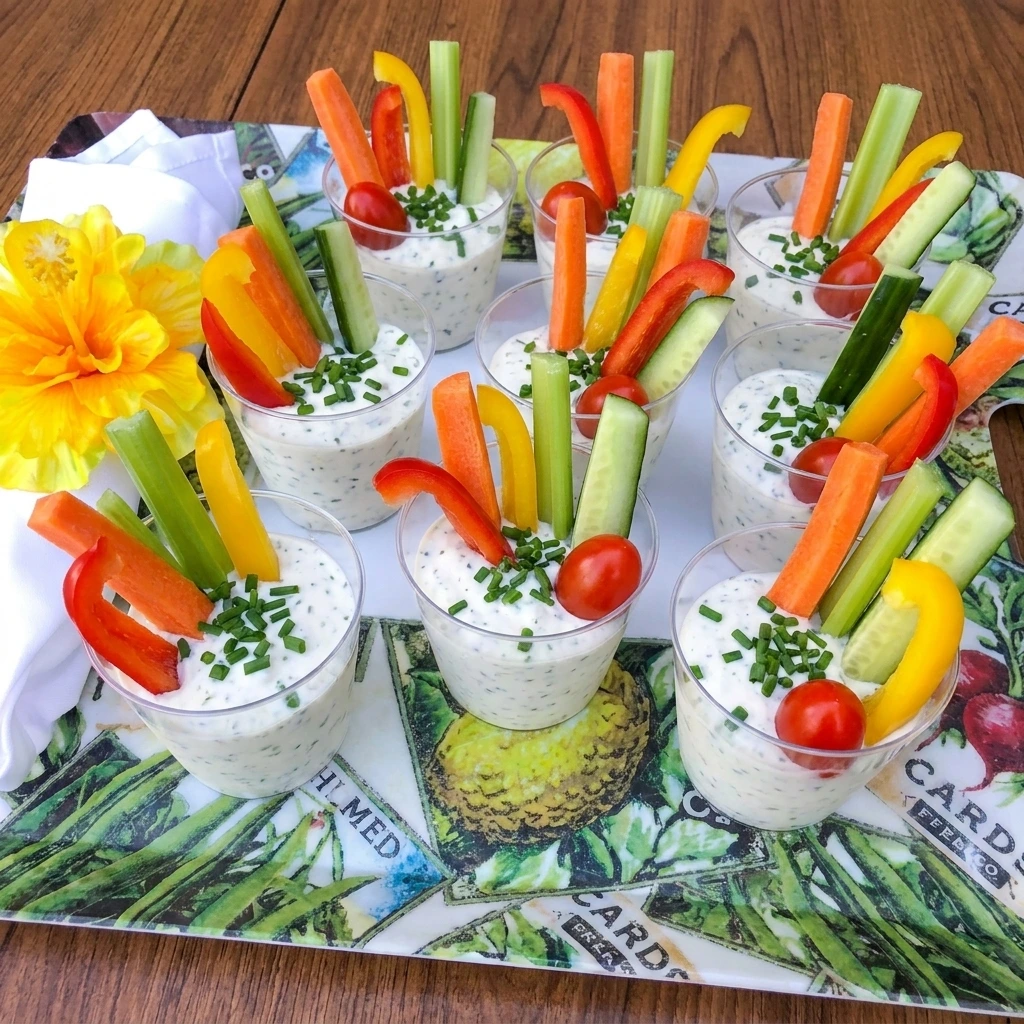
If you enjoy colorful make ahead dishes then try our Cranberry Chicken Salad for another simple lunch idea. When people think about vegetable cups they probably assume they are plain since they are made from raw vegetables and dip. But trust me on this when they are prepared with a creamy ranch base and a crisp mix of vegetables they offer a cool and savory taste that is very satisfying.
This recipe is super tasty and quick to make so I recommend this snack for those who want an easy way to enjoy more vegetables.
Ingredients

Here is what I use for this recipe and you can adjust nuts or spices based on preference:
- Sour cream: Creates the thick creamy base that supports the vegetables without becoming runny.
- Mayonnaise: Adds richness and a smooth texture that balances the tang of the sour cream.
- Ranch seasoning mix: Provides the signature savory herb flavor with garlic and onion notes.
- Fresh lemon juice: Brightens the dip and loosens it slightly for easy spooning into cups.
- Carrots: Add a sweet crisp bite and bright orange color to every serving.
- Celery stalks: Bring clean crunch and a fresh green contrast to the creamy ranch layer.
- Red bell pepper: Adds juicy sweetness and vivid red strips that make the cups look inviting.
- Yellow bell pepper: Contributes mild sweetness and a sunny color that balances the vegetable mix.
- English cucumber: Provides cool crisp texture and tender green edges without many watery seeds.
- Cherry tomatoes: Add juicy bursts of flavor and rounded shapes among the vegetable sticks.
- Fresh chives: Finish the ranch dip with a mild onion flavor and small green flecks.
Tools You’ll Need
- Wooden cutting board: Provides a stable surface for cutting the vegetables into snack size pieces.
- Sharp kitchen knife: Cuts the vegetables cleanly while allowing varied homemade shapes and sizes.
- Vegetable peeler: Removes the outer layer from the carrots for a smooth crisp bite.
- Medium mixing bowl: Holds the ranch dip ingredients while they are folded into a thick creamy mixture.
- Mixing spoon: Blends the dip and creates soft swirls without making the mixture too loose.
- Eight clear serving cups: Keeps each portion neat while showing the colorful vegetables and creamy dip.
- White serving plate: Presents one finished cup as an individual portion for serving.
Instructions
Step 1: Cut the vegetables into snack size pieces
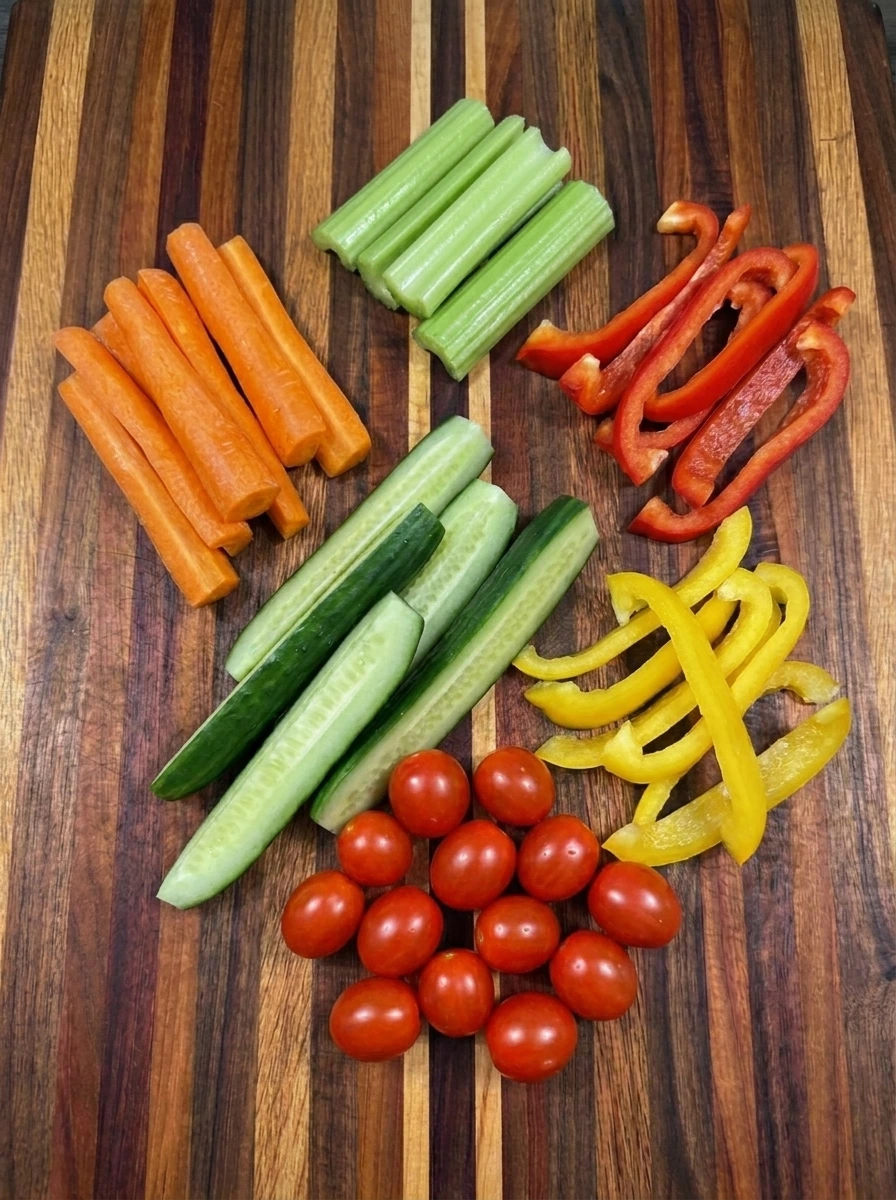
Peel the two carrots and cut them into uneven sticks that are tall enough to stand in the serving cups. Slice the three celery stalks into similar lengths while keeping a few natural bends and irregular edges. Cut the red bell pepper and yellow bell pepper into loose strips. Slice the English cucumber into thick spears and leave the twelve cherry tomatoes whole so the vegetable mix has varied shapes and textures.
Tip: Keep the vegetable pieces close in height so they stand well while allowing irregular widths for a natural homemade look.
Step 2: Mix the creamy ranch dip
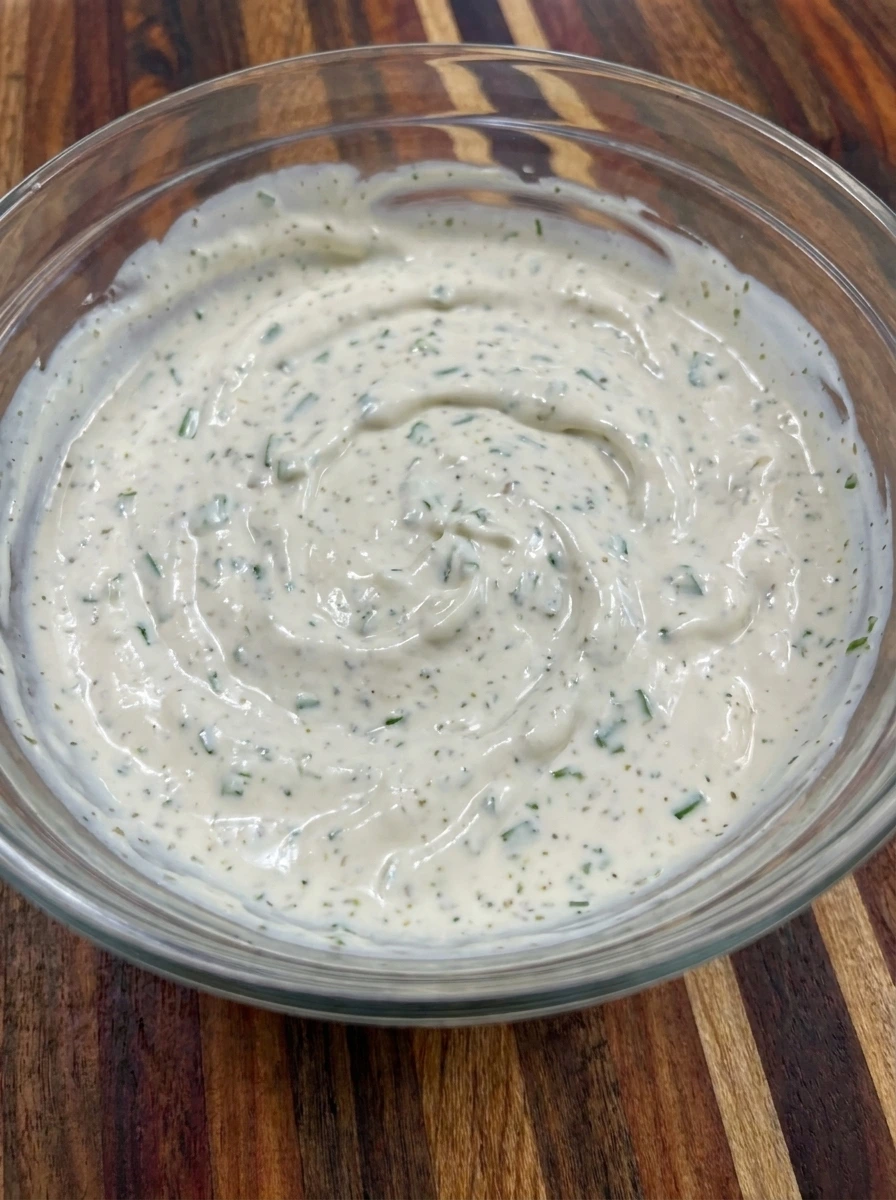
Add the sour cream and mayonnaise to a mixing bowl then scatter the ranch seasoning across the top. Pour in the lemon juice and fold everything together until the white mixture becomes evenly creamy with visible herb flecks. Stir in most of the chopped chives while saving a small amount for the finished cups. The dip should look thick and smooth with a few soft swirls instead of a perfectly flat surface.
Tip: Mix only until the seasoning is evenly distributed because overmixing can make the dip looser than needed for the cups.
Step 3: Spoon ranch dip into the cups
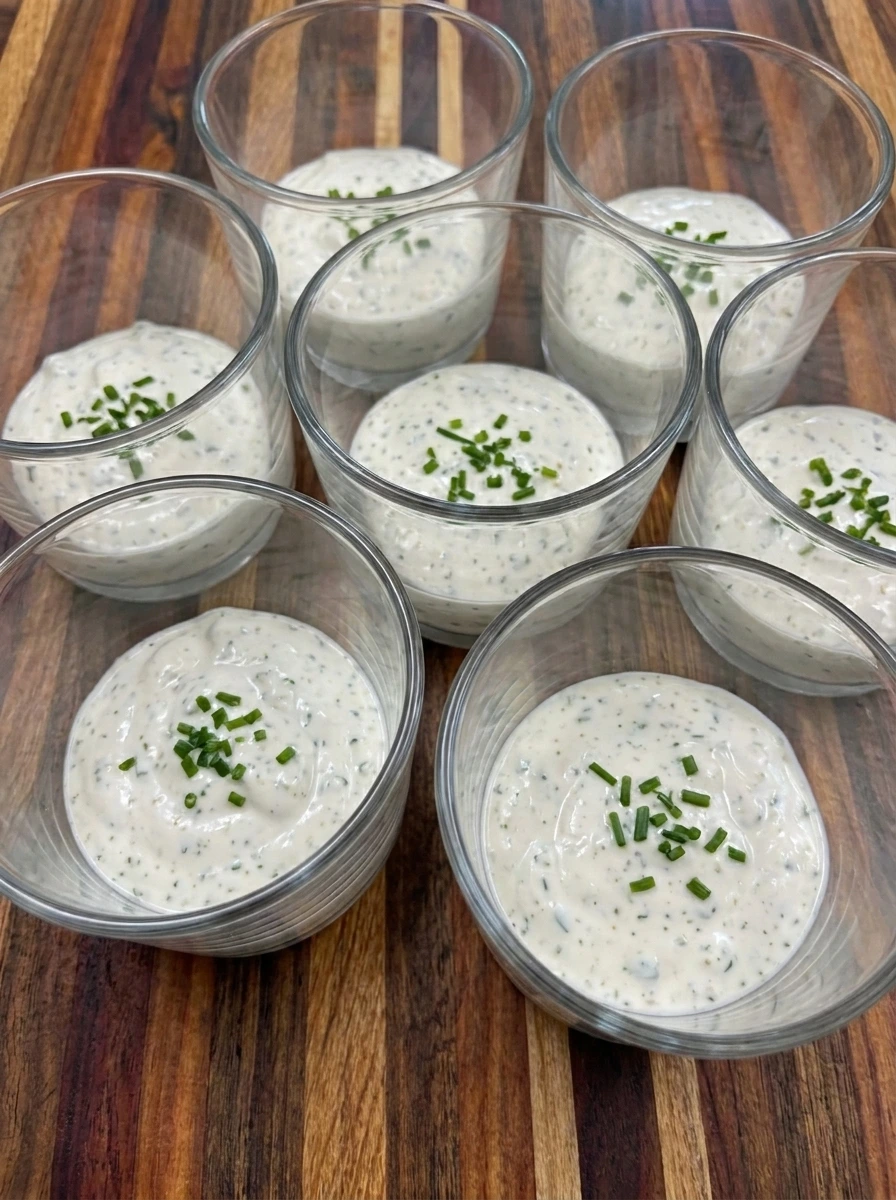
Divide the creamy ranch mixture among eight clear cups and fill each one about one quarter full. Let the spooned dip settle into uneven mounds so the portions look generous and homemade. Shift the cups into a loose cluster instead of a perfect row. Sprinkle the reserved chopped chives lightly across the dip so a few green flecks remain visible in every cup.
Tip: Use shallow portions of dip so the vegetables stay upright and guests can reach the ranch without pushing the sticks too deep.
Step 4: Arrange the vegetables in each cup
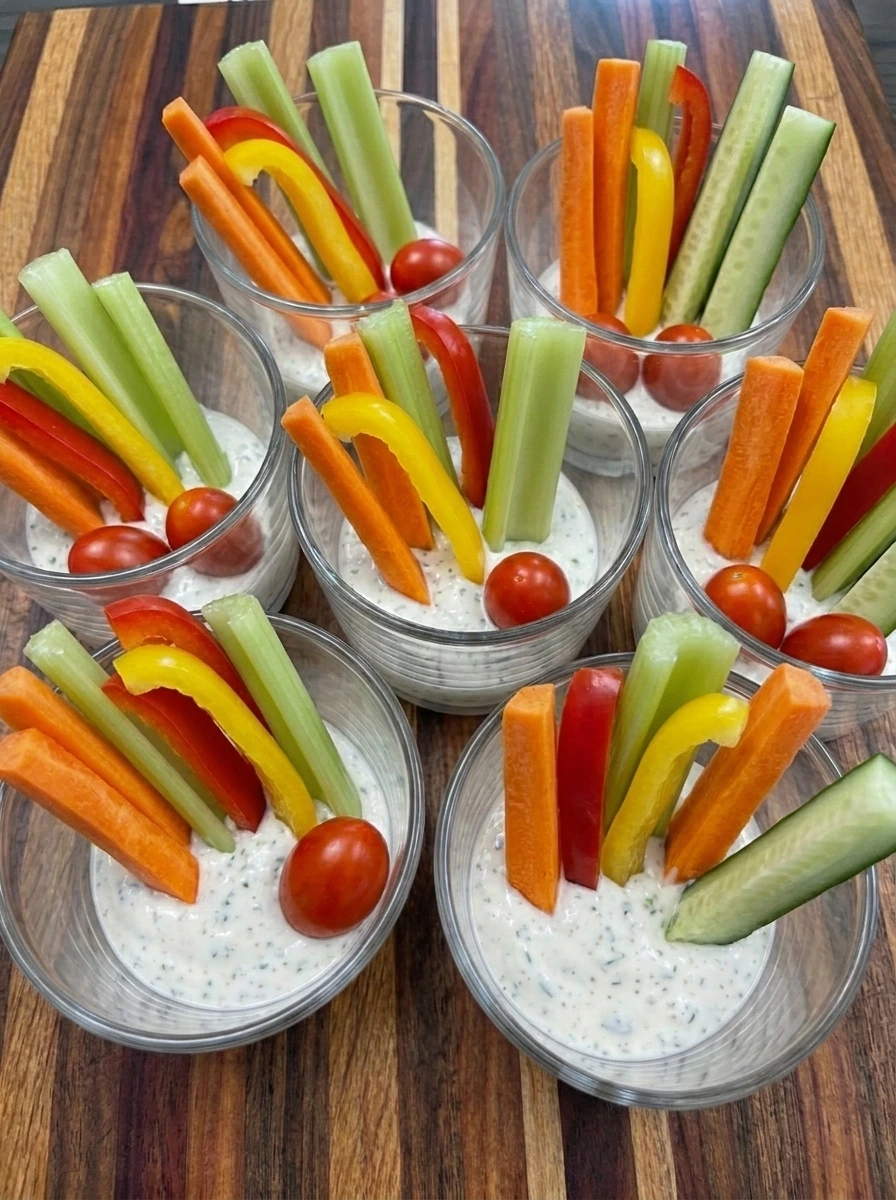
Divide the carrot sticks and celery sticks and red pepper strips and yellow pepper strips and cucumber spears among the eight cups. Press the pieces lightly into the dip while keeping the colors loosely mixed and the heights uneven. Divide the twelve cherry tomatoes among the cups with some cups holding one tomato and others holding two. Tilt a few vegetable sticks outward and let several pieces overlap so the finished cups look casual rather than arranged in a rigid pattern.
Tip: Alternate colors without making a repeated pattern so every cup looks inviting while still keeping the presentation relaxed.
Step 5: Serve one chilled veggie cup
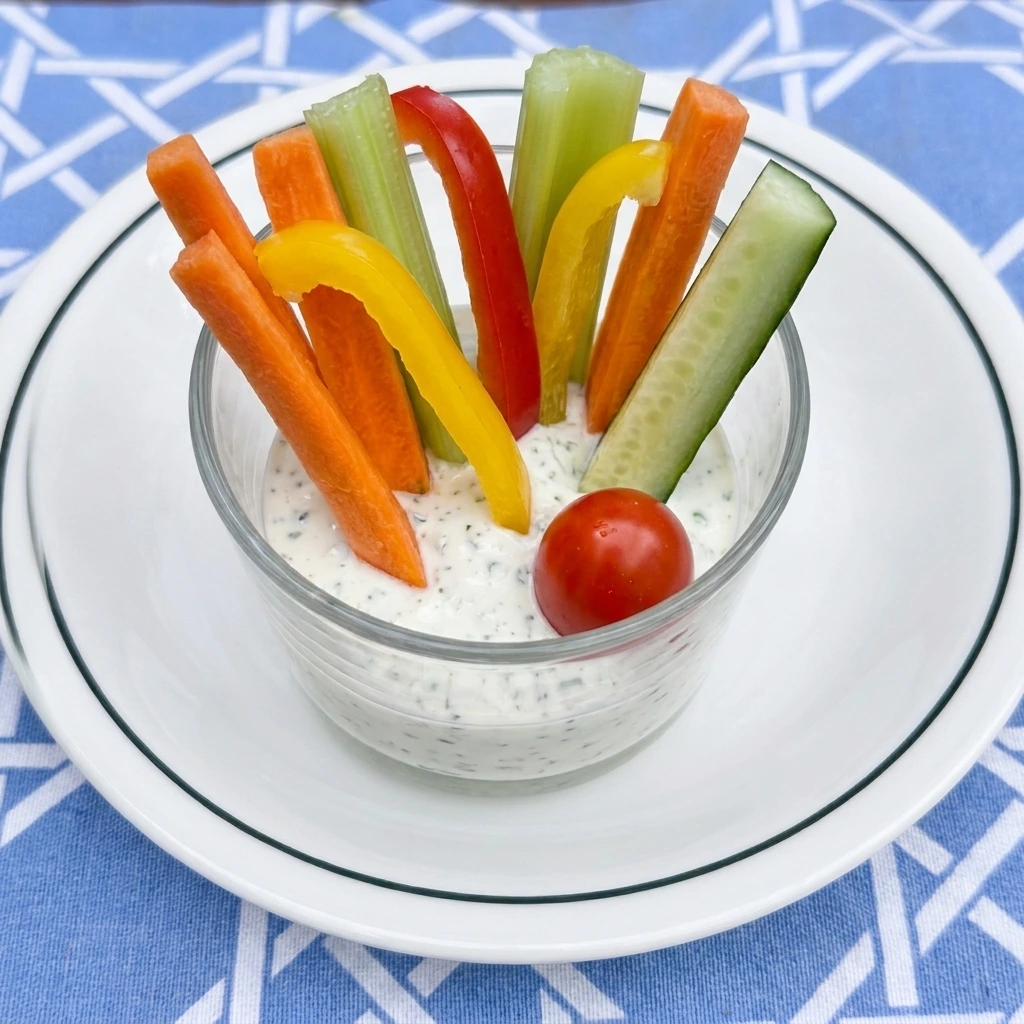
Place one finished cup on a white plate and show the thick ranch dip around the lower ends of the vegetables. Keep the carrot and celery and pepper and cucumber pieces at uneven angles with one cherry tomato resting near the front. The single portion should reveal the creamy herb speckled dip and crisp cut edges. Leave small gaps and natural overlaps so the serving looks fresh and homemade.
Tip: Chill the assembled cups briefly before serving so the dip stays firm and the vegetables keep their crisp texture.
Pro Tips
- Dry every vegetable well after washing so extra moisture does not thin the ranch dip or collect in the bottom of the cups.
- Cut the sticks slightly taller than the cups so guests can grab them easily while the lower ends stay anchored in the dip.
- Prepare the ranch dip one day ahead so the herb flavor develops while keeping the cut vegetables in separate airtight containers.
- Use firm fresh vegetables and avoid very thin slices because sturdy pieces remain crisp and stand upright during serving.
Storage Instructions
Store unassembled vegetables and ranch dip in separate airtight containers whenever possible. Keep both refrigerated and use the vegetables within three days for the best crunch. Assembled cups can be covered and chilled for up to six hours. Place them on a level shelf so the dip stays at the bottom and the vegetables remain upright. Do not freeze the finished cups because thawed raw vegetables become soft and release water. The creamy dip may also separate after freezing. If liquid appears in a stored cup then pour it off gently before serving. Replace any vegetable pieces that look wilted or feel soft.
Frequently Asked Questions
Yes. Prepare them up to six hours ahead and keep them covered and chilled so the vegetables remain crisp.
Carrots and celery and peppers and cucumber work well because they stay firm and hold their shape in the dip.
Dry the vegetables thoroughly and use a thick dip so moisture does not collect at the bottom of each cup.
Yes. Thick hummus or spinach dip can replace ranch as long as the texture is firm enough to hold the vegetables.
See You in the Kitchen
These Creamy Ranch Veggie Cups are a great way to satisfy your snack cravings without opening a bag of chips or setting out one large dip bowl.
I typically prepare the vegetables at the same time I make the ranch dip so all of my party components will be ready at the same time and I often add Butternut Squash Flatbread or Maple Pecan Granola to round out the table.
Even my kids love this one!
Print
Creamy Ranch Veggie Cups
- Total Time: 20 minutes
- Yield: 8 servings
Description
Creamy Ranch Veggie Cups are an easy and healthy snack packed with crisp vegetables and a cool ranch dip. They are quick to assemble and simple to customize with the best colorful produce you have on hand. These individual cups are practical ideas for meal prep and weeknight dinner sides while also fitting a holiday buffet or potluck brunch or party table. Every cup stays neat and fresh for relaxed serving. Kids can grab one easily and adults enjoy the bright crunch.
Ingredients
- 1 cup Sour cream
- 1/2 cup Mayonnaise
- 2 tablespoons Ranch seasoning mix
- 1 tablespoon Fresh lemon juice
- 2 medium Carrots
- 3 Celery stalks
- 1 large Red bell pepper
- 1 large Yellow bell pepper
- 1 medium English cucumber
- 12 Cherry tomatoes
- 2 tablespoons Fresh chives
Instructions
- Peel the two carrots and cut them into uneven sticks that are tall enough to stand in the serving cups. Slice the three celery stalks into similar lengths while keeping a few natural bends and irregular edges. Cut the red bell pepper and yellow bell pepper into loose strips. Slice the English cucumber into thick spears and leave the twelve cherry tomatoes whole so the vegetable mix has varied shapes and textures.
- Add the sour cream and mayonnaise to a mixing bowl then scatter the ranch seasoning across the top. Pour in the lemon juice and fold everything together until the white mixture becomes evenly creamy with visible herb flecks. Stir in most of the chopped chives while saving a small amount for the finished cups. The dip should look thick and smooth with a few soft swirls instead of a perfectly flat surface.
- Divide the creamy ranch mixture among eight clear cups and fill each one about one quarter full. Let the spooned dip settle into uneven mounds so the portions look generous and homemade. Shift the cups into a loose cluster instead of a perfect row. Sprinkle the reserved chopped chives lightly across the dip so a few green flecks remain visible in every cup.
- Divide the carrot sticks and celery sticks and red pepper strips and yellow pepper strips and cucumber spears among the eight cups. Press the pieces lightly into the dip while keeping the colors loosely mixed and the heights uneven. Divide the twelve cherry tomatoes among the cups with some cups holding one tomato and others holding two. Tilt a few vegetable sticks outward and let several pieces overlap so the finished cups look casual rather than arranged in a rigid pattern.
- Place one finished cup on a white plate and show the thick ranch dip around the lower ends of the vegetables. Keep the carrot and celery and pepper and cucumber pieces at uneven angles with one cherry tomato resting near the front. The single portion should reveal the creamy herb speckled dip and crisp cut edges. Leave small gaps and natural overlaps so the serving looks fresh and homemade.
Notes
Pro Tips:
- Dry every vegetable well after washing so extra moisture does not thin the ranch dip or collect in the bottom of the cups.
- Cut the sticks slightly taller than the cups so guests can grab them easily while the lower ends stay anchored in the dip.
- Prepare the ranch dip one day ahead so the herb flavor develops while keeping the cut vegetables in separate airtight containers.
- Use firm fresh vegetables and avoid very thin slices because sturdy pieces remain crisp and stand upright during serving.
Storage: Store unassembled vegetables and ranch dip in separate airtight containers whenever possible. Keep both refrigerated and use the vegetables within three days for the best crunch. Assembled cups can be covered and chilled for up to six hours. Place them on a level shelf so the dip stays at the bottom and the vegetables remain upright. Do not freeze the finished cups because thawed raw vegetables become soft and release water. The creamy dip may also separate after freezing. If liquid appears in a stored cup then pour it off gently before serving. Replace any vegetable pieces that look wilted or feel soft.
- Prep Time: 20 minutes
- Cook Time: 0 minute
- Category: Lunch
- Cuisine: American