Our family discovered this Butternut Squash Flatbread during the height of fall. Our boys were hosting a cousin from Detroit at our remote lake cottage where they ran through the leaves during the day and toasted marshmallows around the bonfire every night.
That was one of my best weeks of the year and this easy flatbread quickly became one of my favorite squash recipes. If you love cozy fall dinners like this one then try our Apple Chicken Salad for another fresh and comforting meal.
I will never forget the first time I made this and the look on the kids faces when they tasted it. Read on and as I show you how to make this unforgettable family dinner.
Ingredients

Here is what I use for this recipe and you can adjust nuts or spices based on preference:
- Flatbread crust: Creates the crisp base that holds the roasted squash and cheese without getting soggy.
- Butternut squash: Adds sweet fall flavor and soft golden texture after roasting.
- Olive oil: Coats the squash so the edges roast lightly and the slices stay tender.
- Maple syrup: Deepens the natural sweetness of the squash and helps the edges caramelize.
- Garlic powder: Adds savory flavor that balances the sweetness of the squash.
- Smoked paprika: Adds warm color and a gentle smoky note to the roasted squash.
- Kosher salt: Brings out the flavor of the squash and cheese.
- Black pepper: Adds mild heat and balances the sweet roasted topping.
- Ricotta cheese: Spreads into a creamy base that keeps each slice soft under the squash.
- Mozzarella cheese: Melts over the flatbread and helps hold the topping together.
- Red onion: Adds sharp flavor and purple color between the sweet squash pieces.
- Fresh sage: Finishes the flatbread with earthy fall flavor.
- Balsamic glaze: Adds glossy tangy sweetness over the finished flatbread.
Tools You’ll Need
- Mixing bowl: Used to coat the squash evenly with oil and seasoning.
- Sheet pan: Used to roast the squash and bake the assembled flatbreads.
- Parchment paper: Helps prevent sticking and makes the roasted squash easier to move.
- Chef knife: Used to slice the squash and onion thinly and evenly.
- Cutting board: Provides a safe surface for slicing the vegetables and finished flatbread.
- Measuring spoons: Used to measure seasoning and glaze so the flavor stays balanced.
Instructions
Step 1: Coat the squash slices

Thin butternut squash slices are placed in a mixing bowl and coated with olive oil and maple syrup and garlic powder and smoked paprika and salt and pepper. The orange slices change from dry and matte to glossy and speckled with seasoning while some pieces overlap and some curl at the edges.
Tip: Slice the squash thinly so it softens fast and caramelizes at the edges without making the flatbread heavy.
Step 2: Roast the squash until tender

The coated squash slices are spread onto a sheet pan in a loose uneven layer with some pieces touching and some spaces left open. After roasting the squash looks softer and deeper orange with browned tips and slightly curled edges that show the first clear cooked texture.
Tip: Spread the slices loosely so the edges brown instead of steaming into a soft pile with little color.
Step 3: Spread ricotta on the flatbreads
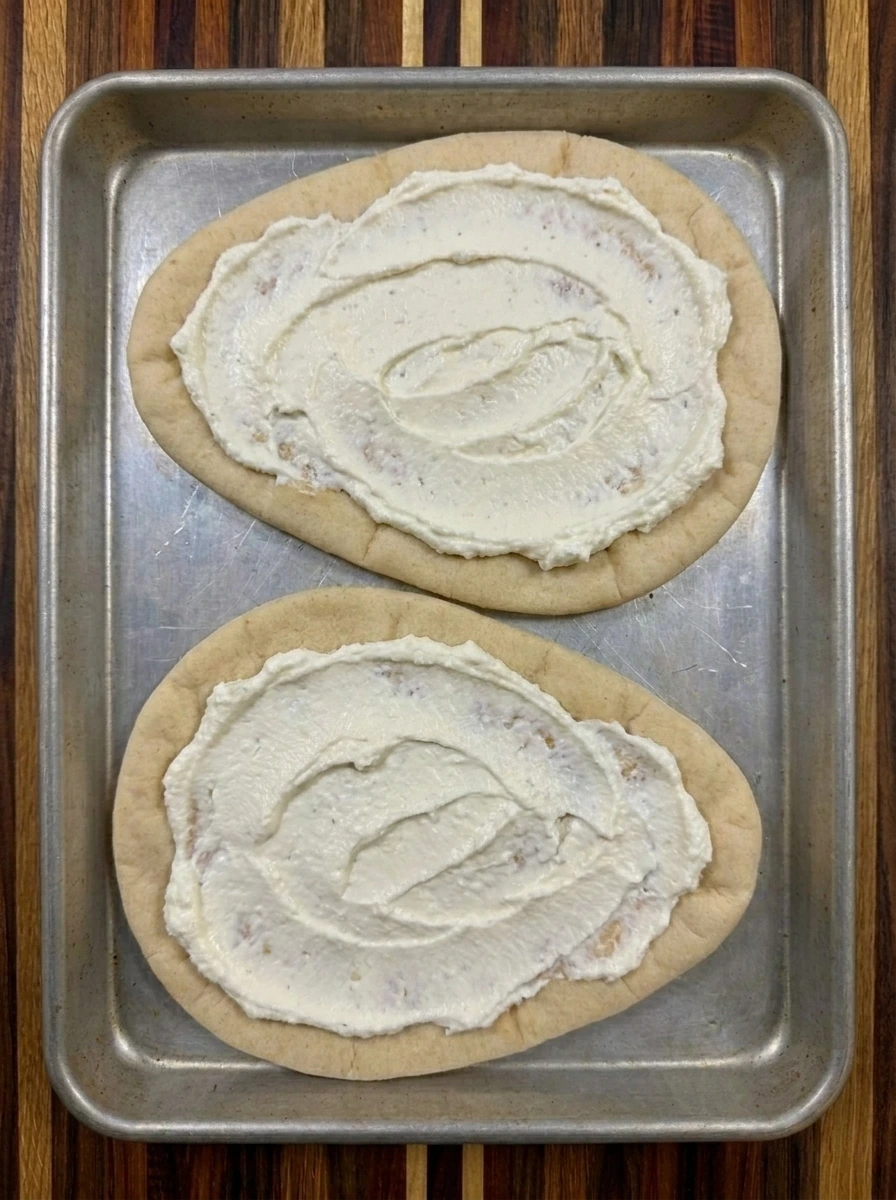
The flatbreads are placed on a baking tray and ricotta is spread across the tops in uneven swoops. The crust changes from plain and dry to creamy and textured with bare edges left visible for crisping.
Tip: Leave a small border around each flatbread so the crust can crisp and the cheese does not spill over.
Step 4: Layer the squash and onion
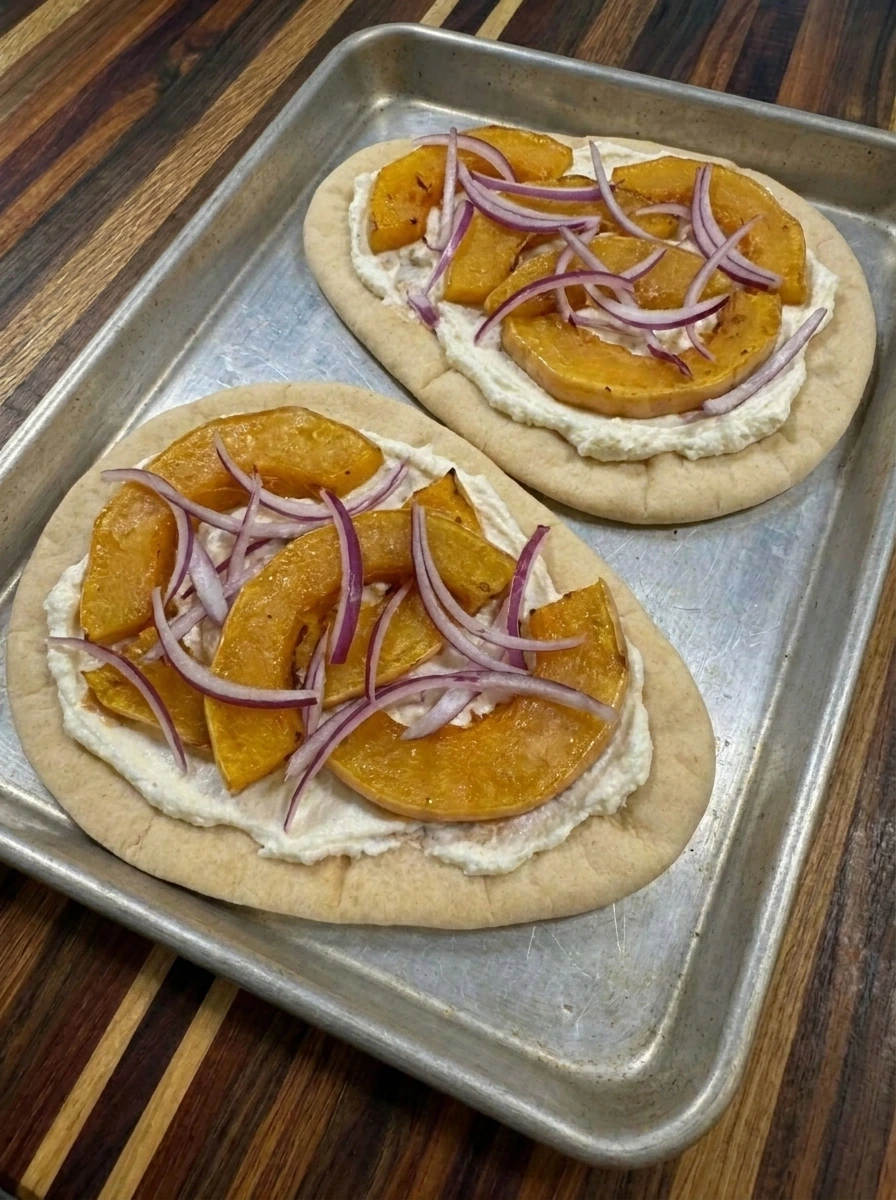
Roasted squash slices are moved from the sheet pan onto the ricotta covered flatbreads and thin red onion is scattered between them. The flatbreads become layered and colorful with orange squash pieces overlapping the creamy base and purple onion strands sitting unevenly across the tops.
Tip: Scatter toppings casually so every slice has squash and onion while still showing creamy ricotta underneath.
Step 5: Melt the mozzarella
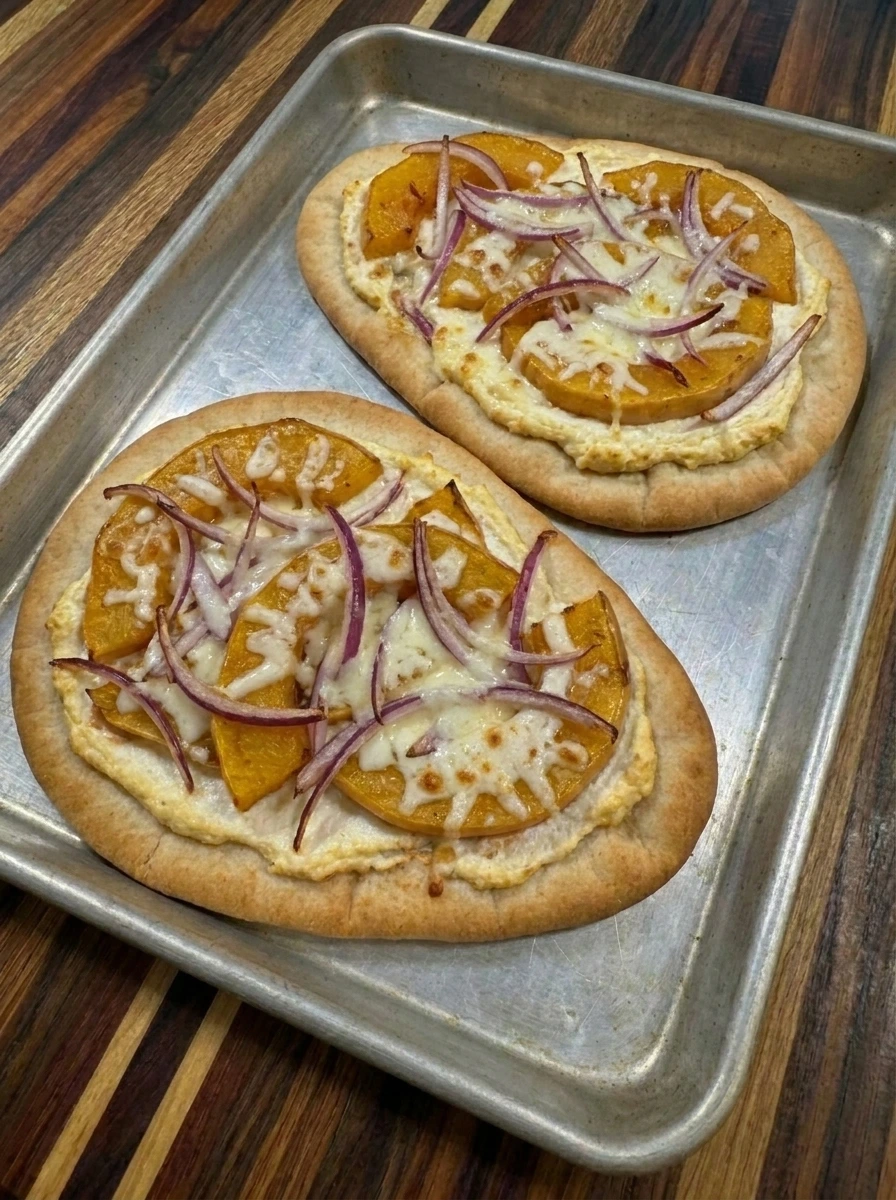
Mozzarella is scattered over the layered flatbreads and the tray goes back into the oven until the cheese melts into uneven patches. The flatbread edges turn lightly browned while the cheese stretches around the squash and the toppings settle into a baked structure.
Tip: Bake just until the cheese melts and the crust browns so the squash stays tender and the flatbread stays crisp.
Step 6: Slice and finish one serving

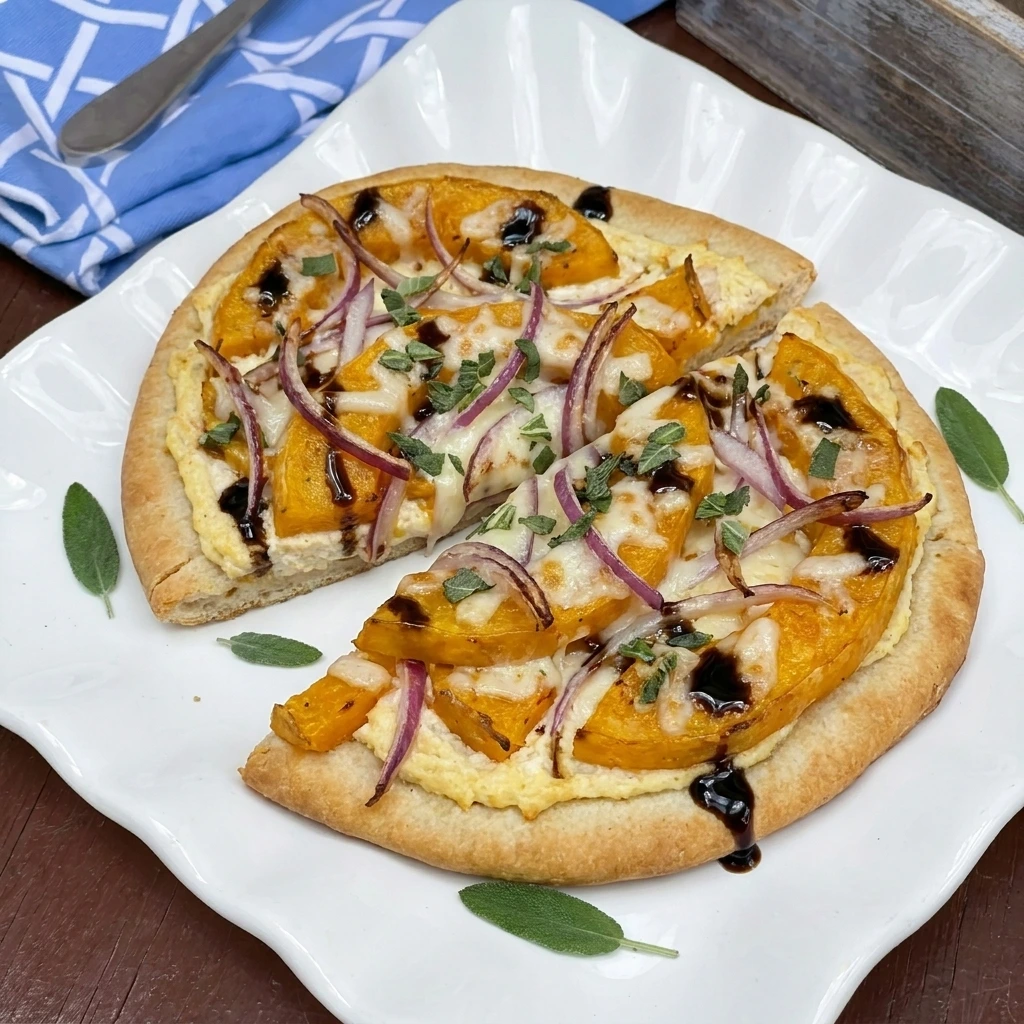
One slice is cut from the finished flatbread and placed on a white plate with melted cheese and squash layers visible along the edge. Fresh sage and balsamic glaze finish the slice with dark glossy lines and green flecks while the cheese looks unevenly melted and the crust looks crisp.
Tip: Add sage and glaze at the end so the herbs stay fresh and the sweet tangy finish stays glossy.
Pro Tips
- Use thin squash slices because thick chunks can stay firm while the flatbread crust browns too quickly.
- Spread ricotta in uneven swoops so every bite has creamy pockets without weighing down the crisp crust.
- Add balsamic glaze after baking so it stays shiny and tangy instead of disappearing into the cheese.
- Cut the flatbread after resting for a few minutes so the melted cheese settles and the slices lift cleanly.
Storage Instructions
Store leftover Butternut Squash Flatbread in an airtight container after the slices cool completely. Layer parchment between slices so the cheese and glaze do not stick together. Keep the flatbread in the refrigerator for up to 3 days. The crust will soften as it sits though the flavor stays rich and cozy. Reheat slices on a sheet pan at 375 degrees until the edges crisp and the cheese softens again. Avoid the microwave when possible because it can make the crust chewy. For meal prep roast the squash ahead and keep it chilled in a separate container. Assemble and bake the flatbread when you want the freshest texture.
Frequently Asked Questions
Yes assemble the toppings early and bake just before serving for the crispest crust.
Ricotta and mozzarella work well because they give creamy texture and melty structure.
Yes store slices chilled and reheat in the oven until the crust turns crisp again.
Roast the squash first and leave a crust border so extra moisture does not soften the base.
See You in the Kitchen
I hope you try this Butternut Squash Flatbread soon!
It is a simple recipe that looks beautiful and tastes incredible and makes every occasion a little more special especially with cozy sides like Apple Cider Donuts or a fresh plate of Apple Chicken Salad.
Don’t forget to share your results or save this recipe for later it’s one worth keeping.
Print
Butternut Squash Flatbread
- Total Time: 45 minutes
- Yield: 4 servings
Description
This Butternut Squash Flatbread is an easy fall recipe with quick prep and simple layers of roasted squash and creamy cheese. It is one of the best healthy ideas for weeknight dinner as well as meal prep and holiday brunch. Crisp edges and soft squash make every slice cozy while still feeling fresh enough for a party or potluck table.
Ingredients
- 2 large flatbreads Flatbread crust
- 3 cups peeled and thinly sliced Butternut squash
- 2 tablespoons Olive oil
- 1 tablespoon Maple syrup
- 1 teaspoon Garlic powder
- 1/2 teaspoon Smoked paprika
- 3/4 teaspoon Kosher salt
- 1/4 teaspoon Black pepper
- 1 cup Ricotta cheese
- 1 cup shredded Mozzarella cheese
- 1/2 cup thinly sliced Red onion
- 2 tablespoons chopped Fresh sage
- 2 tablespoons Balsamic glaze
Instructions
- Thin butternut squash slices are placed in a mixing bowl and coated with olive oil and maple syrup and garlic powder and smoked paprika and salt and pepper. The orange slices change from dry and matte to glossy and speckled with seasoning while some pieces overlap and some curl at the edges.
- The coated squash slices are spread onto a sheet pan in a loose uneven layer with some pieces touching and some spaces left open. After roasting the squash looks softer and deeper orange with browned tips and slightly curled edges that show the first clear cooked texture.
- The flatbreads are placed on a baking tray and ricotta is spread across the tops in uneven swoops. The crust changes from plain and dry to creamy and textured with bare edges left visible for crisping.
- Roasted squash slices are moved from the sheet pan onto the ricotta covered flatbreads and thin red onion is scattered between them. The flatbreads become layered and colorful with orange squash pieces overlapping the creamy base and purple onion strands sitting unevenly across the tops.
- Mozzarella is scattered over the layered flatbreads and the tray goes back into the oven until the cheese melts into uneven patches. The flatbread edges turn lightly browned while the cheese stretches around the squash and the toppings settle into a baked structure.
- One slice is cut from the finished flatbread and placed on a white plate with melted cheese and squash layers visible along the edge. Fresh sage and balsamic glaze finish the slice with dark glossy lines and green flecks while the cheese looks unevenly melted and the crust looks crisp.
Notes
Pro Tips:
- Use thin squash slices because thick chunks can stay firm while the flatbread crust browns too quickly.
- Spread ricotta in uneven swoops so every bite has creamy pockets without weighing down the crisp crust.
- Add balsamic glaze after baking so it stays shiny and tangy instead of disappearing into the cheese.
- Cut the flatbread after resting for a few minutes so the melted cheese settles and the slices lift cleanly.
Storage: Store leftover Butternut Squash Flatbread in an airtight container after the slices cool completely. Layer parchment between slices so the cheese and glaze do not stick together. Keep the flatbread in the refrigerator for up to 3 days. The crust will soften as it sits though the flavor stays rich and cozy. Reheat slices on a sheet pan at 375 degrees until the edges crisp and the cheese softens again. Avoid the microwave when possible because it can make the crust chewy. For meal prep roast the squash ahead and keep it chilled in a separate container. Assemble and bake the flatbread when you want the freshest texture.
- Prep Time: 15 minutes
- Cook Time: 30 minutes
- Category: Dinner
- Cuisine: American