This Oven Roasted Pumpkin Seeds recipe is an easy and comforting snack that comes together so quickly on a sheet pan! With crisp edges and a savory coating and a golden roasted crunch.

We love fall because it means that easy recipes like this Oven Roasted Pumpkin Seeds and Pecan Pumpkin Granola are back on the table. Comfort foods and especially those that are healthy and nourish our bodies and make the kitchen feel cozy are my favorite kinds of recipes.
Ingredients

Here is what I use for this recipe and you can adjust nuts or spices based on preference:
- Fresh pumpkin seeds: Fresh seeds give the recipe its nutty base and roast into crisp golden bites when cleaned and dried well.
- Olive oil: Oil lightly coats the seeds and helps the seasoning cling while encouraging even browning in the oven.
- Fine sea salt: Salt seasons the seeds from the outside and balances their earthy pumpkin flavor.
- Garlic powder: Garlic powder adds a savory layer that makes the roasted seeds taste fuller and more snackable.
- Smoked paprika: Paprika gives the seeds warm color and a gentle smoky flavor without adding heat.
- Black pepper: Pepper adds a mild sharp finish that keeps the seasoning from tasting flat.
Tools You’ll Need
- Colander: Rinses away pumpkin pulp and helps drain the seeds before drying.
- Clean kitchen towel: Absorbs extra moisture so the seeds roast crisp instead of steaming.
- Mixing bowl: Gives space to coat the seeds evenly with oil and seasoning.
- Sheet pan: Spreads the seeds in a thin layer so they toast evenly in the oven.
- Spatula: Moves the seeds during roasting so both sides can brown.
- White plate: Holds the finished portion for serving and shows the toasted texture clearly.
Instructions
Step 1: Rinse and dry the pumpkin seeds
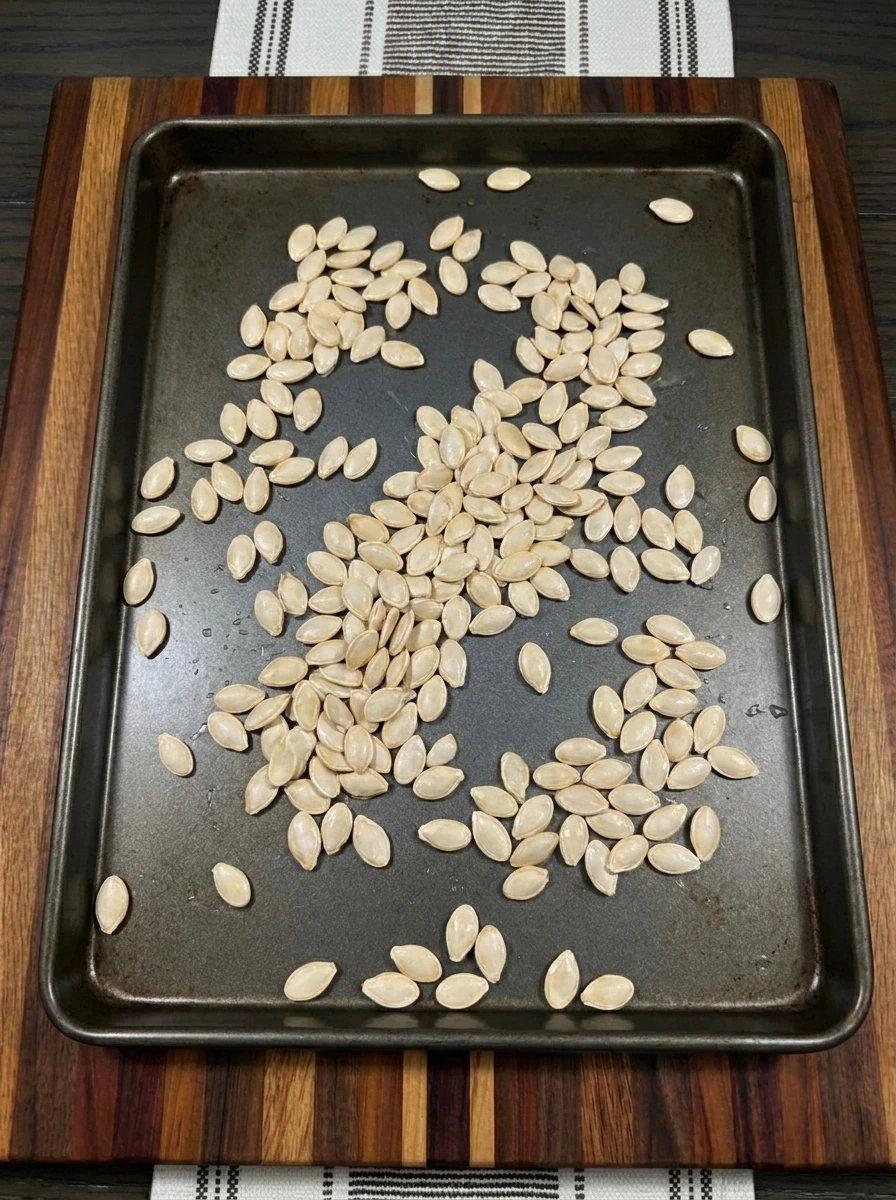
The fresh pumpkin seeds start pale and slick with bits of pumpkin still clinging to the edges. After rinsing and drying and spreading them loosely the seeds look cleaner and less glossy with irregular sizes and a few curled pieces still overlapping naturally.
Tip: Dry the seeds as well as possible because extra moisture can make them steam instead of turning crisp in the oven.
Step 2: Coat the seeds with oil and seasoning

The dried seeds turn lightly glossy as olive oil touches the surface and the spices cling in orange and tan patches. The mixture looks uneven in the best way with some seeds more coated than others and little seasoning specks caught between overlapping seeds.
Tip: Toss until most seeds look lightly shiny and speckled because heavy oil can make the seeds roast unevenly.
Step 3: Spread the seasoned seeds on the sheet pan

The coated seeds move from the bowl onto the sheet pan and spread into a thin uneven layer. Some seeds sit alone while others overlap in small clusters and the seasoning looks scattered rather than perfectly even so the pan already feels homemade.
Tip: Keep the layer mostly thin and unevenly spaced so hot air can reach the seeds and create crisp edges.
Step 4: Roast until the seeds turn golden
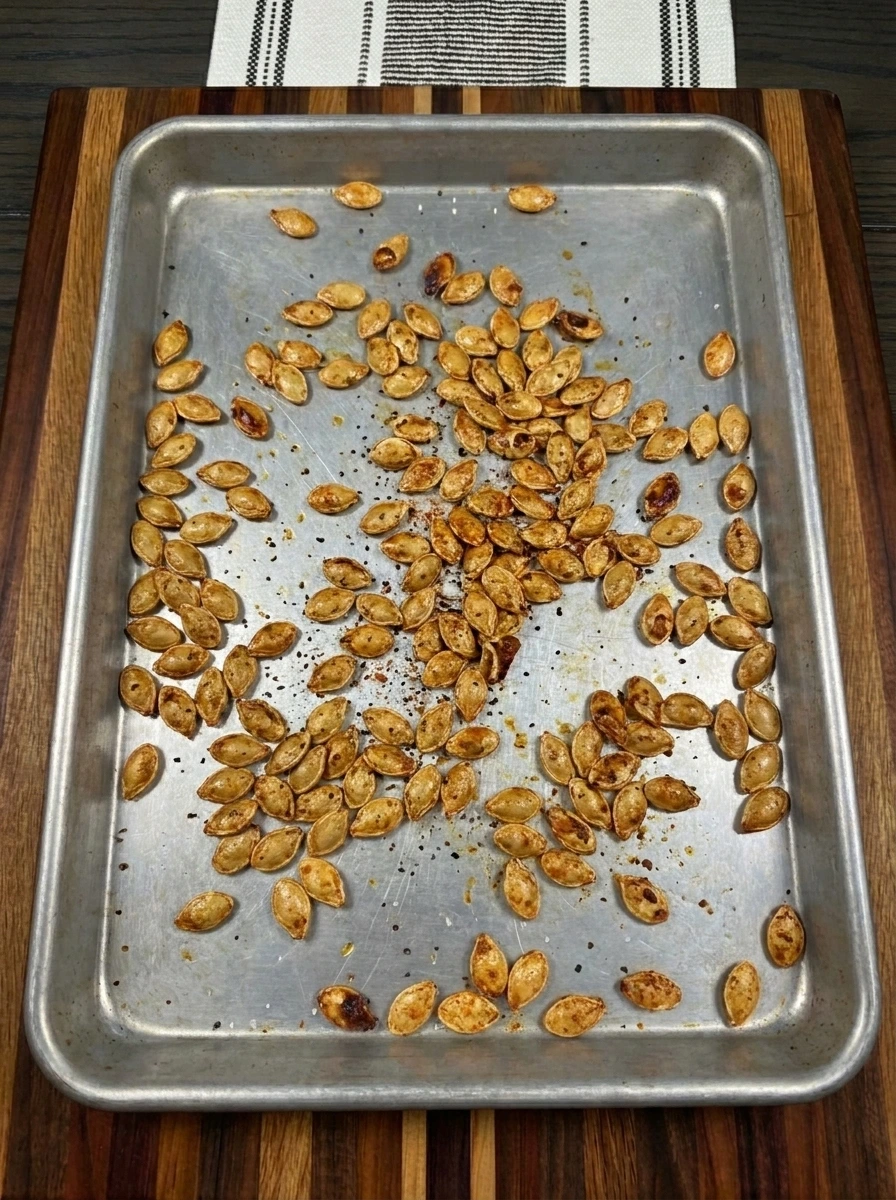
The seeds visually change from pale and glossy to dry and crisp with toasted golden edges. Several pieces deepen to amber brown and the layer shifts slightly as the seeds curl and separate and the spice coating darkens in small uneven patches.
Tip: Stir once during roasting so the seeds shift positions and the darker edges stay tasty instead of burning.
Step 5: Serve the roasted seeds on a plate
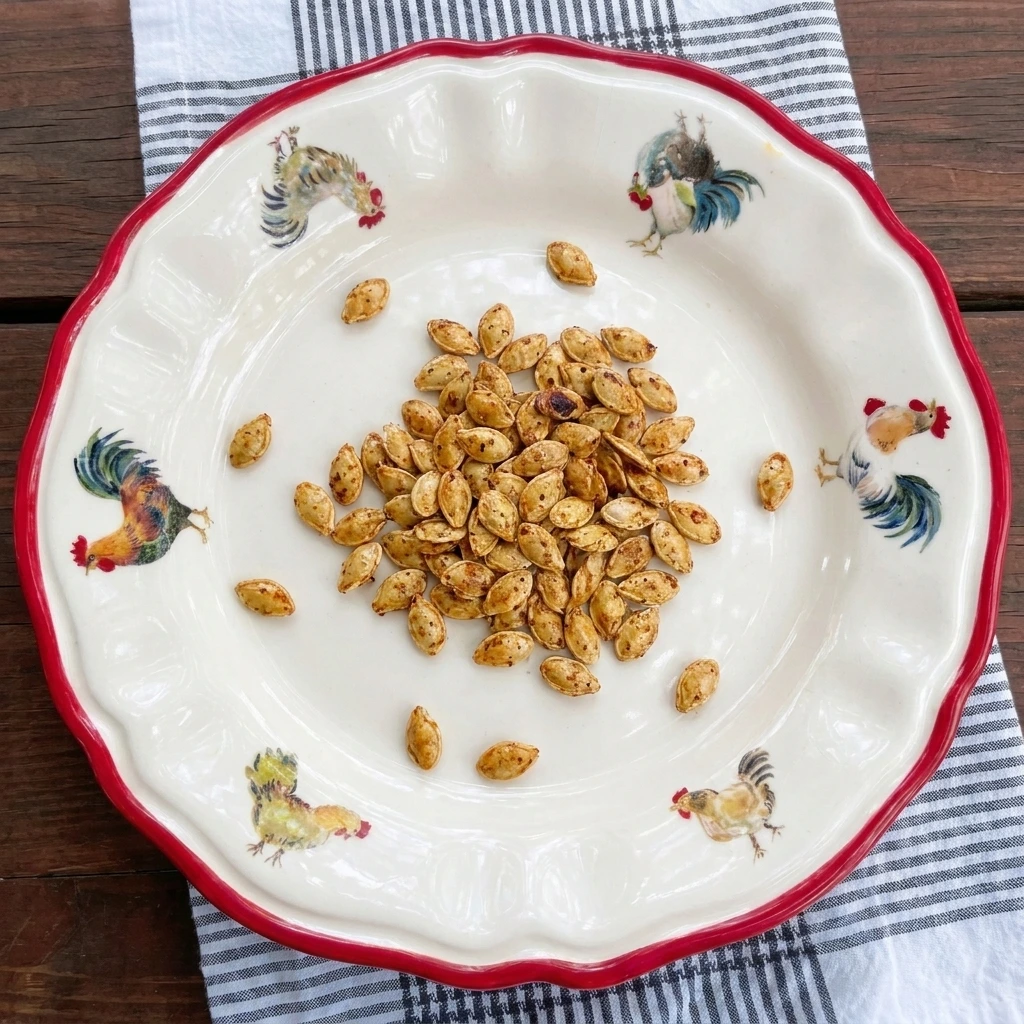
The finished seeds move from the hot pan to a plate and settle into a small casual pile. The final serving shows crisp texture and non uniform color with golden seeds and darker toasted flecks and a few pieces scattered away from the main pile.
Tip: Let the seeds cool briefly before serving because the crunch improves as the roasted seeds rest on the plate.
Pro Tips
- For the crispiest texture rinse the seeds well and dry them until they no longer feel slippery or wet.
- Spread the seeds in one loose layer because crowded seeds trap steam and stay chewy instead of crisp.
- Watch the final minutes closely because pumpkin seeds can turn from golden to too dark faster than expected.
- Change the seasoning with cinnamon sugar or chili powder but keep the oil light so the seeds still roast well.
Storage Instructions
Cool the roasted seeds completely before storing because trapped steam softens the crisp edges and makes the seasoning feel damp. Keep them in an airtight jar or container at room temperature for about one week and shake the jar lightly before serving to loosen any seeds that settle together. For longer storage move the cooled seeds to a freezer safe bag and freeze for up to two months and thaw them at room temperature before eating. To refresh the crunch spread the seeds on a sheet pan and warm them briefly in the oven until they smell toasted again.
Frequently Asked Questions
Yes and carving pumpkin seeds work well when rinsed clean and dried before seasoning and roasting.
Dry the seeds thoroughly and roast them in a thin layer with one stir halfway through baking.
They stay crisp for about one week in an airtight container once fully cooled.
Yes and cinnamon sugar works well when added after roasting so the sugar does not burn.
See You in the Kitchen
I hope you try this Oven Roasted Pumpkin Seeds recipe soon!
It’s a simple recipe that looks beautiful and tastes incredible and makes every holiday snack bowl a little more special especially with Cinnamon Sugar Pumpkin Donuts or Cinnamon Apple Granola.
Don’t forget to share your results or save this recipe for later it’s one worth keeping.
Print
Oven Roasted Pumpkin Seeds
- Total Time: 45 minutes
- Yield: 4 servings
Description
These Oven Roasted Pumpkin Seeds are easy to make with quick prep and a simple seasoning blend that brings out the best nutty crunch. They are a healthy snack idea for holiday carving nights and meal prep jars while also fitting right into a brunch board or party bowl. Every bite turns crisp and golden in the oven with just a few pantry ingredients and this method keeps the seeds light and savory without feeling fussy.
Ingredients
- 2 cups Fresh pumpkin seeds
- 1 tablespoon Olive oil
- 1 teaspoon Fine sea salt
- 1/2 teaspoon Garlic powder
- 1/2 teaspoon Smoked paprika
- 1/4 teaspoon Black pepper
Instructions
- The fresh pumpkin seeds start pale and slick with bits of pumpkin still clinging to the edges. After rinsing and drying and spreading them loosely the seeds look cleaner and less glossy with irregular sizes and a few curled pieces still overlapping naturally.
- The dried seeds turn lightly glossy as olive oil touches the surface and the spices cling in orange and tan patches. The mixture looks uneven in the best way with some seeds more coated than others and little seasoning specks caught between overlapping seeds.
- The coated seeds move from the bowl onto the sheet pan and spread into a thin uneven layer. Some seeds sit alone while others overlap in small clusters and the seasoning looks scattered rather than perfectly even so the pan already feels homemade.
- The seeds visually change from pale and glossy to dry and crisp with toasted golden edges. Several pieces deepen to amber brown and the layer shifts slightly as the seeds curl and separate and the spice coating darkens in small uneven patches.
- The finished seeds move from the hot pan to a plate and settle into a small casual pile. The final serving shows crisp texture and non uniform color with golden seeds and darker toasted flecks and a few pieces scattered away from the main pile.
Notes
Pro Tips:
- For the crispiest texture rinse the seeds well and dry them until they no longer feel slippery or wet.
- Spread the seeds in one loose layer because crowded seeds trap steam and stay chewy instead of crisp.
- Watch the final minutes closely because pumpkin seeds can turn from golden to too dark faster than expected.
- Change the seasoning with cinnamon sugar or chili powder but keep the oil light so the seeds still roast well.
Storage: Cool the roasted seeds completely before storing because trapped steam softens the crisp edges and makes the seasoning feel damp. Keep them in an airtight jar or container at room temperature for about one week and shake the jar lightly before serving to loosen any seeds that settle together. For longer storage move the cooled seeds to a freezer safe bag and freeze for up to two months and thaw them at room temperature before eating. To refresh the crunch spread the seeds on a sheet pan and warm them briefly in the oven until they smell toasted again.
- Prep Time: 15 minutes
- Cook Time: 30 minutes
- Category: Lunch
- Cuisine: American