Our family discovered these Old Fashioned Fig Preserves during the height of summer. Our boys were hosting a cousin from Detroit at our remote lake cottage where they frolicked in the lake during the day and toasted marshmallows around the bonfire every night.
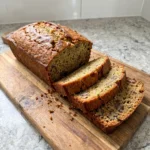
That was one of my best weeks of the year and this easy fig preserve recipe quickly became one of my favorite fruit recipes. If you love this recipe then try our Raspberry Lemon Loaf Cake for another bright sweet treat.
I will never forget the first time I made this and the look on the kids’ faces when they tasted it. Read on and as I show you how to make these unforgettable homemade preserves.
Ingredients
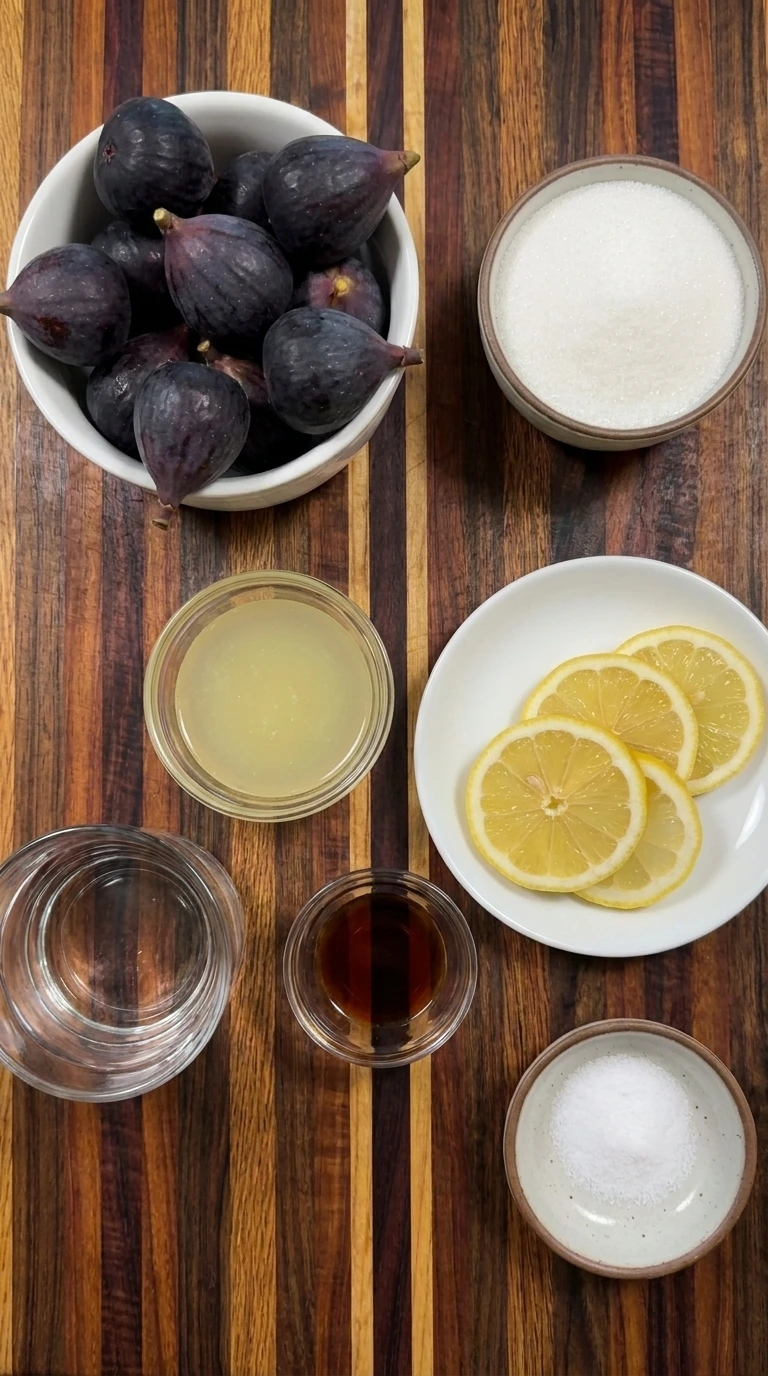
Here is what I use for this recipe and you can adjust nuts or spices based on preference:
- Fresh ripe figs: Forms the soft fruit base with tender skins and jammy centers.
- Granulated sugar: Draws out fig juices and creates the glossy syrup that thickens around the fruit.
- Fresh lemon juice: Balances sweetness and helps brighten the finished preserves.
- Lemon slices: Adds old fashioned citrus flavor and a pretty homemade look in the jar.
- Water: Helps dissolve the sugar and starts the syrup before the figs release their juice.
- Vanilla extract: Rounds out the fruit flavor with warm sweetness near the end of cooking.
- Fine salt: Makes the fig flavor taste fuller without making the preserves salty.
Tools You’ll Need
- Paring knife: Trims stems and cuts figs into rustic halves and quarters.
- Cutting board: Gives a steady surface for cutting the soft figs safely.
- Large saucepan: Holds the figs and syrup as they simmer and thicken evenly.
- Wooden spoon: Stirs the fruit gently without crushing every fig piece.
- Measuring cups and spoons: Measures sugar lemon juice water vanilla and salt accurately.
- Clean jars: Stores the finished preserves once they cool slightly.
Instructions
Step 1: Trim and halve the figs
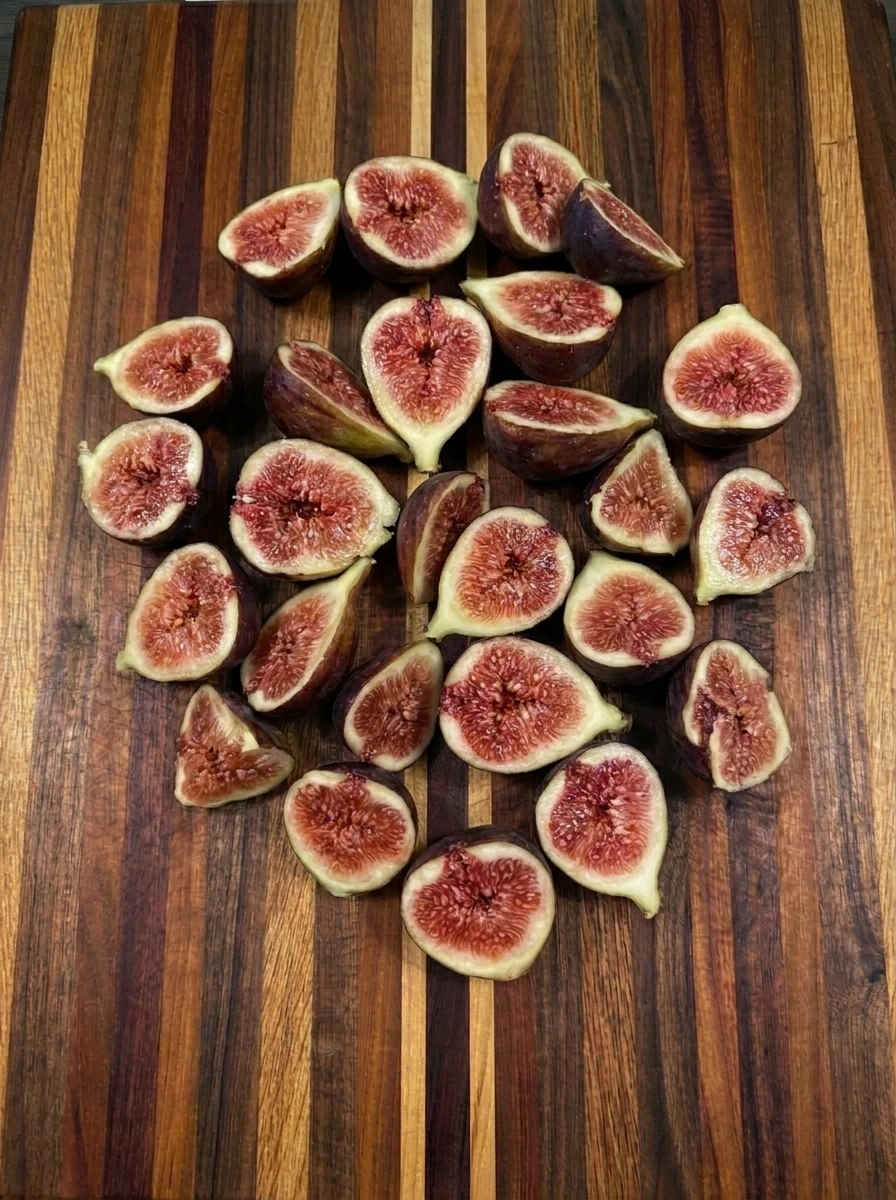
The fresh figs change from whole fruit into rustic pieces with exposed ruby centers and uneven edges. Some figs stay halved while a few are quartered so the preserves will have mixed textures after cooking.
Tip: Use ripe figs that feel soft but not mushy so they hold shape while still releasing rich syrup.
Step 2: Coat the figs with sugar and lemon
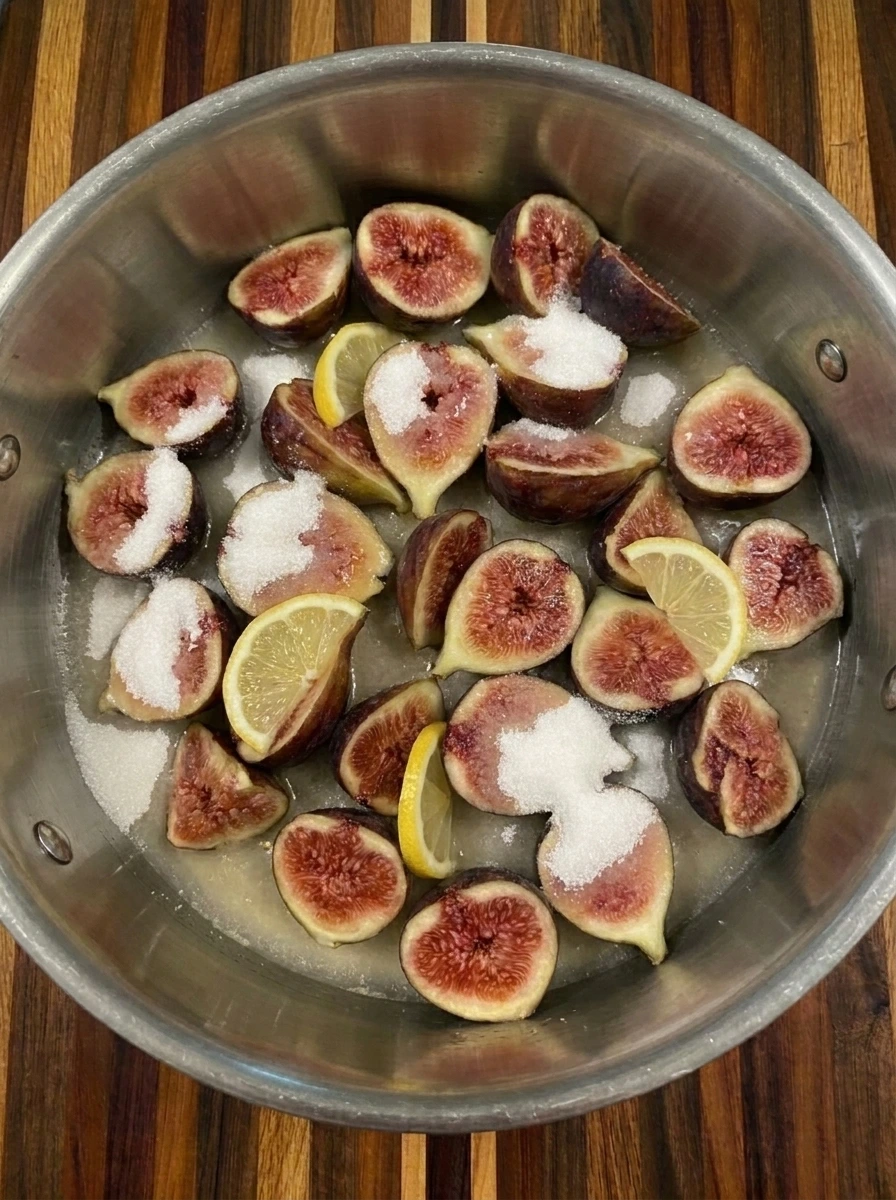
Sugar and lemon juice settle over the cut figs and begin pulling out glossy fruit juices. The figs look partly coated rather than fully mixed with small wet sugar patches clinging to the skins.
Tip: Let the sugar touch the cut sides first because that draws out juice and builds a better syrup.
Step 3: Simmer the figs into syrup
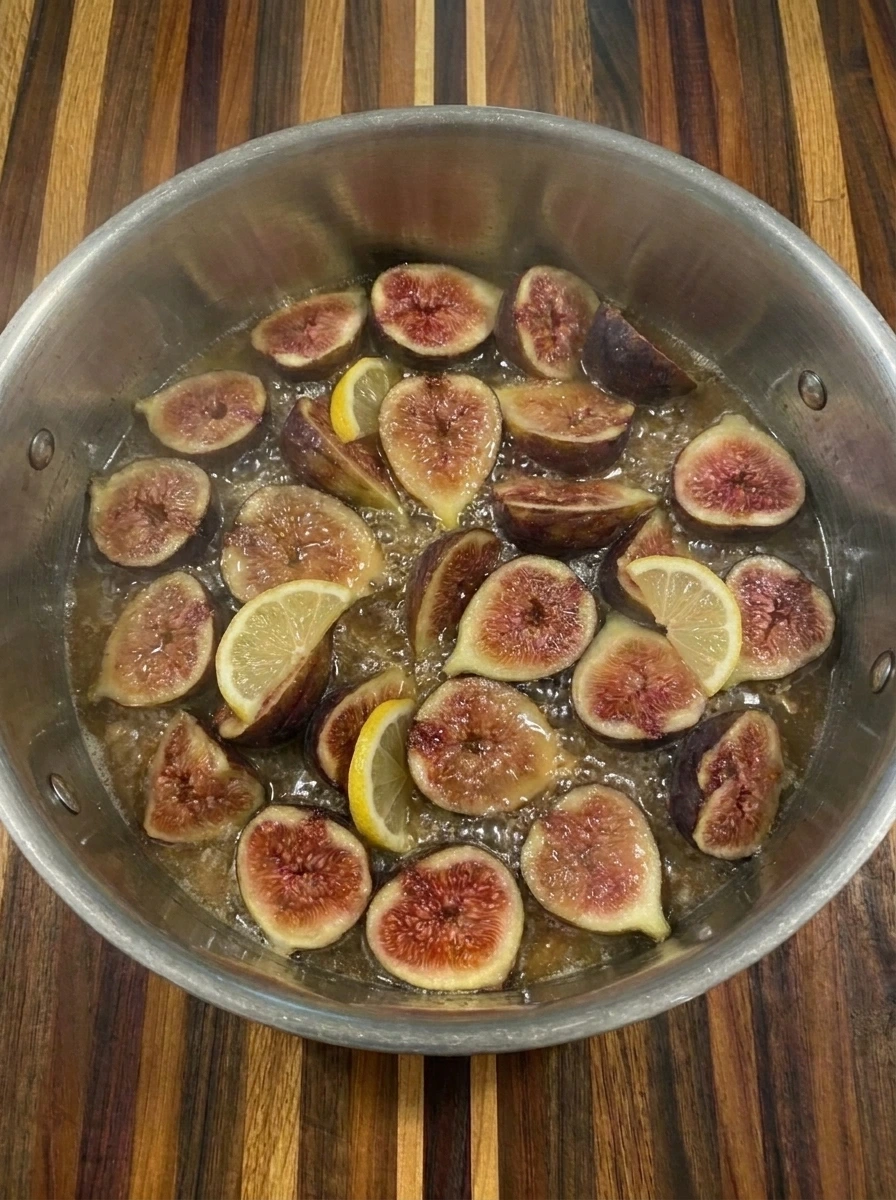
The mixture changes from dry sugared fruit into bubbling fig syrup with softened skins and darker edges. The figs shift through the syrup as they cook and a few pieces break down enough to thicken the liquid.
Tip: Keep the simmer gentle so the figs soften slowly and the syrup thickens without turning harsh.
Step 4: Thicken the preserves with vanilla
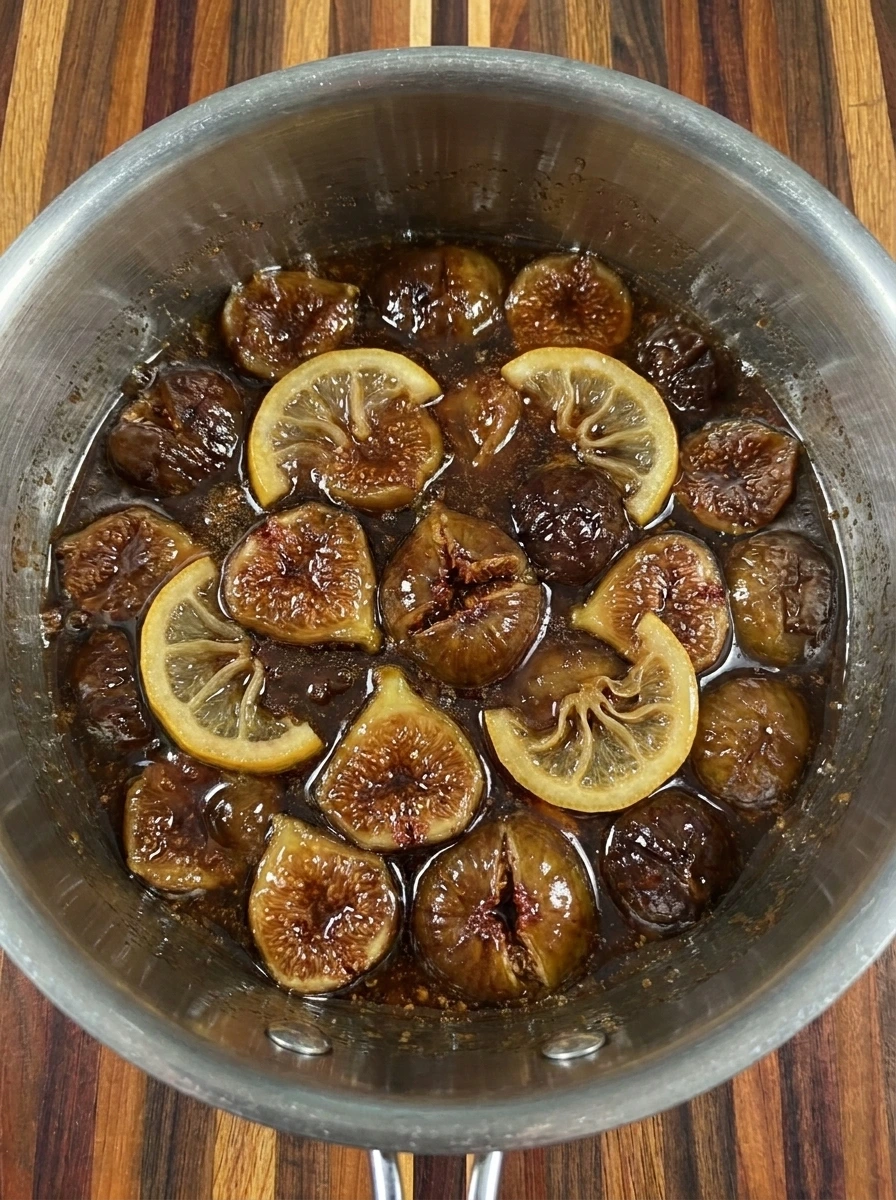
The syrup becomes glossy and heavy while vanilla blends into the hot figs and deepens the color. The fruit looks tender and slightly collapsed with sticky amber syrup coating each uneven piece.
Tip: Add vanilla near the end so its flavor stays warm and clear instead of fading in the long simmer.
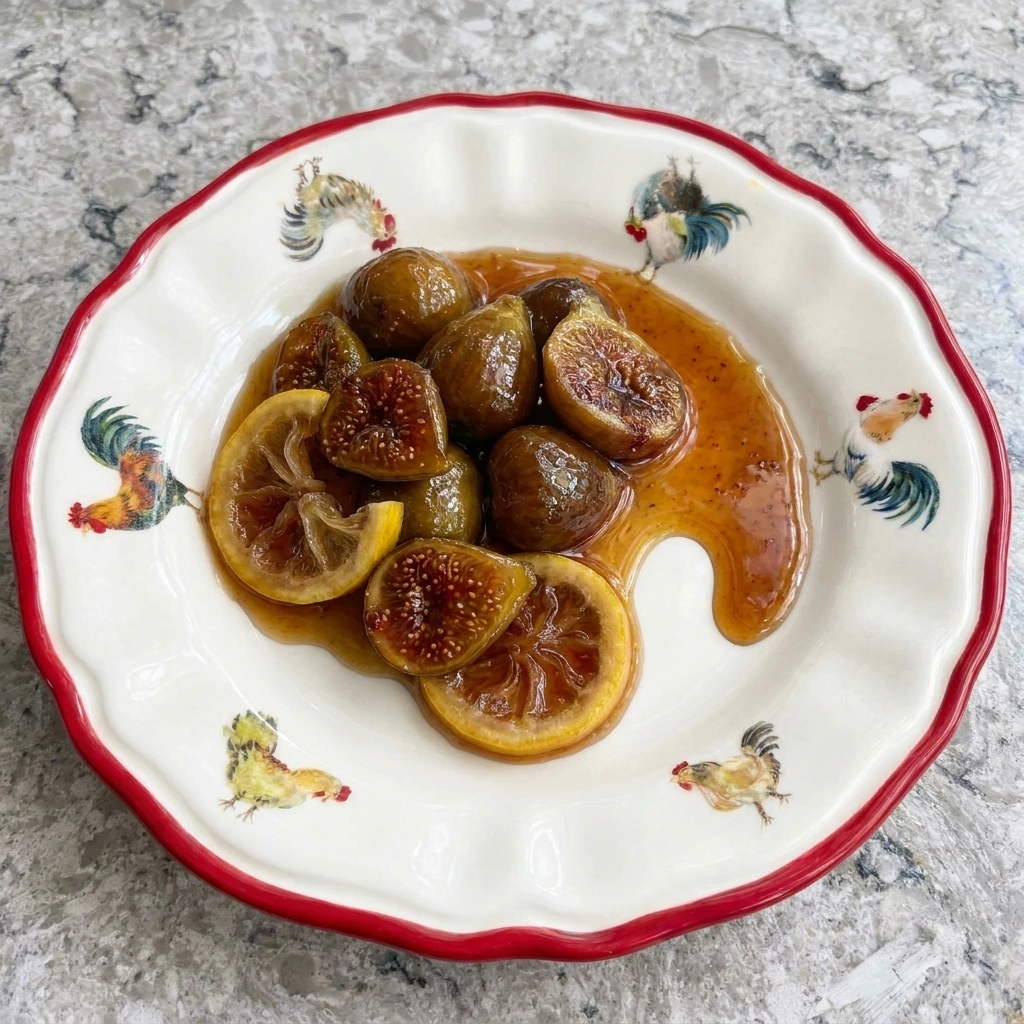
Step 5: Spoon the preserves onto a serving plate
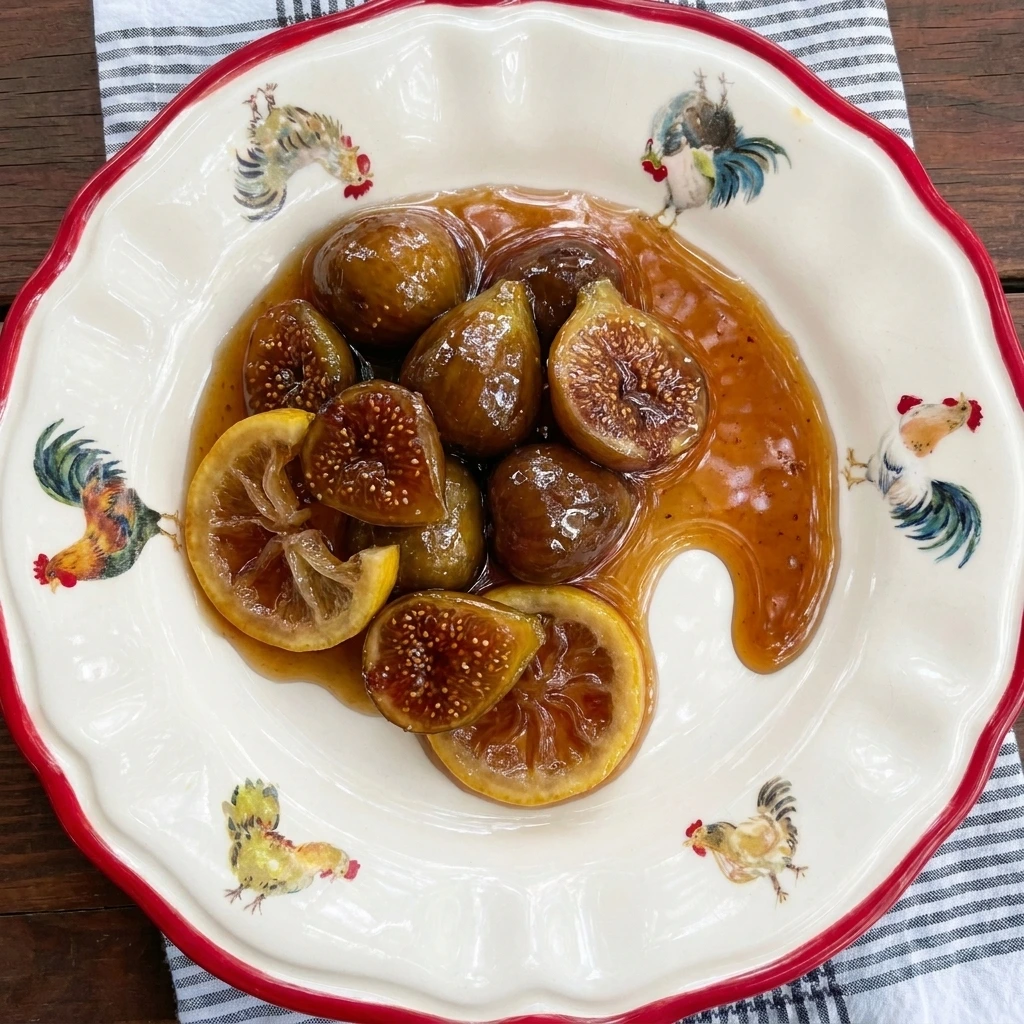
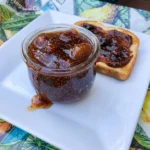
The finished preserves move from the cooking syrup into a single serving with fruit and syrup settling naturally. The figs look glossy and soft with uneven lemon slices and thick syrup pooling around the portion.
Tip: Serve a small spoonful with toast biscuits cheese or yogurt so the rich syrup can shine.
Pro Tips
- Choose figs with soft skins and sweet centers because underripe figs stay firm and need more sugar to taste full.
- Skim away any pale foam as the syrup cooks so the finished jar looks clearer and more old fashioned.
- Stop cooking once syrup coats a spoon because it thickens more as it cools and can turn too stiff.
- Use thin lemon slices so they soften into the preserves instead of staying tough beside the figs.
Storage Instructions
Cool the preserves until the syrup settles and the figs stop steaming before spooning them into clean jars. Store the jars in the refrigerator and use them within about 3 weeks for the freshest flavor and best texture. For longer keeping use proper canning jars and follow safe water bath canning directions for fruit preserves. Always use a clean spoon when serving so the syrup stays clear and the fruit keeps well.
Frequently Asked Questions
The syrup should coat a spoon and drip slowly while the figs look glossy soft and slightly wrinkled.
Yes but thaw and drain them first because extra liquid can make the syrup cook longer.
Yes lemon juice balances sweetness and helps the preserves taste bright instead of flat.
Spoon them over toast biscuits yogurt pancakes cheese boards or simple brunch plates.
See You in the Kitchen
I hope you try these Old Fashioned Fig Preserves soon!
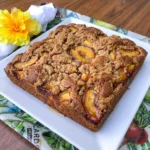
It’s a simple recipe that looks beautiful tastes incredible and makes every occasion a little more special especially beside Bakery Style Huckleberry Muffins or a slice of Raspberry Lemon Loaf Cake.
Don’t forget to share your results or save this recipe for later it’s one worth keeping.
Print
Old Fashioned Fig Preserves
- Total Time: 45 minutes
- Yield: 4 servings
Description
Old Fashioned Fig Preserves are easy and quick enough for a calm kitchen project while still tasting like the best simple homemade jar from summer. These healthy fruit preserves are perfect for brunch and holiday gifting and potluck boards and party trays. Spread them on toast and biscuits or spoon them over yogurt and cheese for cozy ideas that feel classic.
Ingredients
- 2 pounds Fresh ripe figs
- 2 cups Granulated sugar
- 3 tablespoons Fresh lemon juice
- 4 thin slices Lemon slices
- 1 cup Water
- 1 teaspoon Vanilla extract
- 1/4 teaspoon Fine salt
Instructions
- The fresh figs change from whole fruit into rustic pieces with exposed ruby centers and uneven edges. Some figs stay halved while a few are quartered so the preserves will have mixed textures after cooking.
- Sugar and lemon juice settle over the cut figs and begin pulling out glossy fruit juices. The figs look partly coated rather than fully mixed with small wet sugar patches clinging to the skins.
- The mixture changes from dry sugared fruit into bubbling fig syrup with softened skins and darker edges. The figs shift through the syrup as they cook and a few pieces break down enough to thicken the liquid.
- The syrup becomes glossy and heavy while vanilla blends into the hot figs and deepens the color. The fruit looks tender and slightly collapsed with sticky amber syrup coating each uneven piece.
- The finished preserves move from the cooking syrup into a single serving with fruit and syrup settling naturally. The figs look glossy and soft with uneven lemon slices and thick syrup pooling around the portion.
Notes
Pro Tips:
- Choose figs with soft skins and sweet centers because underripe figs stay firm and need more sugar to taste full.
- Skim away any pale foam as the syrup cooks so the finished jar looks clearer and more old fashioned.
- Stop cooking once syrup coats a spoon because it thickens more as it cools and can turn too stiff.
- Use thin lemon slices so they soften into the preserves instead of staying tough beside the figs.
Storage: Cool the preserves until the syrup settles and the figs stop steaming before spooning them into clean jars. Store the jars in the refrigerator and use them within about 3 weeks for the freshest flavor and best texture. For longer keeping use proper canning jars and follow safe water bath canning directions for fruit preserves. Always use a clean spoon when serving so the syrup stays clear and the fruit keeps well.
- Prep Time: 15 minutes
- Cook Time: 30 minutes
- Category: Breakfast
- Cuisine: Southern American