Our family discovered this Halloween Pot Pie during the height of autumn. Our boys were hosting a cousin from Detroit at our remote lake cottage where they carved pumpkins during the day and toasted marshmallows around the bonfire every night.
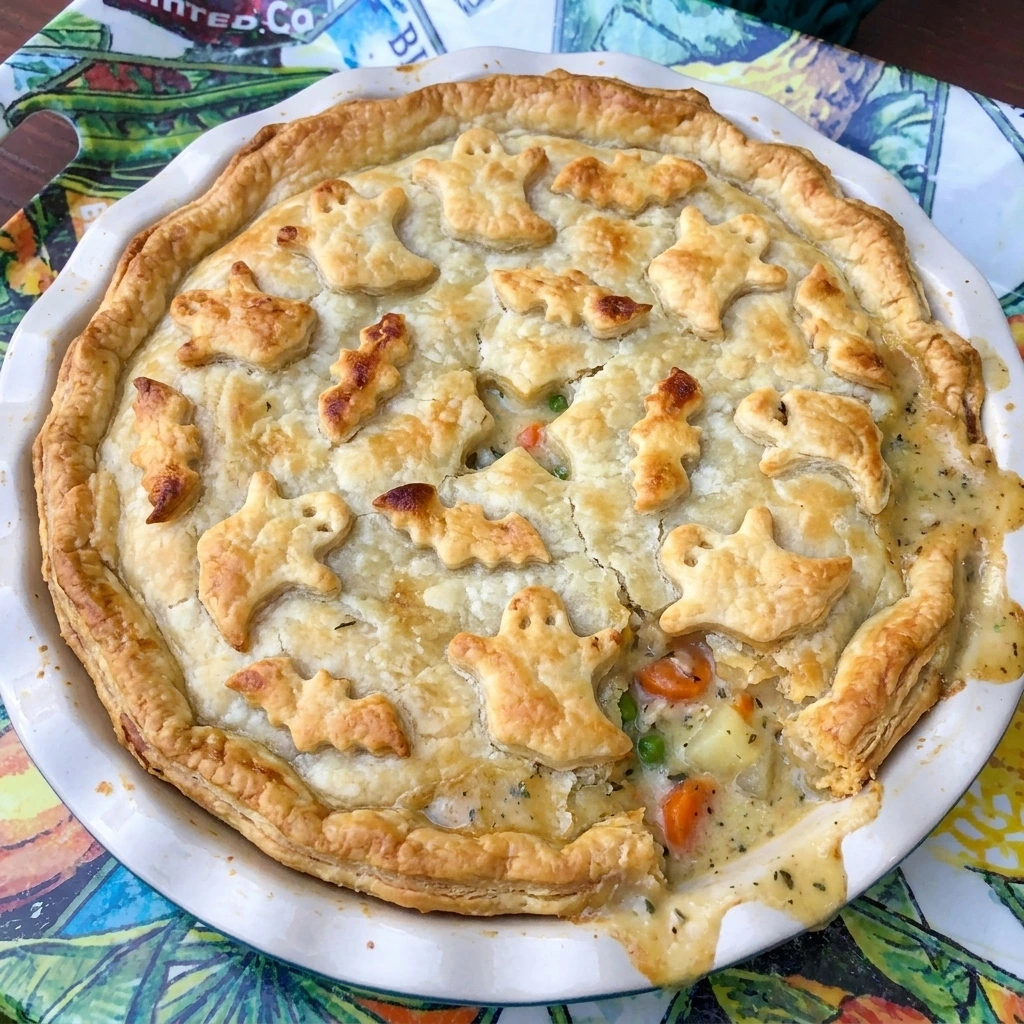
That was one of my best weeks of the year and this easy pot pie quickly became one of my favorite Halloween dinner recipes. We served it beside Crispy Parmesan Potato Bites and everyone returned for another helping.
I will never forget the first time I made this and the look on the kids’ faces when they saw the spooky pastry shapes. Read on as I show you how to make this unforgettable family dinner.
Ingredients
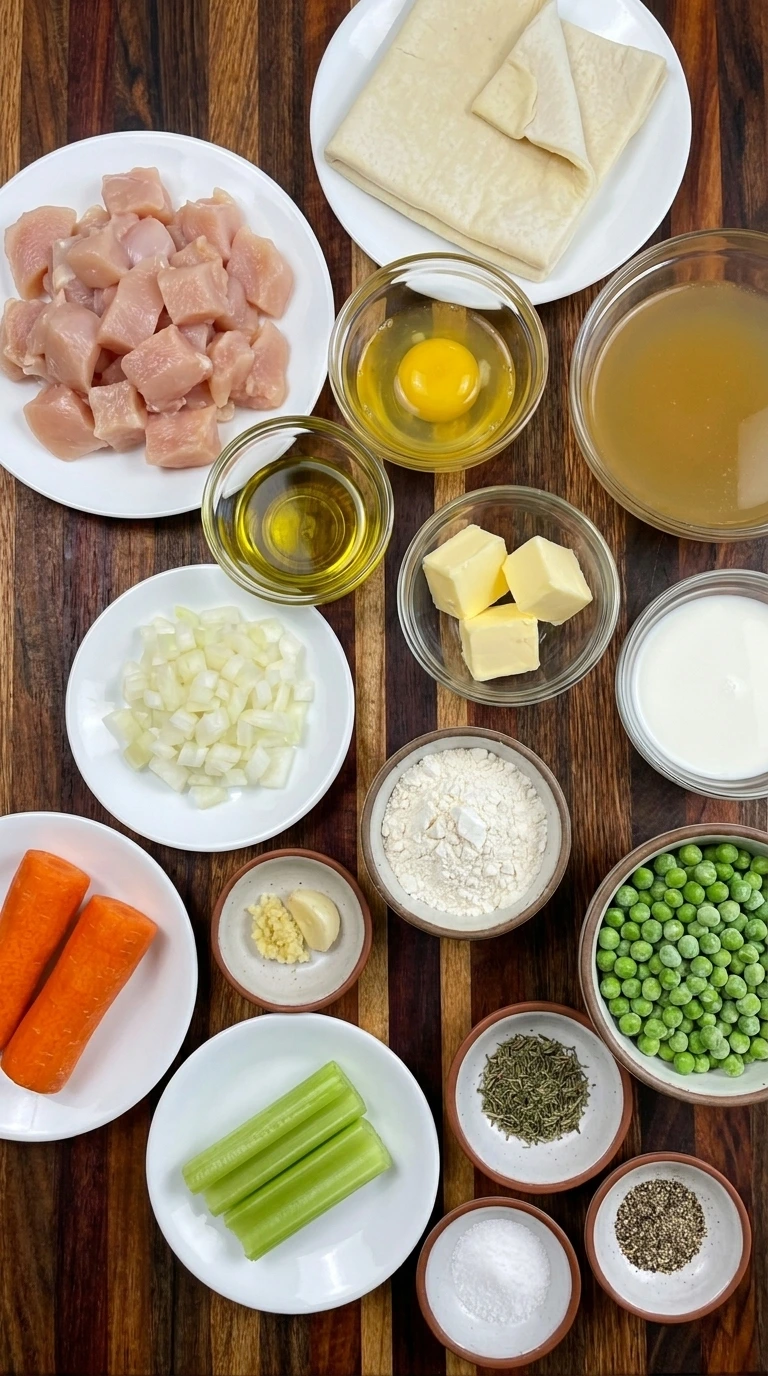
Here is what I use for this recipe and you can adjust nuts or spices based on preference:
- Boneless skinless chicken breast: Provides tender protein and becomes bite sized pieces throughout the creamy filling.
- Olive oil: Helps the chicken and vegetables cook evenly while preventing sticking.
- Yellow onion: Adds gentle sweetness and a savory base that deepens as it softens.
- Carrots: Add color plus mild sweetness plus a tender texture to the filling.
- Celery: Adds fresh savory flavor and balances the richness of the creamy sauce.
- Garlic: Adds aromatic depth that blends into the chicken and vegetable mixture.
- Unsalted butter: Combines with flour to form the thickening base for the creamy sauce.
- All purpose flour: Thickens the broth and milk into a smooth filling that holds together when served.
- Chicken broth: Adds savory moisture and creates the main body of the pot pie sauce.
- Whole milk: Gives the filling a creamy texture while keeping the sauce lighter than heavy cream.
- Frozen peas: Add bright green color and soft sweet bites throughout the finished filling.
- Dried thyme: Adds earthy herbal flavor that complements the chicken and vegetables.
- Salt: Enhances the savory flavor of the chicken plus vegetables plus creamy sauce.
- Black pepper: Adds gentle warmth and balances the richness of the filling.
- Refrigerated puff pastry: Creates the flaky golden top and provides extra dough for spooky cutout decorations.
- Large egg: Coats the pastry so it bakes with a glossy golden brown finish.
Tools You’ll Need
- Chef knife: Cuts the chicken plus onion plus carrots plus celery into small cooking pieces.
- Cutting board: Provides a stable surface for safely preparing the chicken and vegetables.
- Cast iron skillet: Browns the chicken plus softens the vegetables plus thickens the creamy filling.
- Wooden spoon: Folds the ingredients together while scraping the thickening sauce from the skillet.
- Round ceramic baking dish: Holds the creamy filling and supports the puff pastry during baking.
- Halloween cookie cutters: Cuts ghost plus bat plus pumpkin shapes from the extra puff pastry.
- Pastry brush: Spreads beaten egg over the pastry for glossy golden browning.
- Measuring cups and spoons: Measure the liquids plus flour plus herbs accurately for consistent filling texture.
Instructions
Step 1: Brown the chicken and soften the vegetables
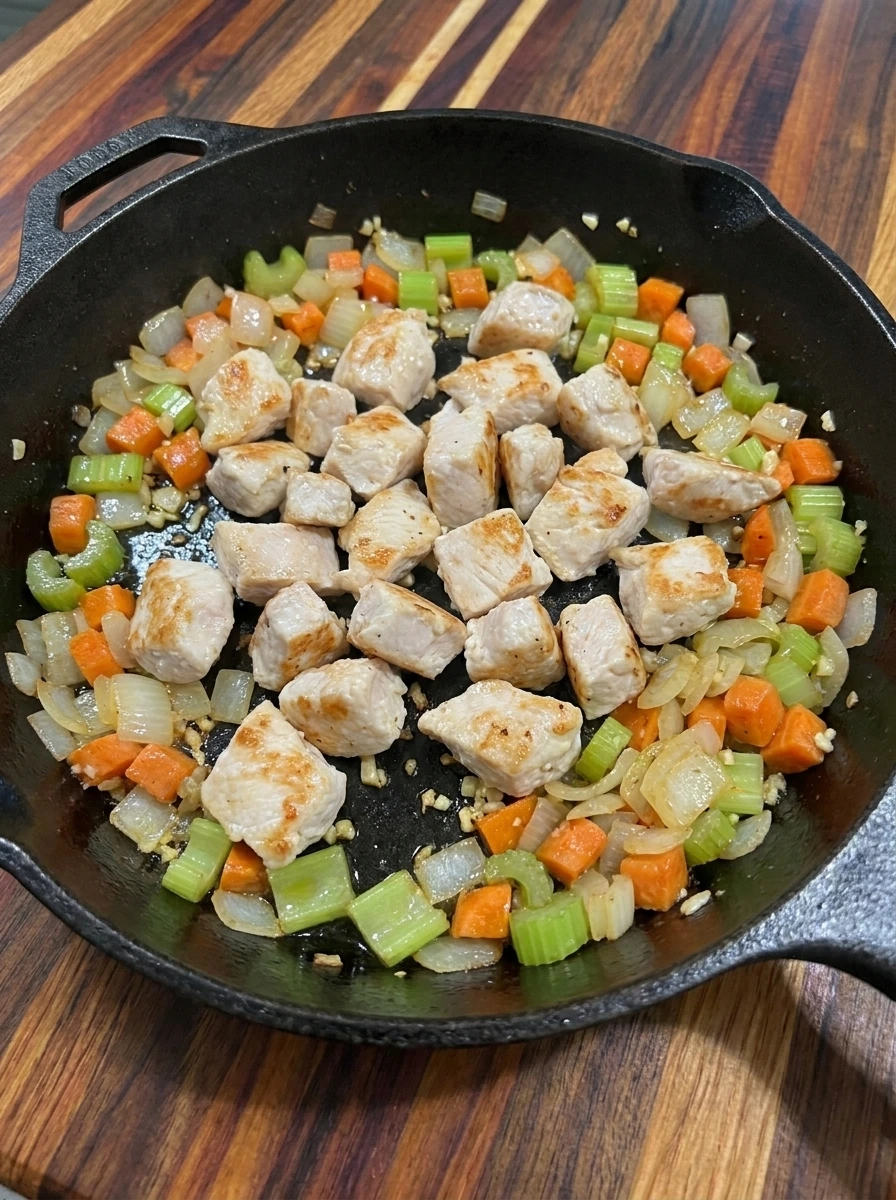
Cook the diced chicken until the surfaces turn opaque with scattered golden edges while the pieces remain irregularly spaced. Add the onion plus carrots plus celery plus garlic and cook until the vegetables soften slightly and mingle around the chicken with uneven placement.
Tip: Cut the chicken into similar small pieces so it cooks evenly while still keeping natural irregular edges.
Step 2: Thicken the creamy chicken filling
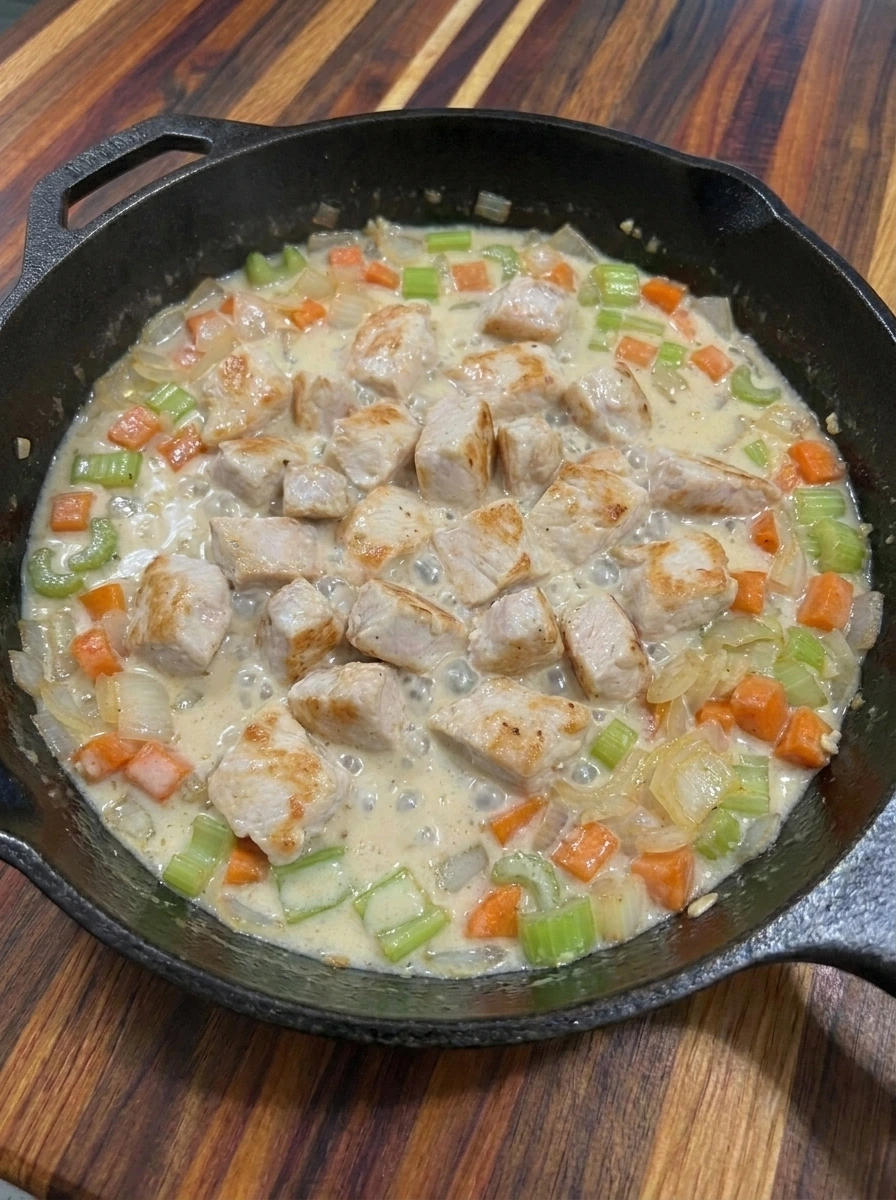
Fold the butter and flour through the chicken mixture until the pieces look lightly coated and the dry flour disappears. Pour in the broth plus milk and stir until the liquid changes into a thick creamy sauce that clings to the chicken and vegetables with a few uneven bubbles.
Tip: Add the liquids gradually so the flour blends smoothly and the filling thickens without visible dry pockets.
Step 3: Fold in the peas and seasonings
Scatter the frozen peas over the thick filling so bright green pockets appear across the surface. Fold in the thyme plus salt plus black pepper until the peas are partially submerged and unevenly distributed without crushing them.
Tip: Add frozen peas near the end so they stay bright green and keep their shape through baking.
Step 4: Layer the filling and spooky pastry crust

Transfer the thick chicken filling into the ceramic baking dish and spread it loosely so the surface remains slightly uneven. Drape the puff pastry over the filling and press the edges casually before arranging irregular ghost and bat cutouts across the top with natural spacing.
Tip: Keep small gaps between the pastry cutouts so steam can escape and each shape browns around the edges.
Step 5: Bake until golden and bubbling

Brush the pastry with beaten egg so the surface looks glossy while leaving a few natural streaks. Bake until the pastry rises into flaky layers plus turns deeply golden in uneven patches while creamy filling bubbles through small openings near the edges.
Tip: Bake until the center pastry looks fully puffed because pale soft pastry may remain doughy underneath.
Step 6: Serve one creamy pot pie portion

Cut through the flaky crust and lift one uneven portion onto a white plate so the creamy interior becomes visible. Let a little sauce settle naturally beside the piece while layers of pastry plus chicken plus peas plus vegetables remain clearly defined.
Tip: Rest the baked pot pie briefly so each portion holds together while the filling stays creamy.
Pro Tips
- Cool the filling for several minutes before adding pastry so the dough stays firm and puffs into distinct flaky layers.
- Keep the vegetable pieces close in size so they soften together while still looking naturally irregular and homemade.
- Cut small vents between the spooky shapes so steam escapes without disturbing the decorative pastry design.
- Place the baking dish on a tray during baking to catch any creamy filling that bubbles naturally over the edge.
Storage Instructions
Allow leftover Halloween Pot Pie to cool until it is no longer steaming before covering it. Refrigerate portions in airtight containers for up to three days. For the best texture reheat individual portions in the oven until the filling is hot and the pastry becomes crisp again. A microwave works quickly although the crust will soften. The cooked filling can be frozen without the puff pastry for up to two months.
Thaw it overnight in the refrigerator then transfer it into a baking dish and add fresh pastry before baking. Avoid freezing the fully assembled unbaked pie for a long period because the creamy sauce may soak into the pastry and reduce its rise.
Frequently Asked Questions
Prepare the filling one day ahead then chill it before adding fresh pastry and baking.
Yes and use about 3 cups cooked chicken then add it after the vegetables have softened.
Cool the filling slightly and bake immediately after adding chilled puff pastry.
Freeze the cooled filling without pastry for up to two months then thaw before assembling.
See You in the Kitchen
I hope you try this Halloween Pot Pie soon!
It is a simple recipe that looks festive and tastes incredible and makes every Halloween dinner a little more special beside Ham and Cheese Crescent Bites or Pizza Stuffed Mushrooms.
Do not forget to share your results or save this recipe for later because it is one worth keeping.
Print
Halloween Pot Pie
- Total Time: 45 minutes
- Yield: 4 servings
Description
This Halloween Pot Pie is an easy and quick dinner filled with tender chicken plus colorful vegetables and a simple creamy sauce under a flaky golden crust. Spooky pastry cutouts make it one of the best ideas for a weeknight dinner plus holiday meal plus Halloween party or potluck. It feels comforting yet can fit a healthy family menu when served with salad and it is ideal for meal prep because the filling can be prepared ahead.
Ingredients
- 1 pound Boneless skinless chicken breast
- 1 tablespoon Olive oil
- 1 small onion diced Yellow onion
- 2 medium carrots diced Carrots
- 2 stalks diced Celery
- 2 cloves minced Garlic
- 3 tablespoons Unsalted butter
- 3 tablespoons All purpose flour
- 1 and 1 half cups Chicken broth
- 1 cup Whole milk
- 1 cup Frozen peas
- 1 teaspoon Dried thyme
- 1 teaspoon Salt
- 1 half teaspoon Black pepper
- 1 sheet Refrigerated puff pastry
- 1 egg beaten Large egg
Instructions
- Cook the diced chicken until the surfaces turn opaque with scattered golden edges while the pieces remain irregularly spaced. Add the onion plus carrots plus celery plus garlic and cook until the vegetables soften slightly and mingle around the chicken with uneven placement.
- Fold the butter and flour through the chicken mixture until the pieces look lightly coated and the dry flour disappears. Pour in the broth plus milk and stir until the liquid changes into a thick creamy sauce that clings to the chicken and vegetables with a few uneven bubbles.
- Scatter the frozen peas over the thick filling so bright green pockets appear across the surface. Fold in the thyme plus salt plus black pepper until the peas are partially submerged and unevenly distributed without crushing them.
- Transfer the thick chicken filling into the ceramic baking dish and spread it loosely so the surface remains slightly uneven. Drape the puff pastry over the filling and press the edges casually before arranging irregular ghost and bat cutouts across the top with natural spacing.
- Brush the pastry with beaten egg so the surface looks glossy while leaving a few natural streaks. Bake until the pastry rises into flaky layers plus turns deeply golden in uneven patches while creamy filling bubbles through small openings near the edges.
- Cut through the flaky crust and lift one uneven portion onto a white plate so the creamy interior becomes visible. Let a little sauce settle naturally beside the piece while layers of pastry plus chicken plus peas plus vegetables remain clearly defined.
Notes
Pro Tips:
- Cool the filling for several minutes before adding pastry so the dough stays firm and puffs into distinct flaky layers.
- Keep the vegetable pieces close in size so they soften together while still looking naturally irregular and homemade.
- Cut small vents between the spooky shapes so steam escapes without disturbing the decorative pastry design.
- Place the baking dish on a tray during baking to catch any creamy filling that bubbles naturally over the edge.
Storage: Allow leftover Halloween Pot Pie to cool until it is no longer steaming before covering it. Refrigerate portions in airtight containers for up to three days. For the best texture reheat individual portions in the oven until the filling is hot and the pastry becomes crisp again. A microwave works quickly although the crust will soften. The cooked filling can be frozen without the puff pastry for up to two months. Thaw it overnight in the refrigerator then transfer it into a baking dish and add fresh pastry before baking. Avoid freezing the fully assembled unbaked pie for a long period because the creamy sauce may soak into the pastry and reduce its rise.
- Prep Time: 15 minutes
- Cook Time: 30 minutes
- Category: Dinner
- Cuisine: American