A good sandwich shop serves one of the best Crispy Dill Chicken Sandwiches I have ever tasted and the chicken is juicy and crunchy and so delicious with fresh dill plus tangy pickles plus crisp lettuce and creamy sauce and today I will show how I make my Crispy Dill Chicken Sandwich at home easily just with some easy to find ingredients. Just To know that my Crispy Dill Chicken Sandwich turned out so delicious and so juicy almost like one from a restaurant and I really love this dish and I also tried the same crispy chicken idea with extra cheese and the result was even better so if you enjoy flavorful chicken you can also try my CrockPot Pepper Jack Chicken using another easy cooking style.
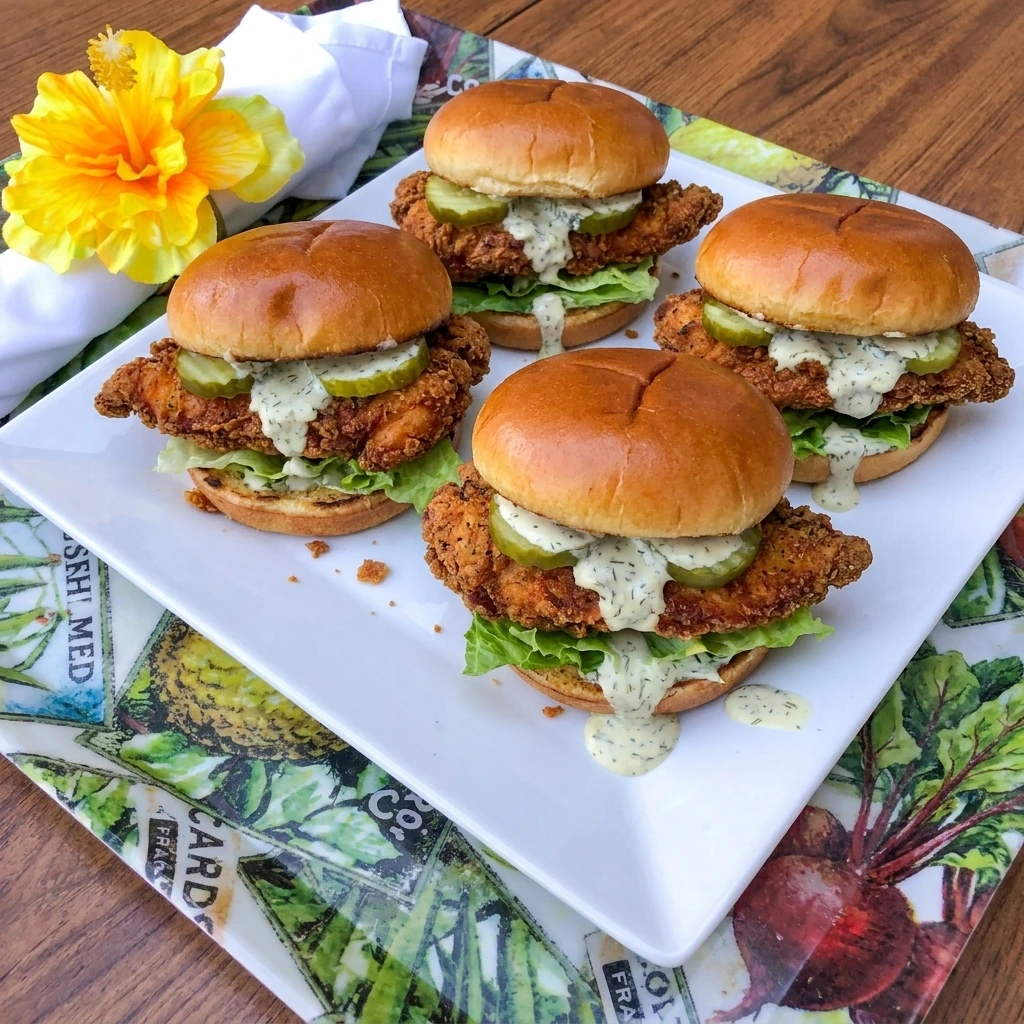
Usually Crispy Dill Chicken Sandwich is perfect for a relaxed lunch or weeknight dinner and it is so incredible and I recommend anyone to enjoy it and if you cannot visit your favorite sandwich place you can try out my recipe. Also for my recipe I use a pan for frying and I recommend keeping the oil at a steady heat instead of rushing the cooking process and simply coat your chicken then fry it until it is cooked through and deeply golden.
Ingredients

Here is what I use for this recipe and you can adjust nuts or spices based on preference:
- Chicken breast cutlets: Thin chicken cutlets cook quickly while providing the juicy protein center for each sandwich.
- Buttermilk: Buttermilk tenderizes the chicken while helping the seasonings and crispy coating adhere.
- Pickle brine: Pickle brine adds tangy dill flavor while seasoning the chicken during marinating.
- Fresh dill: Fresh dill supplies the signature herbal flavor for both the chicken marinade and creamy sauce.
- Garlic powder: Garlic powder adds savory depth throughout the seasoned marinade.
- Onion powder: Onion powder adds rounded savory flavor without changing the texture of the coating.
- Paprika: Paprika gives the chicken gentle warmth and helps create an appetizing golden color.
- All purpose flour: Flour forms the main structure of the crunchy coating around each chicken cutlet.
- Cornstarch: Cornstarch makes the fried coating lighter and noticeably crispier.
- Salt: Salt seasons the coating and balances the tangy pickle and dill flavors.
- Black pepper: Black pepper adds gentle warmth and savory contrast to the crispy coating.
- Vegetable oil: Vegetable oil provides even frying heat so the chicken becomes crisp and golden.
- Mayonnaise: Mayonnaise creates the rich creamy base for the cool dill sandwich sauce.
- Lemon juice: Lemon juice brightens the creamy sauce and balances its richness.
- Brioche buns: Soft brioche buns provide a slightly sweet base that contrasts with the crunchy chicken.
- Dill pickle slices: Dill pickle slices add crunch and sharp tang while reinforcing the dill flavor.
- Green leaf lettuce: Fresh lettuce adds cool crisp texture that balances the hot fried chicken.
Tools You’ll Need
- Large mixing bowl: Provides enough room to marinate all four chicken cutlets evenly in the buttermilk mixture.
- Shallow mixing bowl: Provides a wide area for pressing the seasoned flour mixture onto each chicken cutlet.
- Cast iron skillet: Maintains steady heat for frying the coated chicken and later toasting the brioche buns.
- Small mixing bowl: Keeps the mayonnaise plus fresh dill and lemon juice contained while blending the sandwich sauce.
- Kitchen tongs: Helps turn the chicken during frying while keeping the textured coating as intact as possible.
- Instant read thermometer: Checks the center of the chicken so each cutlet reaches a safe cooked temperature without overcooking.
- White serving plate: Holds the finished sandwich portion and makes the cut interior easy to see when serving.
Instructions
Step 1: Marinate the chicken in dill pickle buttermilk
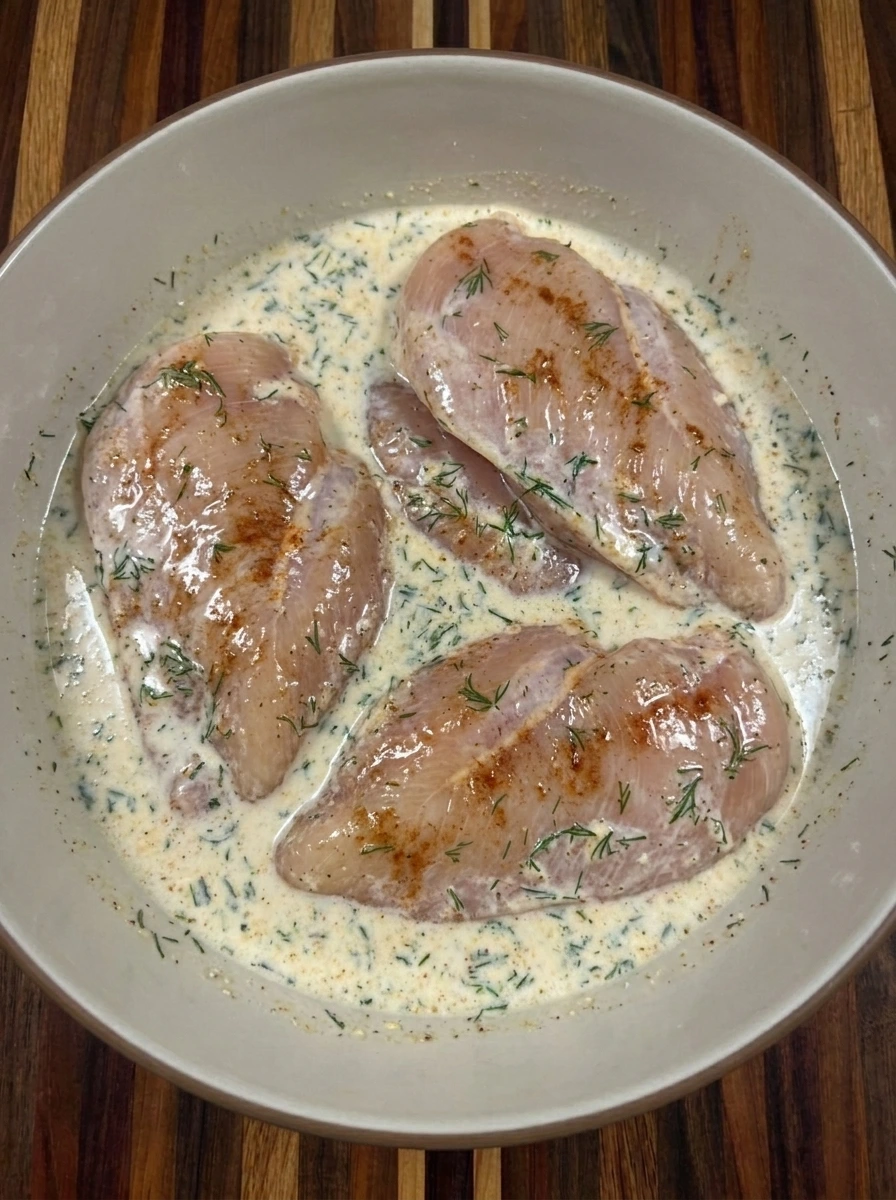
Place all four chicken cutlets into the buttermilk mixture with pickle brine plus one tablespoon of fresh dill plus garlic powder plus onion powder plus paprika and turn the pieces until creamy marinade clings unevenly across every surface. The chicken changes from plain raw cutlets into glossy seasoned pieces that sit partially submerged with scattered dill visible across the pale marinade.
Tip: Give every cutlet enough contact with the marinade so the pickle brine and buttermilk can season and tenderize the meat evenly.
Step 2: Coat the marinated chicken in seasoned flour
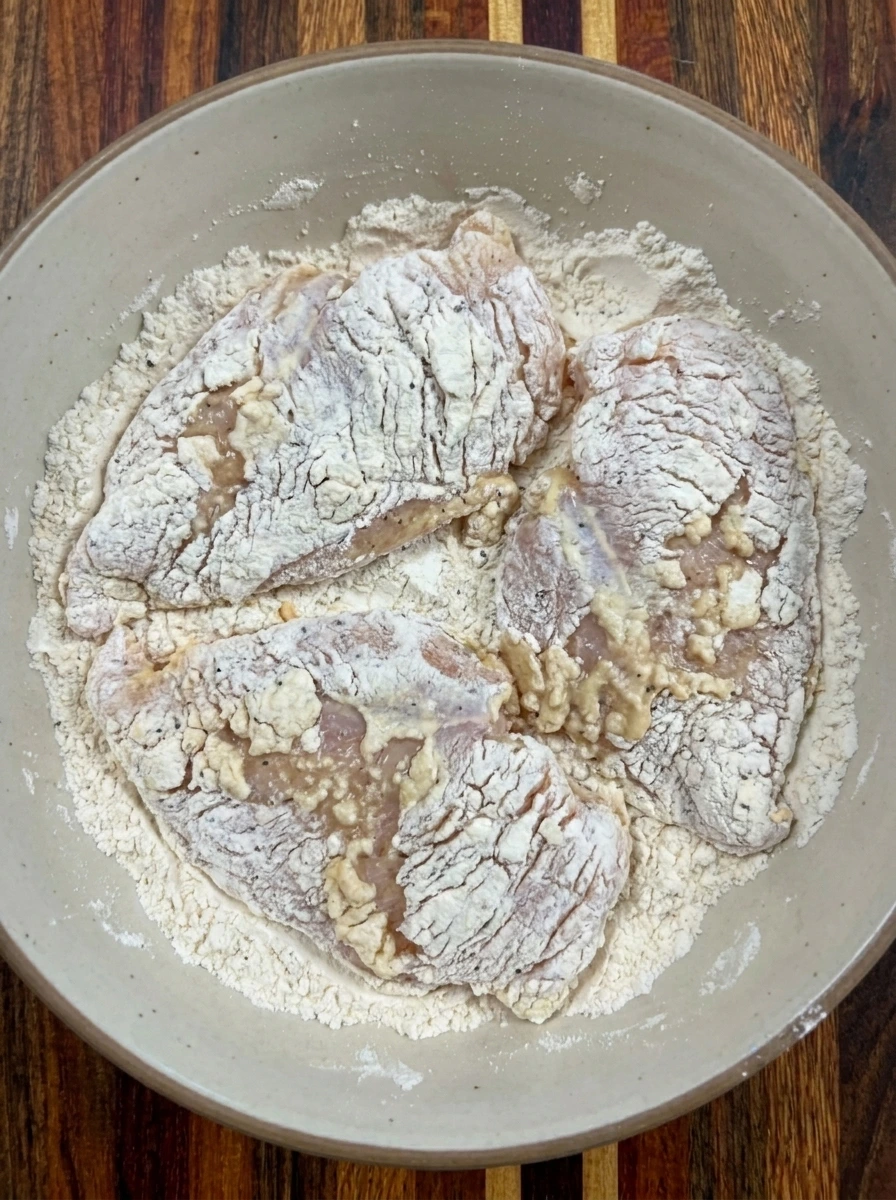
Transfer the four wet chicken cutlets into the flour plus cornstarch plus salt and black pepper mixture then press the dry mixture onto each piece until rough uneven ridges form over the moist surfaces. The glossy chicken becomes pale and heavily textured while irregular clumps of coating gather along the edges and create the craggy surface that will turn crisp during frying.
Tip: Press loose flour firmly onto the damp chicken and leave the rough clumps in place because those irregular patches create extra crunch.
Step 3: Fry the chicken until crisp and golden
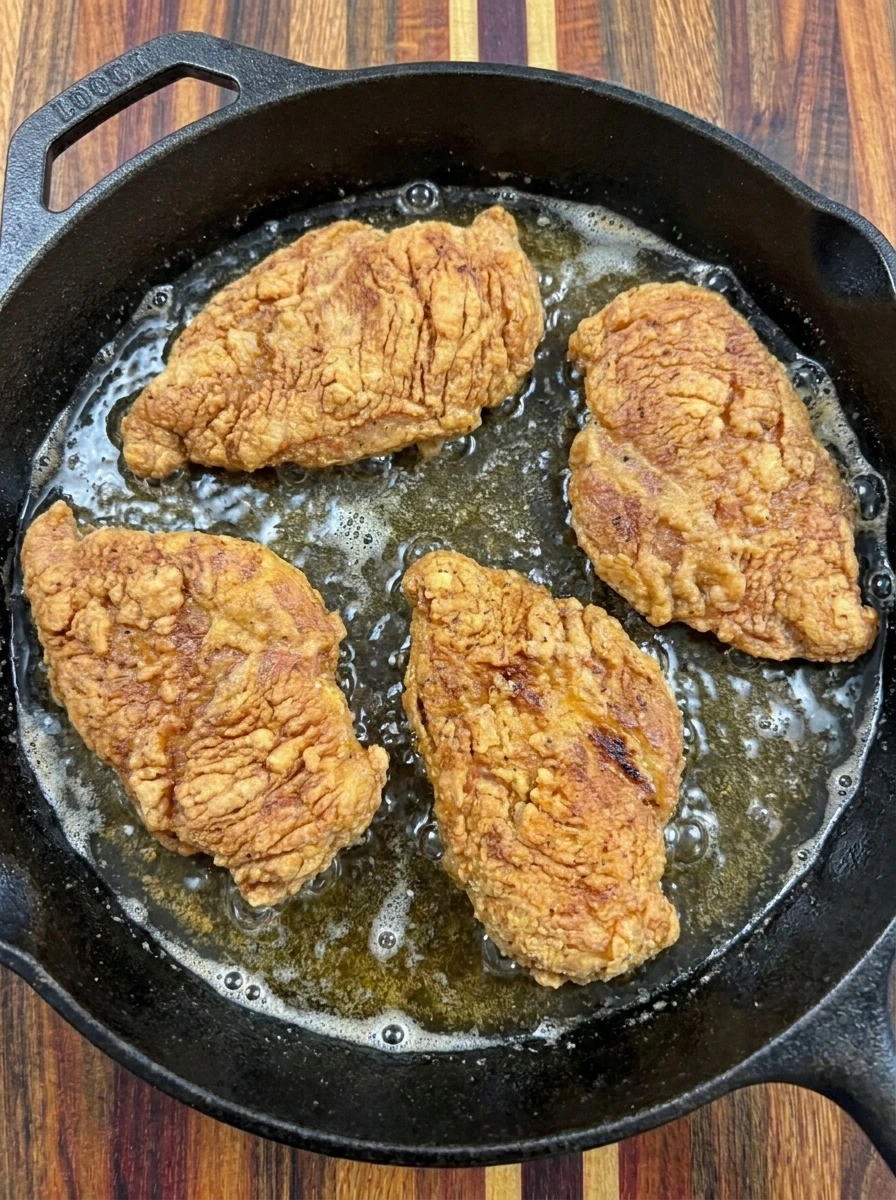
Place the four coated chicken cutlets into the frying oil with natural spacing then turn them during cooking so both sides develop an uneven deep golden crust with darker brown ridges and crisp edges. The pale flour coating changes into a crunchy structured shell while the pieces shift around the pan and show slightly different shapes plus natural browning instead of identical coloring.
Tip: Fry in a steady layer without crowding so the coating stays crisp and turn each cutlet only when the underside has developed good color.
Step 4: Mix the creamy fresh dill sauce
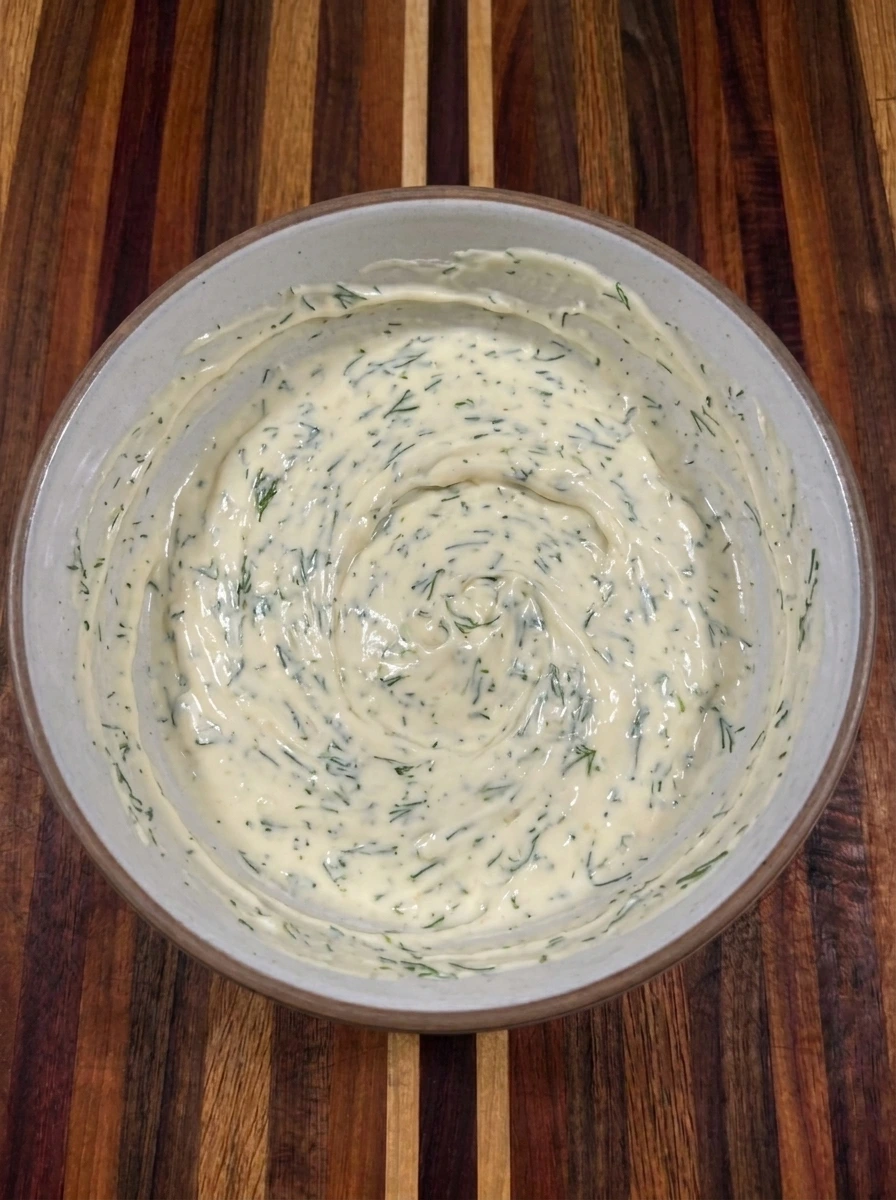
Combine the mayonnaise with the remaining one tablespoon of chopped fresh dill plus lemon juice until the ingredients change from separate components into a thick creamy sauce with visible green dill flecks. The sauce should remain slightly uneven with small herb clusters throughout rather than looking completely smooth because that gives the homemade mixture a fresh natural texture.
Tip: Mix the sauce only until the dill is distributed because leaving visible herb flecks gives every sandwich brighter fresh dill flavor.
Step 5: Toast the brioche buns until lightly browned
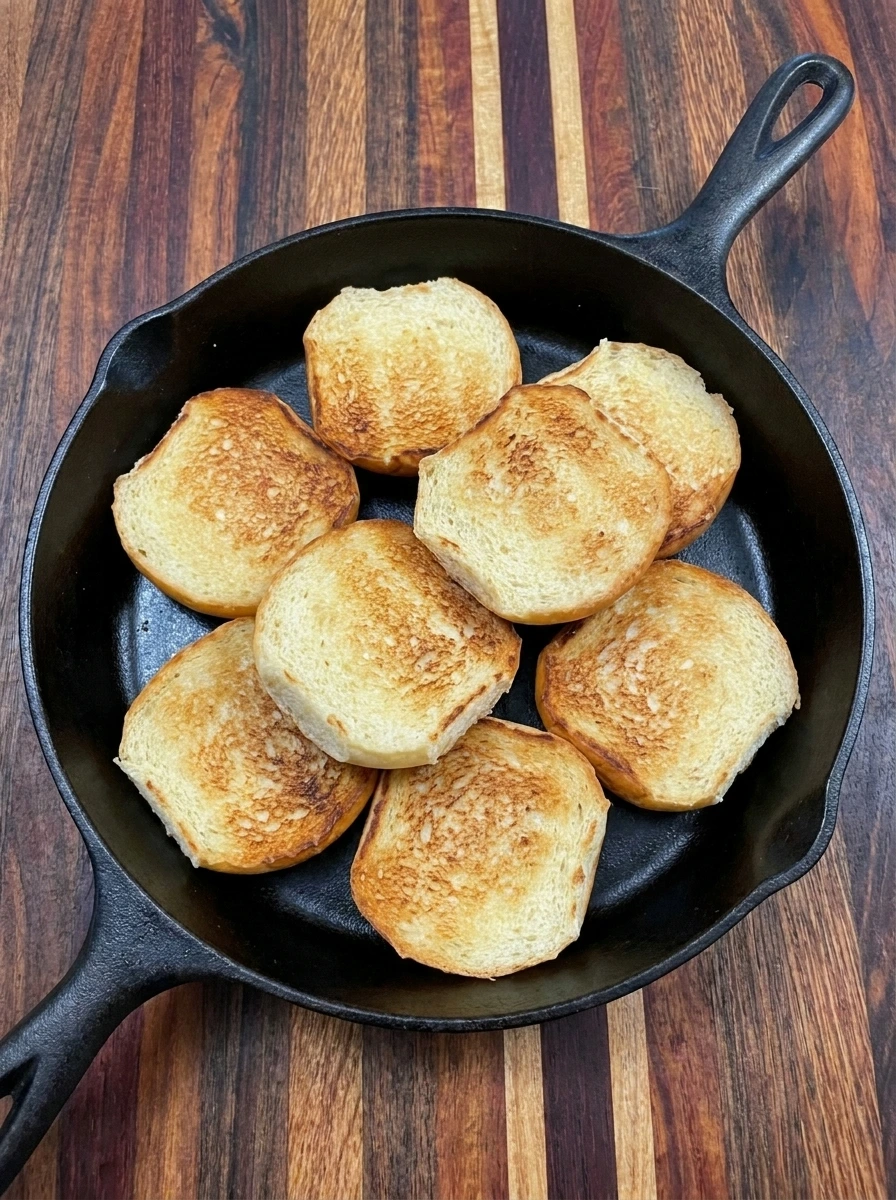
Place all eight cut sides from the four brioche buns against the hot cooking surface until the soft interiors develop scattered golden patches and slightly crisp edges while remaining fluffy through the centers. The bun halves change from uniformly pale bread into lightly toasted pieces with irregular brown areas and the halves shift around the cooking surface rather than sitting in perfect alignment.
Tip: Toast only the cut sides until lightly golden so the buns gain structure while the outer bread stays soft enough for an easy bite.
Step 6: Layer and serve the crispy dill chicken sandwich

Spread creamy dill sauce over one toasted bun then layer one lettuce leaf plus one golden chicken cutlet plus three pickle slices before adding the top bun and gently cutting the finished sandwich to reveal the juicy chicken beneath the craggy crust. The final portion shows loose lettuce edges plus overlapping pickles plus sauce peeking unevenly from the bun while crumbs and varied golden tones keep the sandwich looking homemade and naturally assembled.
Tip: Build each sandwich just before serving so the toasted bun and crispy chicken keep their texture beside the cool sauce and pickles.
Pro Tips
- Let excess marinade drip naturally before coating so enough moisture remains for craggy flour patches without creating a heavy paste.
- Press the flour mixture onto every cutlet with gentle pressure because loose irregular ridges become the crunchiest areas during frying.
- Keep the frying temperature steady between batches so the chicken cooks through before the coating becomes too dark or greasy.
- Assemble the sandwiches immediately before eating so the cool pickles and sauce stay fresh while the fried chicken remains crisp.
Storage Instructions
Store leftover fried chicken separately from the buns plus sauce plus lettuce and pickles because separating the components protects the crunchy coating from excess moisture. Keep cooked chicken in a sealed refrigerator container for up to three days and keep the dill sauce chilled in its own covered container for the same period. Reheat the chicken until thoroughly hot using dry heat whenever possible because this helps restore more crispness than reheating it together with the sauce or vegetables.
Freeze only the cooked chicken cutlets for longer storage and wrap each one separately before placing them in a freezer safe container then thaw them in the refrigerator before reheating and assembling fresh sandwiches.
Frequently Asked Questions
Yes and you can prepare the sauce plus coating early while frying and assembling the chicken shortly before serving.
Keep cooked chicken uncovered on a rack until serving and add sauce only during assembly so steam does not soften the crust.
Yes and a hot oven can cook the coated cutlets although the crust will usually be lighter and less deeply crisp.
Classic dill pickle slices work best because their sharp briny flavor complements the fresh dill and creamy sauce.
See You in the Kitchen
I hope you try this Crispy Dill Chicken Sandwich soon because it is a simple recipe that looks beautiful and tastes incredible and makes an everyday lunch or dinner a little more special.
Do not forget to share your results or save this recipe for later because it is one worth keeping and if you want more easy chicken favorites try my Crockpot Sesame Chicken or Crockpot Cowboy Butter Chicken Pasta.
Print
Crispy Dill Chicken Sandwich
- Total Time: 45 minutes
- Yield: 4 servings
Description
This easy Crispy Dill Chicken Sandwich brings juicy chicken together with a crunchy dill crust plus crisp lettuce plus tangy pickles plus creamy dill sauce on a toasted bun. It is a quick and simple choice for the best weeknight dinner ideas plus meal prep plus a casual party spread. The sandwich feels hearty yet fresh with healthy toppings and it works for brunch plus potluck tables plus holiday gatherings when you want familiar comfort with bright flavor.
Ingredients
- 4 cutlets Chicken breast cutlets
- 1 cup Buttermilk
- 1/3 cup Pickle brine
- 2 tablespoons chopped Fresh dill
- 1 teaspoon Garlic powder
- 1 teaspoon Onion powder
- 1 teaspoon Paprika
- 1 1/4 cups All purpose flour
- 1/2 cup Cornstarch
- 1 teaspoon Salt
- 1/2 teaspoon Black pepper
- 2 cups for frying Vegetable oil
- 1/2 cup Mayonnaise
- 1 tablespoon Lemon juice
- 4 buns Brioche buns
- 12 slices Dill pickle slices
- 4 leaves Green leaf lettuce
Instructions
- Place all four chicken cutlets into the buttermilk mixture with pickle brine plus one tablespoon of fresh dill plus garlic powder plus onion powder plus paprika and turn the pieces until creamy marinade clings unevenly across every surface. The chicken changes from plain raw cutlets into glossy seasoned pieces that sit partially submerged with scattered dill visible across the pale marinade.
- Transfer the four wet chicken cutlets into the flour plus cornstarch plus salt and black pepper mixture then press the dry mixture onto each piece until rough uneven ridges form over the moist surfaces. The glossy chicken becomes pale and heavily textured while irregular clumps of coating gather along the edges and create the craggy surface that will turn crisp during frying.
- Place the four coated chicken cutlets into the frying oil with natural spacing then turn them during cooking so both sides develop an uneven deep golden crust with darker brown ridges and crisp edges. The pale flour coating changes into a crunchy structured shell while the pieces shift around the pan and show slightly different shapes plus natural browning instead of identical coloring.
- Combine the mayonnaise with the remaining one tablespoon of chopped fresh dill plus lemon juice until the ingredients change from separate components into a thick creamy sauce with visible green dill flecks. The sauce should remain slightly uneven with small herb clusters throughout rather than looking completely smooth because that gives the homemade mixture a fresh natural texture.
- Place all eight cut sides from the four brioche buns against the hot cooking surface until the soft interiors develop scattered golden patches and slightly crisp edges while remaining fluffy through the centers. The bun halves change from uniformly pale bread into lightly toasted pieces with irregular brown areas and the halves shift around the cooking surface rather than sitting in perfect alignment.
- Spread creamy dill sauce over one toasted bun then layer one lettuce leaf plus one golden chicken cutlet plus three pickle slices before adding the top bun and gently cutting the finished sandwich to reveal the juicy chicken beneath the craggy crust. The final portion shows loose lettuce edges plus overlapping pickles plus sauce peeking unevenly from the bun while crumbs and varied golden tones keep the sandwich looking homemade and naturally assembled.
Notes
Pro Tips:
- Let excess marinade drip naturally before coating so enough moisture remains for craggy flour patches without creating a heavy paste.
- Press the flour mixture onto every cutlet with gentle pressure because loose irregular ridges become the crunchiest areas during frying.
- Keep the frying temperature steady between batches so the chicken cooks through before the coating becomes too dark or greasy.
- Assemble the sandwiches immediately before eating so the cool pickles and sauce stay fresh while the fried chicken remains crisp.
Storage: Store leftover fried chicken separately from the buns plus sauce plus lettuce and pickles because separating the components protects the crunchy coating from excess moisture. Keep cooked chicken in a sealed refrigerator container for up to three days and keep the dill sauce chilled in its own covered container for the same period. Reheat the chicken until thoroughly hot using dry heat whenever possible because this helps restore more crispness than reheating it together with the sauce or vegetables. Freeze only the cooked chicken cutlets for longer storage and wrap each one separately before placing them in a freezer safe container then thaw them in the refrigerator before reheating and assembling fresh sandwiches.
- Prep Time: 15 minutes
- Cook Time: 30 minutes
- Category: Lunch
- Cuisine: American