Making a delicious family dinner is so EASY with recipes like these Cowboy Sliders because seasoned beef plus smoky bacon plus cheddar bake inside soft rolls and the whole tray takes very little hands on time to make.
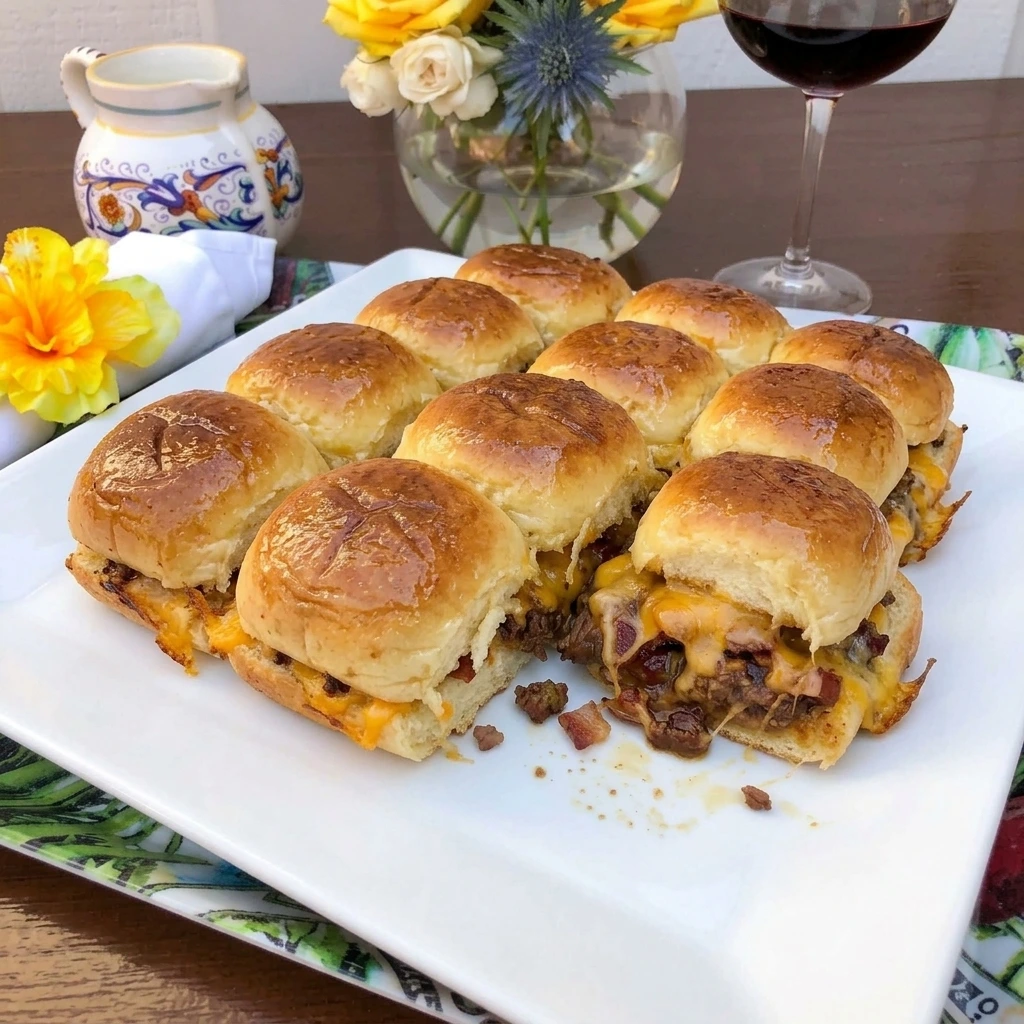
The sweetness of barbecue sauce and rich beef combine to make flavors both kids and adults will love and if you enjoy loaded handheld dinners then try our Crack Burgers next.
Sliders are one of those well loved classic American comfort foods for a ton of great reasons and baking them together makes you love them even more because they are so easy to make and require almost no babysitting and in the end you get a delicious hearty tray of cheesy beef sliders.
Ingredients
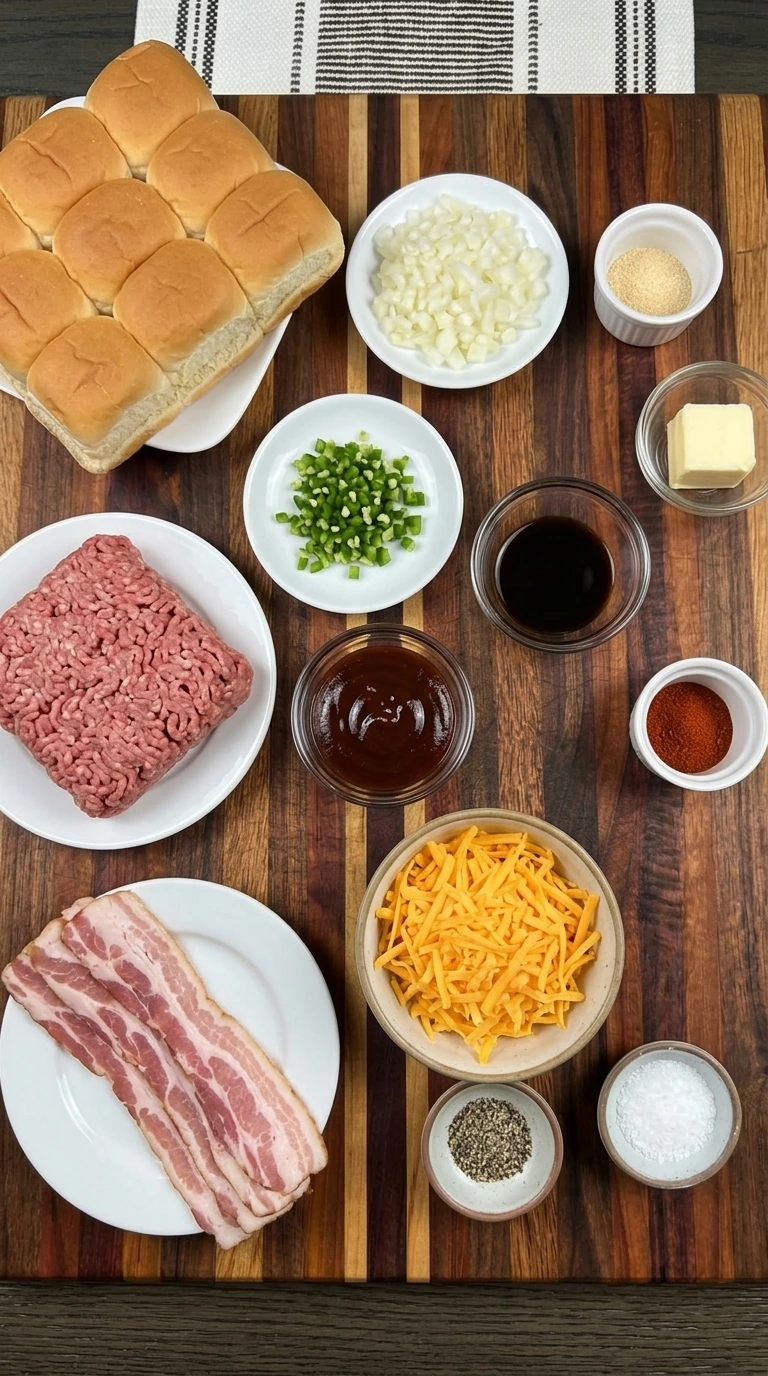
Here is what I use for this recipe :
- Slider rolls: Soft pull apart rolls create the tender base and golden top for the full tray.
- Lean ground beef: Lean beef provides the hearty savory filling while keeping excess grease under control.
- Bacon: Chopped bacon adds smoky flavor and crisp chewy pieces throughout the beef filling.
- Yellow onion: Diced onion softens into the meat and adds gentle sweetness plus moisture.
- Jalapeno: Finely diced jalapeno adds mild heat and a fresh pepper flavor without overwhelming the filling.
- Barbecue sauce: Thick barbecue sauce coats the beef and adds sweet tangy flavor while helping the filling hold together.
- Worcestershire sauce: Worcestershire sauce deepens the savory beef flavor and balances the sweetness of the barbecue sauce.
- Garlic powder: Garlic powder seasons the filling evenly and adds a warm savory layer.
- Smoked paprika: Smoked paprika reinforces the bacon flavor and gives the filling a deeper warm color.
- Kosher salt: Kosher salt sharpens the beef and cheese flavors throughout the sliders.
- Black pepper: Black pepper adds gentle warmth and a savory finish to the meat mixture.
- Sharp cheddar cheese: Sharp cheddar melts over the beef and creates the rich gooey layer that holds each slider together.
- Unsalted butter: Butter melts over the roll tops so they bake with a soft center and lightly browned finish.
Tools I Use :
- Serrated bread knife: Slices the connected slider rolls horizontally into even top and bottom slabs.
- Wooden cutting board: Supports the connected rolls while they are split into two slabs.
- Cast iron skillet: Browns the beef bacon onion and jalapeno then thickens the barbecue filling.
- Wooden spoon or spatula: Breaks the beef into crumbles and folds the sauce evenly through the filling.
- 9 x 13 inch glass or ceramic baking dish: Holds all 12 assembled sliders together while the cheese melts and the tops brown.
- Pastry brush: Spreads melted butter across the roll tops and into the seams before baking.
Instructions
Step 1: Brown the beef with bacon onion and jalapeno
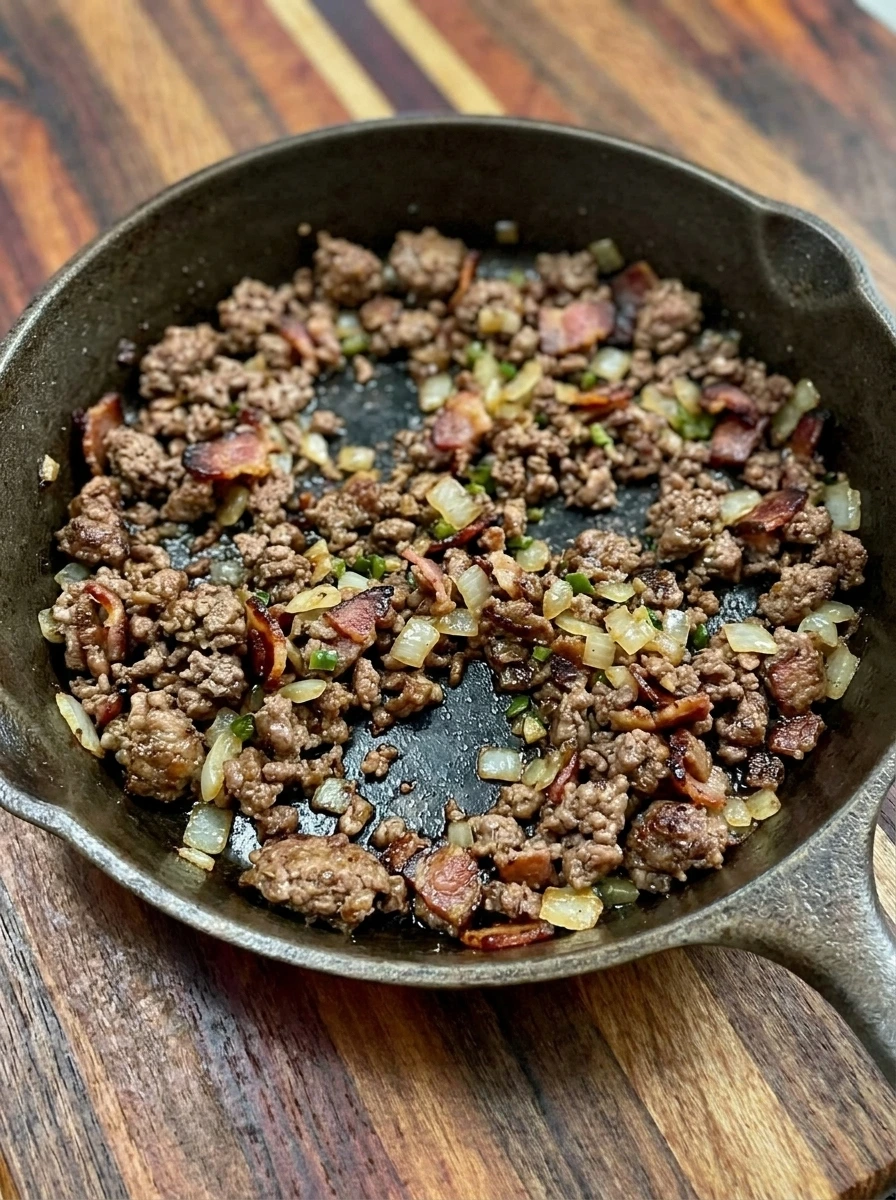
Cook the one pound of ground beef with all four chopped bacon slices plus the diced onion and jalapeno until the beef loses its pink color and the bacon curls at the edges. The mixture should shift into irregular browned crumbles with softened onion and green pepper pieces scattered through the meat while excess moisture cooks away.
Tip: Break the beef into small uneven crumbles rather than fine crumbs so the filling keeps a hearty homemade texture inside each slider.
Step 2: Coat the browned filling with barbecue seasoning
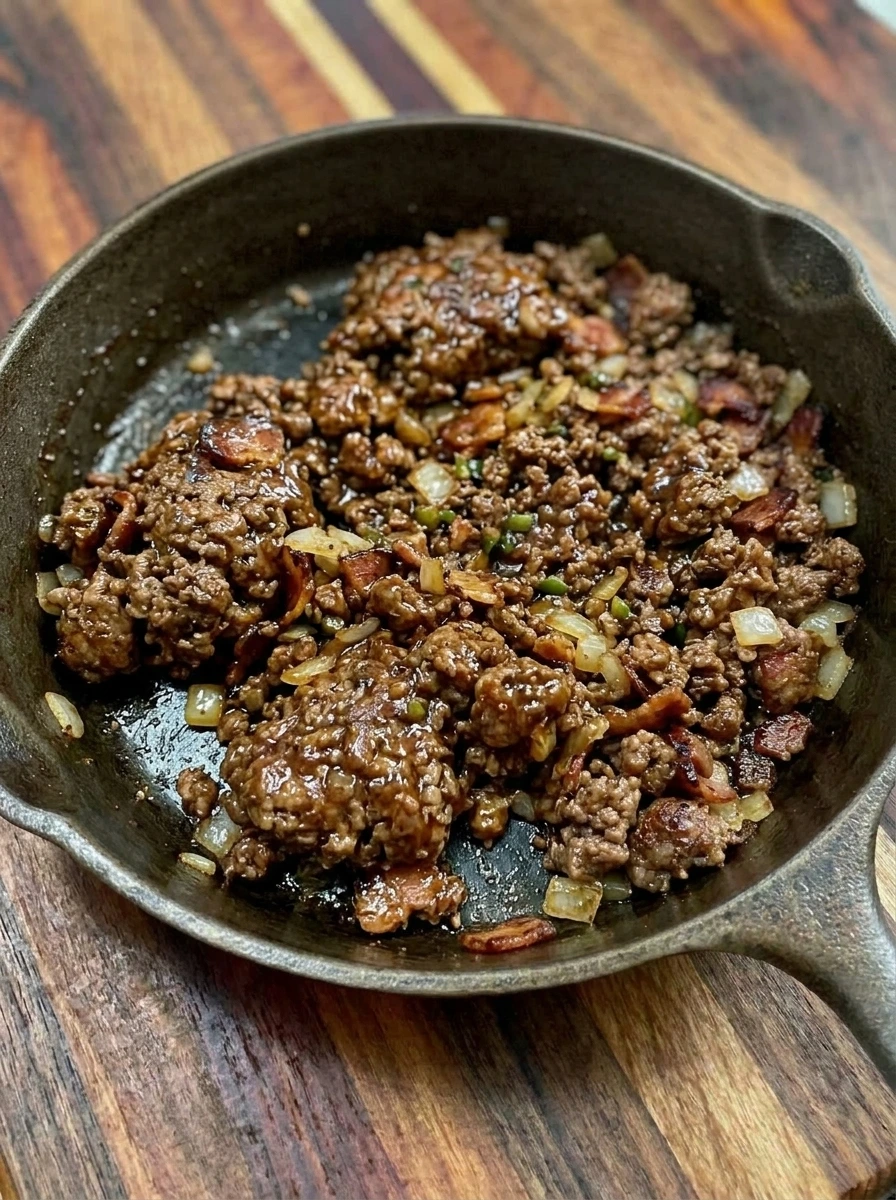
Stir the barbecue sauce plus Worcestershire sauce plus garlic powder plus smoked paprika plus salt and pepper through the browned beef mixture until every crumble looks lightly glazed. The filling becomes darker and glossier while the sauce clings to the meat instead of pooling around it and the bacon remains visible between the crumbles.
Tip: Cook the sauce into the meat until it clings to the crumbles because a thick filling helps protect the roll bottoms from sogginess.
Step 3: Split the rolls and layer the filling with cheddar
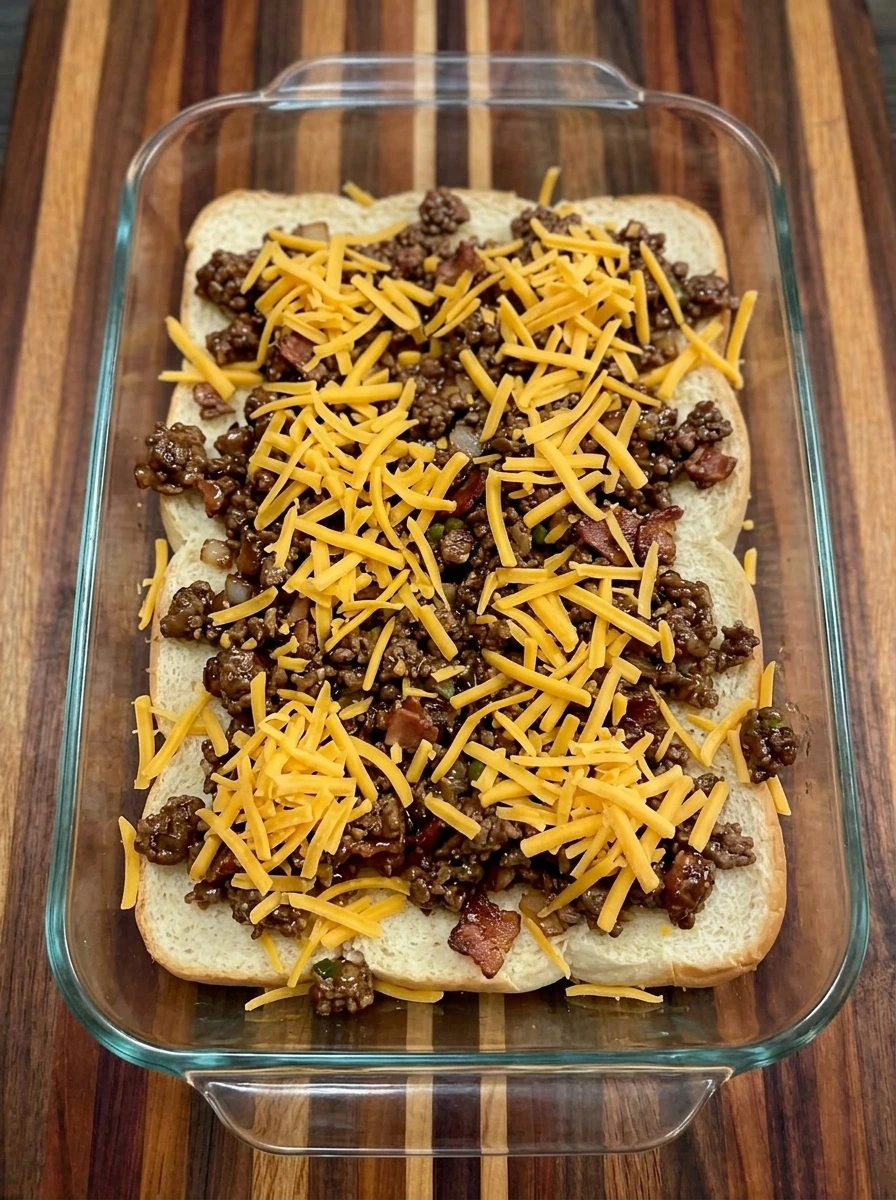
Keep all 12 slider rolls connected and split them horizontally then place the bottom slab into the baking dish and spread the full beef mixture loosely across the bread. Scatter all six ounces of shredded cheddar over the beef in an uneven layer so some meat stays visible while the top slab remains ready to cover the filling.
Tip: Keep the connected rolls intact while slicing and spread the beef loosely so the cheddar can melt into the filling without making the bread dense.
Step 4: Cap the sliders and brush with melted butter
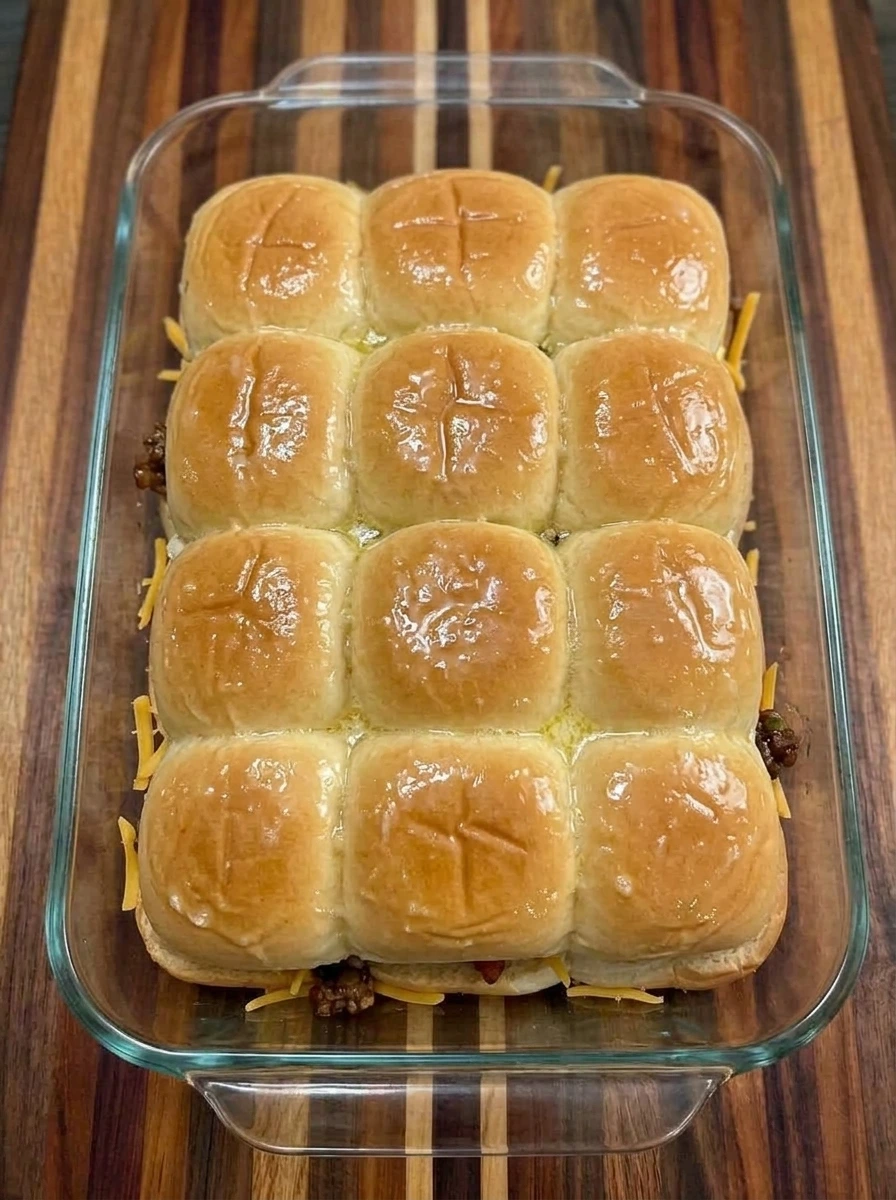
Set the connected top slab back over the cheese so all 12 sliders are covered while the edges sit slightly unevenly over the filling. Brush all two tablespoons of melted butter over the roll tops so they turn glossy and a few buttery streaks collect naturally in the shallow seams.
Tip: Brush butter across the seams as well as the crowns so the connected tops brown evenly while still keeping a soft pull apart texture.
Step 5: Bake until the tops brown and the cheddar melts
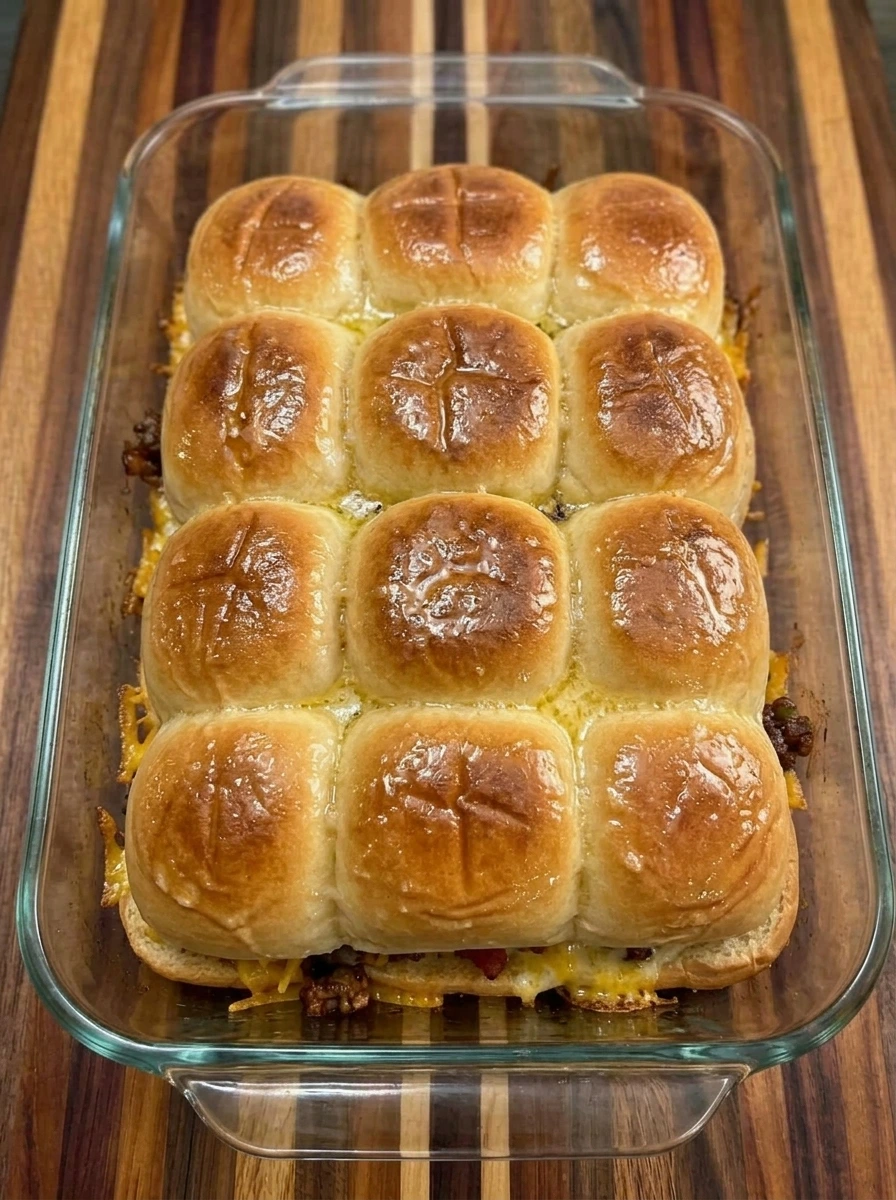
Bake the full tray until all 12 roll tops deepen to a patchy golden brown and the cheddar melts unevenly around the edges of the beef filling. The sliders become one cohesive baked tray with soft centers plus slightly crisp crowns and small streaks of cheese escaping between a few irregular seams.
Tip: Bake only until the cheese is fully melted and the tops are golden because overbaking can dry the rolls before the filling is served.
Step 6: Serve one portion with the cheesy center exposed
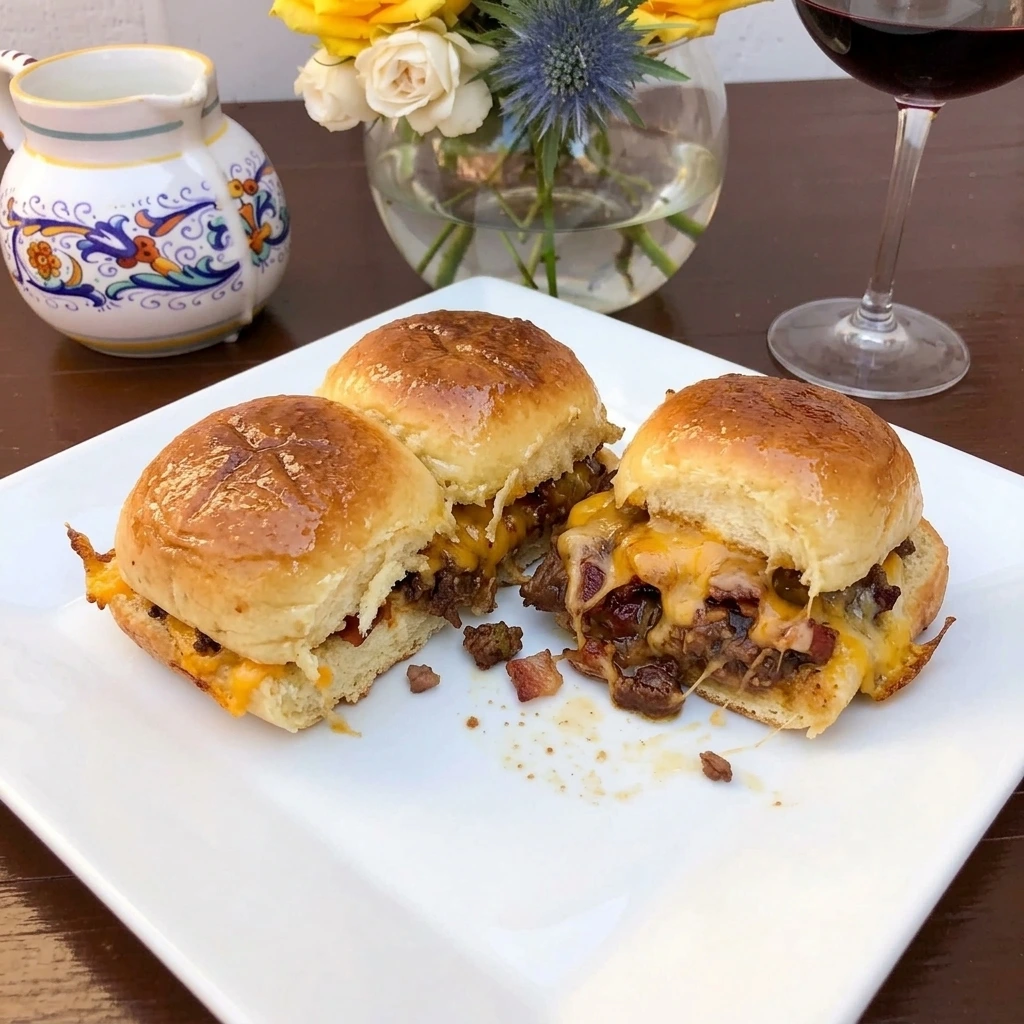
Separate one serving of three sliders from the baked tray and place the portion on a white plate with two sliders intact and one opened through the center. The opened slider should reveal juicy beef plus bacon plus melted cheddar while the three browned tops remain slightly uneven with natural crumbs and soft torn edges.
Tip: Let the baked tray rest briefly before pulling apart a serving so the cheese stays melty while the filling remains neatly inside the rolls.
Pro Tips
- Keep the beef mixture thick rather than saucy so the roll bottoms stay tender without turning wet during baking.
- Cut the connected rolls as one slab so the bottoms and tops stay aligned and every slider holds an even layer of filling.
- Spread the beef loosely instead of pressing it flat because small gaps let melted cheddar settle naturally through the filling.
- Cover the sliders for the first part of baking if the tops brown quickly then uncover them so the rolls finish lightly crisp.
Storage Instructions
Cool leftover Cowboy Sliders before storage so trapped steam does not soften the browned tops more than necessary. Place the sliders in a covered container and refrigerate them for up to three days while keeping the portions close together so the bread does not dry out. Reheat the sliders until the beef is hot and the cheddar softens again while avoiding excessive heat that can make the rolls tough. For longer storage wrap individual portions well and freeze them for up to two months then thaw them in the refrigerator before reheating.
Frequently Asked Questions
Yes you can cook the filling ahead then chill it and assemble the sliders just before baking for the best texture.
Sharp cheddar melts well and brings bold flavor although Monterey Jack or pepper Jack also work very nicely.
Use a thick filling and avoid excess sauce then bake until the tops are browned and the cheese is fully melted.
Yes the pull apart format makes them easy to share and they stay satisfying on a warm party tray for a crowd.
See You in the Kitchen
These Cowboy Sliders are a great way to satisfy your loaded burger cravings without heading out for takeout.
I typically serve them with Crispy Pickle Poppers and I also make Honey Feta Sweet Potato Rounds when I want all of my dinner components ready at the same time.
Even my kids love this one.
Print
Cowboy Sliders
- Total Time: 45 minutes
- Yield: 4 servings
Description
Cowboy Sliders are an easy choice when you need quick dinner ideas with bold flavor and a simple method because soft rolls hold seasoned beef plus smoky bacon plus cheddar plus barbecue sauce for the best handheld bite and they fit a weeknight dinner and meal prep while also working for a holiday potluck or party and you can serve them with a crisp salad or fresh vegetables for a healthy balance while enjoying every warm cheesy portion straight from the oven.
Ingredients
- 12 rolls Slider rolls
- 1 pound Lean ground beef
- 4 slices Bacon
- 1/2 cup diced Yellow onion
- 1 small finely diced Jalapeno
- 1/3 cup Barbecue sauce
- 1 tablespoon Worcestershire sauce
- 1 teaspoon Garlic powder
- 1 teaspoon Smoked paprika
- 1/2 teaspoon Kosher salt
- 1/4 teaspoon Black pepper
- 6 ounces shredded Sharp cheddar cheese
- 2 tablespoons Unsalted butter
Instructions
- Cook the one pound of ground beef with all four chopped bacon slices plus the diced onion and jalapeno until the beef loses its pink color and the bacon curls at the edges.
The mixture should shift into irregular browned crumbles with softened onion and green pepper pieces scattered through the meat while excess moisture cooks away.
- Stir the barbecue sauce plus Worcestershire sauce plus garlic powder plus smoked paprika plus salt and pepper through the browned beef mixture until every crumble looks lightly glazed.
The filling becomes darker and glossier while the sauce clings to the meat instead of pooling around it and the bacon remains visible between the crumbles.
- Keep all 12 slider rolls connected and split them horizontally then place the bottom slab into the baking dish and spread the full beef mixture loosely across the bread.
Scatter all six ounces of shredded cheddar over the beef in an uneven layer so some meat stays visible while the top slab remains ready to cover the filling.
- Set the connected top slab back over the cheese so all 12 sliders are covered while the edges sit slightly unevenly over the filling.
Brush all two tablespoons of melted butter over the roll tops so they turn glossy and a few buttery streaks collect naturally in the shallow seams.
- Bake the full tray until all 12 roll tops deepen to a patchy golden brown and the cheddar melts unevenly around the edges of the beef filling.
The sliders become one cohesive baked tray with soft centers plus slightly crisp crowns and small streaks of cheese escaping between a few irregular seams.
- Separate one serving of three sliders from the baked tray and place the portion on a white plate with two sliders intact and one opened through the center.
The opened slider should reveal juicy beef plus bacon plus melted cheddar while the three browned tops remain slightly uneven with natural crumbs and soft torn edges.
Notes
Pro Tips:
- Keep the beef mixture thick rather than saucy so the roll bottoms stay tender without turning wet during baking.
- Cut the connected rolls as one slab so the bottoms and tops stay aligned and every slider holds an even layer of filling.
- Spread the beef loosely instead of pressing it flat because small gaps let melted cheddar settle naturally through the filling.
- Cover the sliders for the first part of baking if the tops brown quickly then uncover them so the rolls finish lightly crisp.
Storage: Cool leftover Cowboy Sliders before storage so trapped steam does not soften the browned tops more than necessary.
Place the sliders in a covered container and refrigerate them for up to three days while keeping the portions close together so the bread does not dry out.
Reheat the sliders until the beef is hot and the cheddar softens again while avoiding excessive heat that can make the rolls tough.
For longer storage wrap individual portions well and freeze them for up to two months then thaw them in the refrigerator before reheating.
- Prep Time: 15 minutes
- Cook Time: 30 minutes
- Category: Dinner
- Cuisine: American