A neighborhood Halloween party serves some of the best Monster Mash Brownies I have ever tasted and they have soft fudgy centers and rich chocolate flavor and colorful monster decorations and today I will show how I make my Monster Mash Brownies at home easily with simple ingredients. Just to know that my Monster Mash Brownies turned out so delicious and so chewy almost like the party version and I really love this dessert and I also tried the same decorating method with Mini Oreo Cheesecake Cups and the result was even better so I will leave some tasty variations below that you can try using similar decorations and the same playful colors.
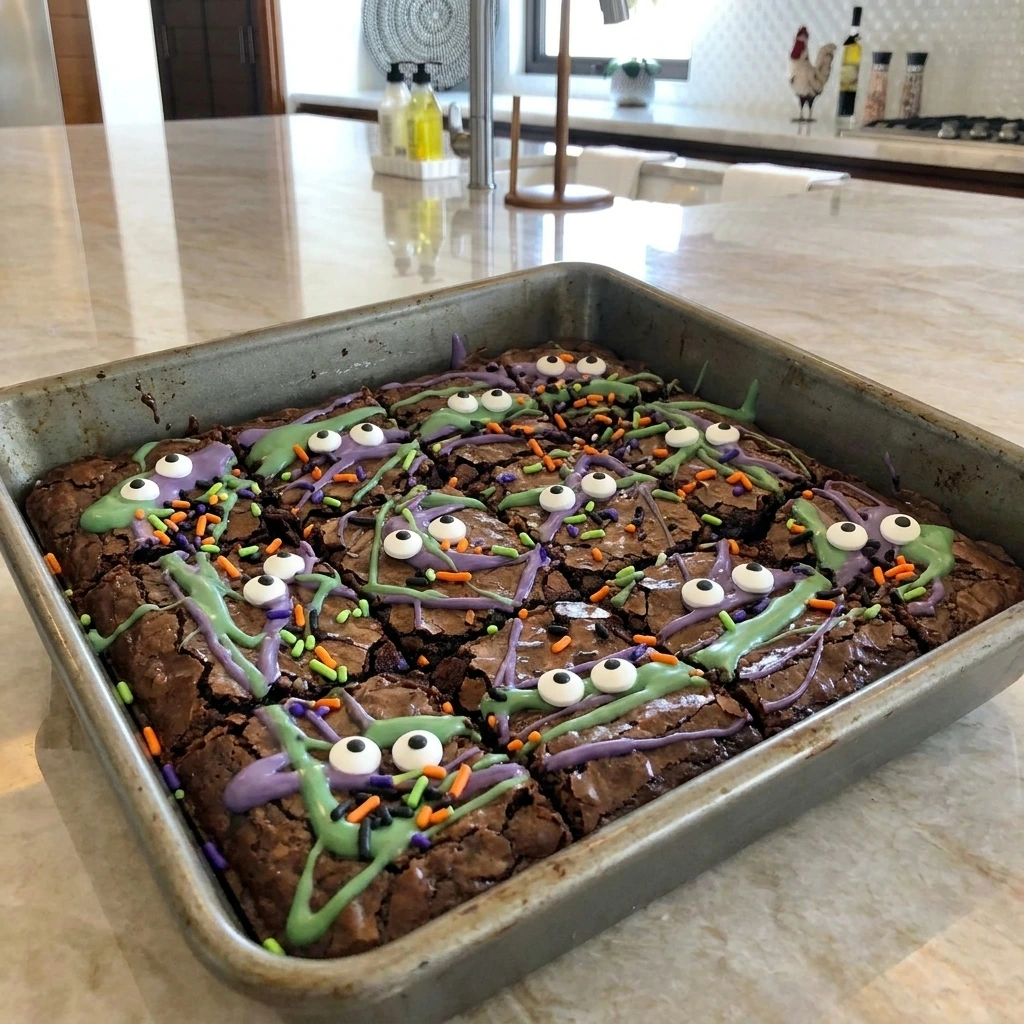
Usually Monster Mash Brownies are served at Halloween parties and they are so much fun and I recommend everyone enjoy them and when you cannot find them at a bakery you can try my recipe. Also for my recipe I use a square baking pan for baking and I recommend letting the brownies cool before decorating instead of adding candy coating while they are warm because the colorful swirls will stay thicker and the candy eyes will hold their shape.
Ingredients

Here is what I use for this recipe and you can adjust nuts or spices based on preference:
- Unsalted butter: Melted butter adds richness and keeps the brownie centers soft and fudgy.
- Granulated sugar: Sugar sweetens the batter and helps create a thin crackly top.
- Light brown sugar: Brown sugar adds moisture and a gentle caramel flavor to the brownies.
- Large eggs: Eggs bind the batter and help the brownies set with a chewy structure.
- Vanilla extract: Vanilla rounds out the chocolate flavor and softens the bitterness of cocoa.
- All purpose flour: Flour gives the brownies enough structure while keeping the crumb tender.
- Unsweetened cocoa powder: Cocoa powder creates the deep chocolate color and rich brownie flavor.
- Salt: Salt balances the sweetness and sharpens the chocolate flavor.
- Semisweet chocolate chips: Chocolate chips melt unevenly through the batter and create soft pockets of chocolate.
- Green candy melts: Green candy melts form the first bright monster colored decoration.
- Purple candy melts: Purple candy melts add contrasting swirls and a playful Halloween finish.
- Candy eyes: Candy eyes turn the twelve brownie squares into irregular monster faces.
- Halloween sprinkles: Sprinkles add scattered color and crunchy texture across the decorated tops.
Tools You’ll Need
- Large mixing bowl: Holds the wet ingredients and thick brownie batter with enough room for folding.
- Whisk: Combines the butter and sugars and incorporates the eggs into a smooth base.
- Rubber spatula: Folds the dry ingredients and chocolate chips without overworking the batter.
- 8 inch square baking pan: Shapes the batter into a thick brownie slab that can be cut into twelve pieces.
- Parchment paper: Lines the pan so the cooled brownie slab can be lifted out cleanly.
- Two microwave safe bowls: Melt the green and purple candy coatings separately for contrasting decorations.
- Sharp knife: Cuts the cooled decorated slab into twelve naturally uneven brownie squares.
Instructions
Step 1: Whisk the sugars into the melted butter
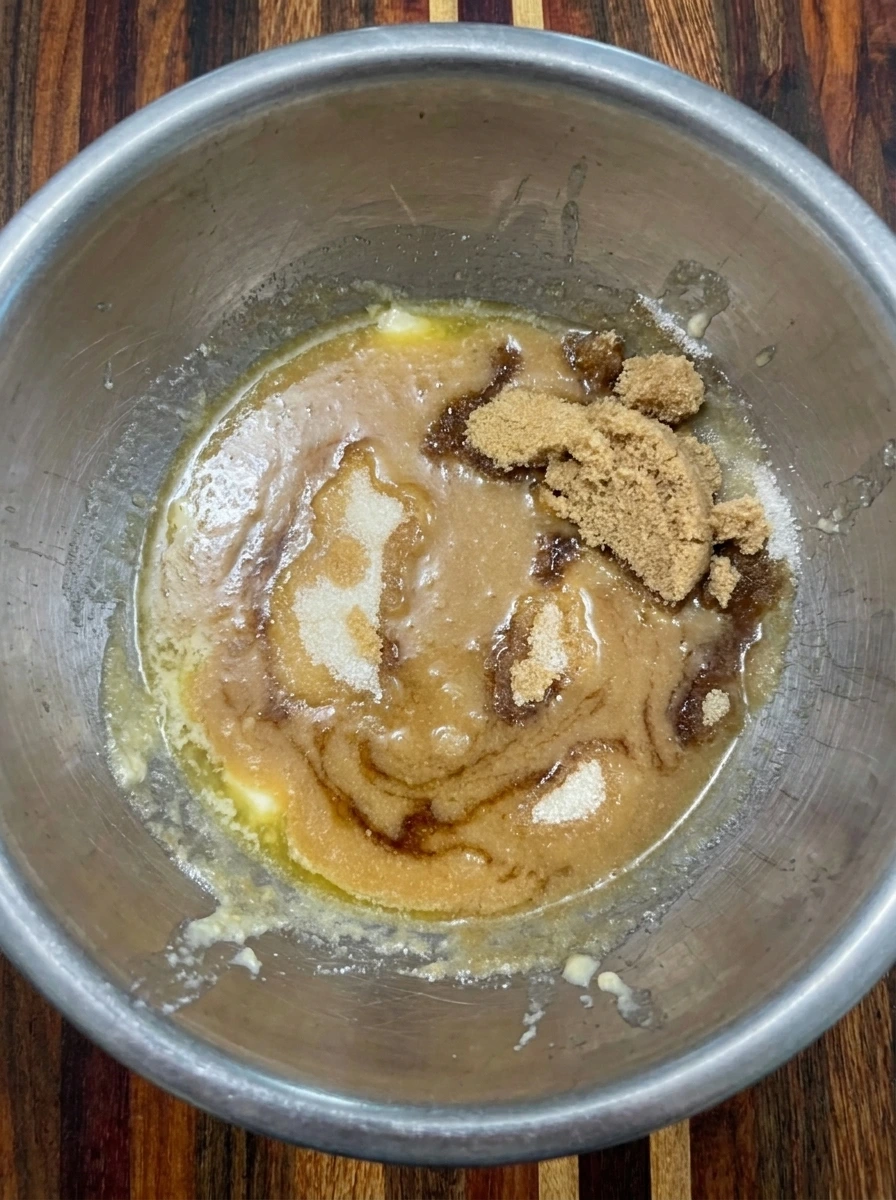
Pour the melted butter over the granulated sugar and packed brown sugar and stir until the three ingredients become a glossy tan mixture with a few visible sugar grains. The mixture should look thicker than melted butter and slightly uneven around the edges because the sugars have started absorbing the fat.
Tip: Stir until no dry sugar pockets remain because a well combined base helps the brownies bake with a shiny crackled surface.
Step 2: Beat in the eggs and vanilla

Add the 2 eggs and vanilla extract to the glossy sugar mixture and beat until the batter becomes smoother and lighter brown with loose ribbons falling back into the mixture. The egg streaks should disappear while small bubbles and irregular swirls remain across the surface.
Tip: Mix only until the eggs disappear because excessive beating can add too much air and make the brownies more cake like.
Step 3: Fold the cocoa mixture and chocolate chips into the batter

Fold the flour and cocoa powder and salt into the wet mixture until the pale streaks disappear and the batter turns thick and dark chocolate brown. Scatter the chocolate chips through the batter and fold them unevenly so some remain near the surface and others settle deeper inside.
Tip: Stop folding as soon as the flour disappears because overmixing can make the baked brownies firm instead of soft and chewy.
Step 4: Spread and bake the brownie batter

Transfer the thick batter into the square baking pan and spread it toward the corners with an uneven surface and visible chocolate chips in different positions. Bake until the batter rises slightly and changes into a set dark brownie with a thin crackly top and softly sunken patches near the center.
Tip: Remove the brownies when a tester has moist crumbs because a completely clean tester can mean the center has baked too long.
Step 5: Swirl the candy coating and add monster faces

Drizzle the melted green candy coating and melted purple candy coating across the cooled brownie slab and leave dark chocolate areas visible between the irregular swirls. Press all 24 candy eyes into different positions and scatter the Halloween sprinkles loosely before cutting the slab into 12 uneven squares and placing one square on a white plate.
Tip: Add the eyes while the candy coating is still soft so they stay attached without sinking deeply into the brownie surface.
Pro Tips
- Cool the brownie slab completely before decorating so the candy coating stays thick and the monster eyes remain clearly visible.
- Use gentle folding after adding flour because too much mixing develops gluten and can turn the fudgy centers firm and dry.
- Cut the brownies with a clean warm knife and wipe it between slices to reveal soft interiors without dragging the candy coating.
- Scatter the eyes and sprinkles unevenly because irregular monster faces look more playful and naturally homemade than matching designs.
Storage Instructions
Keep the cooled Monster Mash Brownies in a tightly covered container at room temperature for up to three days. Place parchment between layers so the candy coating and eyes do not stick together. For longer storage place the brownies in the refrigerator for up to five days. Let each serving rest at room temperature before eating so the fudgy center can soften again.
Freeze the brownies before decorating whenever possible because candy eyes and sprinkles can become damp after thawing. Wrap individual squares and place them in a freezer safe container for up to two months. Thaw the wrapped brownies at room temperature and then add fresh candy coating and decorations. Avoid reheating decorated brownies because the candy coating and eyes may melt unevenly.
Frequently Asked Questions
Yes and the cooled brownies can be decorated and stored overnight in a covered container at room temperature.
Store them tightly covered with a small piece of bread nearby so the brownie centers retain moisture.
Yes and orange or blue candy melts can replace either color while keeping the same melting method.
Freeze undecorated squares for up to two months and thaw them fully before adding the monster decorations.
See You in the Kitchen
I hope you try these Monster Mash Brownies soon because they are a simple recipe that looks playful and tastes incredible and makes every Halloween party a little more special.
Do not forget to share your results or save this recipe for later and when you want more festive sweets try Chocolate Dipped Strawberry Crackers or Mini Oreo Cheesecake Cups because these are recipes worth keeping.
Print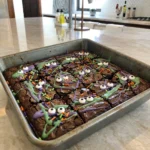
Monster Mash Brownies
- Total Time: 45 minutes
- Yield: 12 servings
Description
Monster Mash Brownies are an easy Halloween dessert packed with fudgy chocolate flavor and playful candy eyes. They are quick to mix and simple to decorate which makes them one of the best ideas for a holiday party or potluck. A small serving can fit a healthy balanced menu when enjoyed with fruit and lighter snacks. These colorful brownies also work for weeknight baking and meal prep because the pieces store well and stay soft for several days too.
Ingredients
- 1/2 cup Unsalted butter
- 3/4 cup Granulated sugar
- 1/2 cup packed Light brown sugar
- 2 Large eggs
- 1 teaspoon Vanilla extract
- 3/4 cup All purpose flour
- 1/2 cup Unsweetened cocoa powder
- 1/4 teaspoon Salt
- 1/2 cup Semisweet chocolate chips
- 1/2 cup Green candy melts
- 1/2 cup Purple candy melts
- 24 Candy eyes
- 2 tablespoons Halloween sprinkles
Instructions
- Pour the melted butter over the granulated sugar and packed brown sugar and stir until the three ingredients become a glossy tan mixture with a few visible sugar grains. The mixture should look thicker than melted butter and slightly uneven around the edges because the sugars have started absorbing the fat.
- Add the 2 eggs and vanilla extract to the glossy sugar mixture and beat until the batter becomes smoother and lighter brown with loose ribbons falling back into the mixture. The egg streaks should disappear while small bubbles and irregular swirls remain across the surface.
- Fold the flour and cocoa powder and salt into the wet mixture until the pale streaks disappear and the batter turns thick and dark chocolate brown. Scatter the chocolate chips through the batter and fold them unevenly so some remain near the surface and others settle deeper inside.
- Transfer the thick batter into the square baking pan and spread it toward the corners with an uneven surface and visible chocolate chips in different positions. Bake until the batter rises slightly and changes into a set dark brownie with a thin crackly top and softly sunken patches near the center.
- Drizzle the melted green candy coating and melted purple candy coating across the cooled brownie slab and leave dark chocolate areas visible between the irregular swirls. Press all 24 candy eyes into different positions and scatter the Halloween sprinkles loosely before cutting the slab into 12 uneven squares and placing one square on a white plate.
Notes
Pro Tips:
- Cool the brownie slab completely before decorating so the candy coating stays thick and the monster eyes remain clearly visible.
- Use gentle folding after adding flour because too much mixing develops gluten and can turn the fudgy centers firm and dry.
- Cut the brownies with a clean warm knife and wipe it between slices to reveal soft interiors without dragging the candy coating.
- Scatter the eyes and sprinkles unevenly because irregular monster faces look more playful and naturally homemade than matching designs.
Storage: Keep the cooled Monster Mash Brownies in a tightly covered container at room temperature for up to three days. Place parchment between layers so the candy coating and eyes do not stick together. For longer storage place the brownies in the refrigerator for up to five days. Let each serving rest at room temperature before eating so the fudgy center can soften again. Freeze the brownies before decorating whenever possible because candy eyes and sprinkles can become damp after thawing. Wrap individual squares and place them in a freezer safe container for up to two months. Thaw the wrapped brownies at room temperature and then add fresh candy coating and decorations. Avoid reheating decorated brownies because the candy coating and eyes may melt unevenly.
- Prep Time: 15 minutes
- Cook Time: 30 minutes
- Category: Dessert
- Cuisine: American