I honestly havent really shared many taco based recipes in my blog but these Mini Taco Biscuit Cups were one I had to share. This recipe is inspired by classic taco night flavors and is easy to prepare and make. It is a super tasty dish packed full of seasoned beef plus beans plus cheese and is quite filling.

When people think about biscuit cups they probably expect a plain breakfast bite. But trust me on this because when they are filled with taco meat and salsa they offer a rich and savory taste that is very satisfying. You can also try my Sweet Potato Black Bean Tacos when you want another cozy taco based meal.
This recipe is super tasty and quick to make so I recommend this meal for those who want a fun twist on taco night.
Ingredients
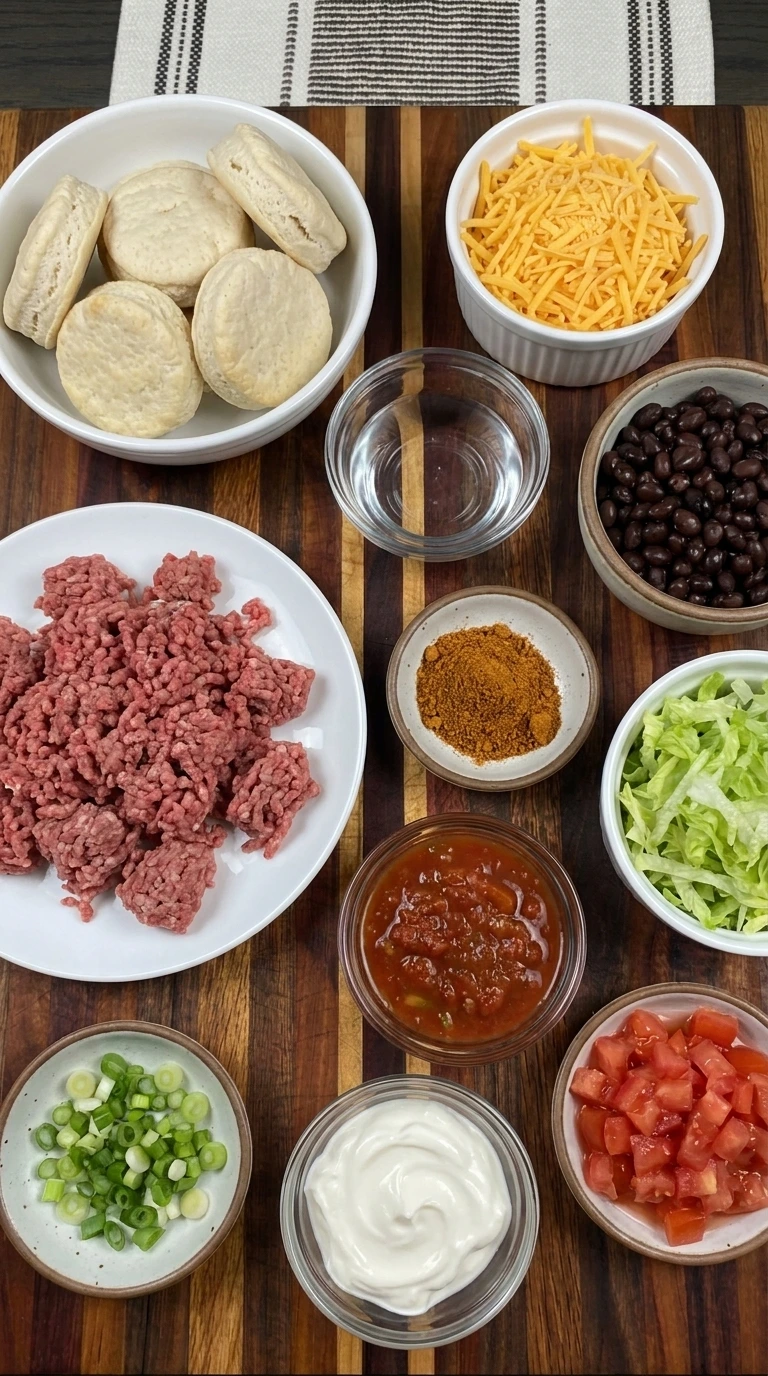
Here is what I use for this recipe and you can adjust nuts or spices based on preference:
- Refrigerated biscuit dough: Forms the flaky golden shells that hold the taco filling while keeping each portion sturdy.
- Lean ground beef: Creates the savory protein rich base and gives each biscuit cup a hearty taco flavor.
- Taco seasoning: Adds chili plus cumin plus garlic flavors that season the beef evenly during cooking.
- Water: Helps dissolve the taco seasoning and creates a lightly saucy coating around the beef.
- Black beans: Adds soft texture plus fiber and stretches the filling without making it overly heavy.
- Chunky salsa: Provides tomato flavor plus moisture and mild acidity while binding the filling together.
- Shredded cheddar cheese: Melts through the filling and forms uneven golden patches across the finished tops.
- Shredded lettuce: Adds a cool crisp contrast after baking and keeps the final serving fresh.
- Diced tomato: Adds juicy color plus freshness and a lightly sweet finish to each warm cup.
- Sliced green onions: Provides a mild onion bite and a casual fresh garnish for the plated cups.
- Sour cream: Adds a cool creamy finish that balances the warm spices and rich melted cheese.
Tools You’ll Need
- Cast iron skillet: Browns the ground beef and provides enough space for the beans plus salsa to thicken into the filling.
- Wooden spoon: Breaks the beef into irregular crumbles and folds the seasoning plus beans plus salsa through the mixture.
- Standard twelve cup muffin tin: Holds the eight shaped biscuit shells upright while their edges puff and brown during baking.
- Measuring cups and spoons: Measures the seasoning plus water plus beans plus salsa plus cheese and toppings accurately.
- Small knife: Dices the tomato plus slices the green onions and opens a serving portion to reveal the filling.
- Cooling rack: Supports the hot muffin tin while the baked cups rest and become firm enough to remove.
Instructions
Step 1: Brown and crumble the ground beef

Add the one pound of ground beef to a cast iron skillet and break it into irregular pieces as it cooks. Shift the larger pieces toward the hotter center while smaller crumbles remain near the edges. Cook until no pink areas remain and the meat develops scattered brown edges. Drain excess grease so the filling stays rich without making the biscuit shells soggy.
Tip: Keep some beef crumbles slightly larger than others because varied pieces create a more natural filling texture inside the biscuit cups.
Step 2: Thicken the taco beef filling

Pour the water over the browned beef and scatter the taco seasoning across different areas. Fold the meat until the spices coat the crumbles and the liquid begins to cling around them. Add the black beans plus salsa and stir until they are partially mixed through the beef. Continue cooking until the filling looks thick and glossy with visible tomato pieces and beans sitting unevenly between the crumbles.
Tip: Cook the filling until little loose liquid remains because a thick mixture protects the biscuit dough from becoming soft underneath.
Step 3: Press the biscuits into muffin cups
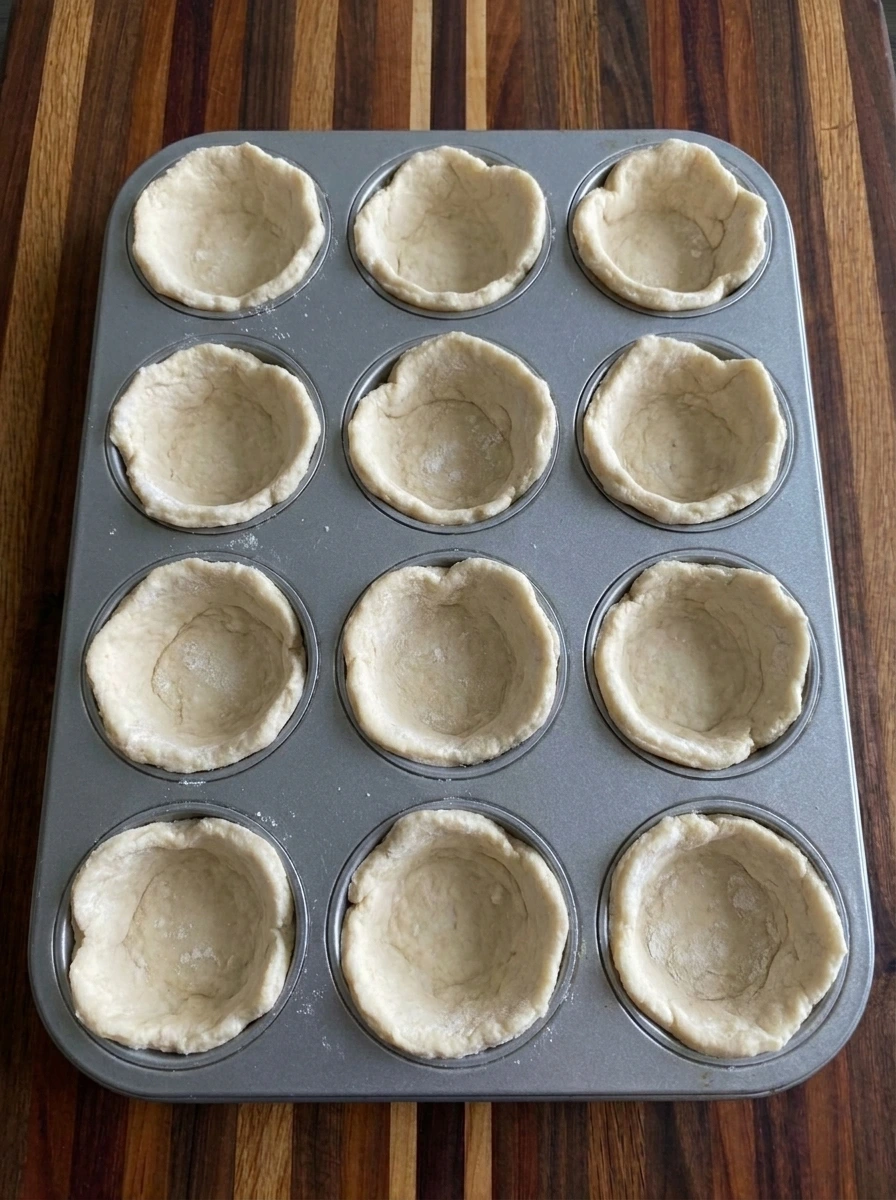
Flatten all eight biscuits into rough circles that are wide enough to cover the bottoms and sides of eight muffin wells. Keep the edges slightly irregular instead of forming perfect rounds. Transfer one flattened biscuit into each well and press the dough upward to form deep cups. Let some rims sit higher than others so every shell keeps a casual homemade shape.
Tip: Press the centers thinner than the upper edges so the cups have enough room for filling while the rims stay flaky and substantial.
Step 4: Fill the biscuit cups with taco mixture
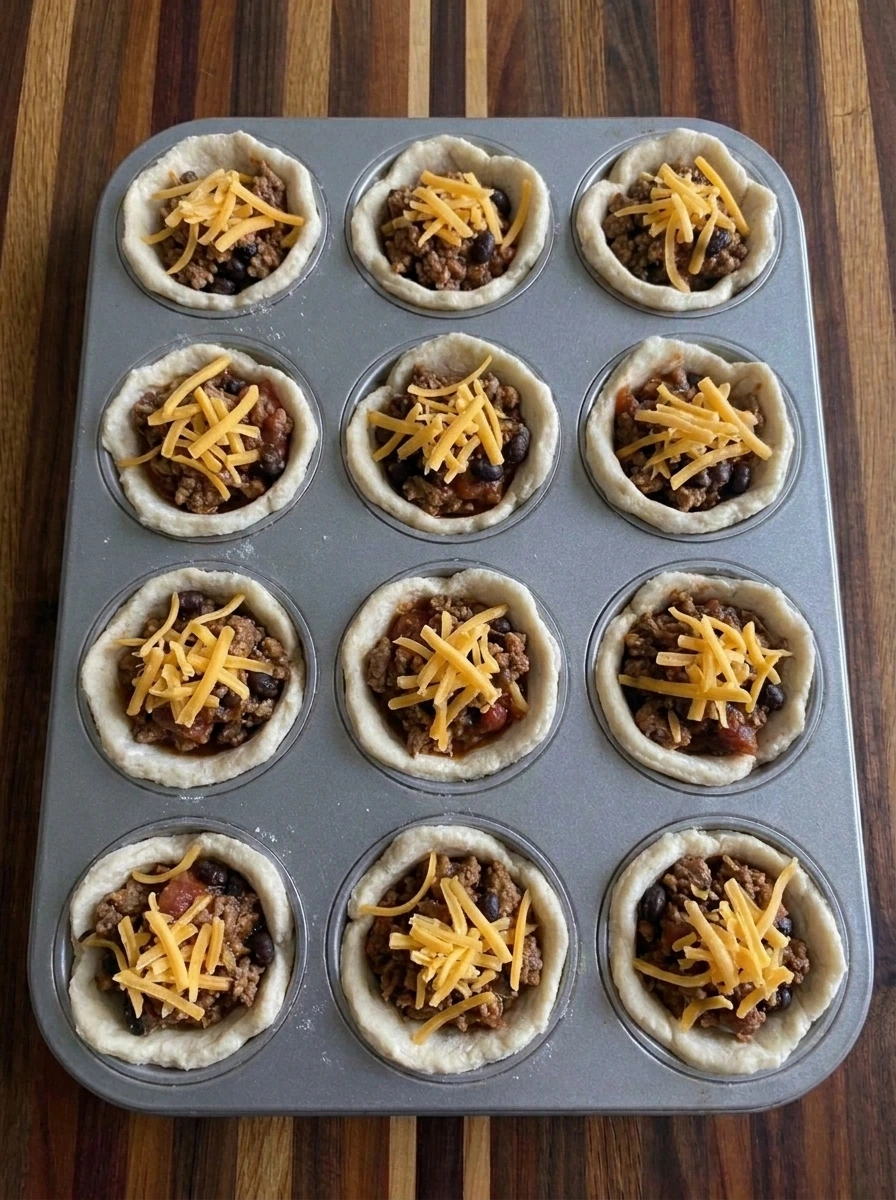
Divide the thick taco mixture among all eight biscuit shells and keep the filling slightly below the uneven dough rims. Let visible beans plus tomato pieces sit in different positions across the cups. Scatter three quarters cup of cheddar over the filling so some beef remains visible. Keep the cheese coverage irregular with loose strands falling toward a few biscuit edges.
Tip: Avoid packing the filling firmly because a loose scoop allows hot air to move through the center and helps the biscuit dough bake evenly.
Step 5: Bake until golden and melted

Bake the filled cups until the biscuit rims puff and turn golden with deeper brown patches along a few edges. The cheese should melt into uneven glossy pools while small sections of beef plus beans remain visible. Scatter the remaining one quarter cup cheddar across the hot cups and let it soften into fresh strands. Rest the cups briefly so their sides firm enough to hold the filling when removed.
Tip: Look for browned rims plus bubbling cheese instead of relying only on time because muffin tins and biscuit dough brands can bake differently.
Step 6: Top and serve one taco biscuit cup

Transfer one baked cup to a white plate and cut it partly open to reveal the layered biscuit shell plus beef plus beans plus salsa and melted cheese. Tilt one half slightly so the warm filling stays visible. Finish the portion with shredded lettuce plus diced tomato plus sliced green onion and a small spoonful of sour cream. Scatter the toppings casually so the browned rim and cheesy interior remain easy to see.
Tip: Add the lettuce plus tomato plus sour cream only after baking so the toppings stay cool and fresh against the warm savory filling.
Pro Tips
- Drain the browned beef well before adding salsa because excess grease can collect beneath the filling and soften the biscuit bottoms.
- Flatten each biscuit wider than the muffin well so the dough can climb the sides and create a deep shell for generous filling.
- Keep the taco mixture thick and slightly cooled before filling because very hot or watery meat can weaken the unbaked dough.
- Wait until serving to add lettuce plus tomato plus sour cream so every topping stays fresh and contrasts with the warm cups.
Storage Instructions
Let leftover Mini Taco Biscuit Cups cool completely before storing them because trapped steam can soften the flaky biscuit shells. Remove lettuce plus tomato plus green onion and sour cream whenever possible before refrigeration. Place the cooled cups in a single loose layer inside an airtight container. Refrigerate them for up to three days and keep fresh toppings in separate containers so they remain crisp.
Reheat the cups in a moderate oven until the biscuit edges become warm and lightly crisp again. A microwave works for speed although it produces a softer shell. For longer storage freeze the baked cups without fresh toppings on a tray until firm. Transfer them to a freezer container and keep them for up to two months before reheating from frozen or thawed.
Frequently Asked Questions
Cook the filling one day ahead and refrigerate it then shape plus fill plus bake the cups shortly before serving.
Freeze baked cups without fresh toppings for up to two months then reheat them until the centers are hot.
Drain the beef plus thicken the salsa mixture well and avoid adding cold toppings until the cups are served.
Cheddar melts well and gives bold flavor although Monterey Jack or a Mexican cheese blend also works nicely.
See You in the Kitchen
These Mini Taco Biscuit Cups are a great way to satisfy your taco night cravings without assembling a full tray of tacos.
I typically prepare the toppings at the same time I bake the cups so all of my dinner components will be ready at the same time and I also serve them with Sweet Potato Black Bean Tacos or Cinnamon Sweet Potato Wedges when we need more food.
Even my kids love this one!
Print
Mini Taco Biscuit Cups
- Total Time: 45 minutes
- Yield: 4 servings
Description
Mini Taco Biscuit Cups are an easy choice when you need quick dinner ideas with a simple method and the best taco flavor in every bite. Flaky biscuit dough holds seasoned beef plus black beans plus salsa and melted cheese for a fun handheld meal. They are a healthy minded option for weeknight dinner or meal prep and they also fit a holiday buffet plus brunch plus potluck plus party menus. Serve them warm with crisp lettuce and fresh tomato for color and crunch.
Ingredients
- 1 tube with 8 biscuits Refrigerated biscuit dough
- 1 pound Lean ground beef
- 2 tablespoons Taco seasoning
- 1 quarter cup Water
- 1 half cup drained and rinsed Black beans
- 1 half cup Chunky salsa
- 1 cup divided Shredded cheddar cheese
- 1 cup Shredded lettuce
- 1 medium tomato Diced tomato
- 2 green onions Sliced green onions
- 1 half cup Sour cream
Instructions
- Add the one pound of ground beef to a cast iron skillet and break it into irregular pieces as it cooks. Shift the larger pieces toward the hotter center while smaller crumbles remain near the edges. Cook until no pink areas remain and the meat develops scattered brown edges. Drain excess grease so the filling stays rich without making the biscuit shells soggy.
- Pour the water over the browned beef and scatter the taco seasoning across different areas. Fold the meat until the spices coat the crumbles and the liquid begins to cling around them. Add the black beans plus salsa and stir until they are partially mixed through the beef. Continue cooking until the filling looks thick and glossy with visible tomato pieces and beans sitting unevenly between the crumbles.
- Flatten all eight biscuits into rough circles that are wide enough to cover the bottoms and sides of eight muffin wells. Keep the edges slightly irregular instead of forming perfect rounds. Transfer one flattened biscuit into each well and press the dough upward to form deep cups. Let some rims sit higher than others so every shell keeps a casual homemade shape.
- Divide the thick taco mixture among all eight biscuit shells and keep the filling slightly below the uneven dough rims. Let visible beans plus tomato pieces sit in different positions across the cups. Scatter three quarters cup of cheddar over the filling so some beef remains visible. Keep the cheese coverage irregular with loose strands falling toward a few biscuit edges.
- Bake the filled cups until the biscuit rims puff and turn golden with deeper brown patches along a few edges. The cheese should melt into uneven glossy pools while small sections of beef plus beans remain visible. Scatter the remaining one quarter cup cheddar across the hot cups and let it soften into fresh strands. Rest the cups briefly so their sides firm enough to hold the filling when removed.
- Transfer one baked cup to a white plate and cut it partly open to reveal the layered biscuit shell plus beef plus beans plus salsa and melted cheese. Tilt one half slightly so the warm filling stays visible. Finish the portion with shredded lettuce plus diced tomato plus sliced green onion and a small spoonful of sour cream. Scatter the toppings casually so the browned rim and cheesy interior remain easy to see.
Notes
Pro Tips:
- Drain the browned beef well before adding salsa because excess grease can collect beneath the filling and soften the biscuit bottoms.
- Flatten each biscuit wider than the muffin well so the dough can climb the sides and create a deep shell for generous filling.
- Keep the taco mixture thick and slightly cooled before filling because very hot or watery meat can weaken the unbaked dough.
- Wait until serving to add lettuce plus tomato plus sour cream so every topping stays fresh and contrasts with the warm cups.
Storage: Let leftover Mini Taco Biscuit Cups cool completely before storing them because trapped steam can soften the flaky biscuit shells. Remove lettuce plus tomato plus green onion and sour cream whenever possible before refrigeration. Place the cooled cups in a single loose layer inside an airtight container. Refrigerate them for up to three days and keep fresh toppings in separate containers so they remain crisp. Reheat the cups in a moderate oven until the biscuit edges become warm and lightly crisp again. A microwave works for speed although it produces a softer shell. For longer storage freeze the baked cups without fresh toppings on a tray until firm. Transfer them to a freezer container and keep them for up to two months before reheating from frozen or thawed.
- Prep Time: 15 minutes
- Cook Time: 30 minutes
- Category: Dinner
- Cuisine: Tex-Mex American