


This Turkey and Stuffing Cups with Gravy recipe is one of my favorite meals when I’m craving classic holiday comfort food but want something a little easier to portion. Inspired by traditional turkey and stuffing dinners I’ve packed each cup with savory turkey and seasoned stuffing and finished everything with warm gravy.
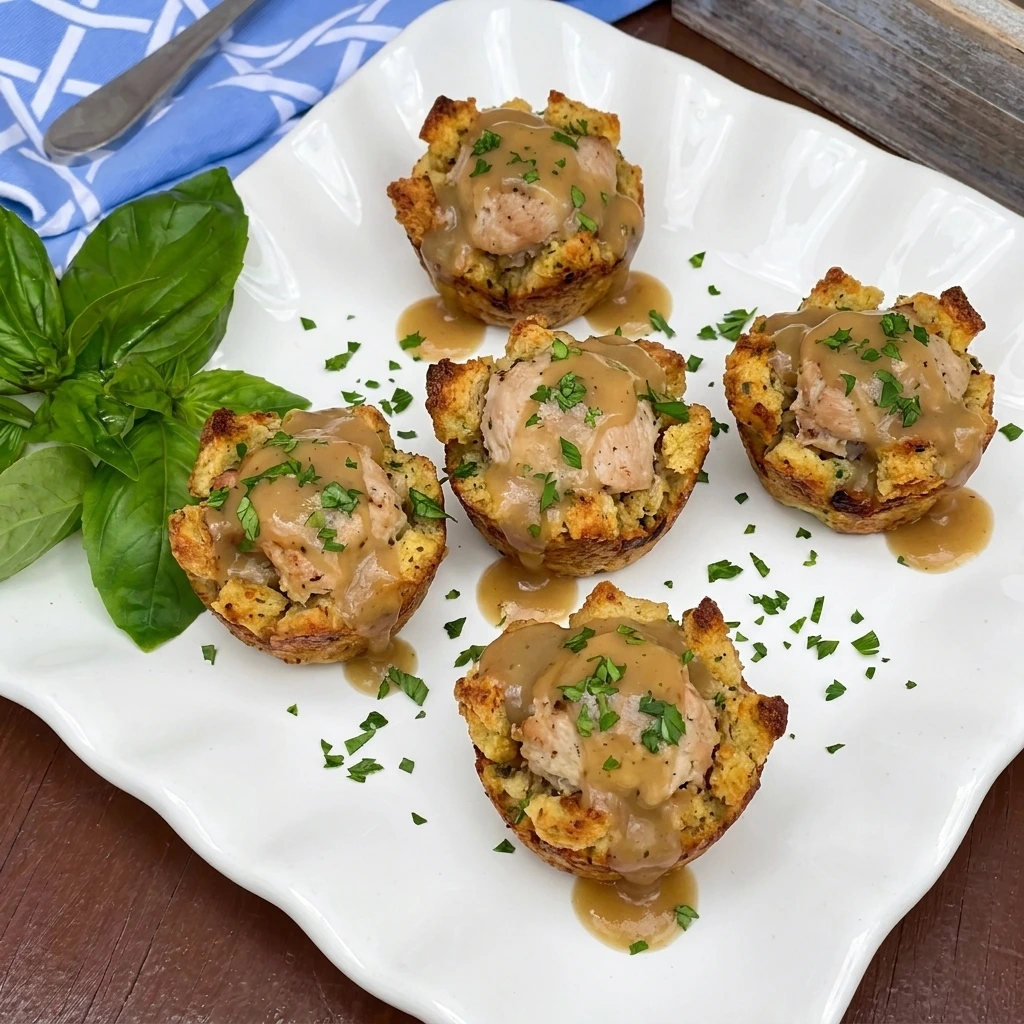
It’s also loaded with comforting flavor from the herbs and turkey and it’s so easy to serve based on whatever holiday sides you have ready or toppings you want to add! I also love pairing these cups with French Onion Chicken Soup and enjoying the leftovers throughout the week for lunches!
Ingredients
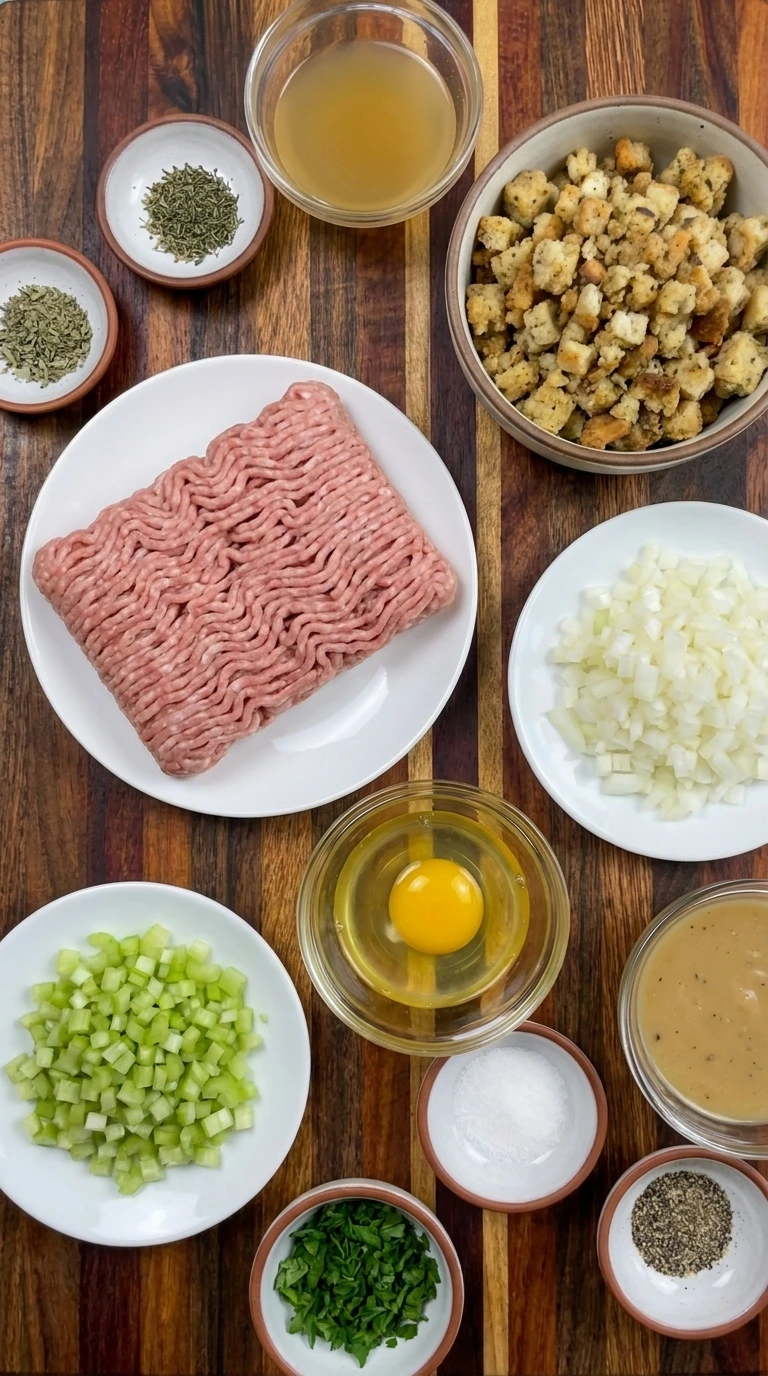
Here is what I use for this recipe :
- Ground turkey: Provides the savory protein center while staying tender as the cups bake.
- Prepared stuffing: Forms the seasoned base and outer structure that holds each individual turkey portion.
- Large egg: Binds the turkey mixture so the centers stay together after baking.
- Chicken broth: Adds moisture to the stuffing so the cups bake tender instead of dry.
- Finely diced celery: Adds gentle crunch and classic stuffing flavor throughout the turkey mixture.
- Finely diced onion: Adds savory sweetness and moisture as it softens during baking.
- Dried sage: Adds the familiar earthy herb flavor associated with turkey and stuffing.
- Dried thyme: Adds a mild herbal note that balances the richer turkey and gravy.
- Salt: Seasons the turkey mixture and brings the savory ingredients together.
- Black pepper: Adds gentle warmth and balances the richness of the finished cups.
- Prepared turkey gravy: Finishes the baked cups with warm savory moisture and classic holiday flavor.
- Chopped fresh parsley: Adds a fresh green finish to the plated portion just before serving.
Tools I Use :
- Large mixing bowl: Holds the ground turkey and vegetables while the filling is gently combined.
- Medium mixing bowl: Provides enough space to moisten the prepared stuffing evenly with broth.
- 12-cup muffin tin: Shapes and supports eight individual stuffing cups while they bake.
- Measuring cups and spoons: Measures the broth and vegetables and herbs so the texture and seasoning remain balanced.
- Small saucepan: Warms the prepared gravy gently before it is spooned over the finished cups.
- White serving plate: Holds the final single portion so the browned edges and gravy remain clearly visible.
Instructions
Step 1: Mix the turkey filling
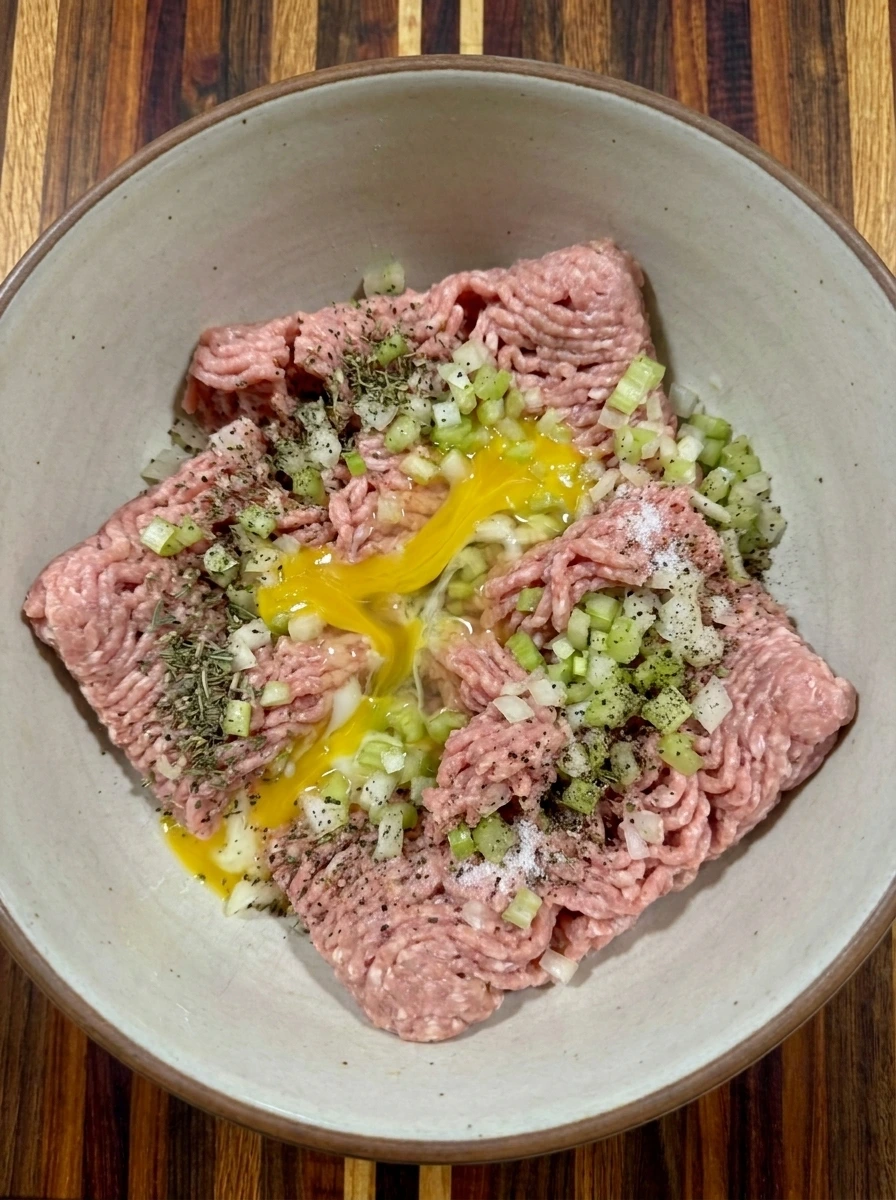
Combine the ground turkey with the egg and diced celery and diced onion and sage and thyme and salt and black pepper until the mixture changes from separate ingredients into a loosely blended filling. Keep the mixture slightly uneven rather than overworking it because small visible pieces of celery and onion should remain throughout the turkey.
Tip: Mix only until the ingredients are distributed because overworking ground turkey can make the baked centers firmer and less tender.
Step 2: Moisten and shape the stuffing cups
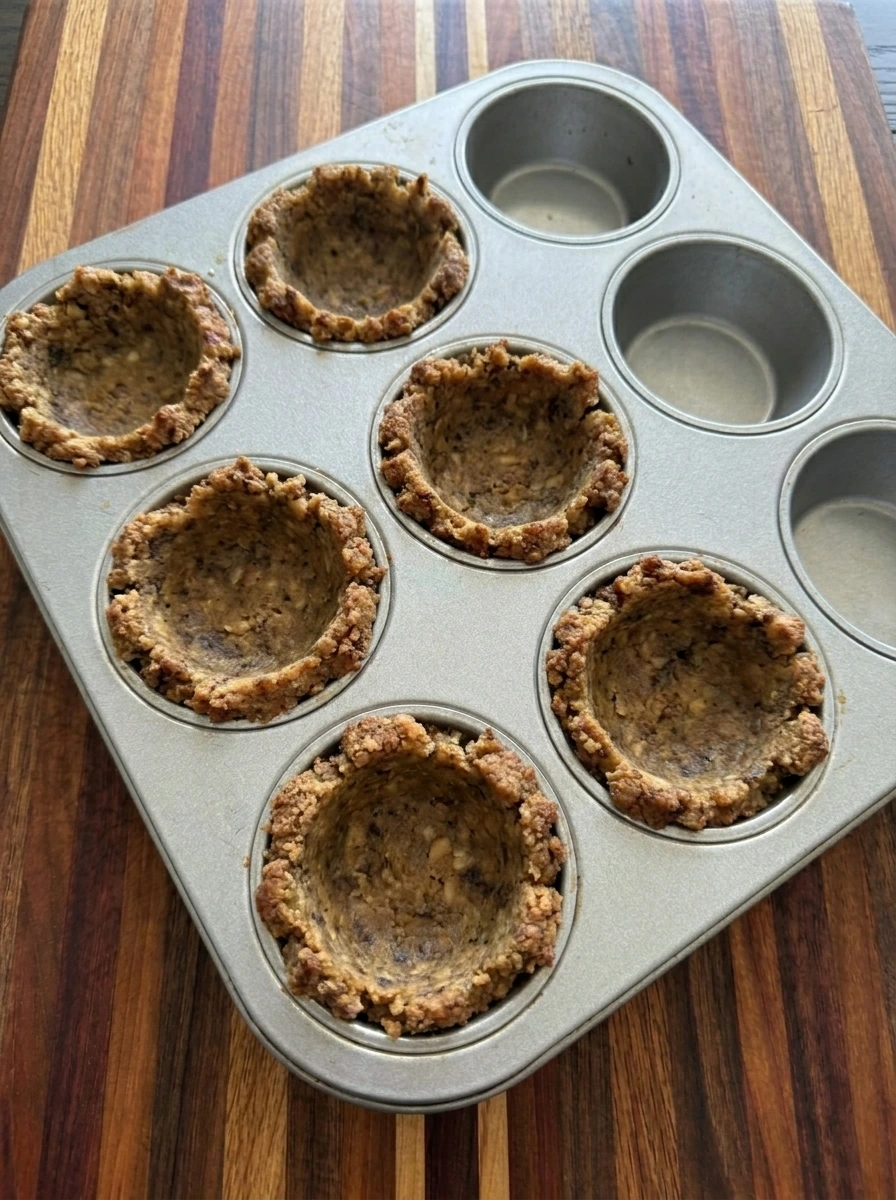
Fold the chicken broth into the prepared stuffing until the crumbs look slightly darker and more cohesive while still keeping an irregular texture. Divide the stuffing into eight portions and press each portion into a muffin cavity with a shallow center so the mixture changes into individual cup shapes with uneven rims.
Tip: Press the stuffing firmly enough to hold its shape while keeping the edges a little loose so they become crisp and golden during baking.
Step 3: Fill the stuffing cups with turkey
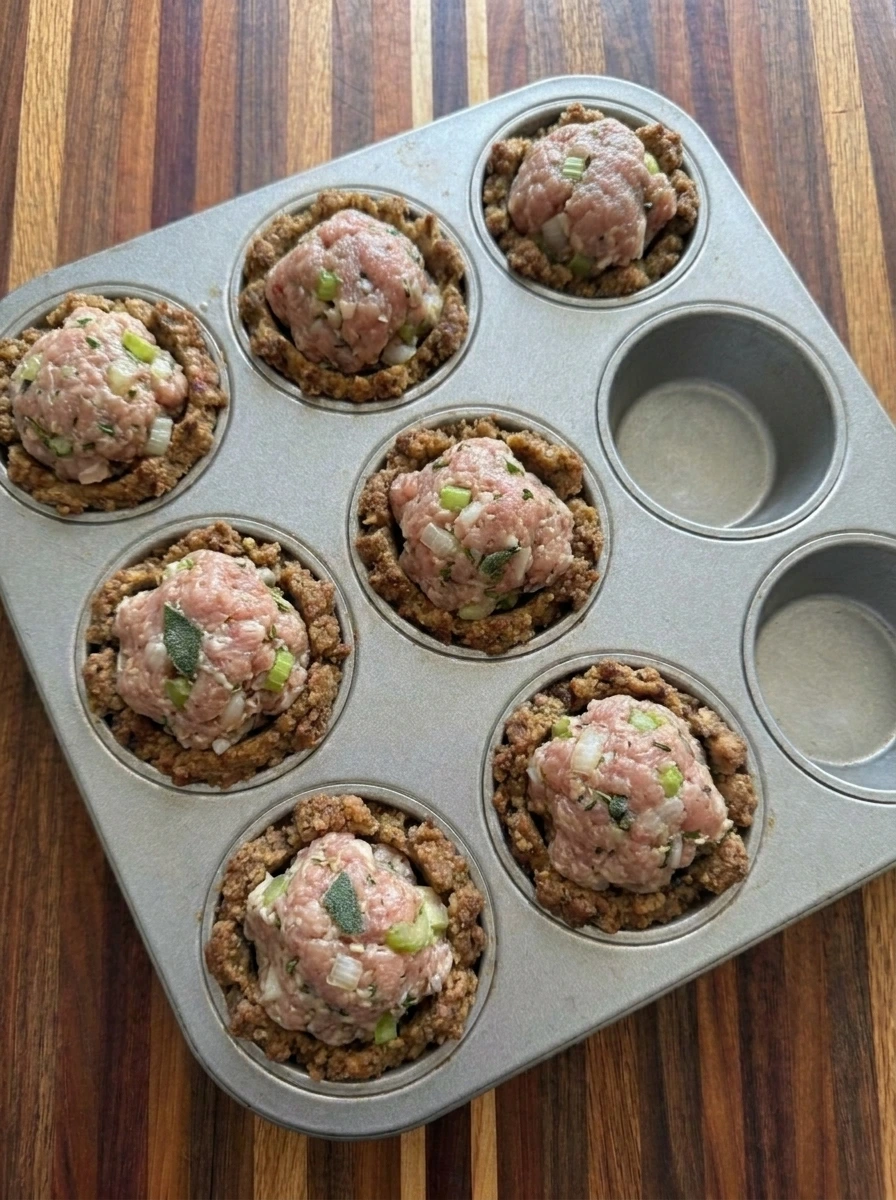
Divide the turkey mixture evenly among the eight stuffing cups and gently mound it into each center so the raw filling sits against the stuffing without completely covering the golden crumb edges. The cups should now look fuller and more structured with uneven turkey mounds and casually shaped stuffing borders.
Tip: Keep the turkey portions similar in size so they cook evenly while leaving the stuffing edges exposed for better browning.
Step 4: Bake until browned and cooked through
Bake the filled cups until the turkey centers change from pink to fully cooked and the stuffing edges become firmer and lightly golden with darker toasted spots. The tops should look slightly uneven and the exposed stuffing should appear crisp in places while the centers remain moist.
Tip: Check the thickest turkey center for doneness while avoiding extra baking because lean turkey can dry out when cooked too long.
Step 5: Finish one cup with warm gravy
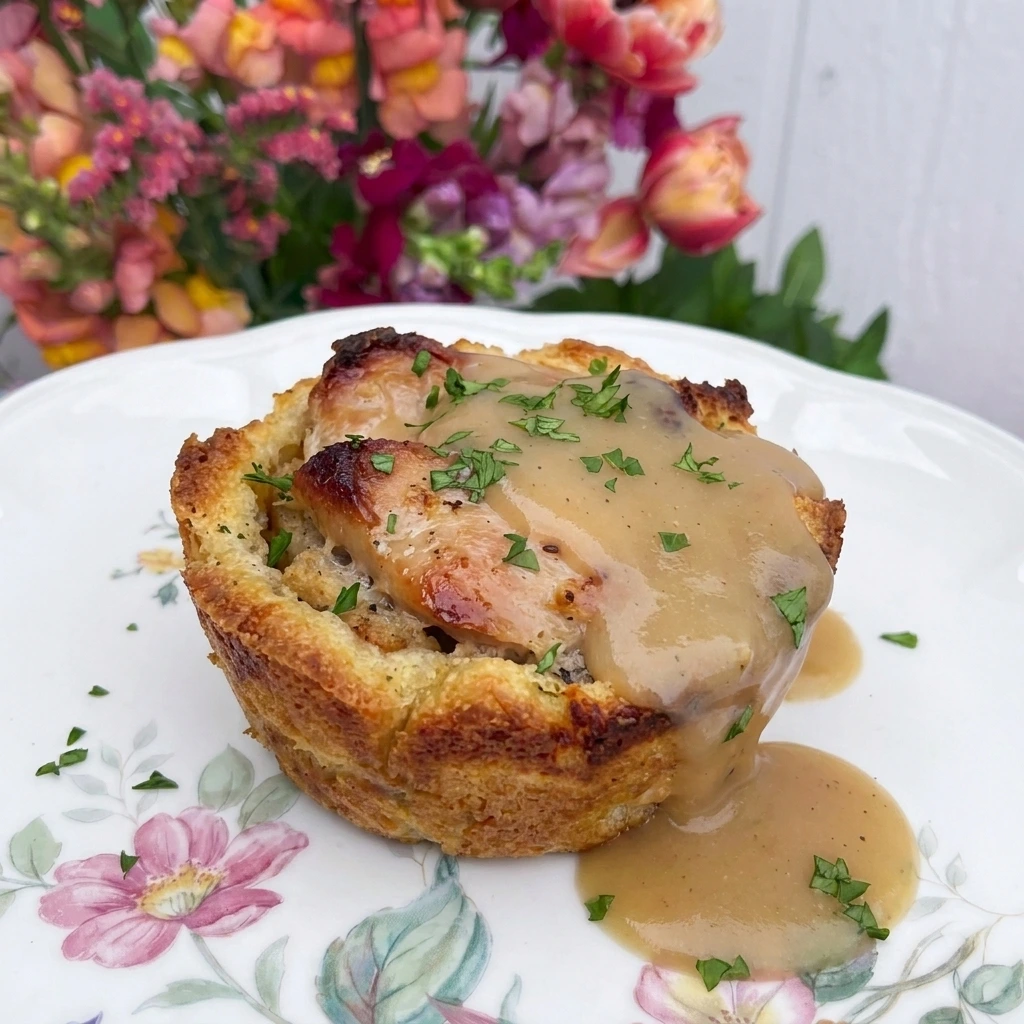
Transfer one baked turkey and stuffing cup onto a white plate and spoon warm gravy over part of the top so some browned stuffing remains visible and some gravy settles naturally along one side. Scatter a little parsley over the cup so the plated portion looks finished while keeping the irregular browned edges and homemade texture visible.
Tip: Spoon the gravy just before serving so the crisp stuffing edges stay visible while the center gains extra moisture and savory flavor.
Pro Tips
- Use moist prepared stuffing rather than very dry crumbs because a little moisture helps each cup hold together without becoming dense.
- Avoid packing the turkey filling too tightly because a loose mound cooks more evenly and gives the finished center a tender homemade texture.
- Leave some stuffing exposed around every turkey center because those uncovered edges become crisp and lightly browned during baking.
- Add the warm gravy only when serving because keeping it separate during baking protects the stuffing edges from becoming overly soft.
Storage Instructions
Let the Turkey and Stuffing Cups with Gravy cool before transferring them into an airtight container. Store the gravy separately when possible because this helps the stuffing edges keep more of their texture. Refrigerate the baked cups for up to four days and keep the gravy chilled in its own sealed container. Reheat only the portions you plan to eat so repeated heating does not dry out the turkey.
For freezing place the cooled cups in a freezer safe container with space between them until firm and then store them together once frozen. Keep the gravy in a separate freezer safe container for the easiest reheating. Reheat the cups until hot throughout and warm the gravy separately before spooning it over the top. This method keeps the turkey moist while preventing the stuffing from absorbing too much gravy during storage.
Frequently Asked Questions
Yes and you can assemble the cups a day ahead then cover them well and refrigerate them until you are ready to bake.
Use moist prepared stuffing and press it gently into the muffin cavities so each cup forms a firm but tender shell.
Yes and chopped cooked turkey can work although the filling texture will differ from the ground turkey version shown here.
Serve them with vegetables or cranberry sauce or a simple salad for a balanced holiday style meal.
See You in the Kitchen
These Turkey and Stuffing Cups with Gravy are a great way to satisfy your holiday dinner cravings without making a full traditional turkey feast.
I typically warm the gravy at the same time I bake the cups and I also like serving Italian Wedding Soup or Creamy Chicken Tortilla Soup alongside them so all of my dinner components will be ready at the same time.
Even my kids love this one!
Print
Turkey and Stuffing Cups with Gravy
- Total Time: 45 minutes
- Yield: 4 servings
Description
Turkey and Stuffing Cups with Gravy are an easy way to turn comforting holiday flavors into neat individual portions for dinner. Savory turkey and seasoned stuffing bake together in a simple muffin tin and finish with warm gravy for the best cozy bite. These quick cups are great for a weeknight dinner and meal prep and holiday gatherings and potluck tables and brunch spreads and party menus while still fitting healthy meal ideas for busy families.
Ingredients
- 1 pound Ground turkey
- 3 cups Prepared stuffing
- 1 Large egg
- 1/4 cup Chicken broth
- 1/3 cup Finely diced celery
- 1/3 cup Finely diced onion
- 1/2 teaspoon Dried sage
- 1/2 teaspoon Dried thyme
- 1/2 teaspoon Salt
- 1/4 teaspoon Black pepper
- 1 cup Prepared turkey gravy
- 1 tablespoon Chopped fresh parsley
Instructions
- Combine the ground turkey with the egg and diced celery and diced onion and sage and thyme and salt and black pepper until the mixture changes from separate ingredients into a loosely blended filling.
Keep the mixture slightly uneven rather than overworking it because small visible pieces of celery and onion should remain throughout the turkey.
- Fold the chicken broth into the prepared stuffing until the crumbs look slightly darker and more cohesive while still keeping an irregular texture.
Divide the stuffing into eight portions and press each portion into a muffin cavity with a shallow center so the mixture changes into individual cup shapes with uneven rims.
- Divide the turkey mixture evenly among the eight stuffing cups and gently mound it into each center so the raw filling sits against the stuffing without completely covering the golden crumb edges.
The cups should now look fuller and more structured with uneven turkey mounds and casually shaped stuffing borders.
- Bake the filled cups until the turkey centers change from pink to fully cooked and the stuffing edges become firmer and lightly golden with darker toasted spots.
The tops should look slightly uneven and the exposed stuffing should appear crisp in places while the centers remain moist.
- Transfer one baked turkey and stuffing cup onto a white plate and spoon warm gravy over part of the top so some browned stuffing remains visible and some gravy settles naturally along one side.
Scatter a little parsley over the cup so the plated portion looks finished while keeping the irregular browned edges and homemade texture visible.
Notes
Pro Tips:
- Use moist prepared stuffing rather than very dry crumbs because a little moisture helps each cup hold together without becoming dense.
- Avoid packing the turkey filling too tightly because a loose mound cooks more evenly and gives the finished center a tender homemade texture.
- Leave some stuffing exposed around every turkey center because those uncovered edges become crisp and lightly browned during baking.
- Add the warm gravy only when serving because keeping it separate during baking protects the stuffing edges from becoming overly soft.
Storage: Let the Turkey and Stuffing Cups with Gravy cool before transferring them into an airtight container. Store the gravy separately when possible because this helps the stuffing edges keep more of their texture.
Refrigerate the baked cups for up to four days and keep the gravy chilled in its own sealed container. Reheat only the portions you plan to eat so repeated heating does not dry out the turkey.
For freezing place the cooled cups in a freezer safe container with space between them until firm and then store them together once frozen. Keep the gravy in a separate freezer safe container for the easiest reheating.
Reheat the cups until hot throughout and warm the gravy separately before spooning it over the top. This method keeps the turkey moist while preventing the stuffing from absorbing too much gravy during storage.
- Prep Time: 15 minutes
- Cook Time: 30 minutes
- Category: Dinner
- Cuisine: American