


This Stuffing Muffins recipe is one of my favorite holiday side dishes when I’m craving traditional stuffing but want something a little easier to serve. Inspired by classic Thanksgiving stuffing I’ve packed each muffin with savory flavor from toasted bread and tender vegetables along with fresh herbs and buttery broth.
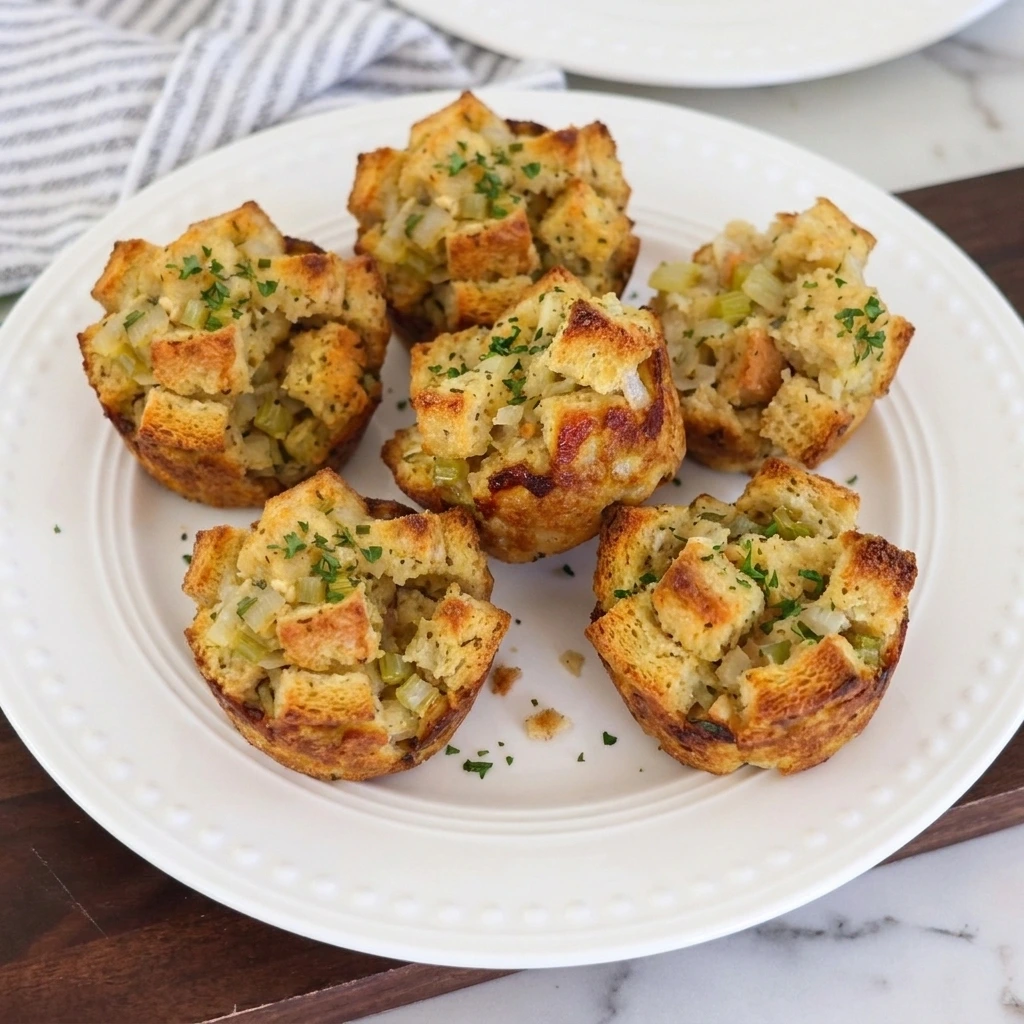
It’s also loaded with flavor from the onion and celery and fresh sage plus thyme and it’s so easy to customize based on whatever bread you have in your kitchen or herbs you want to add! I also love making these alongside BBQ Meatballs for a cozy family dinner or prepping them ahead and enjoying the leftovers throughout the week!
Ingredients
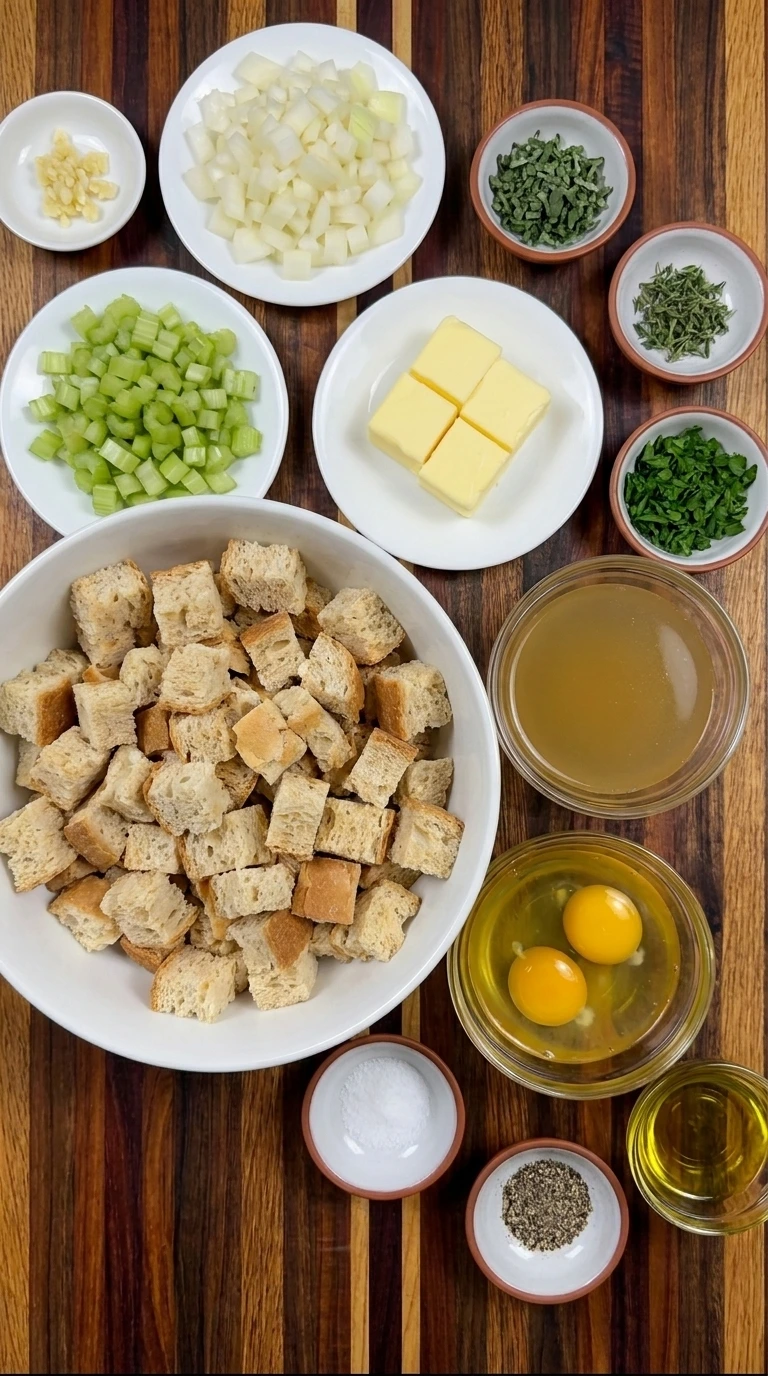
Here is what I use for this recipe :
- Day-old bread cubes: Use approximately 9 ounces of slightly stale French bread or sourdough cut into 3/4-inch cubes. The dry bread absorbs the savory broth while holding its shape and creating crisp edges during baking.
- Unsalted butter: Adds rich buttery flavor while helping soften the vegetables and giving the finished stuffing muffins a tender interior.
- Yellow onion: Provides a naturally sweet and savory foundation as it softens and blends with the other vegetables.
- Celery: Adds traditional stuffing flavor and a delicate vegetable texture that becomes tender during cooking.
- Garlic: Adds aromatic depth and balances the richness of the butter and bread.
- Fresh sage: Gives the stuffing muffins their familiar earthy holiday flavor and blends into the warm bread mixture.
- Fresh thyme leaves: Adds a gentle herbal flavor that complements the sage and vegetables without overpowering the bread.
- Fresh parsley: Adds fresh herbal flavor and small green flecks throughout the muffins. Reserve 1 teaspoon for finishing the plated portions.
- Low-sodium chicken broth: Moistens the dried bread cubes and helps create a soft and savory center without making the muffins soggy.
- Large eggs: Act as the binding ingredient that helps the individual stuffing muffins hold together after baking.
- Kosher salt: Enhances the natural flavors of the bread and vegetables while balancing the herbs and butter.
- Black pepper: Adds a subtle warming flavor and lightly seasons the savory bread mixture.
- Olive oil: Lightly coats the muffin cups to help release the baked stuffing muffins while encouraging golden edges.
Tools I Use :
- 12-cup standard muffin tin: Holds the stuffing mixture in twelve separate portions and creates golden edges while helping each muffin maintain its individual shape.
- Large mixing bowl: Provides enough space to combine the bread cubes with cooked vegetables and binding liquid without crushing the bread.
- Large skillet: Cooks the onion and celery in butter and allows the garlic and herbs to release their flavor before combining with the bread.
- Baking tray: Spreads the bread cubes into a loose layer so they can dry evenly before absorbing the liquid ingredients.
- Cutting board: Provides a stable place to dice the onion and celery and cut bread into evenly sized pieces.
- Chef’s knife: Cuts bread into cubes and chops the vegetables and fresh herbs for consistent distribution throughout the stuffing.
- Small mixing bowl: Holds the eggs and chicken broth while they are whisked together into the liquid binding mixture.
- Whisk: Combines the eggs and broth into a smooth liquid that moistens the bread evenly.
- Large spoon or spatula: Gently folds the bread and vegetable mixture together without breaking the cubes into crumbs.
- Measuring cups and spoons: Measure the bread and broth and seasonings accurately so the muffins remain moist while holding their shape.
- Pastry brush: Distributes the olive oil thinly around the muffin cups to reduce sticking and encourage browned edges.
- Instant-read thermometer: Checks that the center of the baked stuffing muffins reaches 160°F so the egg mixture is fully cooked.
- Oven: Dries fresh bread cubes when needed and bakes the shaped stuffing portions until their centers are set and tops are golden.
- White serving plate: Holds the finished individual muffin portion and allows the crispy edges and moist interior to remain visible.
Instructions
Step 1: Cut and dry the bread cubes
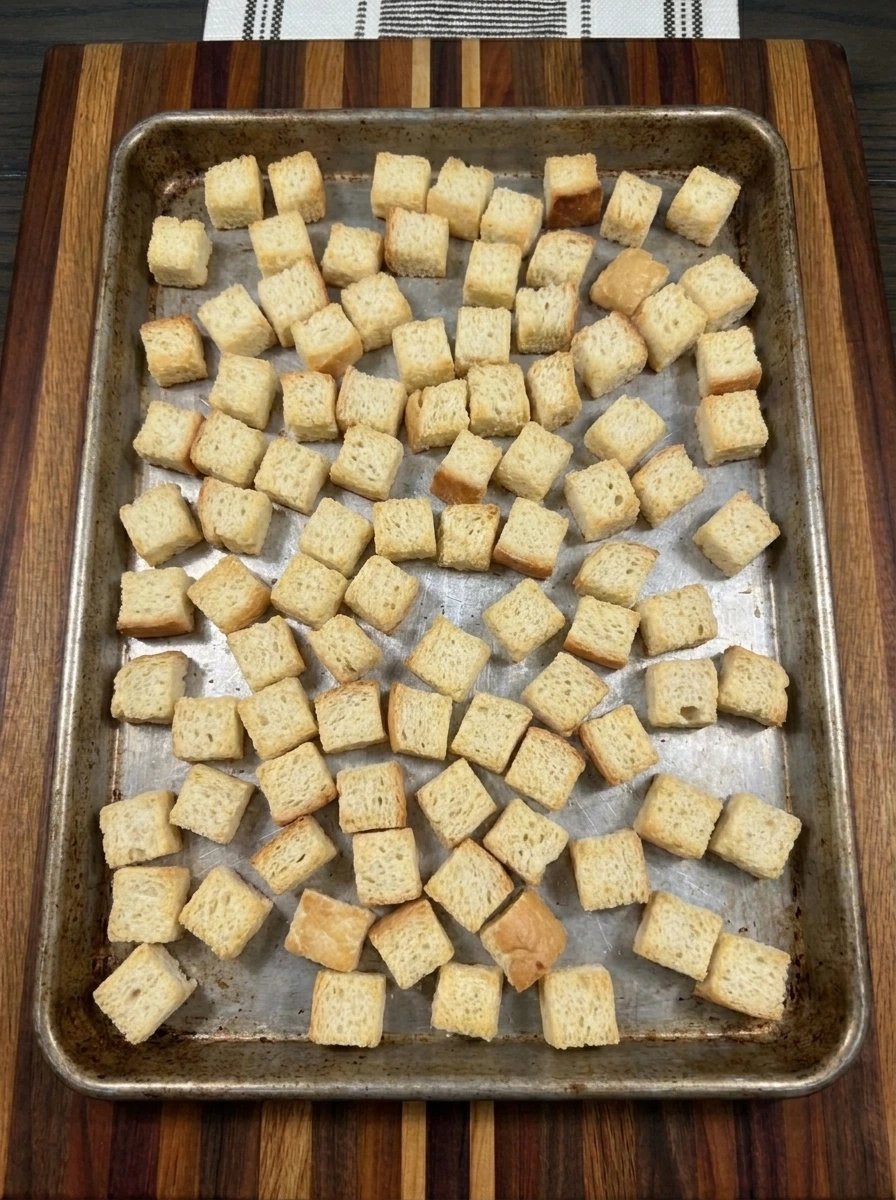
Cut the bread into roughly 3/4-inch cubes if it is not already cubed. Arrange all 6 cups in a loose single layer on a baking tray with some pieces touching and others separated. Slightly uneven cube sizes are fine because they give the finished stuffing muffins more texture. If the bread is already dry and slightly firm then you can move directly to the next step. If it is still soft and fresh then bake the cubes at 300°F for about 8 to 10 minutes until the exterior feels dry but the bread is not deeply browned. Remove the tray and increase the oven temperature to 375°F for the final baking stage.
Tip: Keep the bread cubes slightly irregular rather than perfectly uniform because the uneven edges create better crispy bits.
Step 2: Sauté the onion and celery with herbs
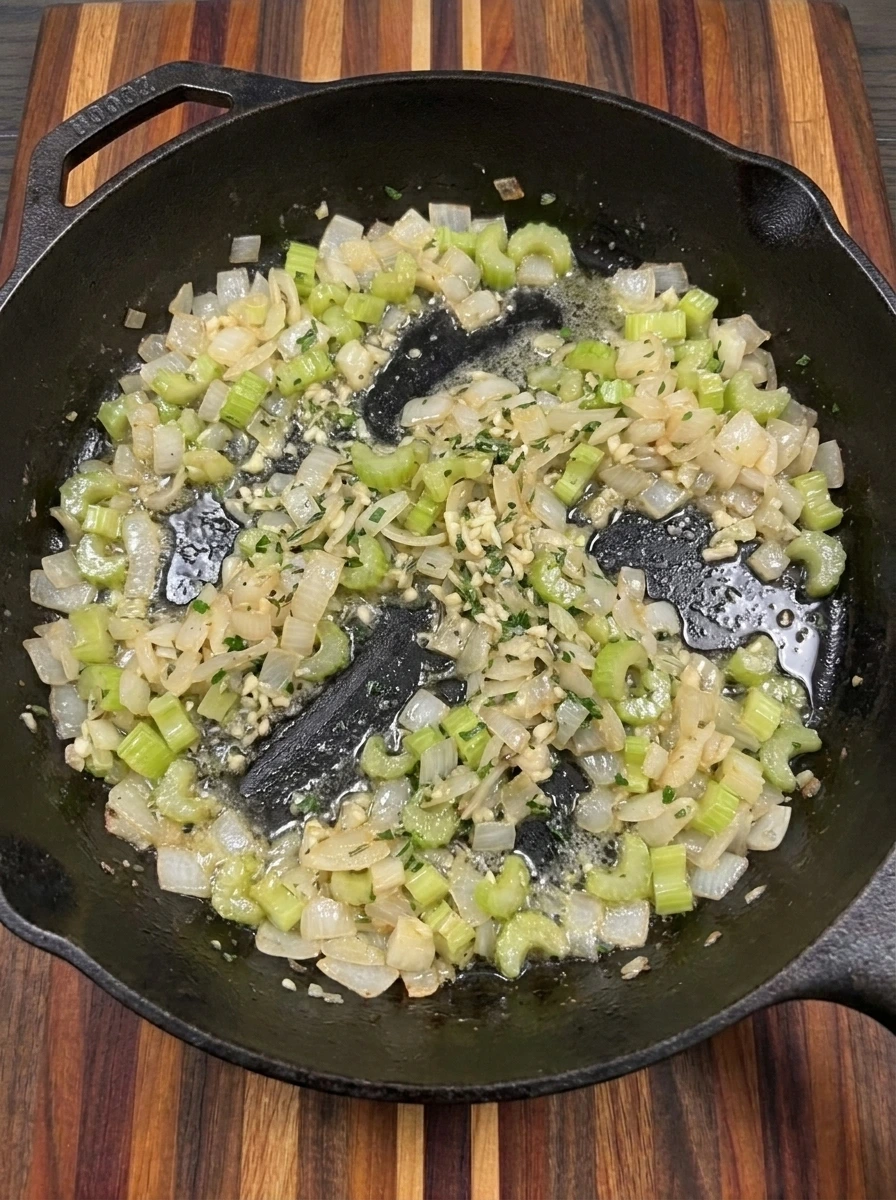
Melt the 4 tablespoons of butter in a large skillet over medium heat. Add the diced onion and celery and cook for 6 to 8 minutes while stirring occasionally until the onion looks translucent and the celery begins to soften. The vegetables should still hold their shape rather than turning into a paste. Add the minced garlic and chopped sage plus thyme and 1 tablespoon and 2 teaspoons of the parsley. Stir for about 1 minute until the herbs become fragrant and the garlic is gently softened. Remove the skillet from the heat and allow the mixture to cool slightly so it will not scramble the eggs when combined later.
Tip: Cook the onion and celery until tender but not browned so the vegetables blend naturally into the soft stuffing centers.
Step 3: Combine the toasted bread and vegetables
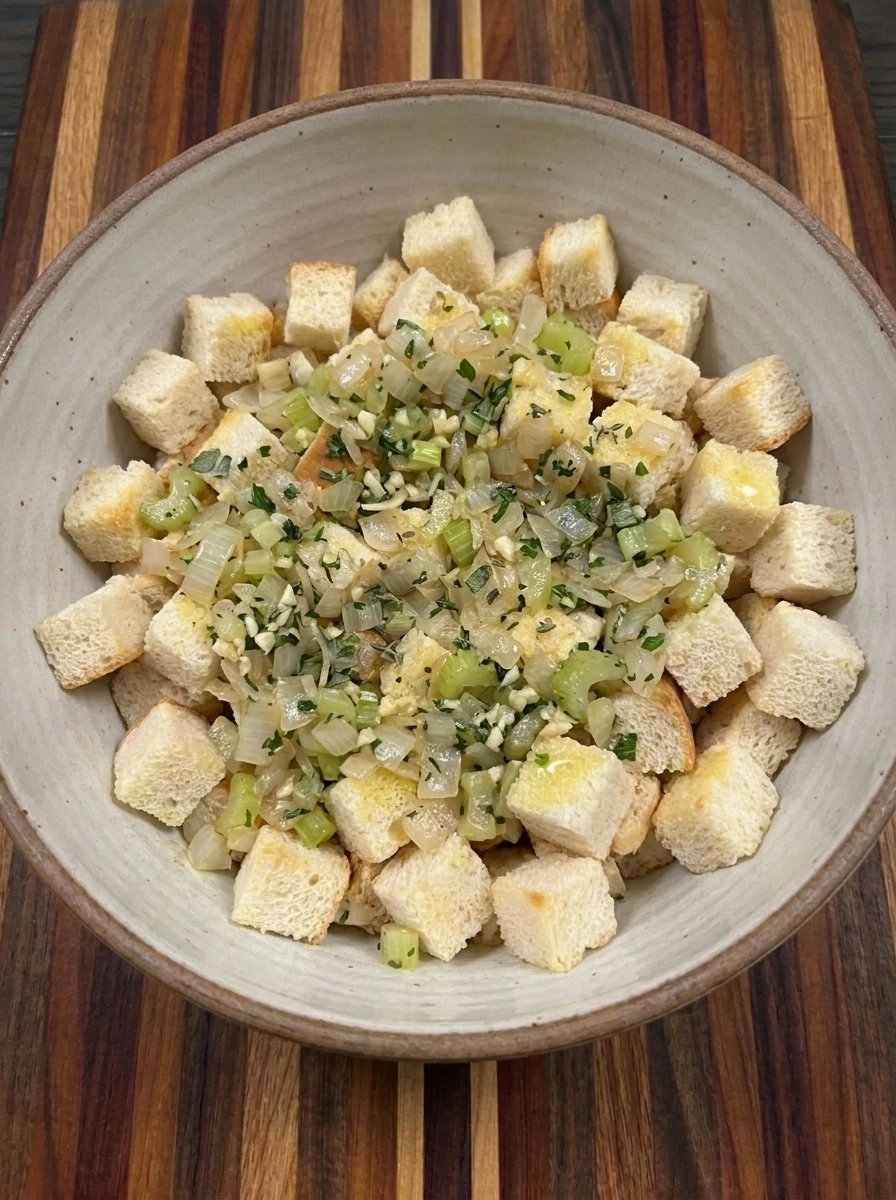
Transfer all the dried bread cubes into a large mixing bowl. Spoon the softened onion and celery mixture over the bread and make sure to include the melted butter and herbs from the skillet. Fold the mixture gently until the vegetables are scattered through the bread. Some cubes will have glossy buttery edges while others remain lighter and drier. This uneven coating is normal because the broth and eggs will moisten everything in the next step.
Tip: Fold the vegetables into the bread gently so the cubes keep their shape instead of breaking into small crumbs.
Step 4: Moisten the stuffing with broth and eggs
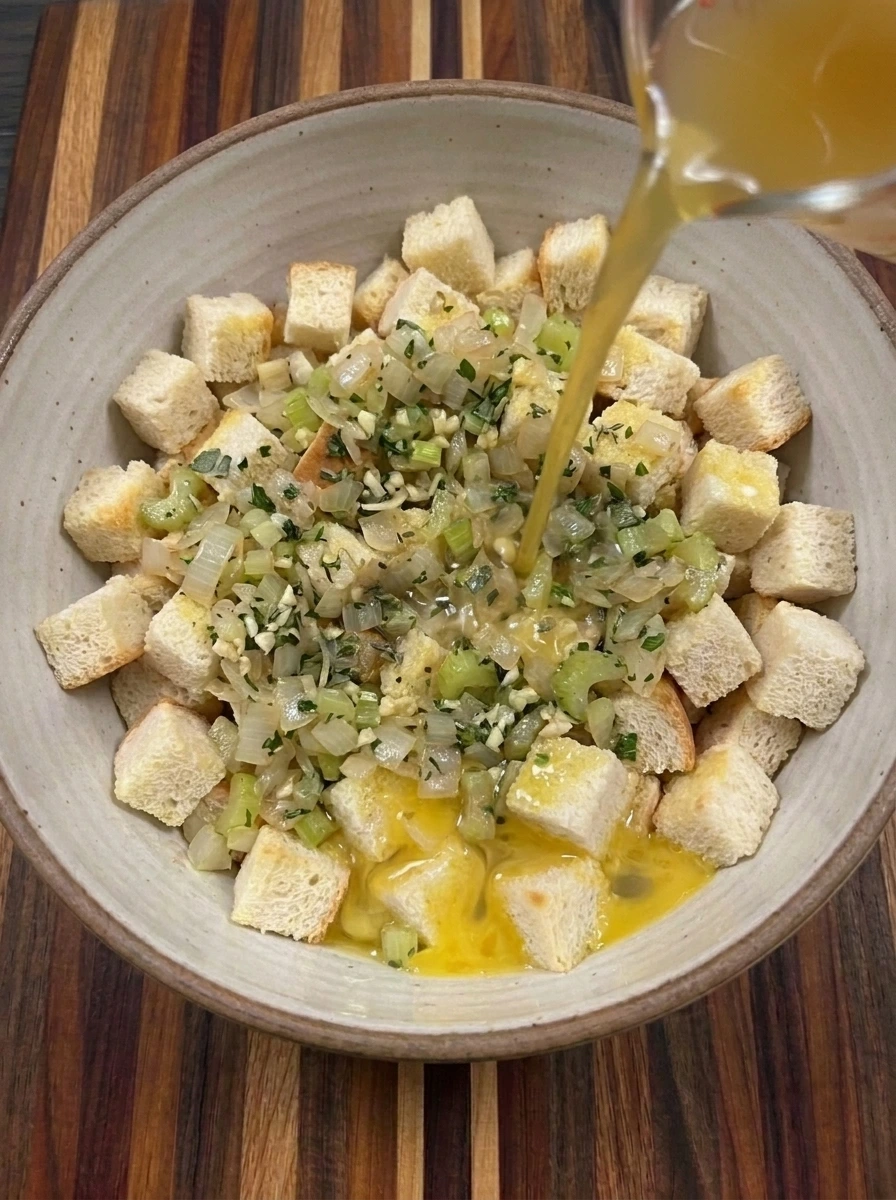
Whisk the 2 eggs with 1 cup of chicken broth and the salt and black pepper in a separate bowl until the mixture becomes smooth. Pour this liquid gradually over the bread and vegetable mixture while gently folding everything together. Continue until the cubes are evenly moistened but still retain their individual shapes. Let the stuffing rest for about 3 minutes so the bread can absorb the liquid. The mixture should feel moist enough to hold together when pressed but should not have broth collecting in the bottom of the bowl.
Tip: Let the moistened bread rest briefly so it absorbs the broth and eggs before shaping the muffin portions.
Step 5: Fill and shape twelve stuffing muffin cups
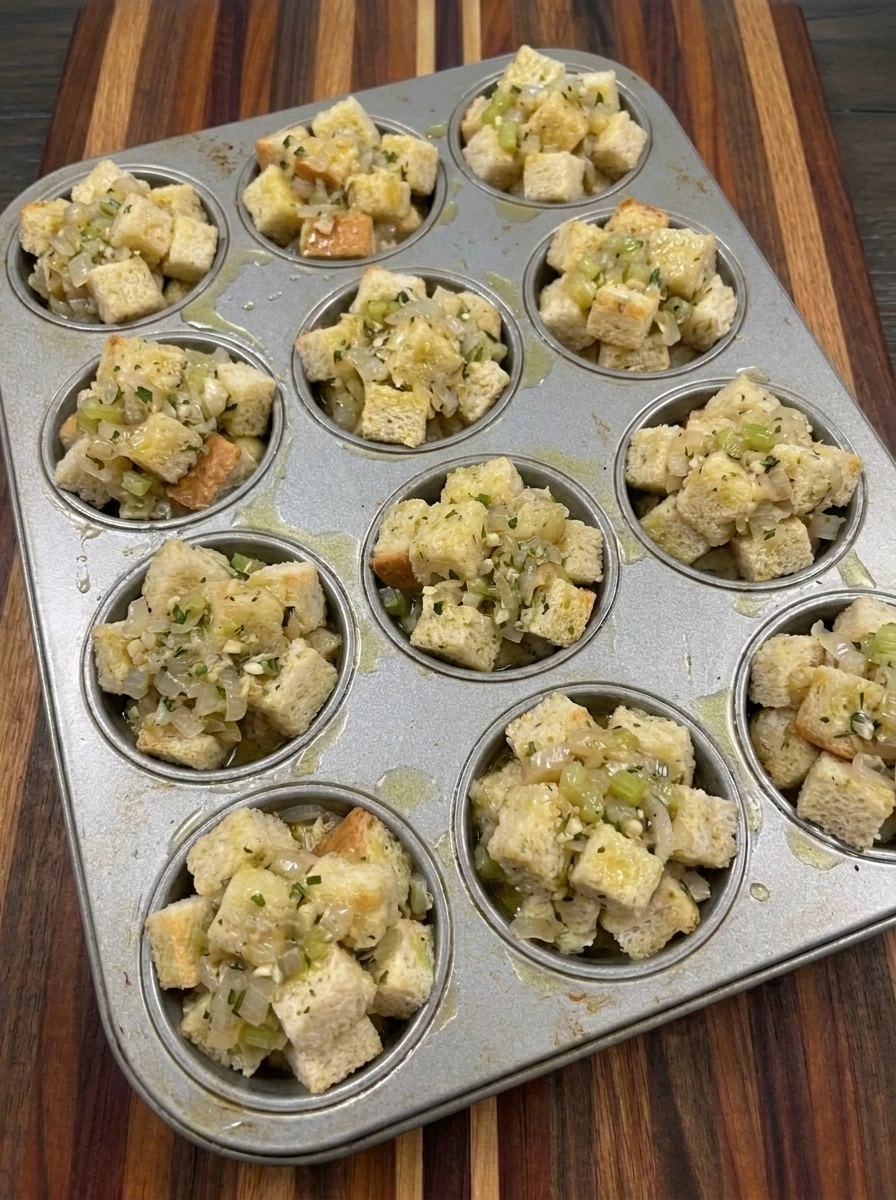
Lightly grease all 12 cups of a standard muffin tin using the 2 teaspoons of olive oil. Divide the stuffing mixture evenly among the cups and gently press each portion down so the bread pieces bind together. Fill the cups close to the top and allow a few bread cube corners to extend slightly above the edges. Avoid packing the mixture too tightly because the muffins need some space between the cubes to develop crispy surfaces while keeping their centers tender.
Tip: Press the stuffing just enough to hold together while leaving a few raised bread corners for crisp golden tops.
Step 6: Bake until the stuffing muffins are golden
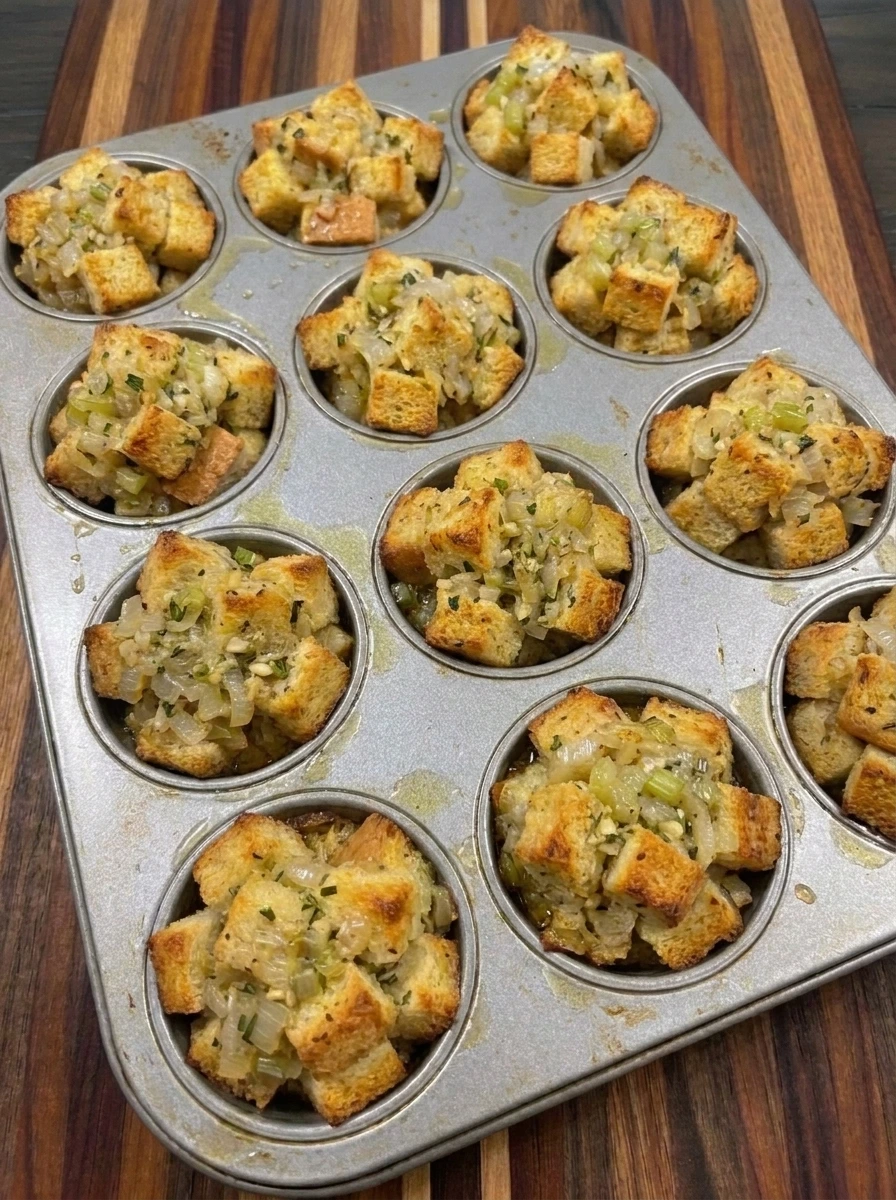
Place the filled muffin tin in the preheated 375°F oven and bake for 25 to 30 minutes. The tops should turn golden brown while the exposed bread corners become deeper toasted brown. The centers should look set and no longer wet. Check that the centers reach 160°F because the stuffing mixture contains eggs. Allow the muffins to cool in the tin for 5 minutes after baking. This short cooling period helps the tender centers firm up so the muffins are easier to remove without breaking apart.
Tip: Wait until the edges turn golden and the centers reach 160°F before removing the stuffing muffins from the oven.
Step 7: Unmold and serve a warm stuffing muffin
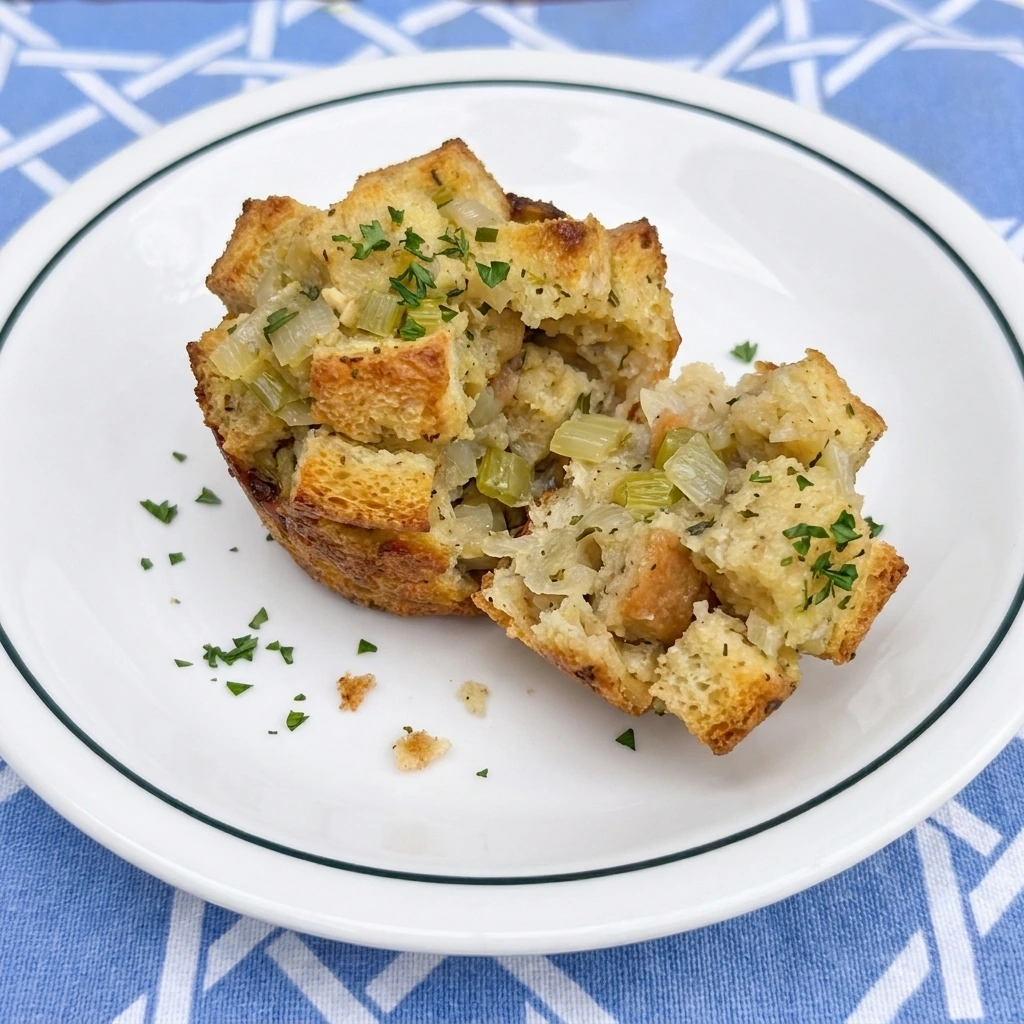
Carefully loosen the edges of the baked muffins and lift them out of the tin. Place one warm muffin on a white serving plate while keeping its golden bread corners intact. Use a fork to gently open one side of the muffin so the soft interior is visible beside the crisp outer pieces. Scatter a small pinch of the reserved parsley over the serving and enjoy while warm. The finished muffin should have a slightly crunchy exterior and a moist herb-filled center with visible pieces of onion and celery.
Tip: Remove the muffins gently after resting because their crispy tops and tender centers are easiest to keep intact when slightly cooled.
Pro Tips
- Use day-old bread that feels slightly dry because fresh soft bread can absorb too much broth and make the stuffing muffins dense.
- Dice the onion and celery into small pieces so they soften evenly and blend into each muffin without creating large vegetable chunks.
- Grease every muffin cup thoroughly and gently press the filling into place so the baked muffins release without falling apart.
- For extra crispy tops leave a few irregular bread corners exposed above the muffin cups and avoid adding too much broth.
Storage Instructions
Allow the baked Stuffing Muffins to cool slightly before storing them. Transfer the muffins into a shallow airtight container and refrigerate within 2 hours of baking to maintain food safety. Store leftovers in the refrigerator for 3 to 4 days. Keep the muffins in a single layer when possible so their shape stays intact and the tender centers do not become compressed. For longer storage let the muffins cool completely and arrange them in a freezer-safe container with parchment between layers if stacking is necessary.
Freeze for up to 2 months for the best flavor and texture. Thaw frozen muffins overnight in the refrigerator before reheating. To reheat place the stuffing muffins on a baking tray and warm them in a 350°F oven for about 10 to 15 minutes or until the centers reach 165°F. Cover loosely at first if they seem dry and uncover near the end to restore their crispy edges. A microwave can also warm individual portions but the crust will become softer.
For holiday meal prep you can dry the bread and cook the vegetables one day ahead. Refrigerate the vegetable mixture separately and combine everything with the eggs and broth shortly before shaping and baking. This approach keeps the bread from soaking too long and gives the finished muffins a better texture.
Frequently Asked Questions
Yes! Bake them one day ahead and refrigerate after cooling. Reheat in the oven until hot throughout before serving.
Use the eggs as directed and allow the bread to absorb the broth. Let the baked muffins rest before removing them.
Yes! Cool the muffins completely and freeze in an airtight container for up to two months for the best texture.
French bread and sourdough work well because their sturdy cubes absorb broth while keeping crisp edges after baking.
See You in the Kitchen
These Stuffing Muffins are a great way to satisfy your classic Thanksgiving stuffing cravings without making a large casserole of traditional stuffing.
I typically start preparing Pumpkin Gooey Butter Cake before I bake my stuffing muffins and sometimes add Pumpkin Bread Pudding to the holiday menu so that all of my dinner and dessert components will be ready for our family gathering.
Even my kids love these little stuffing muffins!
Print
Stuffing Muffins
- Total Time: 45 minutes
- Yield: 4 servings
Description
These easy Stuffing Muffins turn classic holiday stuffing into individual servings with crispy golden edges and soft savory centers. Made with simple ingredients like bread cubes and celery and onion plus fresh herbs and broth these little muffins are a quick way to bring homemade comfort to the table. They are one of the best holiday side dish ideas for Thanksgiving and Christmas or a family potluck. Pair them with a healthy vegetable side for a cozy and satisfying meal.
Ingredients
- 6 cups Day-old bread cubes
- 4 tablespoons Unsalted butter
- 1 medium onion (about 1 cup diced) Yellow onion
- 2 medium stalks (about 3/4 cup diced) Celery
- 2 cloves (minced) Garlic
- 1 tablespoon (finely chopped) Fresh sage
- 2 teaspoons Fresh thyme leaves
- 2 tablespoons (chopped) Fresh parsley
- 1 cup Low-sodium chicken broth
- 2 Large eggs
- 1/2 teaspoon Kosher salt
- 1/4 teaspoon Black pepper
- 2 teaspoons Olive oil
Instructions
- Cut the bread into roughly 3/4-inch cubes if it is not already cubed. Arrange all 6 cups in a loose single layer on a baking tray with some pieces touching and others separated. Slightly uneven cube sizes are fine because they give the finished stuffing muffins more texture.
If the bread is already dry and slightly firm then you can move directly to the next step. If it is still soft and fresh then bake the cubes at 300°F for about 8 to 10 minutes until the exterior feels dry but the bread is not deeply browned. Remove the tray and increase the oven temperature to 375°F for the final baking stage.
- Melt the 4 tablespoons of butter in a large skillet over medium heat. Add the diced onion and celery and cook for 6 to 8 minutes while stirring occasionally until the onion looks translucent and the celery begins to soften. The vegetables should still hold their shape rather than turning into a paste.
Add the minced garlic and chopped sage plus thyme and 1 tablespoon and 2 teaspoons of the parsley. Stir for about 1 minute until the herbs become fragrant and the garlic is gently softened. Remove the skillet from the heat and allow the mixture to cool slightly so it will not scramble the eggs when combined later.
- Transfer all the dried bread cubes into a large mixing bowl. Spoon the softened onion and celery mixture over the bread and make sure to include the melted butter and herbs from the skillet.
Fold the mixture gently until the vegetables are scattered through the bread. Some cubes will have glossy buttery edges while others remain lighter and drier. This uneven coating is normal because the broth and eggs will moisten everything in the next step.
- Whisk the 2 eggs with 1 cup of chicken broth and the salt and black pepper in a separate bowl until the mixture becomes smooth. Pour this liquid gradually over the bread and vegetable mixture while gently folding everything together.
Continue until the cubes are evenly moistened but still retain their individual shapes. Let the stuffing rest for about 3 minutes so the bread can absorb the liquid. The mixture should feel moist enough to hold together when pressed but should not have broth collecting in the bottom of the bowl.
- Lightly grease all 12 cups of a standard muffin tin using the 2 teaspoons of olive oil. Divide the stuffing mixture evenly among the cups and gently press each portion down so the bread pieces bind together.
Fill the cups close to the top and allow a few bread cube corners to extend slightly above the edges. Avoid packing the mixture too tightly because the muffins need some space between the cubes to develop crispy surfaces while keeping their centers tender.
- Place the filled muffin tin in the preheated 375°F oven and bake for 25 to 30 minutes. The tops should turn golden brown while the exposed bread corners become deeper toasted brown. The centers should look set and no longer wet.
Check that the centers reach 160°F because the stuffing mixture contains eggs. Allow the muffins to cool in the tin for 5 minutes after baking. This short cooling period helps the tender centers firm up so the muffins are easier to remove without breaking apart.
- Carefully loosen the edges of the baked muffins and lift them out of the tin. Place one warm muffin on a white serving plate while keeping its golden bread corners intact. Use a fork to gently open one side of the muffin so the soft interior is visible beside the crisp outer pieces.
Scatter a small pinch of the reserved parsley over the serving and enjoy while warm. The finished muffin should have a slightly crunchy exterior and a moist herb-filled center with visible pieces of onion and celery.
Notes
Pro Tips:
- Use day-old bread that feels slightly dry because fresh soft bread can absorb too much broth and make the stuffing muffins dense.
- Dice the onion and celery into small pieces so they soften evenly and blend into each muffin without creating large vegetable chunks.
- Grease every muffin cup thoroughly and gently press the filling into place so the baked muffins release without falling apart.
- For extra crispy tops leave a few irregular bread corners exposed above the muffin cups and avoid adding too much broth.
Storage: Allow the baked Stuffing Muffins to cool slightly before storing them. Transfer the muffins into a shallow airtight container and refrigerate within 2 hours of baking to maintain food safety.
Store leftovers in the refrigerator for 3 to 4 days. Keep the muffins in a single layer when possible so their shape stays intact and the tender centers do not become compressed.
For longer storage let the muffins cool completely and arrange them in a freezer-safe container with parchment between layers if stacking is necessary. Freeze for up to 2 months for the best flavor and texture. Thaw frozen muffins overnight in the refrigerator before reheating.
To reheat place the stuffing muffins on a baking tray and warm them in a 350°F oven for about 10 to 15 minutes or until the centers reach 165°F. Cover loosely at first if they seem dry and uncover near the end to restore their crispy edges. A microwave can also warm individual portions but the crust will become softer.
For holiday meal prep you can dry the bread and cook the vegetables one day ahead. Refrigerate the vegetable mixture separately and combine everything with the eggs and broth shortly before shaping and baking. This approach keeps the bread from soaking too long and gives the finished muffins a better texture.
- Prep Time: 15 minutes
- Cook Time: 30 minutes
- Category: Dinner
- Cuisine: American