

This recipe for Seasoned Pretzels will be the easiest homemade snack you’ve ever whipped up! Crunchy pretzels are mixed with several complementary seasonings in a large bowl and then coated with a savory ranch and garlic mixture. All you need to do is spread them on a baking sheet and let the oven slowly bake your pretzels to crispy perfection!
I know we aren’t quite at football season yet but that hasn’t stopped me from daydreaming about game day gatherings and backyard cookouts and most importantly all of my favorite salty snacks! Some of my favorite snacks that I indulge in all year long include Caramel Apple Pretzel Bites when I’m craving something sweet and salty.
This year I plan on adding another staple to that ever-growing list… Seasoned Pretzels! They’re the perfect way to turn a simple bag of pretzels into something extra flavorful and couldn’t be easier to make. If you’re looking to add something crunchy to your next game day spread or holiday party then this is the snack for you!
Ingredients

Here is what I use for this recipe :
- Mini pretzel twists: Provide the crunchy base of the recipe and hold the savory seasoning mixture along their twisted edges and crevices. Choose plain salted mini pretzels for the best texture and balanced flavor.
- Vegetable oil: Helps the dry seasonings adhere to the pretzels and creates an even coating that becomes crisp during baking. Its neutral flavor allows the ranch and herbs to stand out.
- Dry ranch seasoning mix: Adds the signature savory ranch flavor with tangy herbs and a creamy seasoning profile. The dry mix coats the pretzels without introducing excess moisture.
- Garlic powder: Builds a rich savory flavor that complements the ranch seasoning and gives the finished pretzels an aromatic garlic finish.
- Onion powder: Provides subtle sweetness and savory depth that rounds out the garlic and ranch flavors.
- Dried dill weed: Adds a recognizable herbal ranch aroma and small green flecks throughout the coating for extra color and flavor.
- Cayenne pepper: Introduces gentle background heat that balances the salty and tangy seasonings without making the pretzels overwhelmingly spicy.
Tools I Use :
- Medium mixing bowl: Holds the vegetable oil and dry seasonings while they are combined into an evenly flavored coating.
- Large mixing bowl: Provides enough room to fold the pretzels gently with the ranch seasoning mixture without excessive breakage.
- Measuring cups and spoons: Ensure accurate quantities of oil and individual seasonings for a consistent flavor.
- Whisk: Disperses the dry ranch seasoning and powdered spices evenly throughout the vegetable oil.
- Silicone spatula: Gently folds the pretzels with the seasoning mixture and helps turn them during baking.
- Large rimmed baking sheet: Holds the coated pretzels in a loose layer for even low-temperature baking.
- Parchment paper: Prevents the seasoned pretzels from sticking and simplifies cleanup after baking.
- Oven: Provides steady low heat to dry the seasoned coating and restore the pretzels to a crisp texture.
- Cooling rack: Supports the baking sheet during cooling so the pretzels can reach room temperature before storage.
- Airtight storage container: Protects completely cooled pretzels from moisture and helps preserve their crunchy texture.
Instructions
Step 1: Whisk the oil and seasonings together
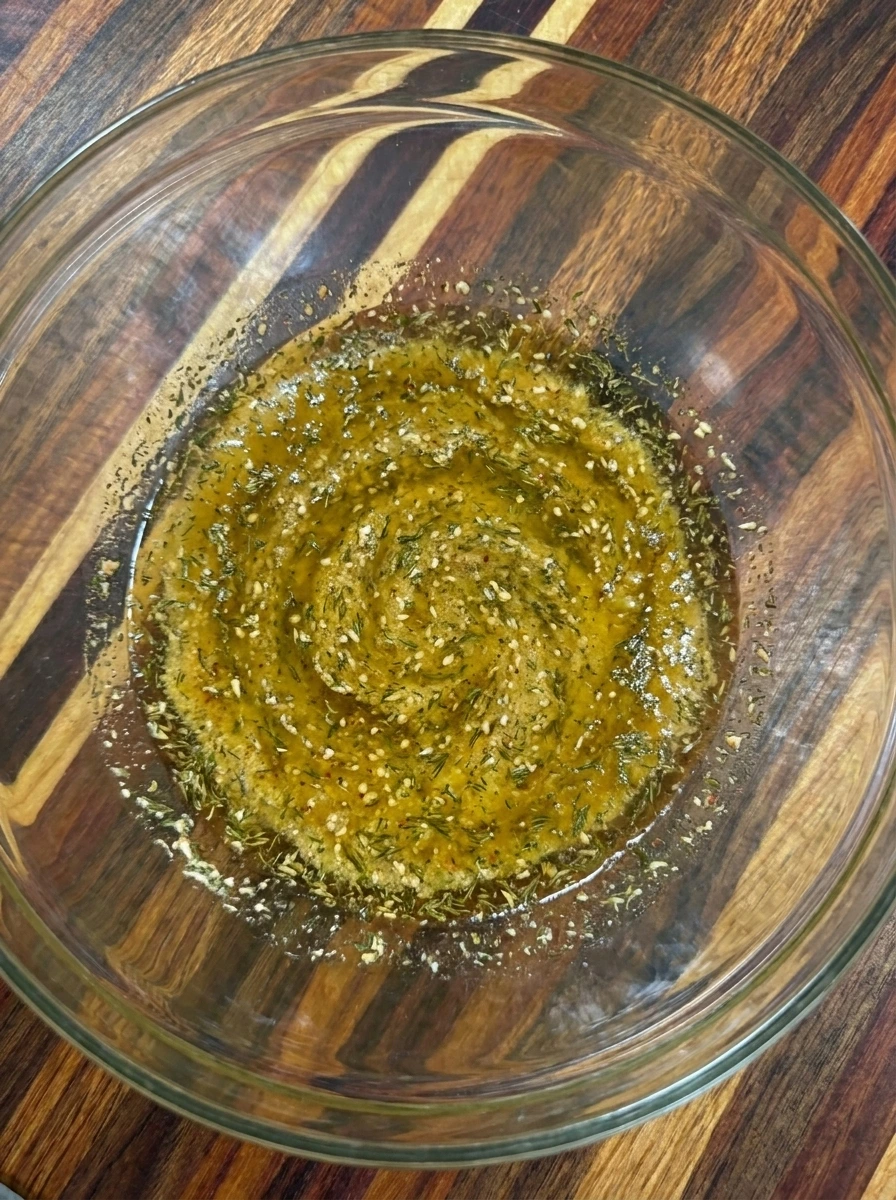
Pour the vegetable oil into a medium mixing bowl. Add the dry ranch seasoning mix along with the garlic powder and onion powder and dried dill and cayenne pepper. Whisk everything together until the herbs and spices are evenly distributed throughout the oil. The mixture should become a slightly thick golden seasoning blend with visible green dill flecks and reddish specks of cayenne. Some seasoning may settle naturally toward the bottom and that is completely normal. Give the mixture another quick stir before adding it to the pretzels.
Tip: Whisk the dry seasonings thoroughly into the oil so every pretzel gets plenty of flavor without large clumps of ranch powder.
Step 2: Coat the pretzels with ranch seasoning

Place all 16 ounces of mini pretzel twists into a large mixing bowl. Pour the prepared ranch and oil mixture over the pretzels and gently fold everything together until the pieces are coated. Continue turning the pretzels so the seasoning reaches their curved edges and small openings. The previously plain pretzels should now have a slight golden sheen with visible herb flecks and ranch seasoning across their surfaces. Some pieces will naturally have heavier seasoning than others which gives the finished snack a homemade appearance. Avoid stirring too aggressively because the pretzels can break.
Tip: Fold the pretzels gently from the bottom upward rather than stirring vigorously to distribute the ranch coating without breaking the twists.
Step 3: Spread the pretzels on a baking sheet
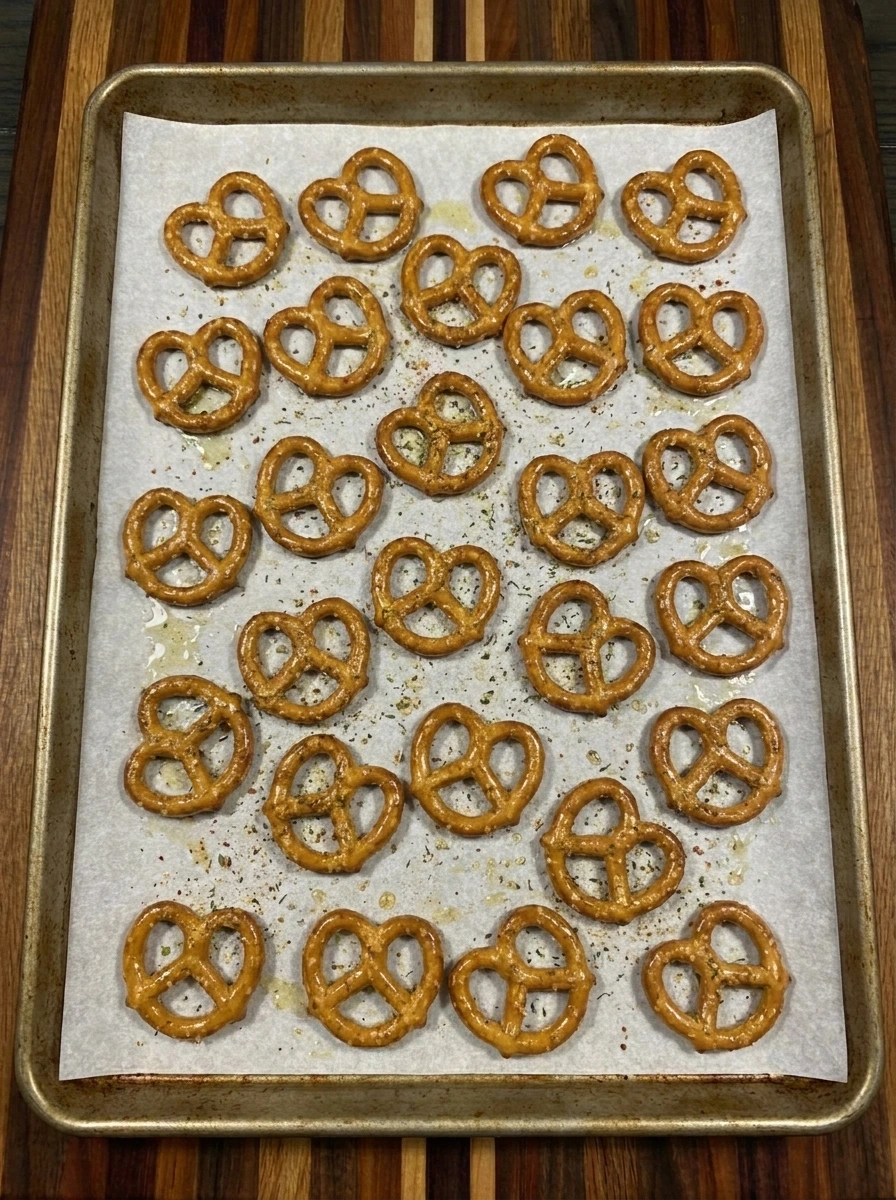
Preheat the oven to 250°F and line a large rimmed baking sheet with parchment paper. Transfer the coated pretzels from the mixing bowl onto the prepared sheet. Spread them into a loose single layer so the heat can circulate around the individual pieces. The pretzels should now be scattered across the baking sheet instead of piled inside the bowl. A few pieces may touch or overlap slightly and some seasoning flecks may collect on the parchment. If necessary use a second baking sheet to avoid crowding because an even layer helps the pretzels become crisp.
Tip: Keep the pretzels in a loose single layer and use a second baking sheet if necessary so the coating dries evenly without crowding.
Step 4: Bake until dry and crispy

Bake the pretzels at 250°F for 30 minutes and gently turn them halfway through the cooking time. The low oven temperature allows the seasoning coating to dry without burning the delicate herbs. Continue baking until the pretzels feel dry to the touch and the oil coating no longer appears shiny. Remove the baking sheet from the oven and allow the pretzels to cool on the sheet until they become fully crisp. Their golden brown surfaces should look slightly deeper in color with scattered toasted spots and visible seasoning clinging to the twists. Let them cool completely before serving or storing.
Tip: Use a low oven temperature and turn the pretzels halfway through baking to develop a dry crisp coating without scorching the herbs.
Step 5: Serve the cooled seasoned pretzels
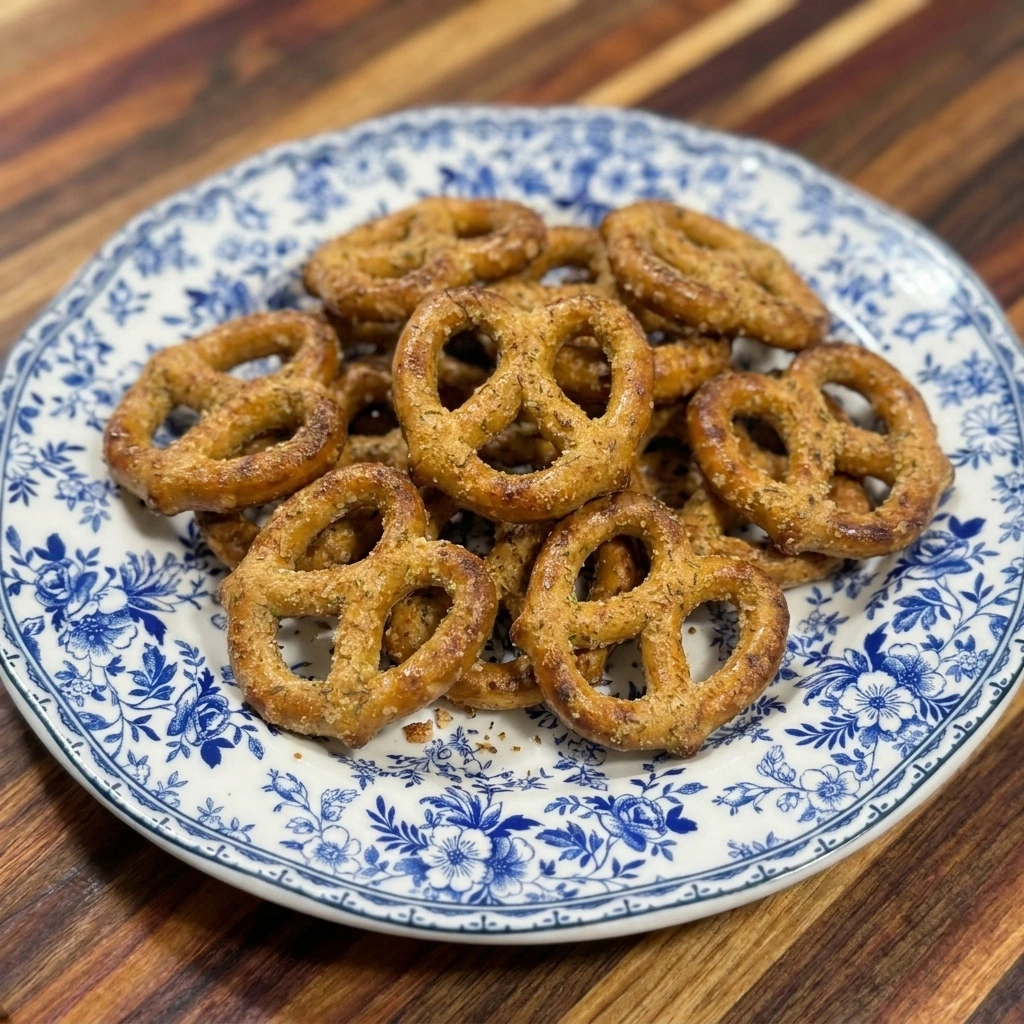
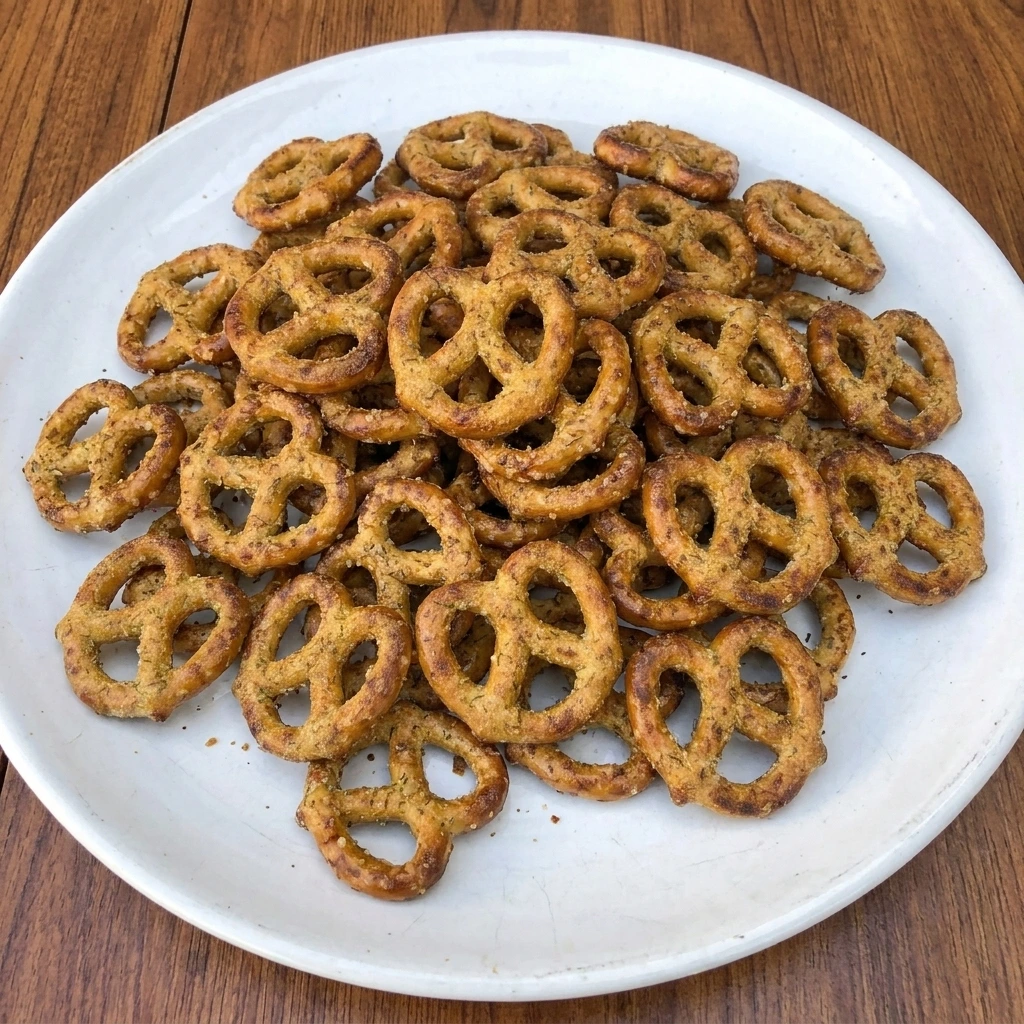
Once the pretzels have cooled completely transfer approximately one serving to a small white plate. Arrange the pieces loosely so their golden surfaces and crunchy ridges are clearly visible. A few scattered herb flecks and irregular overlaps will give the serving a natural homemade finish. Enjoy the pretzels immediately as a savory snack or serve them alongside your favorite game day appetizers. The finished pretzels should be completely crisp with a generous ranch and garlic coating and a gentle hint of heat. Store the remaining cooled pretzels in an airtight container to maintain their crunch.
Tip: Let the baked pretzels cool completely before sealing them in a container because trapped warmth can soften their crunchy coating.
Pro Tips
- Use mini pretzel twists or similarly sized pretzel shapes because their small curves hold seasoning well and make each bite flavorful.
- Spread the coated pretzels loosely across the baking sheet because overcrowding traps moisture and prevents even crisping in the oven.
- Adjust the cayenne pepper to suit your taste and use a smaller amount for children or increase it slightly for a spicier snack.
- Cool the pretzels completely before transferring them to an airtight container so the remaining warmth does not create condensation.
Storage Instructions
Allow the Seasoned Pretzels to cool completely before transferring them into an airtight storage container. Any remaining warmth can create condensation and soften the crunchy coating. Make sure the pretzels feel dry and crisp before closing the lid. Store the pretzels at room temperature in a cool and dry pantry for up to one week for the best flavor and texture.
Keep the container away from direct sunlight and moisture because humidity can make the pretzels lose their crunch. Use a clean and dry container whenever storing additional portions. Refrigeration is not recommended because the additional moisture can affect the crispy texture. Freezing is also unnecessary for this recipe and may cause condensation after thawing.
For the best results prepare only the amount you expect to enjoy within one week. If the pretzels become slightly soft after storage you can spread them on a parchment-lined baking sheet and warm them at 250°F for about 5 to 10 minutes. Watch carefully to avoid overbrowning and allow them to cool completely before serving. Discard pretzels that show signs of spoilage or unusual odors.
Frequently Asked Questions
Yes! Prepare them several days before your event and store them in an airtight container once they have cooled completely.
Bake them until the coating feels completely dry and let them cool before storing in a tightly sealed container.
Absolutely! Reduce the cayenne pepper or omit it completely while keeping the ranch and garlic seasonings unchanged.
Yes! Pretzel sticks and small squares work well although thicker pieces may need extra baking time to dry.
See You in the Kitchen
I hope you enjoy all the recipes I share with you including this delicious Seasoned Pretzels recipe and my sweet Caramel Apple Pretzel Bites and comforting Sausage Potato Soup recipes.
I hope you try it and enjoy it and rate it and share it with your friends and family!
Print
Seasoned Pretzels
- Total Time: 45 minutes
- Yield: 12 servings
Description
These easy Seasoned Pretzels are a quick and simple snack made with crunchy pretzels and a savory blend of ranch seasoning and garlic and herbs. They are one of the best snack ideas for game day parties and holiday gatherings and potlucks. With just a few pantry ingredients and minimal prep time you can make a delicious homemade treat that everyone will love. These baked pretzels are great for sharing and portioning into healthy snack servings for busy afternoons or movie nights.
Ingredients
- 16 oz Mini pretzel twists
- 1/3 cup Vegetable oil
- 1 oz packet Dry ranch seasoning mix
- 1 tsp Garlic powder
- 1/2 tsp Onion powder
- 1 tsp Dried dill weed
- 1/4 tsp Cayenne pepper
Instructions
- Pour the vegetable oil into a medium mixing bowl. Add the dry ranch seasoning mix along with the garlic powder and onion powder and dried dill and cayenne pepper. Whisk everything together until the herbs and spices are evenly distributed throughout the oil.
The mixture should become a slightly thick golden seasoning blend with visible green dill flecks and reddish specks of cayenne. Some seasoning may settle naturally toward the bottom and that is completely normal. Give the mixture another quick stir before adding it to the pretzels.
- Place all 16 ounces of mini pretzel twists into a large mixing bowl. Pour the prepared ranch and oil mixture over the pretzels and gently fold everything together until the pieces are coated. Continue turning the pretzels so the seasoning reaches their curved edges and small openings.
The previously plain pretzels should now have a slight golden sheen with visible herb flecks and ranch seasoning across their surfaces. Some pieces will naturally have heavier seasoning than others which gives the finished snack a homemade appearance. Avoid stirring too aggressively because the pretzels can break.
- Preheat the oven to 250°F and line a large rimmed baking sheet with parchment paper. Transfer the coated pretzels from the mixing bowl onto the prepared sheet. Spread them into a loose single layer so the heat can circulate around the individual pieces.
The pretzels should now be scattered across the baking sheet instead of piled inside the bowl. A few pieces may touch or overlap slightly and some seasoning flecks may collect on the parchment. If necessary use a second baking sheet to avoid crowding because an even layer helps the pretzels become crisp.
- Bake the pretzels at 250°F for 30 minutes and gently turn them halfway through the cooking time. The low oven temperature allows the seasoning coating to dry without burning the delicate herbs. Continue baking until the pretzels feel dry to the touch and the oil coating no longer appears shiny.
Remove the baking sheet from the oven and allow the pretzels to cool on the sheet until they become fully crisp. Their golden brown surfaces should look slightly deeper in color with scattered toasted spots and visible seasoning clinging to the twists. Let them cool completely before serving or storing.
- Once the pretzels have cooled completely transfer approximately one serving to a small white plate. Arrange the pieces loosely so their golden surfaces and crunchy ridges are clearly visible. A few scattered herb flecks and irregular overlaps will give the serving a natural homemade finish.
Enjoy the pretzels immediately as a savory snack or serve them alongside your favorite game day appetizers. The finished pretzels should be completely crisp with a generous ranch and garlic coating and a gentle hint of heat. Store the remaining cooled pretzels in an airtight container to maintain their crunch.
Notes
Pro Tips:
- Use mini pretzel twists or similarly sized pretzel shapes because their small curves hold seasoning well and make each bite flavorful.
- Spread the coated pretzels loosely across the baking sheet because overcrowding traps moisture and prevents even crisping in the oven.
- Adjust the cayenne pepper to suit your taste and use a smaller amount for children or increase it slightly for a spicier snack.
- Cool the pretzels completely before transferring them to an airtight container so the remaining warmth does not create condensation.
Storage: Allow the Seasoned Pretzels to cool completely before transferring them into an airtight storage container. Any remaining warmth can create condensation and soften the crunchy coating. Make sure the pretzels feel dry and crisp before closing the lid.
Store the pretzels at room temperature in a cool and dry pantry for up to one week for the best flavor and texture. Keep the container away from direct sunlight and moisture because humidity can make the pretzels lose their crunch. Use a clean and dry container whenever storing additional portions.
Refrigeration is not recommended because the additional moisture can affect the crispy texture. Freezing is also unnecessary for this recipe and may cause condensation after thawing. For the best results prepare only the amount you expect to enjoy within one week.
If the pretzels become slightly soft after storage you can spread them on a parchment-lined baking sheet and warm them at 250°F for about 5 to 10 minutes. Watch carefully to avoid overbrowning and allow them to cool completely before serving. Discard pretzels that show signs of spoilage or unusual odors.
- Prep Time: 15 minutes
- Cook Time: 30 minutes
- Category: Lunch
- Cuisine: American