


You guys! When my mom tasted this sandwich she said…” I think that’s one of the best things you’ve ever done”! I have to say it’s one of my top five favorites! A Saturday lunch experiment turned into the best Honey Pepper Pimento Sandwich ever! It has the same crunch as a restaurant style chicken sandwich but it is made at home with juicy chicken and creamy pimento cheese and peppery honey and tangy jalapeños.
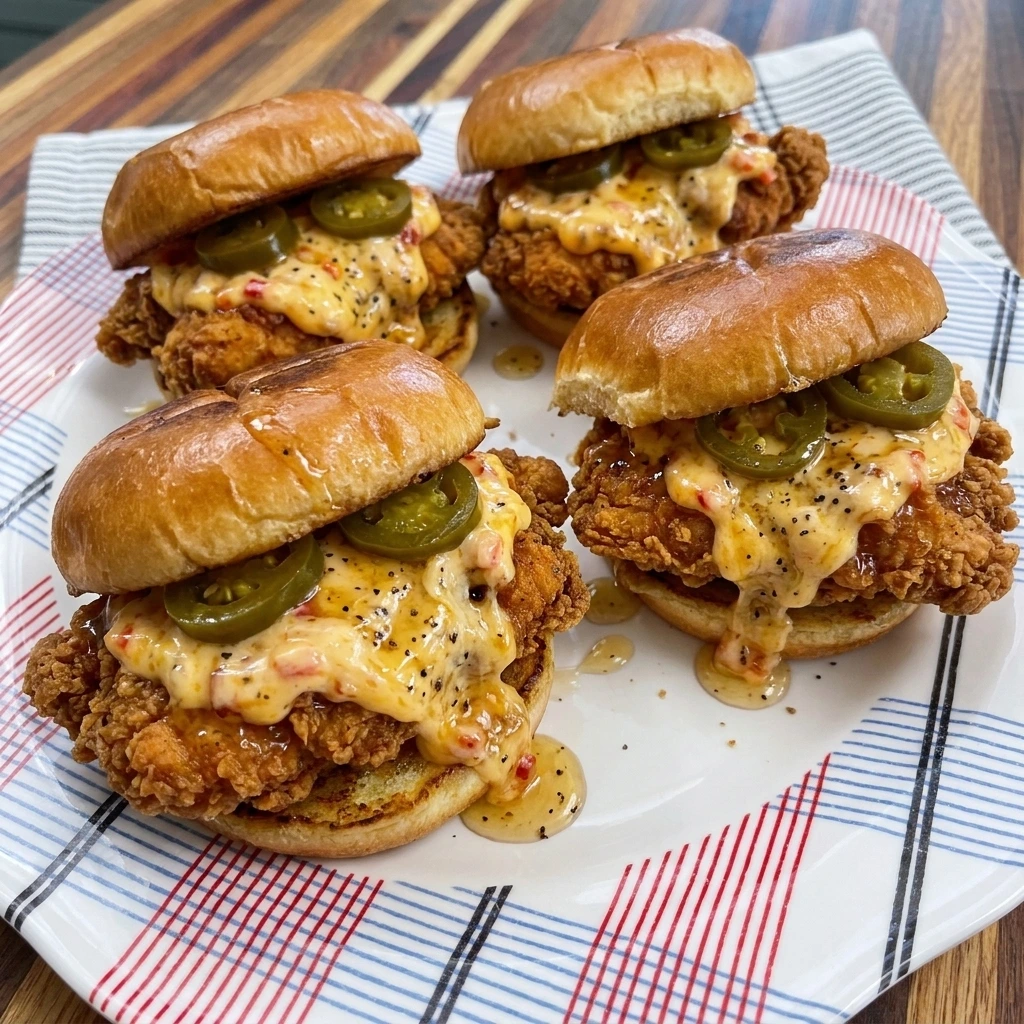
This sandwich gets its rich filling from sharp cheddar and cream cheese and pimentos while the chicken stays crisp under a sweet peppery drizzle. I think you all know I’m a chicken lover and I already tasted CrockPot Cajun Chicken Pasta and so many cozy chicken recipes before and I rarely love a sandwich this much but this one is just to die for! The recipe makes 4 sandwiches and I typically like to make things in smaller batches since I do so much cooking but if you have a bigger group or want to make more you can double the batch and make 8!
These sandwiches can be lunch or you can pair them with some fresh fruit and a crunchy salad for a tasty dinner. They’re also great for meal prep if you want to make the pimento cheese ahead and keep the cooked chicken chilled and assemble everything during the week.
Ingredients
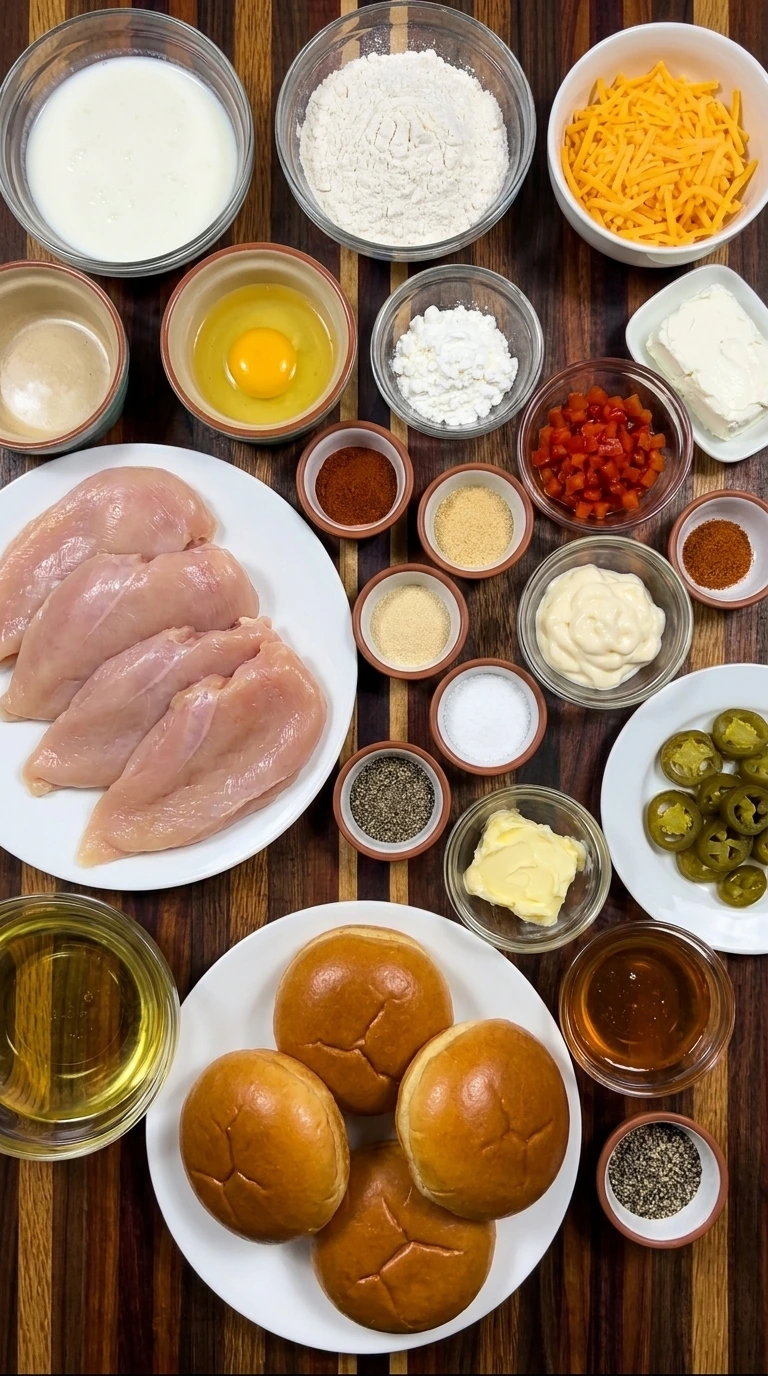
Here is what I use for this recipe :
- Boneless skinless chicken breast cutlets: They provide the juicy protein layer and hold the crisp breading for each sandwich.
- Buttermilk: It tenderizes the chicken and helps the seasoned coating cling evenly to every cutlet.
- Large egg: It binds the buttermilk coating to the chicken so the dry breading forms a sturdy crust.
- All purpose flour: It creates the main structure of the fried coating and turns crisp as the chicken cooks.
- Cornstarch: It lightens the flour coating and encourages a craggy crisp texture around the chicken.
- Smoked paprika: It adds warm color and a gentle smoky note to the seasoned breading.
- Garlic powder: It adds savory depth throughout the breading without adding moisture.
- Onion powder: It rounds out the savory seasoning and supports the sharp cheese topping.
- Kosher salt: It seasons the chicken coating and balances the honey and rich pimento cheese.
- Ground black pepper: It seasons the breading with a mild pepper note that carries through every bite.
- Neutral frying oil: It cooks the breaded chicken evenly and creates a deep golden crisp crust.
- Sharp cheddar cheese: It gives the pimento spread bold cheese flavor and a thick textured body.
- Cream cheese: It makes the pimento mixture creamy and helps the shredded cheddar hold together.
- Diced pimentos: They add sweet pepper flavor and bright red flecks throughout the cheese mixture.
- Mayonnaise: It loosens the cheese mixture just enough to make it creamy and easy to spread.
- Cayenne pepper: It adds a gentle background heat that balances the creamy cheese and sweet honey.
- Brioche buns: They provide a soft rich sandwich base that contrasts with the crisp chicken.
- Unsalted butter: It helps the cut sides of the buns toast to a lightly golden and flavorful finish.
- Honey: It adds the sweet glaze that softens the savory spice and rich pimento cheese.
- Coarsely cracked black pepper: It turns the honey into a peppery drizzle with a fragrant bite and visible dark flecks.
- Pickled jalapeño slices: They add tangy heat and a crisp acidic contrast with six slices for each sandwich.
Tools I Use :
- Mixing bowls: Use separate bowls to combine the pimento cheese and buttermilk coating and seasoned breading without cross mixing components.
- Cast iron skillet or heavy frying pan: Use a heavy pan to maintain steady heat for frying the chicken and then to toast the brioche buns evenly.
- Instant read thermometer: Use it to confirm the thickest part of each chicken cutlet reaches 165°F before serving.
- Wooden cutting board: Use it as a stable surface for arranging the four sandwiches before the final serving portion is plated.
- White serving plate: Use it for the final single sandwich portion so the crisp crust and layered filling remain easy to see.
Instructions
Step 1: Fold the pimento cheese filling
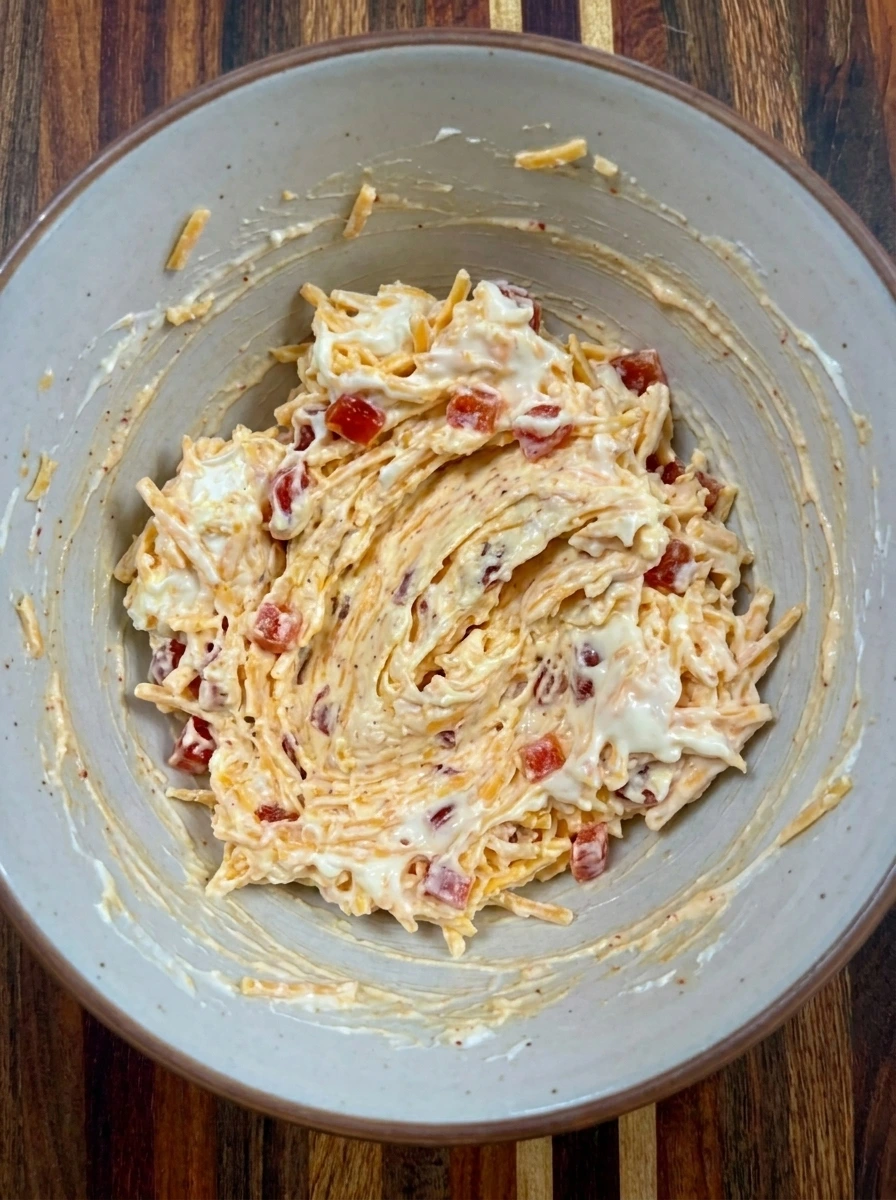
Fold the shredded cheddar with softened cream cheese and drained pimentos and mayonnaise and cayenne until the separate ingredients become a thick speckled mixture. Leave some cheddar strands and small pimento pieces visible so the filling looks creamy yet homemade. The finished mixture should hold soft ridges and uneven red flecks rather than becoming completely smooth. Set it aside while the chicken moves through its crisp coating stages.
Tip: Drain the pimentos thoroughly before mixing so the filling stays thick enough to sit on hot chicken without sliding away.
Step 2: Coat the chicken in buttermilk
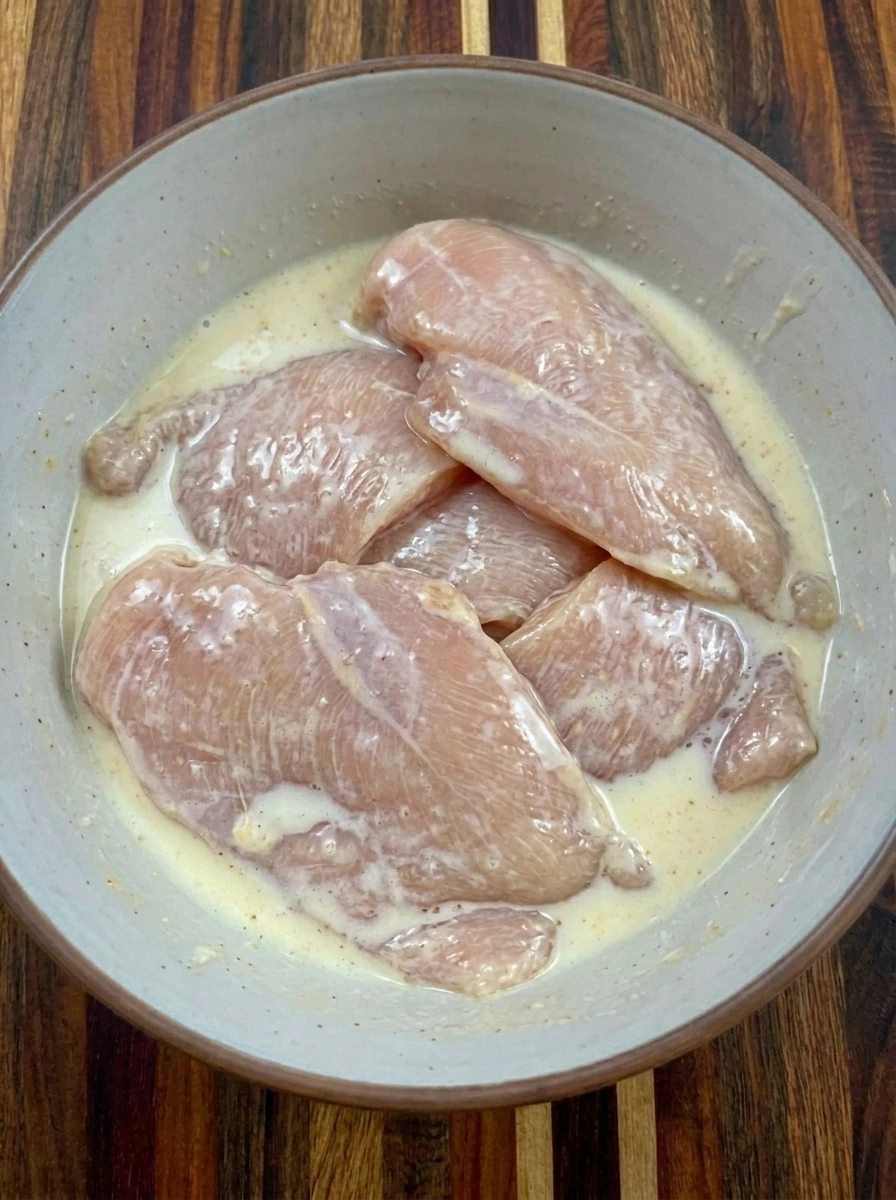
Combine the buttermilk with the egg and settle all four chicken cutlets into the mixture until their surfaces turn glossy and evenly wet. Shift the cutlets so some edges overlap naturally and every piece picks up the coating. The chicken should look fully moistened with pale buttermilk clinging in an uneven layer. This wet coating gives the dry breading enough grip to form craggy patches in the next step.
Tip: Press each cutlet into the buttermilk mixture so the surface is fully wet because dry spots can leave gaps in the final crust.
Step 3: Press the chicken into seasoned breading
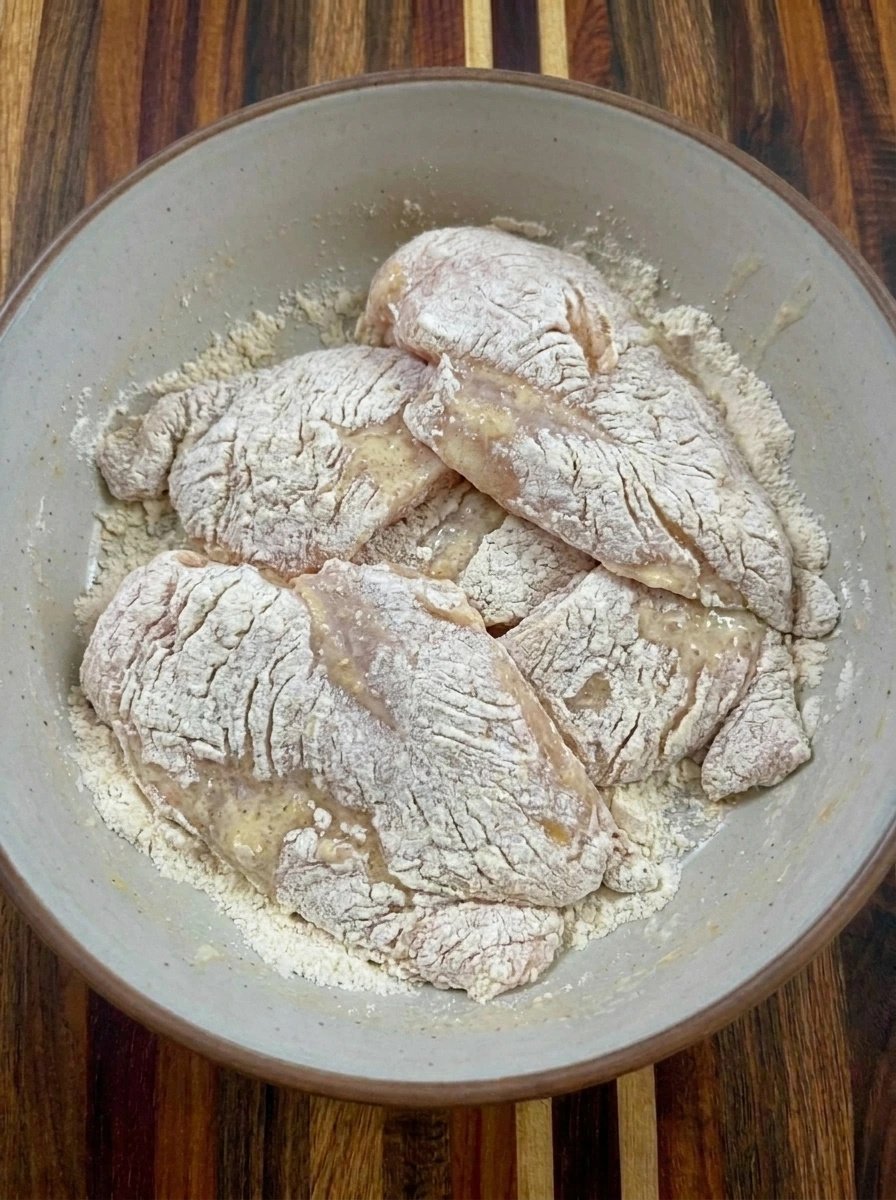
Combine the flour with cornstarch and paprika and garlic powder and onion powder and salt and ground black pepper before pressing all four wet chicken cutlets into the dry mixture. Turn and press each piece until rough clumps of breading cling around the edges and across the surface. The pale wet chicken should now look powdery and heavily textured with uneven ridges and thicker patches. Keep the shapes irregular because those rough spots become the crispest parts during frying.
Tip: Press small flour clumps onto the wet chicken instead of smoothing them away because those uneven bits fry into extra crisp ridges.
Step 4: Fry the chicken until deeply golden
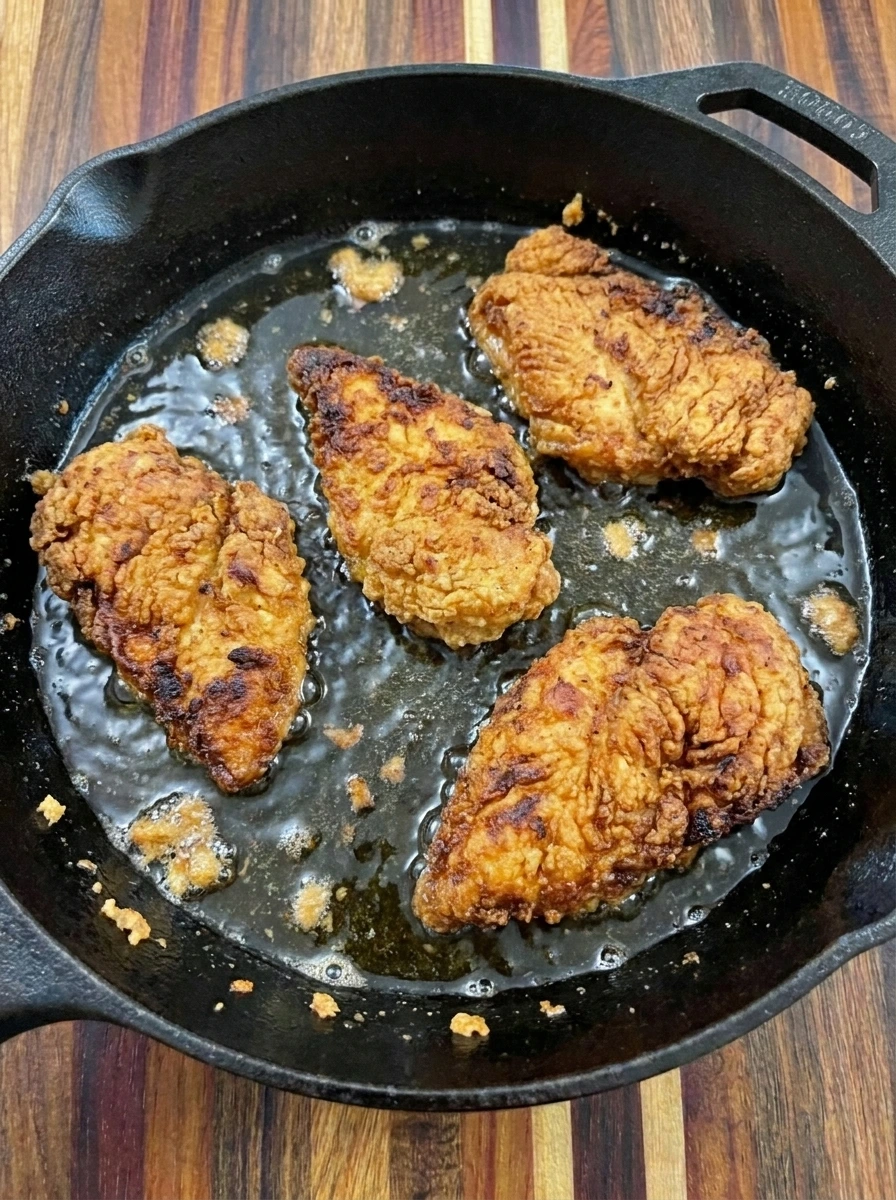
Lower the four breaded chicken cutlets into the hot oil and fry until the pale coating turns deep golden with darker ridges and crisp bubbled patches. Flip the pieces during cooking so both sides brown while the cutlets shift toward the center and edges of the skillet. The finished chicken should look crisp and irregular with small crumbs floating near the pieces and uneven golden tones across the crust. Cook until every cutlet reaches 165°F at the thickest point while keeping the exterior crunchy.
Tip: Fry at a steady moderate heat so the thickest chicken cooks through before the craggy breading becomes too dark or bitter.
Step 5: Toast the brioche buns
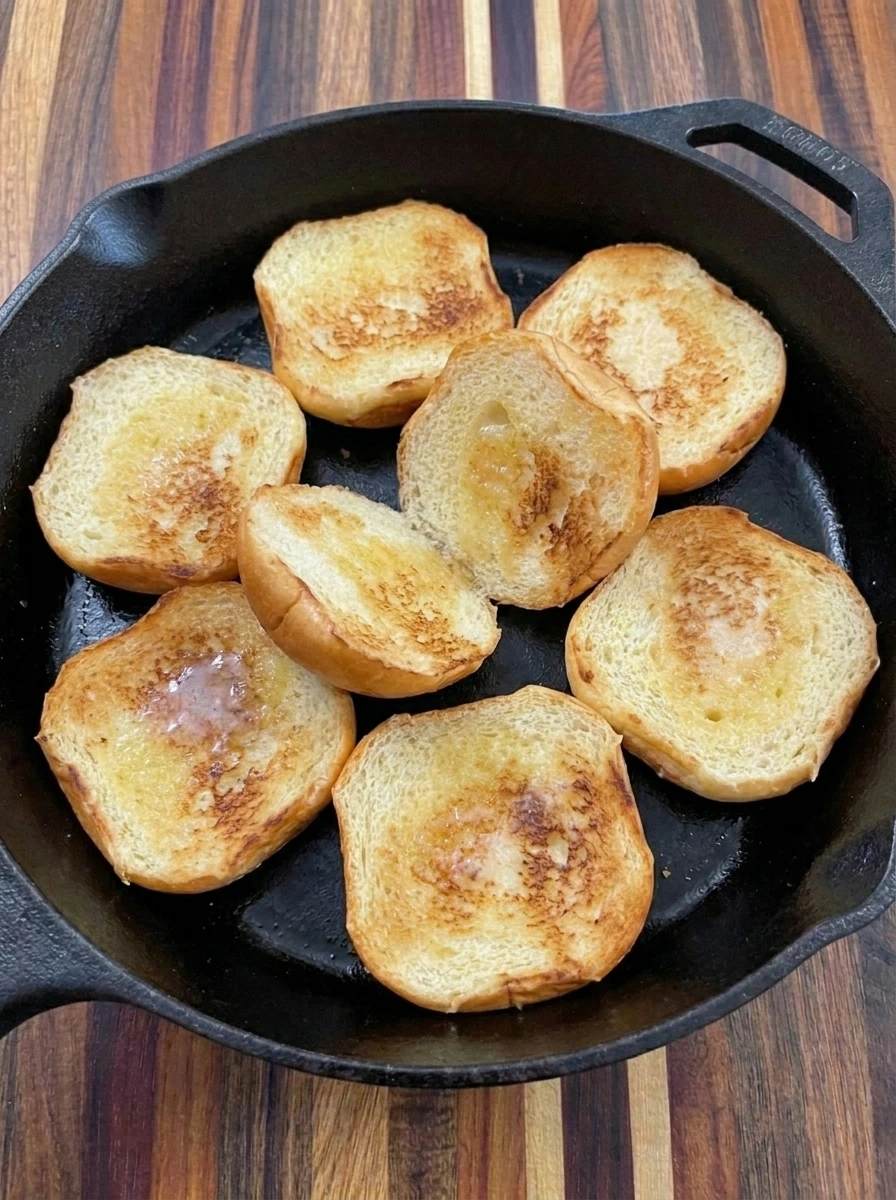
Spread the softened butter over the cut sides of all four brioche buns and toast them until the pale interiors become lightly golden with a few darker patches. Keep the bun halves casually shifted so some edges brown more than others. The toasted surfaces should look dry and lightly crisp while the outer buns stay soft. This thin toasted layer helps the bread hold the creamy cheese and honey without quickly turning soggy.
Tip: Toast only the cut sides so the buns keep their soft outer texture while gaining enough structure to hold the juicy filling.
Step 6: Layer the four sandwiches
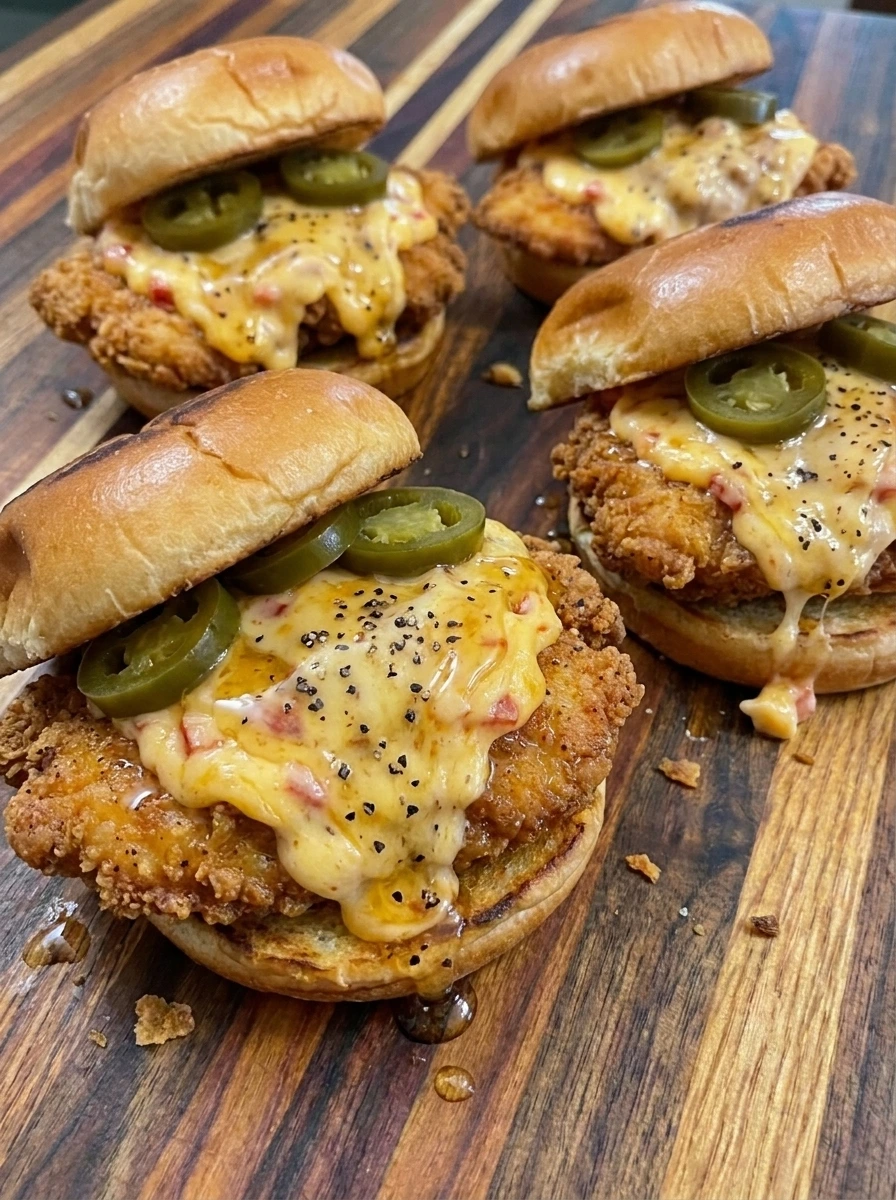
Place one fried chicken cutlet on each of the four toasted bottom buns and spoon the pimento cheese over the hot crust in uneven mounds. Stir the honey with cracked black pepper and drizzle it over the cheese before tucking six pickled jalapeño slices into each sandwich. Set the four top buns on at slight angles so the creamy cheese and pepper flecked honey remain visible around the edges. The finished sandwiches should look generous and casual with drips and overlapping jalapeños rather than identical layers.
Tip: Add the pimento cheese while the chicken is still warm so it softens slightly without melting into a completely smooth layer.
Step 7: Cut and plate one sandwich
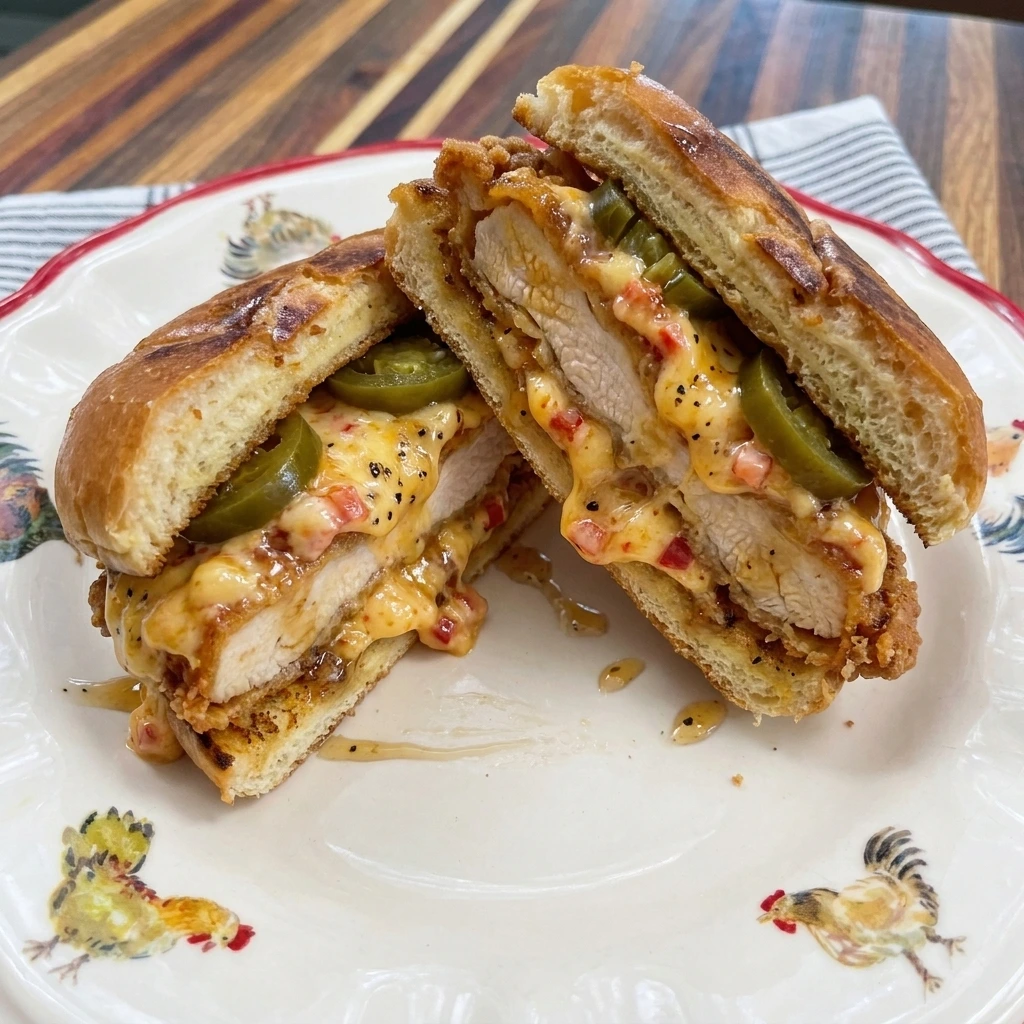
Transfer one finished sandwich to a white plate and cut it in half so the juicy chicken and craggy coating and softened pimento cheese are visible inside. Angle the two halves slightly apart with a little honey slipping toward the cut edge and jalapeños peeking from uneven layers. The single portion should show a crisp browned crust and soft toasted bun with creamy cheese pressed into the rough chicken surface. Keep the halves casually placed so the sandwich looks homemade and ready to eat.
Tip: Let the sandwich rest for a minute before cutting so the layers settle while the crust still stays crisp and visibly textured.
Pro Tips
- Drain the pimentos very well before mixing so the cheese stays thick and creamy instead of turning loose or watery.
- Keep the chicken cutlets close in thickness so all four pieces cook evenly and finish with crisp edges at about the same time.
- Add the peppered honey just before serving so the fried coating stays crisp while every bite still gets a sweet spicy finish.
- Toast the cut sides of the buns until lightly golden so they resist the creamy cheese and honey without becoming soggy.
Storage Instructions
Store the pimento cheese in a covered container in the refrigerator for up to four days so the creamy texture and pepper flavor stay fresh. Keep it separate from the buns and chicken until you are ready to build the sandwiches. Refrigerate cooked chicken in a sealed container for up to three days after it has cooled.
Place a small piece of parchment between pieces if they must overlap so the crust does not stick together. Keep the buns at room temperature in a sealed bag for one to two days or freeze them for longer storage.
Store the honey mixture and jalapeños separately so neither ingredient softens the bread or coating during storage. Reheat the chicken until hot and crisp before assembling the sandwich with cold or room temperature pimento cheese. Add the peppered honey and jalapeños only at serving time for the best contrast between crisp and creamy textures.
Frequently Asked Questions
Yes. Prepare the pimento cheese and breading ahead then fry the chicken and assemble the sandwiches close to serving.
It has a gentle kick from black pepper and jalapeños while the honey and creamy pimento cheese keep the heat balanced.
Yes. Bake the breaded chicken until crisp and fully cooked though the coating will be lighter than the fried version.
Sharp cheddar gives the filling bold flavor while cream cheese and mayonnaise make the pimento mixture smooth and spreadable.
See You in the Kitchen
I hope you enjoy all the recipes I share with you including this delicious Honey Pepper Pimento Sandwich and our Marry Me Chicken Soup plus CrockPot Chicken Tater Tot Casserole!
I hope you try it and enjoy it and rate it and share it with your friends and family.
Print
Honey Pepper Pimento Sandwich
- Total Time: 45 minutes
- Yield: 4 servings
Description
This Honey Pepper Pimento Sandwich is an easy way to turn crispy chicken into one of the best lunch ideas for busy days. The quick and simple layers combine crunchy chicken with creamy pimento cheese and peppery honey plus tangy jalapeños for bold contrast. It feels indulgent yet can fit healthy meal prep with a lighter frying method. Serve it for a weeknight dinner or brunch or a casual party or potluck when you want a warm sandwich everyone can build and enjoy.
Ingredients
- 4 cutlets about 5 ounces each Boneless skinless chicken breast cutlets
- 1 cup Buttermilk
- 1 Large egg
- 1 1/2 cups All purpose flour
- 1/2 cup Cornstarch
- 1 teaspoon Smoked paprika
- 1 teaspoon Garlic powder
- 1 teaspoon Onion powder
- 1 teaspoon Kosher salt
- 1/2 teaspoon Ground black pepper
- 2 cups Neutral frying oil
- 1 1/2 cups shredded Sharp cheddar cheese
- 4 ounces softened Cream cheese
- 1/3 cup drained Diced pimentos
- 2 tablespoons Mayonnaise
- 1/4 teaspoon Cayenne pepper
- 4 buns Brioche buns
- 2 tablespoons softened Unsalted butter
- 1/3 cup Honey
- 1 teaspoon Coarsely cracked black pepper
- 24 slices Pickled jalapeño slices
Instructions
- Fold the shredded cheddar with softened cream cheese and drained pimentos and mayonnaise and cayenne until the separate ingredients become a thick speckled mixture. Leave some cheddar strands and small pimento pieces visible so the filling looks creamy yet homemade.
The finished mixture should hold soft ridges and uneven red flecks rather than becoming completely smooth. Set it aside while the chicken moves through its crisp coating stages.
- Combine the buttermilk with the egg and settle all four chicken cutlets into the mixture until their surfaces turn glossy and evenly wet. Shift the cutlets so some edges overlap naturally and every piece picks up the coating.
The chicken should look fully moistened with pale buttermilk clinging in an uneven layer. This wet coating gives the dry breading enough grip to form craggy patches in the next step.
- Combine the flour with cornstarch and paprika and garlic powder and onion powder and salt and ground black pepper before pressing all four wet chicken cutlets into the dry mixture. Turn and press each piece until rough clumps of breading cling around the edges and across the surface.
The pale wet chicken should now look powdery and heavily textured with uneven ridges and thicker patches. Keep the shapes irregular because those rough spots become the crispest parts during frying.
- Lower the four breaded chicken cutlets into the hot oil and fry until the pale coating turns deep golden with darker ridges and crisp bubbled patches. Flip the pieces during cooking so both sides brown while the cutlets shift toward the center and edges of the skillet.
The finished chicken should look crisp and irregular with small crumbs floating near the pieces and uneven golden tones across the crust. Cook until every cutlet reaches 165°F at the thickest point while keeping the exterior crunchy.
- Spread the softened butter over the cut sides of all four brioche buns and toast them until the pale interiors become lightly golden with a few darker patches. Keep the bun halves casually shifted so some edges brown more than others.
The toasted surfaces should look dry and lightly crisp while the outer buns stay soft. This thin toasted layer helps the bread hold the creamy cheese and honey without quickly turning soggy.
- Place one fried chicken cutlet on each of the four toasted bottom buns and spoon the pimento cheese over the hot crust in uneven mounds. Stir the honey with cracked black pepper and drizzle it over the cheese before tucking six pickled jalapeño slices into each sandwich.
Set the four top buns on at slight angles so the creamy cheese and pepper flecked honey remain visible around the edges. The finished sandwiches should look generous and casual with drips and overlapping jalapeños rather than identical layers.
- Transfer one finished sandwich to a white plate and cut it in half so the juicy chicken and craggy coating and softened pimento cheese are visible inside. Angle the two halves slightly apart with a little honey slipping toward the cut edge and jalapeños peeking from uneven layers.
The single portion should show a crisp browned crust and soft toasted bun with creamy cheese pressed into the rough chicken surface. Keep the halves casually placed so the sandwich looks homemade and ready to eat.
Notes
Pro Tips:
- Drain the pimentos very well before mixing so the cheese stays thick and creamy instead of turning loose or watery.
- Keep the chicken cutlets close in thickness so all four pieces cook evenly and finish with crisp edges at about the same time.
- Add the peppered honey just before serving so the fried coating stays crisp while every bite still gets a sweet spicy finish.
- Toast the cut sides of the buns until lightly golden so they resist the creamy cheese and honey without becoming soggy.
Storage: Store the pimento cheese in a covered container in the refrigerator for up to four days so the creamy texture and pepper flavor stay fresh. Keep it separate from the buns and chicken until you are ready to build the sandwiches.
Refrigerate cooked chicken in a sealed container for up to three days after it has cooled. Place a small piece of parchment between pieces if they must overlap so the crust does not stick together.
Keep the buns at room temperature in a sealed bag for one to two days or freeze them for longer storage. Store the honey mixture and jalapeños separately so neither ingredient softens the bread or coating during storage.
Reheat the chicken until hot and crisp before assembling the sandwich with cold or room temperature pimento cheese. Add the peppered honey and jalapeños only at serving time for the best contrast between crisp and creamy textures.
- Prep Time: 20 minutes
- Cook Time: 25 minutes
- Category: Lunch
- Cuisine: American