Our family discovered this Classic Fudge & Crunch Cake during the height of summer. Our boys were hosting a cousin from Detroit at our remote lake cottage where they frolicked in the lake during the day and toasted marshmallows around the bonfire every night.
That was one of my best weeks of the year and this easy chocolate cake quickly became one of my favorite dessert recipes. If you enjoy something lighter alongside a rich slice then our Banana Yogurt Parfait Bowl is another family favorite.
I will never forget the first time I made this and the look on the kids’ faces when they tasted it. Read on as I show you how to make this unforgettable family dessert.
Ingredients
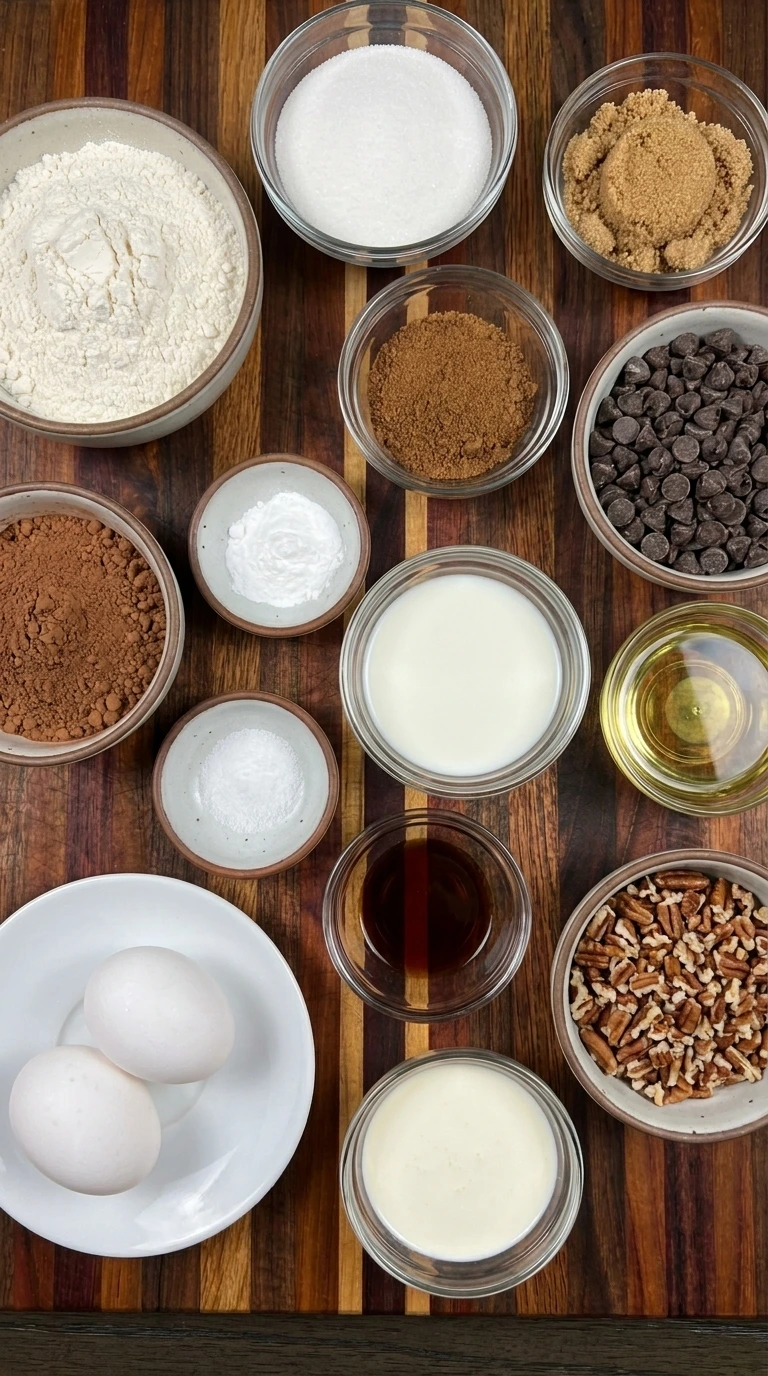
Here is what I use for this recipe and you can adjust nuts or spices based on preference:
- All-purpose flour: Provides structure so the cake rises while keeping the finished crumb sturdy enough for the fudge topping.
- Unsweetened cocoa powder: Creates the deep chocolate flavor and dark color that define the fudgy cake base.
- Granulated sugar: Sweetens the batter while helping the baked cake stay tender and moist.
- Brown sugar: Adds caramel flavor and extra moisture that make the chocolate crumb richer.
- Baking powder: Provides lift so the cake develops a tender crumb instead of becoming overly dense.
- Fine salt: Balances the sweetness and strengthens the cocoa and chocolate flavors.
- Large eggs: Bind the batter while contributing richness and structure during baking.
- Whole milk: Hydrates the dry ingredients and keeps the cake crumb soft after baking.
- Vegetable oil: Adds lasting moisture and gives the finished cake its soft fudgy texture.
- Vanilla extract: Rounds out the cocoa flavor and adds warm aromatic sweetness to the batter.
- Semi-sweet chocolate chips: Half creates pockets in the crunchy topping while the remainder forms the smooth fudge finish.
- Chopped pecans: Create the signature toasted crunch and add irregular texture across the cake surface.
- Heavy cream: Combines with chocolate to create a glossy fudge topping that firms slightly after cooling.
Tools You’ll Need
- Large mixing bowl: Provides enough room to combine the dry and wet ingredients without spilling while developing the chocolate batter.
- Whisk: Combines the batter efficiently while breaking up cocoa lumps and incorporating the wet ingredients evenly.
- Rubber spatula: Scrapes the bowl clean and helps transfer the thick batter into the cake pan with minimal waste.
- 9-inch round cake pan: Holds the batter at the correct depth so the center stays fudgy while the top develops its toasted crunch.
- Small saucepan: Gently combines the heavy cream and chocolate chips into a smooth glossy fudge topping.
- Cooling rack: Allows air to circulate around the baked cake so it cools evenly before the fudge topping is added.
Instructions
Step 1: Mix the chocolate batter
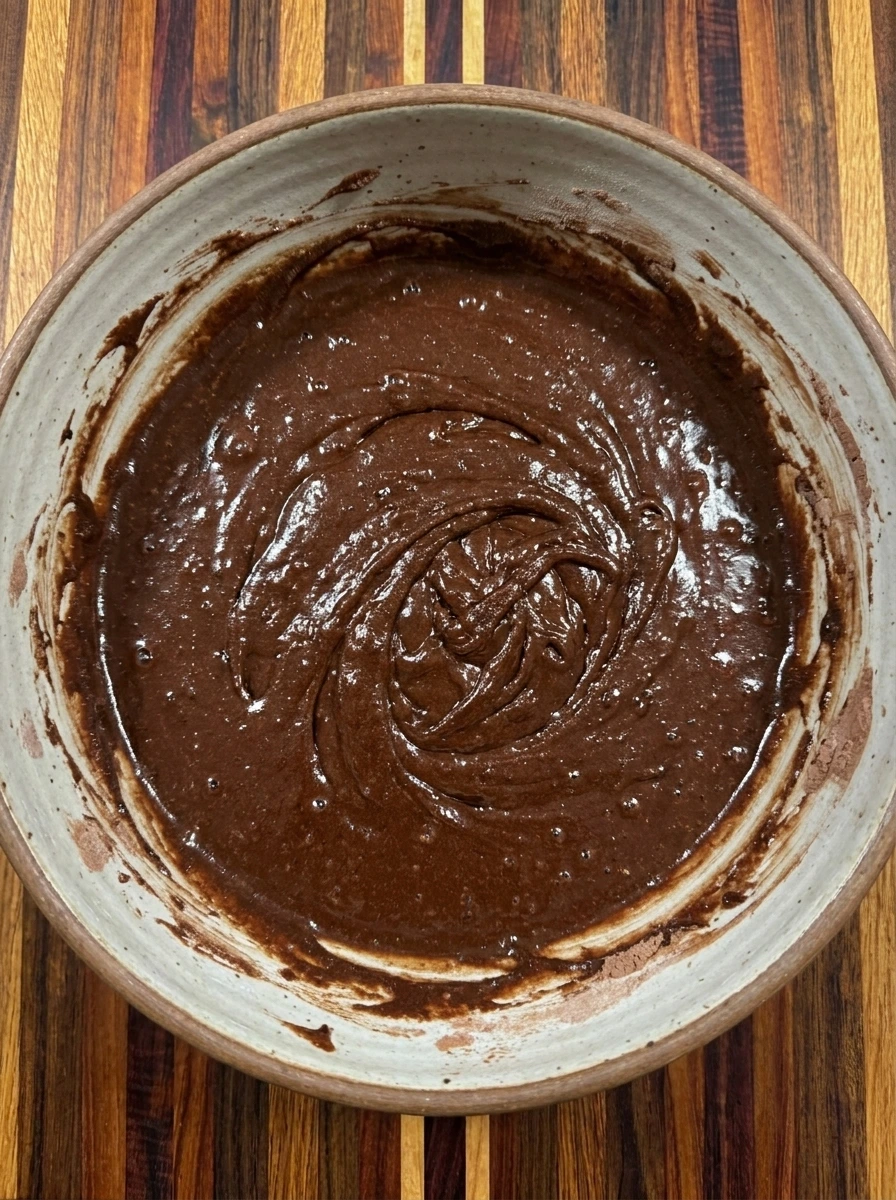
Combine the flour with cocoa and both sugars then add the eggs with milk and oil plus vanilla. Mix until the pale dry ingredients disappear into a thick dark chocolate batter. The finished mixture should look glossy yet slightly uneven. A few small streaks and bubbles are natural and help the batter look homemade.
Tip: Mix only until the dry streaks disappear because excessive mixing develops gluten and can make the finished chocolate cake tougher.
Step 2: Pour the batter into the cake pan
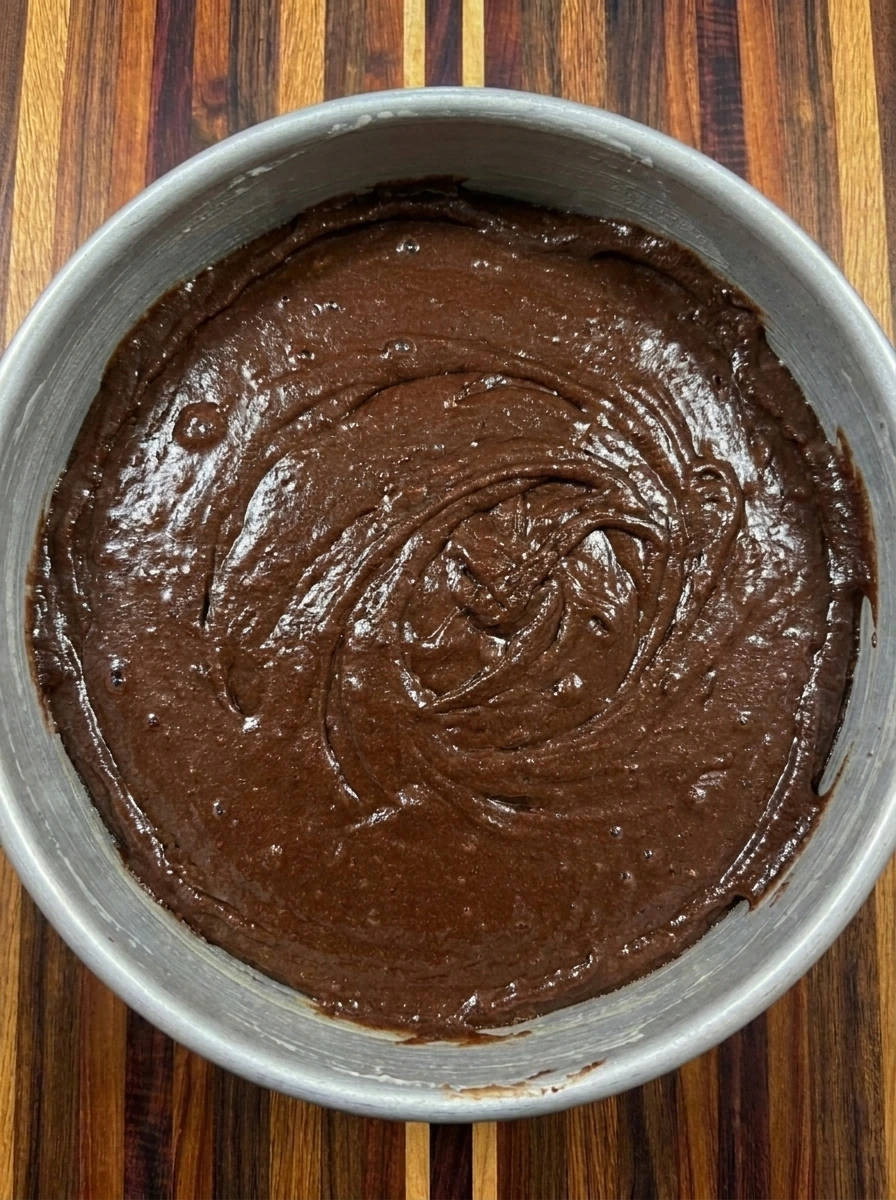
Transfer the chocolate batter into the cake pan so the mixture changes from a deep bowl shape into a broad cake layer. Spread it loosely so the thickness is mostly even while leaving subtle ripples across the surface. The batter should reach the edges without becoming perfectly smooth. Small ridges and irregular swirls will disappear naturally as the cake rises.
Tip: Spread the batter gently toward the edges while leaving a few natural ripples because a perfectly polished surface is unnecessary.
Step 3: Scatter the chocolate pecan crunch
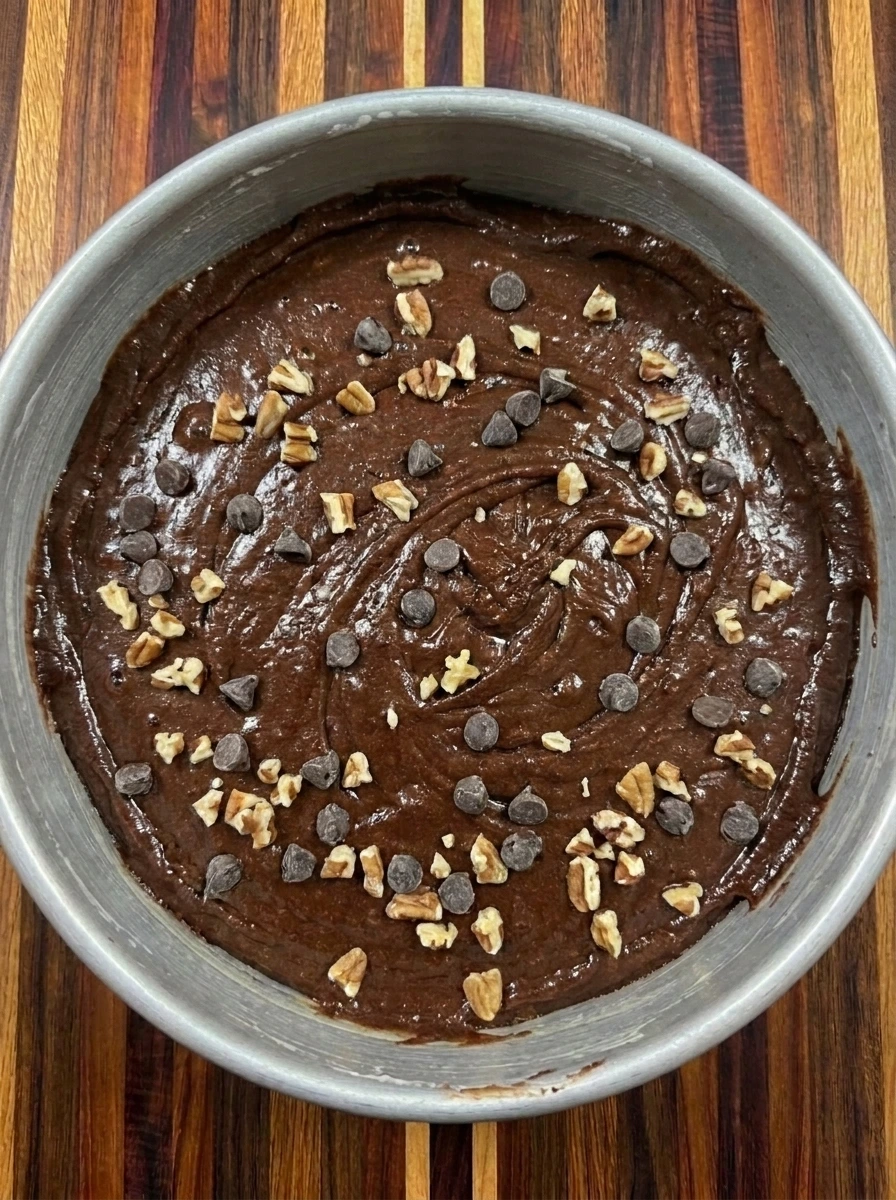
Scatter half of the chocolate chips with all of the chopped pecans across the wet batter. Leave some chocolate showing between clusters so the topping looks casually distributed instead of perfectly uniform. The surface now changes from smooth dark batter into a textured layer with rough pecan pieces and chocolate chips partly touching the batter. Keep a few bare patches for natural contrast.
Tip: Scatter the pecans and chocolate unevenly so some areas become extra crunchy while other patches reveal the fudgy cake underneath.
Step 4: Bake until risen and crackled
Bake until the batter rises around the pecans and the center becomes set while staying soft beneath the surface. The chocolate chips melt unevenly as the nuts toast and the top develops small cracks. The finished cake should look dark and slightly domed with irregular browned pecans across the surface. Some edges will rise more than others and that homemade variation is ideal.
Tip: Remove the cake when a tester shows moist crumbs rather than wet batter because overbaking can reduce the signature fudgy texture.
Step 5: Pour the warm fudge over the cake
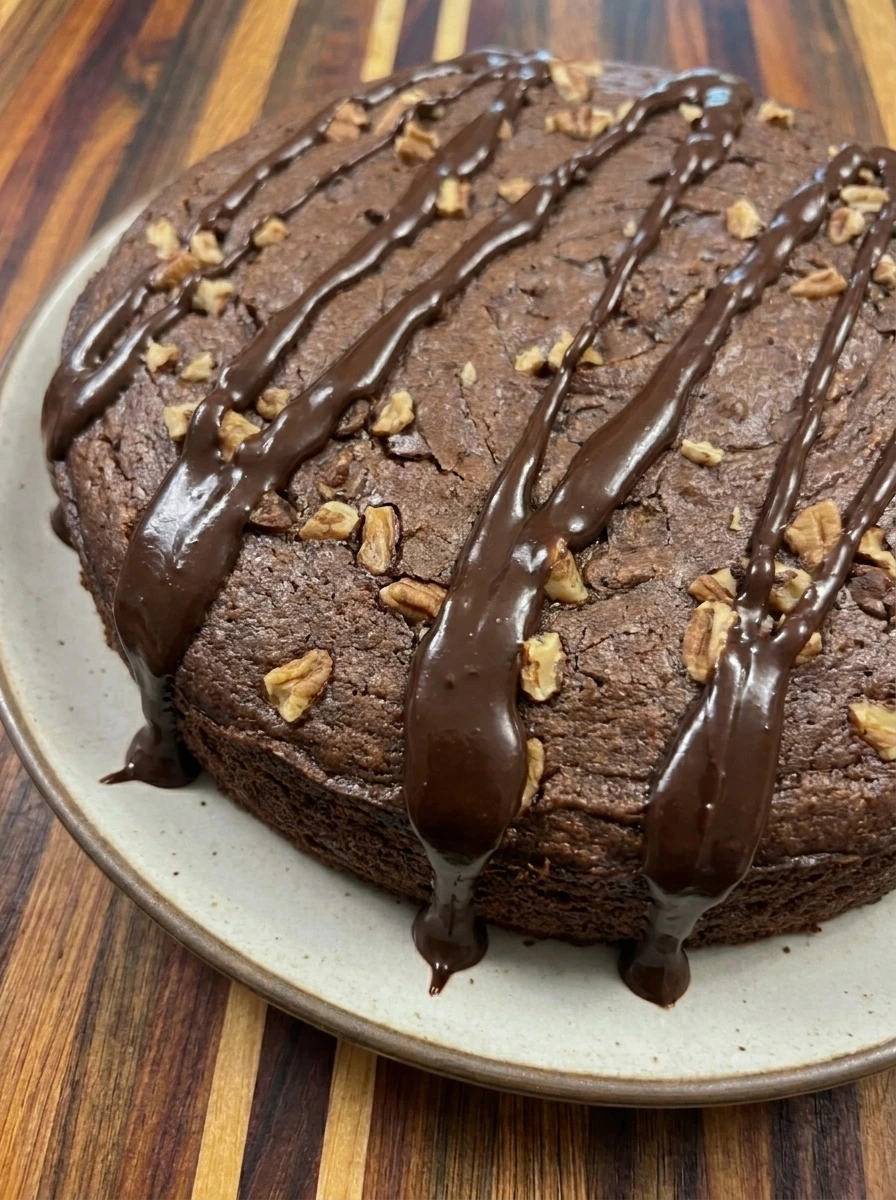
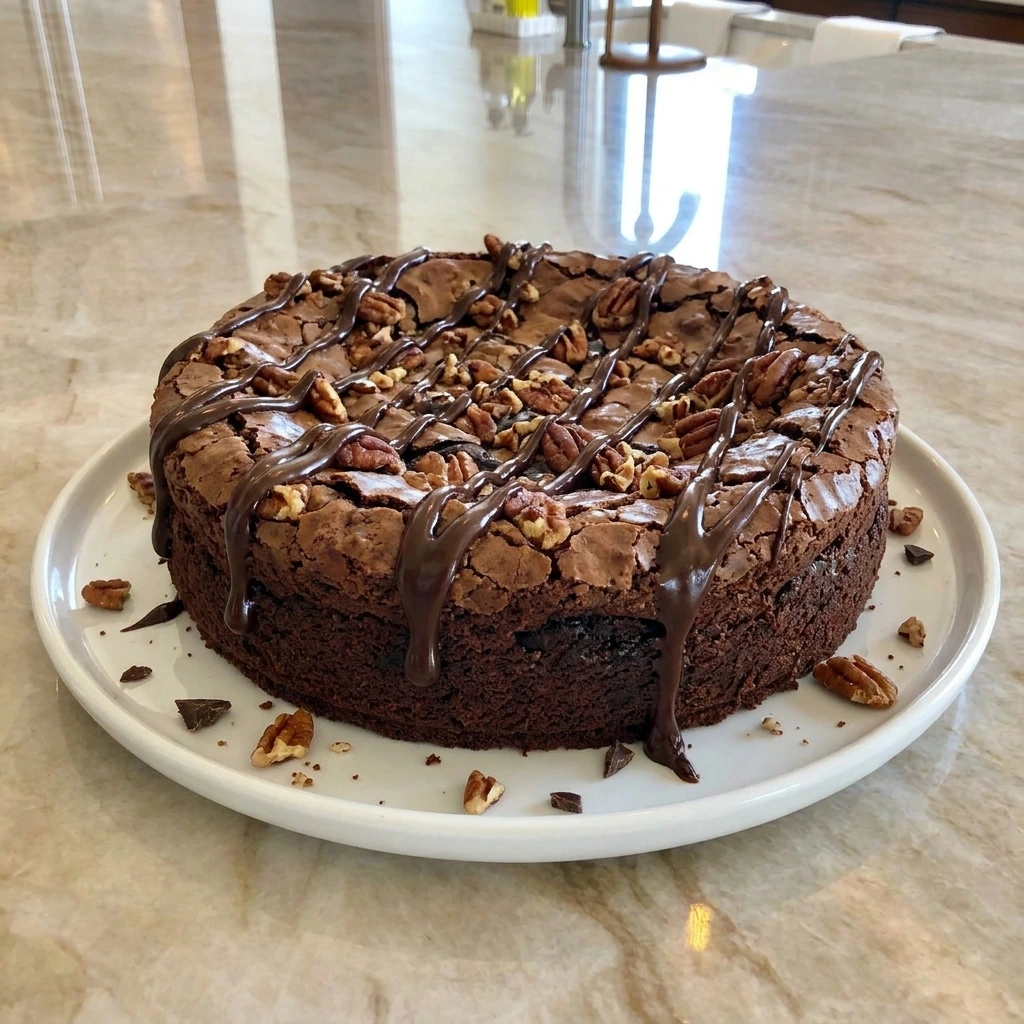
Melt the remaining chocolate chips with the heavy cream until they become thick glossy fudge. Pour the fudge unevenly across the cooled cake so dark ribbons settle around the toasted crunch instead of hiding it completely. The cake now gains a shiny chocolate finish while patches of toasted pecans remain visible. Allow some fudge to gather in shallow cracks and leave other areas lightly coated.
Tip: Let the cake cool before adding the fudge so the topping stays glossy and thick rather than soaking completely into the warm crumb.
Step 6: Slice and serve the fudgy cake
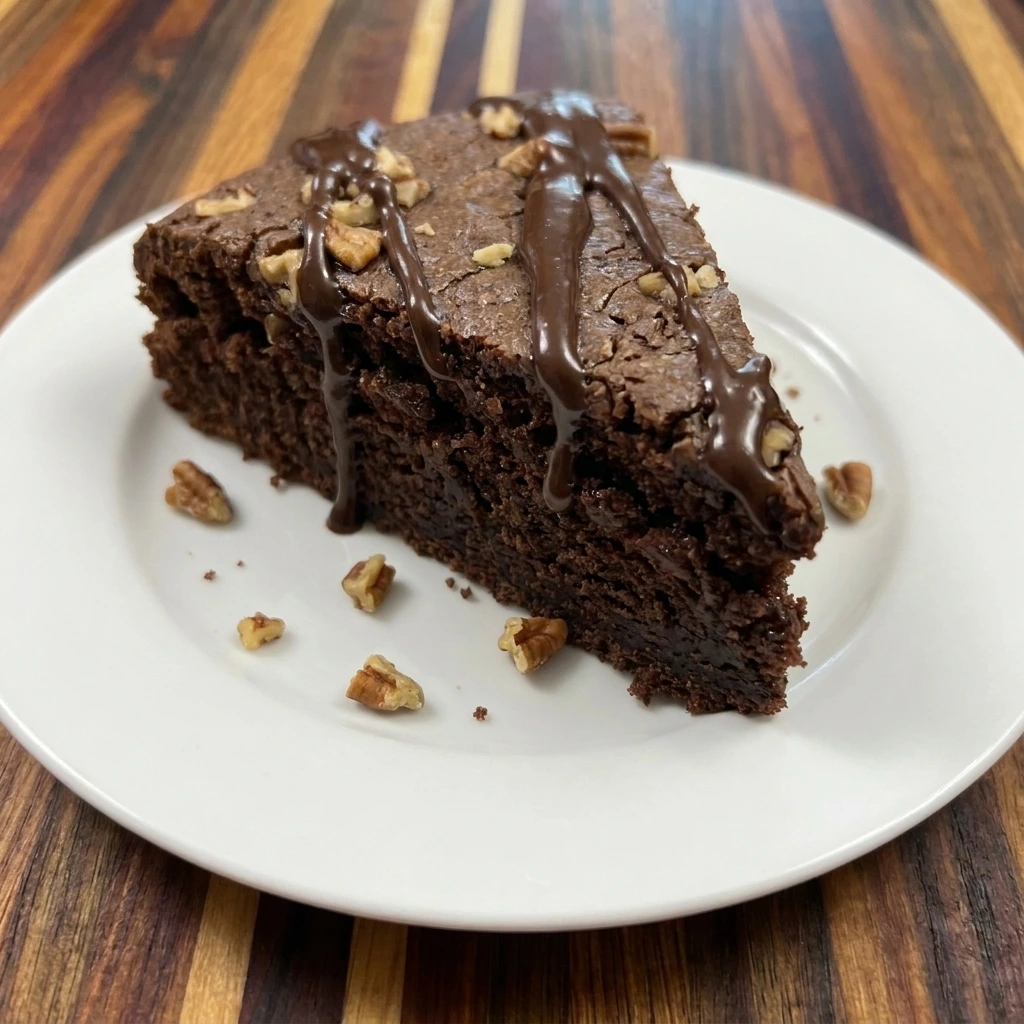
Cut one generous slice and transfer it to a white plate so the dark moist interior becomes visible beneath the crunchy top. Let the slice sit naturally with a few loose pecan crumbs beside it. The final portion should reveal an uneven fudgy crumb with glossy chocolate streaks and toasted crunch along the top edge. Slightly rough cut edges make the serving look freshly homemade.
Tip: Cut the cooled cake cleanly while accepting a few loose crumbs because the contrast between soft fudge and crisp topping is part of its appeal.
Pro Tips
- Measure the flour lightly rather than packing it into the cup because excess flour can make this naturally fudgy cake dry and dense.
- Use pecans chopped into irregular pieces so the topping develops both tiny crisp bits and larger toasted pockets in every slice.
- Check the center near the end of baking and remove the cake when moist crumbs remain because residual heat continues setting the interior.
- Cool the cake before adding warm fudge so the chocolate forms visible glossy ribbons instead of disappearing into the soft crumb.
Storage Instructions
Keep leftover Classic Fudge & Crunch Cake covered at room temperature for up to two days. Store it away from direct heat so the fudge stays thick and the cake does not dry out. For longer storage place slices in an airtight container and refrigerate them for up to five days. Allow a chilled slice to sit at room temperature before serving so the crumb becomes softer again. To freeze the cake wrap individual cooled slices tightly and place them inside a freezer safe container.
Freeze for up to two months and thaw overnight in the refrigerator before bringing them to room temperature. If the topping loses some shine after chilling you can add a small fresh drizzle of warm chocolate before serving. This restores the glossy finish while keeping the original crunch visible.
Frequently Asked Questions
Yes. Bake it one day ahead then cool it completely and keep it covered before adding or refreshing the fudge topping.
Avoid overbaking and remove the cake when a tester has moist crumbs because the center continues setting as it cools.
Yes. Walnuts or hazelnuts work well although pecans give the topping an especially buttery and crisp texture.
Yes. Freeze individual fully cooled slices tightly wrapped for up to two months then thaw them before serving.
See You in the Kitchen
I hope you try this Classic Fudge & Crunch Cake soon!
It is a simple recipe that looks beautiful and tastes incredible and makes every occasion a little more special alongside favorites like Crockpot Mac and Cheese or a fresh Banana Yogurt Parfait Bowl.
Do not forget to share your results or save this recipe for later because it is one worth keeping.
Print
Classic Fudge & Crunch Cake
- Total Time: 55 minutes
- Yield: 8 servings
Description
Classic Fudge & Crunch Cake is an easy dessert with a quick chocolate batter and a simple crunchy topping that bakes into rich fudgy layers. It is one of the best ideas for a holiday table or potluck and it also works for brunch or a party when you want a homemade treat. The method is simple for beginners and uses familiar ingredients plus a healthy touch of nuts for extra texture while every slice stays deeply chocolatey and satisfying.
Ingredients
- 1 1/2 cups All-purpose flour
- 1/2 cup Unsweetened cocoa powder
- 1 cup Granulated sugar
- 1/2 cup Brown sugar
- 1 1/2 teaspoons Baking powder
- 1/2 teaspoon Fine salt
- 2 Large eggs
- 3/4 cup Whole milk
- 1/2 cup Vegetable oil
- 2 teaspoons Vanilla extract
- 1 cup divided Semi-sweet chocolate chips
- 3/4 cup Chopped pecans
- 1/2 cup Heavy cream
Instructions
- Combine the flour with cocoa and both sugars then add the eggs with milk and oil plus vanilla. Mix until the pale dry ingredients disappear into a thick dark chocolate batter. The finished mixture should look glossy yet slightly uneven. A few small streaks and bubbles are natural and help the batter look homemade.
- Transfer the chocolate batter into the cake pan so the mixture changes from a deep bowl shape into a broad cake layer. Spread it loosely so the thickness is mostly even while leaving subtle ripples across the surface. The batter should reach the edges without becoming perfectly smooth. Small ridges and irregular swirls will disappear naturally as the cake rises.
- Scatter half of the chocolate chips with all of the chopped pecans across the wet batter. Leave some chocolate showing between clusters so the topping looks casually distributed instead of perfectly uniform. The surface now changes from smooth dark batter into a textured layer with rough pecan pieces and chocolate chips partly touching the batter. Keep a few bare patches for natural contrast.
- Bake until the batter rises around the pecans and the center becomes set while staying soft beneath the surface. The chocolate chips melt unevenly as the nuts toast and the top develops small cracks. The finished cake should look dark and slightly domed with irregular browned pecans across the surface. Some edges will rise more than others and that homemade variation is ideal.
- Melt the remaining chocolate chips with the heavy cream until they become thick glossy fudge. Pour the fudge unevenly across the cooled cake so dark ribbons settle around the toasted crunch instead of hiding it completely. The cake now gains a shiny chocolate finish while patches of toasted pecans remain visible. Allow some fudge to gather in shallow cracks and leave other areas lightly coated.
- Cut one generous slice and transfer it to a white plate so the dark moist interior becomes visible beneath the crunchy top. Let the slice sit naturally with a few loose pecan crumbs beside it. The final portion should reveal an uneven fudgy crumb with glossy chocolate streaks and toasted crunch along the top edge. Slightly rough cut edges make the serving look freshly homemade.
Notes
Pro Tips:
- Measure the flour lightly rather than packing it into the cup because excess flour can make this naturally fudgy cake dry and dense.
- Use pecans chopped into irregular pieces so the topping develops both tiny crisp bits and larger toasted pockets in every slice.
- Check the center near the end of baking and remove the cake when moist crumbs remain because residual heat continues setting the interior.
- Cool the cake before adding warm fudge so the chocolate forms visible glossy ribbons instead of disappearing into the soft crumb.
Storage: Keep leftover Classic Fudge & Crunch Cake covered at room temperature for up to two days. Store it away from direct heat so the fudge stays thick and the cake does not dry out. For longer storage place slices in an airtight container and refrigerate them for up to five days. Allow a chilled slice to sit at room temperature before serving so the crumb becomes softer again. To freeze the cake wrap individual cooled slices tightly and place them inside a freezer safe container. Freeze for up to two months and thaw overnight in the refrigerator before bringing them to room temperature. If the topping loses some shine after chilling you can add a small fresh drizzle of warm chocolate before serving. This restores the glossy finish while keeping the original crunch visible.
- Prep Time: 20 minutes
- Cook Time: 35 minutes
- Category: Dessert
- Cuisine: American