Seriously no joke this is the best Poison Apples recipe. It is the one my family asks for whenever Halloween gets close. It is a classic spooky treat with simple and delicious ingredients. Crisp apples are covered with glossy black candy and finished with eerie green drips.
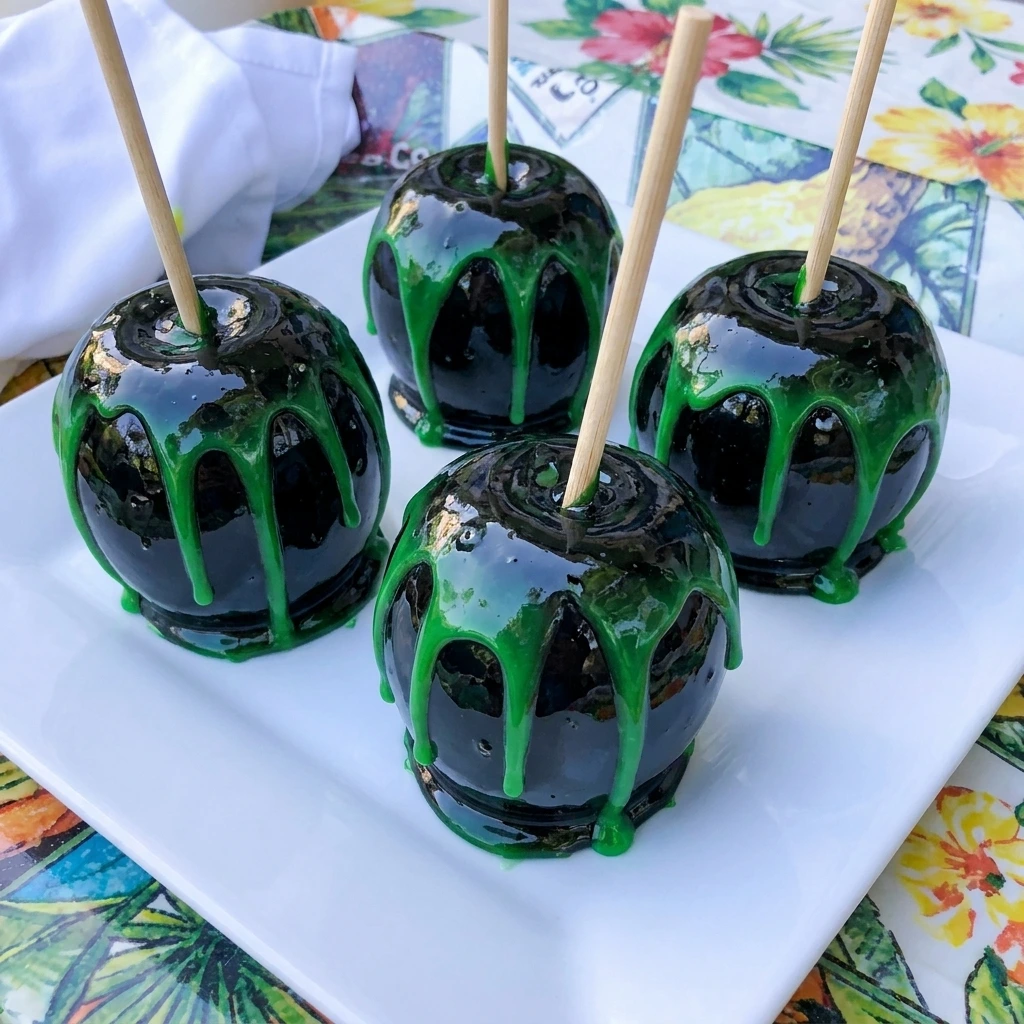
They are perfect for Halloween parties or haunted movie nights with sweet snacks on the side. A batch of Poison Apples is one of my go-to easy Halloween desserts. Not only does each apple make a super dramatic treat but the fresh fruit beneath the candy keeps every bite crisp and satisfying. Also there are no complicated decorating methods needed.
And party prep is a cinch. I often make these apples alongside Chocolate Dipped Strawberry Crackers for a colorful dessert table. With just a few basic ingredients probably already in the pantry you can create glossy apples for a holiday potluck or a spooky brunch or even wrap them individually for a playful party favor.
Ingredients
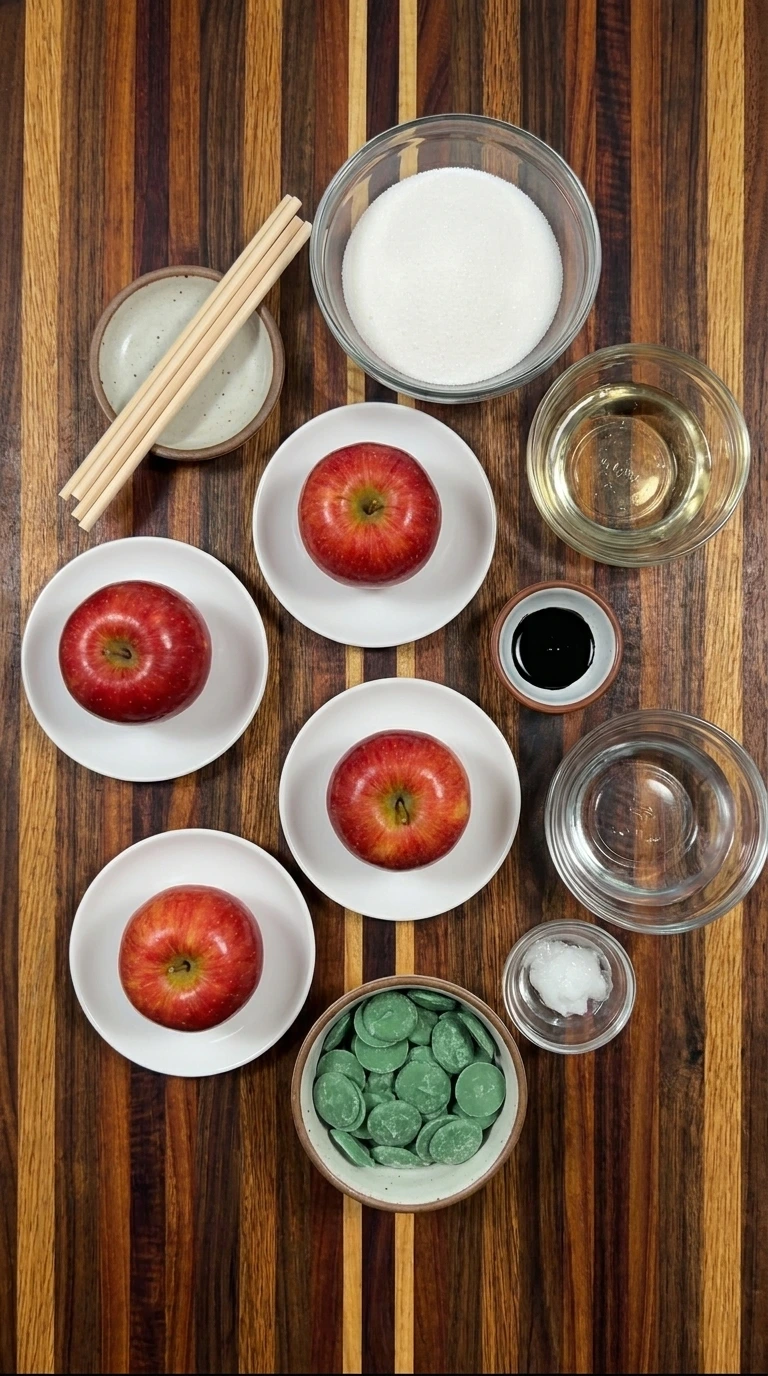
Here is what I use for this recipe and you can adjust nuts or spices based on preference:
- Small red apples: Firm chilled apples provide a crisp juicy center and hold the hot candy coating without becoming soft.
- Wooden candy apple sticks: Sturdy sticks create secure handles so each apple can be dipped and lifted without touching the hot coating.
- Granulated sugar: Granulated sugar melts into the hard glossy shell that gives each apple its signature crackly finish.
- Light corn syrup: Corn syrup helps prevent crystallization and keeps the cooked candy mixture smooth and glassy.
- Water: Water dissolves the sugar evenly before evaporating as the candy syrup reaches the hard crack stage.
- Black gel food coloring: Concentrated black coloring creates a deep dramatic shell without thinning the hot candy mixture.
- Green candy melts: Green candy melts form the vivid poison drips and add a creamy contrast to the brittle black shell.
- Refined coconut oil: A small amount loosens the melted green coating so it flows into uneven natural drips.
Tools You’ll Need
- Medium saucepan: A sturdy saucepan provides enough depth for cooking and tilting the hot candy syrup safely.
- Candy thermometer: A candy thermometer confirms that the syrup reaches the hard crack stage required for a brittle shell.
- Heat resistant spatula: A heat resistant spatula blends in the black coloring without melting or warping.
- Microwave safe bowl: A microwave safe bowl melts the green candy coating gently and contains it for controlled dripping.
- Baking tray: A baking tray holds all four coated apples apart while their candy shells harden.
- Parchment paper: Parchment paper prevents the sticky candy bases from bonding permanently to the baking tray.
- Sharp knife: A sharp knife cuts the hardened apples into manageable wedges immediately before serving.
Instructions
Step 1: Dry the apples and insert the sticks
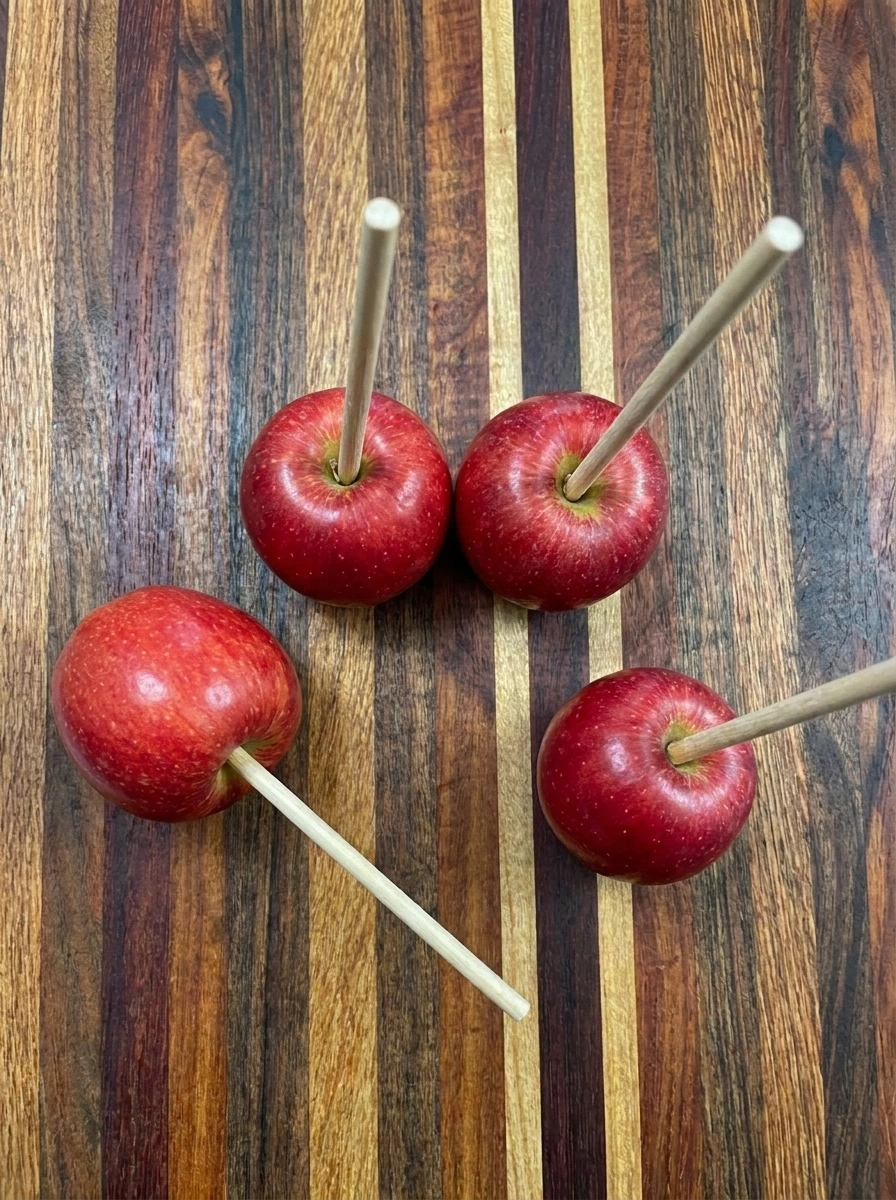
Wash exactly four apples until their skins feel clean and free from any waxy residue. Dry every apple completely because moisture can cause the candy coating to slide away. Press one wooden stick firmly into the stem end of each apple. The four apples should now have secure handles and slightly varied natural angles.
Tip: Rub waxed apples with warm water and dry them thoroughly because a clean dry peel helps the candy shell grip evenly.
Step 2: Cook the black candy syrup
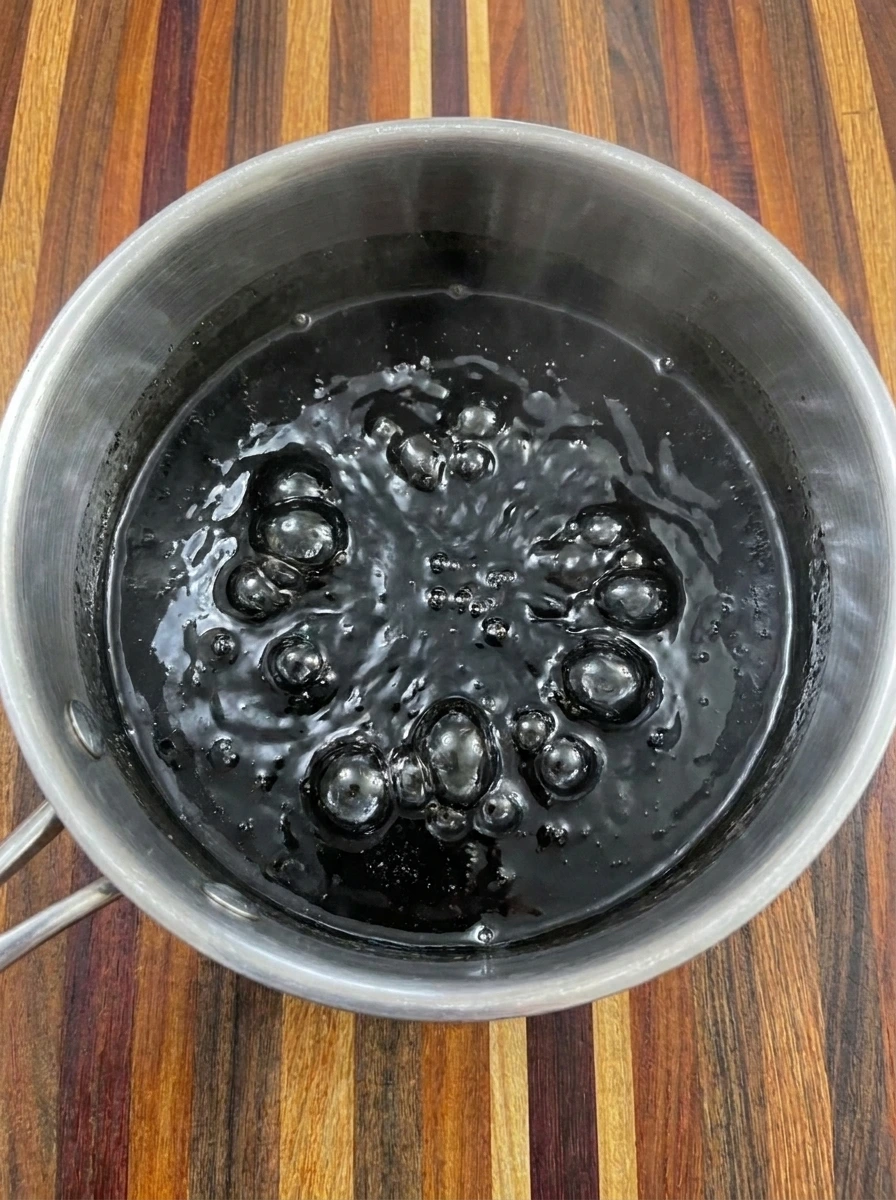
Combine the sugar and corn syrup and water until the sugar becomes fully moistened. Cook the mixture without stirring until the clear syrup bubbles vigorously and reaches the hard crack stage. Add the black gel coloring and gently combine it with the hot syrup. The mixture will transform from clear bubbling syrup into a glossy midnight black coating.
Tip: Avoid stirring once the syrup begins boiling because movement can encourage crystals and create a grainy coating.
Step 3: Dip the apples in black candy

Tilt the black syrup and lower one prepared apple into the coating. Rotate the apple until most of the red skin is covered while leaving a few naturally uneven areas near the stick. Lift each apple and allow the excess coating to fall back into the syrup. Place all four coated apples apart so their glossy shells can harden without touching.
Tip: Work quickly while the syrup is fluid and tilt the coating around each apple instead of repeatedly rolling the fruit.
Step 4: Drip the green candy over the apples

Melt the green candy with the coconut oil until smooth and thick enough to cling to the hardened black shells. Let the mixture cool briefly so it does not run too quickly. Spoon the green coating around the top of all four apples. Allow it to fall into irregular drips that stop at different points along each black shell.
Tip: Let the green coating cool until slightly thick so the drips remain bold instead of sliding completely off the apples.
Step 5: Set and serve the Poison Apples
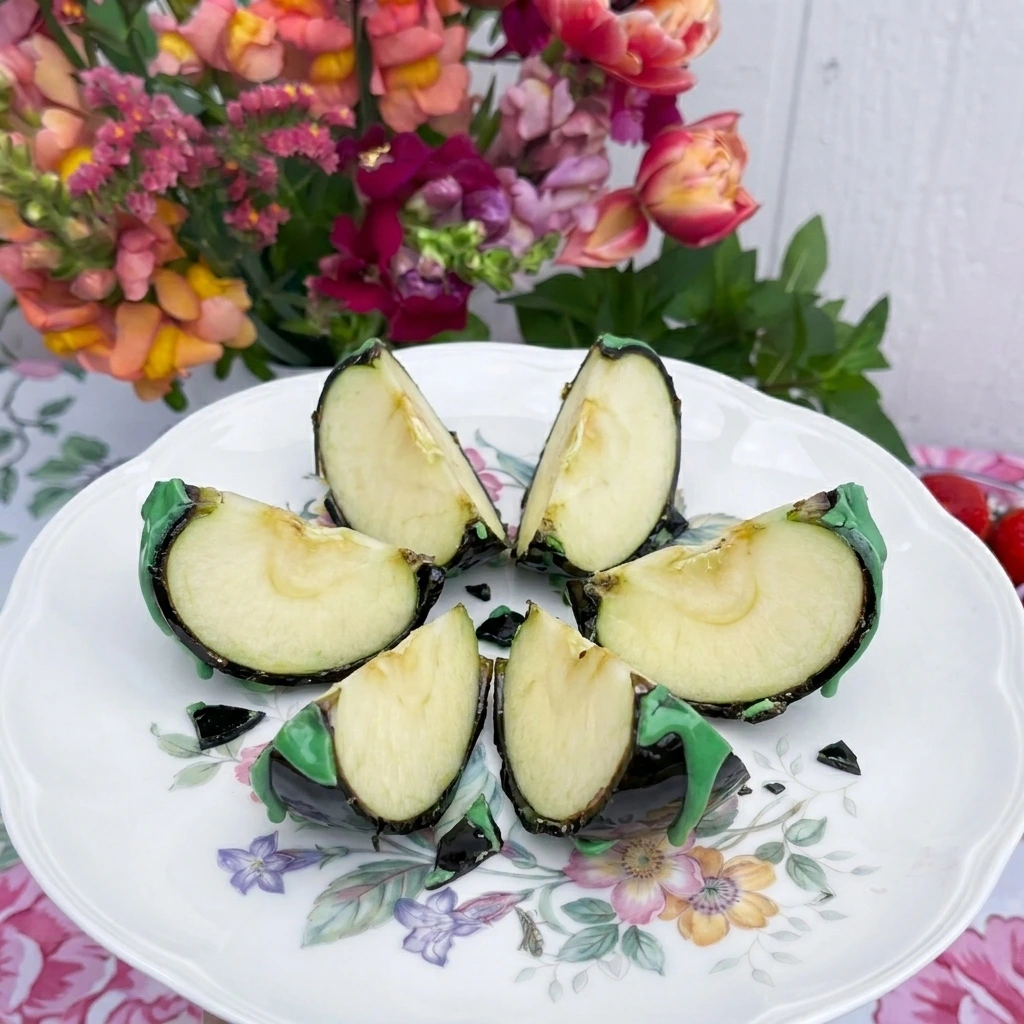
Allow the decorated apples to stand until the green candy feels firm and the black coating has completely hardened. The finished shells should look glossy with natural ripples and uneven drips. Transfer the apples to a serving plate. Cut one apple into a single portion just before eating so the fresh pale interior contrasts with the dark crackly shell.
Tip: Cut each apple shortly before serving because the exposed flesh stays brighter and juicier when it is freshly sliced.
Pro Tips
- Choose small firm apples because they are easier to coat and create a better balance between crisp fruit and sweet candy.
- Dry every apple completely before dipping since even a small amount of moisture can make the glossy shell slide away.
- Keep children away from the cooking syrup because hard crack candy is extremely hot and can cause serious burns.
- Decorate while the green coating is thick but fluid so the poison drips stop at uneven lengths instead of pooling.
Storage Instructions
Store the finished Poison Apples in a cool and dry room for up to one day. Place them apart on parchment so the candy shells do not touch and stick together. Avoid refrigerating the apples unless the room is very warm. Moisture inside the refrigerator can collect on the candy and make the glossy surface tacky.
Do not seal freshly coated apples in an airtight container while they are still warm. Trapped steam can soften the hard shell and cause the green drips to bleed. Cut only the amount you plan to eat. Cover leftover sliced apple tightly and refrigerate it though the exposed fruit may brown and the candy shell may soften.
Frequently Asked Questions
Make them up to one day ahead and keep them in a cool dry place so the candy shell stays crisp.
Wax or moisture on the apple skin can prevent adhesion so wash and dry each apple very thoroughly.
Yes though the apples will lose their dark haunted look and may appear clear or amber instead.
Firm tart apples such as Granny Smith or crisp red apples provide the best contrast with sweet candy.
See You in the Kitchen
These Poison Apples are a great way to satisfy your Halloween candy cravings without picking up a packaged dessert from the store.
I typically prepare Mini Oreo Cheesecake Cups and Chocolate Dipped Strawberry Crackers at the same time I decorate my apples so all of my party treats will be ready at the same time.
Even my kids love this one!
Print
Poison Apples
- Total Time: 45 minutes
- Yield: 4 servings
Description
These Poison Apples are an easy Halloween dessert with crisp apples beneath a glossy black candy shell and eerie green drips. The method is quick and simple while the dramatic finish makes them one of the best ideas for a holiday party or potluck. Apples add a fresh and healthy bite beneath the sweet coating so every piece feels balanced. Make them for a spooky brunch table or prepare them ahead for a playful weeknight dinner treat. Everyone loves the crisp candy shell.
Ingredients
- 4 Small red apples
- 4 Wooden candy apple sticks
- 2 cups Granulated sugar
- 1/2 cup Light corn syrup
- 3/4 cup Water
- 1 teaspoon Black gel food coloring
- 1/2 cup Green candy melts
- 1 teaspoon Refined coconut oil
Instructions
- Wash exactly four apples until their skins feel clean and free from any waxy residue. Dry every apple completely because moisture can cause the candy coating to slide away. Press one wooden stick firmly into the stem end of each apple. The four apples should now have secure handles and slightly varied natural angles.
- Combine the sugar and corn syrup and water until the sugar becomes fully moistened. Cook the mixture without stirring until the clear syrup bubbles vigorously and reaches the hard crack stage. Add the black gel coloring and gently combine it with the hot syrup. The mixture will transform from clear bubbling syrup into a glossy midnight black coating.
- Tilt the black syrup and lower one prepared apple into the coating. Rotate the apple until most of the red skin is covered while leaving a few naturally uneven areas near the stick. Lift each apple and allow the excess coating to fall back into the syrup. Place all four coated apples apart so their glossy shells can harden without touching.
- Melt the green candy with the coconut oil until smooth and thick enough to cling to the hardened black shells. Let the mixture cool briefly so it does not run too quickly. Spoon the green coating around the top of all four apples. Allow it to fall into irregular drips that stop at different points along each black shell.
- Allow the decorated apples to stand until the green candy feels firm and the black coating has completely hardened. The finished shells should look glossy with natural ripples and uneven drips. Transfer the apples to a serving plate. Cut one apple into a single portion just before eating so the fresh pale interior contrasts with the dark crackly shell.
Notes
Pro Tips:
- Choose small firm apples because they are easier to coat and create a better balance between crisp fruit and sweet candy.
- Dry every apple completely before dipping since even a small amount of moisture can make the glossy shell slide away.
- Keep children away from the cooking syrup because hard crack candy is extremely hot and can cause serious burns.
- Decorate while the green coating is thick but fluid so the poison drips stop at uneven lengths instead of pooling.
Storage: Store the finished Poison Apples in a cool and dry room for up to one day. Place them apart on parchment so the candy shells do not touch and stick together. Avoid refrigerating the apples unless the room is very warm. Moisture inside the refrigerator can collect on the candy and make the glossy surface tacky. Do not seal freshly coated apples in an airtight container while they are still warm. Trapped steam can soften the hard shell and cause the green drips to bleed. Cut only the amount you plan to eat. Cover leftover sliced apple tightly and refrigerate it though the exposed fruit may brown and the candy shell may soften.
- Prep Time: 15 minutes
- Cook Time: 30 minutes
- Category: Dessert
- Cuisine: American