A neighborhood Halloween party serves some of the best Bloody Finger Hot Dogs I have ever tasted and each one has a juicy center with creepy carved knuckles and a bright ketchup finish while today I will show how I make my Bloody Finger Hot Dogs recipe at home easily with some easy to find ingredients. Just to know that my Bloody Finger Hot Dogs recipe turned out so delicious and so spooky almost like the party version and I really love this dish while I also tried the same Halloween theme with Mini Corn Dog Muffins and the result was even better for younger guests so I will leave some tasty other variations below you can try using the same ingredients and same cooking process.
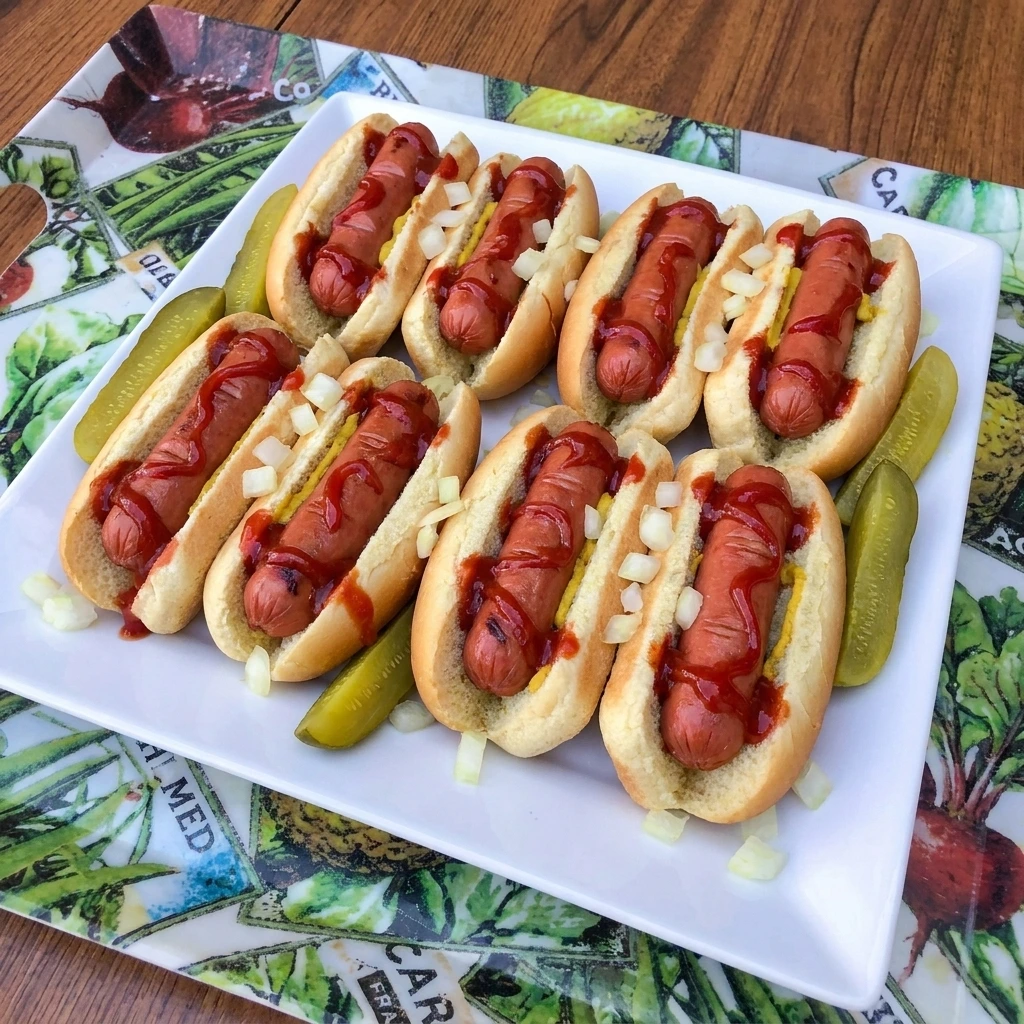
Usually Bloody Finger Hot Dogs are served at Halloween parties and they look so incredible while I recommend anyone to enjoy them and when you cannot find them at an event you can try out my recipe. Also for my recipe I use a pot for cooking while I recommend warming the buns in the oven instead and you can simply carve your hot dogs and cook them for some time until they are heated through.
Ingredients

Here is what I use for this recipe and you can adjust nuts or spices based on preference:
- Beef hot dogs: These form the finger shapes and provide the savory center for each serving.
- Hot dog buns: These hold the carved hot dogs and create a soft base for the finished Halloween meal.
- Ketchup: This adds tangy tomato flavor and creates the bright bloody effect around each finger.
- Yellow mustard: This adds sharp flavor and creates a contrasting stripe beneath the hot dogs.
- Yellow onion: This adds fresh crunch and a savory bite around the finished hot dogs.
- Unsalted butter: This coats the buns and helps their cut surfaces become lightly golden during warming.
- Dill pickle spears: These add crisp acidity and provide an optional side inside or beside each bun.
Tools You’ll Need
- Sharp paring knife: This creates shallow nail beds and realistic knuckle lines without cutting through the hot dogs.
- Wooden cutting board: This provides a stable surface for carving all eight hot dogs safely and evenly.
- Large pot: This holds enough water to simmer all eight carved hot dogs without crowding them.
- Sheet pan: This keeps the buttered buns open while their edges warm and become lightly golden.
- Small spreading knife: This distributes softened butter across the cut surfaces of the buns.
- Large white serving plate: This holds the assembled hot dogs while keeping the ketchup details clearly visible.
Instructions
Step 1: Carve the hot dogs into finger shapes
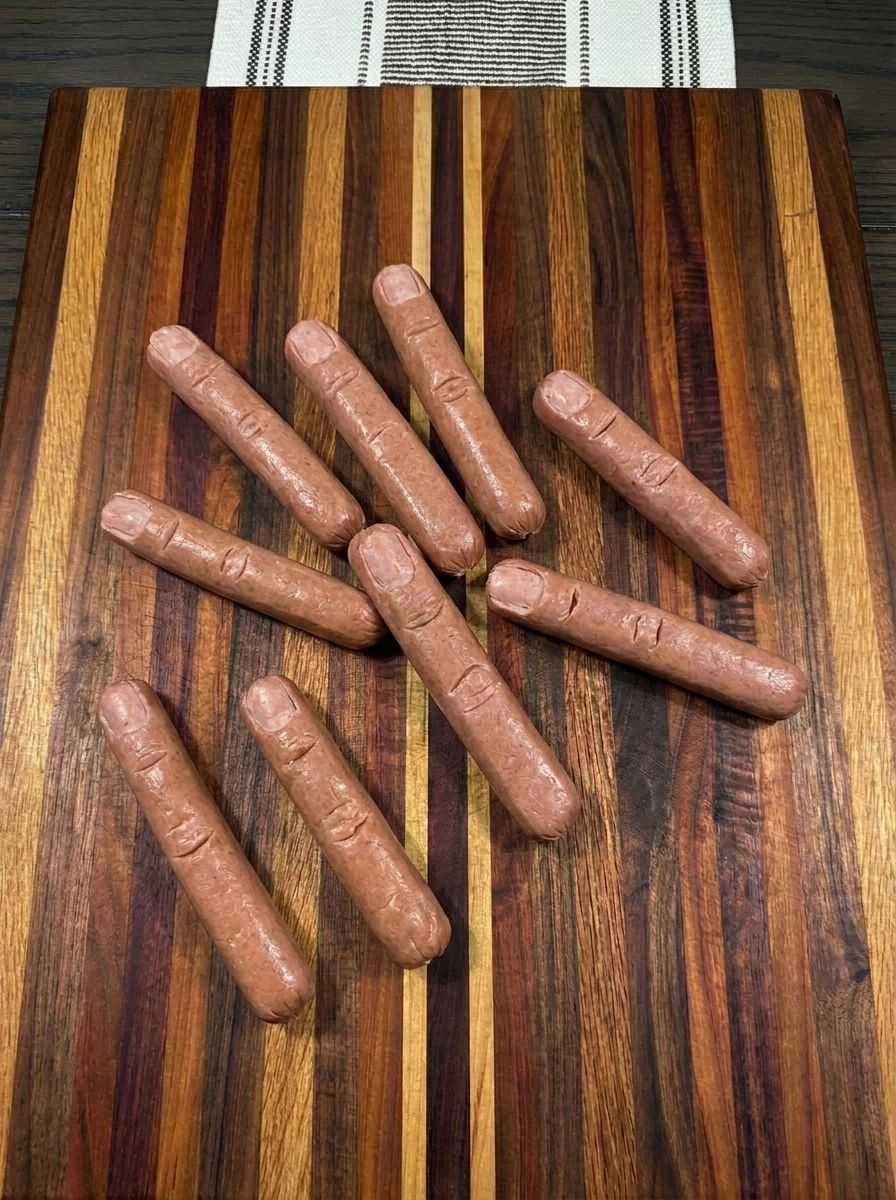
Place all eight hot dogs on the cutting surface and trim a shallow curved section from one end of each hot dog to form uneven nail beds. Cut three shallow lines near the center and two more near the opposite end so every hot dog gains irregular knuckle marks without being sliced through.
Tip: Keep every cut shallow so the hot dogs hold their shape while the carved lines open slightly during cooking.
Step 2: Simmer the carved hot dogs

Lower the eight carved hot dogs into gently simmering water and spread them loosely so they can swell without pressing into a perfect row. Cook until the hot dogs become plump and darker while the knuckle cuts open slightly and several pieces curl or shift into natural positions.
Tip: Use gentle heat instead of a hard boil so the hot dogs stay juicy and the carved finger details remain clear.
Step 3: Toast the buttered buns
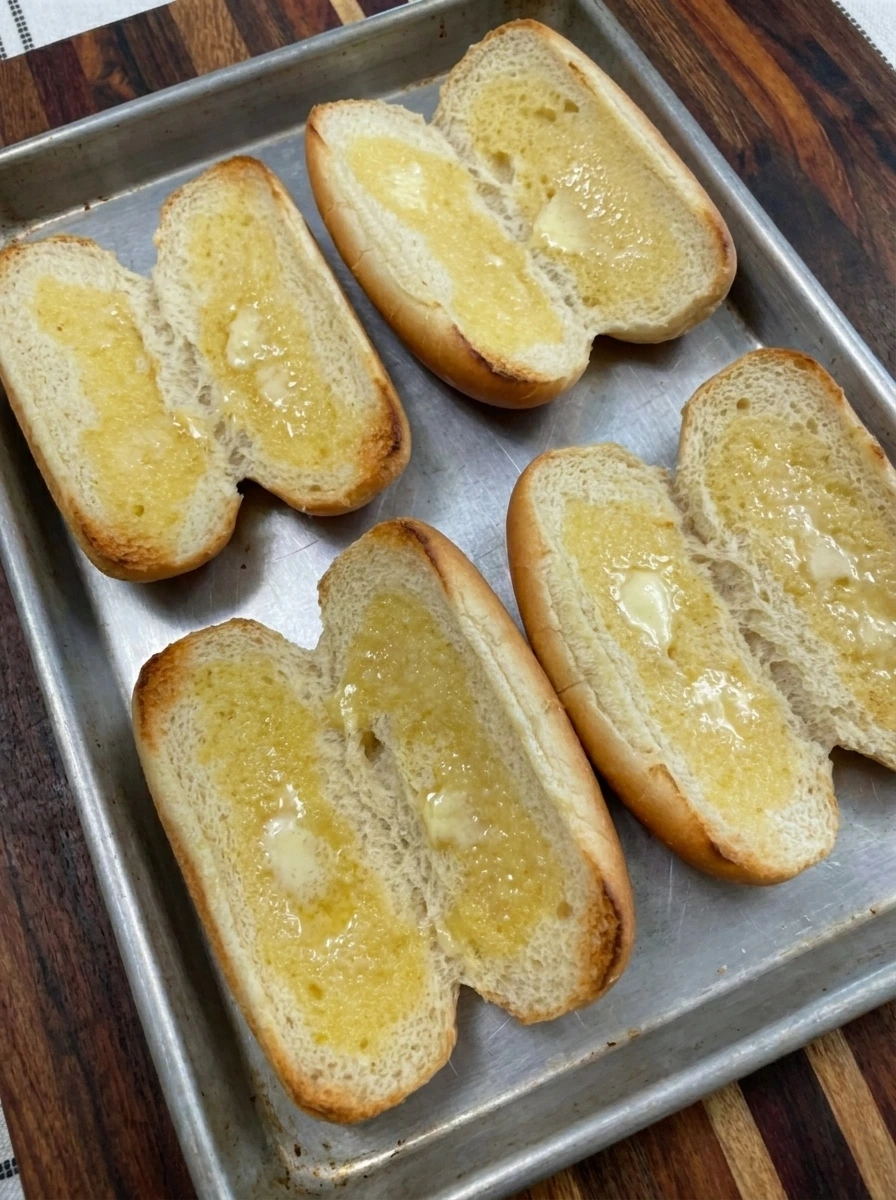
Spread softened butter across the cut sides of all eight buns and place them loosely on the baking tray with several buns angled away from the others. Warm the buns until their edges become lightly golden and their centers look soft while the butter melts unevenly into the bread.
Tip: Toast only until the edges color lightly because very crisp buns can split when the hot dogs are added.
Step 4: Assemble the bloody finger buns

Transfer one cooked hot dog into each toasted bun and rotate the carved nail ends so they point in slightly different directions. Drizzle mustard beneath the hot dogs and spoon ketchup around the nail ends while scattering diced onion unevenly over the buns and tucking one pickle spear beside each hot dog.
Tip: Let some ketchup drip over the bun edges because an imperfect finish makes the bloody effect more convincing.
Step 5: Plate one spooky serving

Place two finished Bloody Finger Hot Dogs on one white plate with the carved nail ends facing outward and with one hot dog sitting slightly higher than the other. Add extra ketchup in uneven drips near the fingers and leave the onions and pickles naturally scattered so the serving looks homemade and ready to eat.
Tip: Serve immediately so the buns stay warm and the ketchup remains bright against the browned hot dogs.
Pro Tips
- Make the nail beds slightly different on every hot dog so the finished fingers look naturally creepy instead of factory perfect.
- Cut only through the surface of each hot dog because deep knuckle marks can cause the fingers to split apart while simmering.
- Dry the cooked hot dogs briefly before assembly so the mustard and ketchup stay bright and cling instead of sliding away.
- Prepare the carved hot dogs several hours early and refrigerate them covered so party assembly feels faster and less stressful.
Storage Instructions
Store leftover cooked hot dogs separately from the buns so the bread does not absorb moisture and become soggy. Place the cooled hot dogs in an airtight container and refrigerate them for up to three days while keeping the condiments in separate covered containers. Reheat the hot dogs gently until steaming throughout and warm the buns separately so their texture remains soft with lightly crisp edges. Freezing the assembled hot dogs is not recommended because the onions and pickles lose texture and the buns can become wet after thawing.
Frequently Asked Questions
Yes and you can carve them one day early before covering them well and cooking them shortly before serving.
Make shallow cuts and simmer them gently because deep carving and rapid boiling can tear the hot dog skins.
Yes and turkey or chicken hot dogs work well although their cooking time and final color may vary slightly.
Serve them with vegetables and fruit or potato bites and other spooky snacks for a complete Halloween meal.
See You in the Kitchen
I hope you try these Bloody Finger Hot Dogs soon because they are a simple recipe that looks creepy and tastes incredible and makes every Halloween party a little more special alongside Pizza Stuffed Mushrooms or Crispy Parmesan Potato Bites.
Do not forget to share your results or save this recipe for later because it is one worth keeping.
Print
Bloody Finger Hot Dogs
- Total Time: 30 minutes
- Yield: 4 servings
Description
Bloody Finger Hot Dogs are an easy and quick Halloween dinner with hot dogs carved into creepy fingers and finished with ketchup for a bloody effect while this simple recipe is one of the best ideas for a spooky party and it also works for a weeknight dinner or holiday potluck and you can serve them in buns with onions and mustard for a playful meal that feels festive while offering a healthy balance with fruit or vegetables and kids and adults enjoy the dramatic look.
Ingredients
- 8 standard hot dogs Beef hot dogs
- 8 split buns Hot dog buns
- 1/2 cup Ketchup
- 1/4 cup Yellow mustard
- 1/2 small onion finely diced Yellow onion
- 2 tablespoons softened Unsalted butter
- 8 small spears Dill pickle spears
Instructions
- Place all eight hot dogs on the cutting surface and trim a shallow curved section from one end of each hot dog to form uneven nail beds. Cut three shallow lines near the center and two more near the opposite end so every hot dog gains irregular knuckle marks without being sliced through.
- Lower the eight carved hot dogs into gently simmering water and spread them loosely so they can swell without pressing into a perfect row. Cook until the hot dogs become plump and darker while the knuckle cuts open slightly and several pieces curl or shift into natural positions.
- Spread softened butter across the cut sides of all eight buns and place them loosely on the baking tray with several buns angled away from the others. Warm the buns until their edges become lightly golden and their centers look soft while the butter melts unevenly into the bread.
- Transfer one cooked hot dog into each toasted bun and rotate the carved nail ends so they point in slightly different directions. Drizzle mustard beneath the hot dogs and spoon ketchup around the nail ends while scattering diced onion unevenly over the buns and tucking one pickle spear beside each hot dog.
- Place two finished Bloody Finger Hot Dogs on one white plate with the carved nail ends facing outward and with one hot dog sitting slightly higher than the other. Add extra ketchup in uneven drips near the fingers and leave the onions and pickles naturally scattered so the serving looks homemade and ready to eat.
Notes
Pro Tips:
- Make the nail beds slightly different on every hot dog so the finished fingers look naturally creepy instead of factory perfect.
- Cut only through the surface of each hot dog because deep knuckle marks can cause the fingers to split apart while simmering.
- Dry the cooked hot dogs briefly before assembly so the mustard and ketchup stay bright and cling instead of sliding away.
- Prepare the carved hot dogs several hours early and refrigerate them covered so party assembly feels faster and less stressful.
Storage: Store leftover cooked hot dogs separately from the buns so the bread does not absorb moisture and become soggy. Place the cooled hot dogs in an airtight container and refrigerate them for up to three days while keeping the condiments in separate covered containers. Reheat the hot dogs gently until steaming throughout and warm the buns separately so their texture remains soft with lightly crisp edges. Freezing the assembled hot dogs is not recommended because the onions and pickles lose texture and the buns can become wet after thawing.
- Prep Time: 15 minutes
- Cook Time: 15 minutes
- Category: Dinner
- Cuisine: American